Redo Rescue (formerly Redo Backup and Recovery) is a powerful and user-friendly backup and disaster recovery solution that provides a simple, easy-to-use interface that anyone can navigate.
Whether you’re using Linux or Windows, Redo Rescue supports bare-metal restores, meaning you can fully recover your system even if your hard drive fails or gets corrupted within minutes.
With Redo Rescue, all your files, settings, and system configurations will be restored to the exact state they were in when the most recent backup was taken.
The software runs as a live ISO image, built on Debian, and provides a graphical interface for ease of use, which is open source and completely free for both personal and commercial use.
Features of Redo Rescue
Here are some key features that make Redo Rescue an excellent backup and recovery tool:
- No Installation Required – It runs directly from a bootable USB or CD – no need to install any software on your system.
- Fast Boot Time – The system boots in just seconds and automatically detects your hardware. The ISO is lightweight (approximately 500MB) and can be freely downloaded and used without license keys.
- User-Friendly Interface – The intuitive graphical interface makes backup and recovery simple, even for non-technical users. The environment is based on Debian, allowing users to run additional tools while performing a backup.
- Cross-Platform Support – It works seamlessly with both Linux and Windows, allowing users to back up and restore systems across different operating environments.
- Network Drive Detection – The software automatically detects shared drives and network storage devices, making it easy to store backups on remote locations.
- Data Recovery Tool – Lost or accidentally deleted important files? It includes a file recovery tool to help retrieve deleted files from damaged or formatted drives.
- Internet Access – Need to download drivers or troubleshoot your system online? It includes a built-in web browser so you can access the internet even if your main operating system is unusable.
- Drive Partitioning & Management – It includes graphical tools to manage and resize disk partitions, making it a complete system recovery toolkit.
How to Use Redo Rescue for Backup & Recovery
First, download the latest Redo Rescue ISO file from its official sourceforge repository.
Once you have downloaded the ISO file, create a bootable USB drive or burn it to a CD/DVD.
Once you have a bootable ISO image, insert the bootable USB or CD/DVD into the target computer, restart the computer, and enter the boot menu by pressing the appropriate key (F8, F12, Esc, or Del depending on your system).
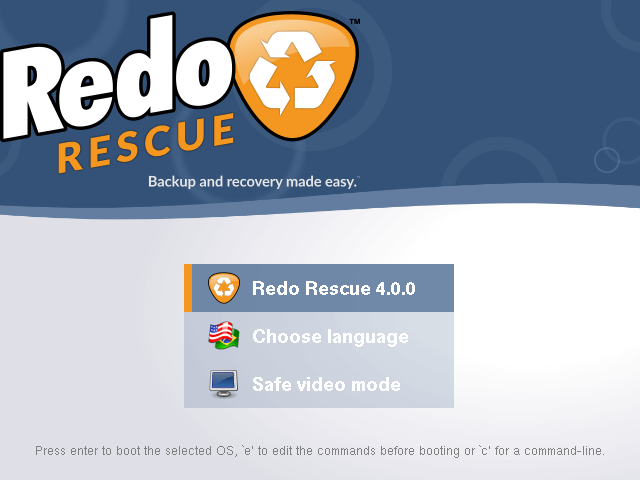
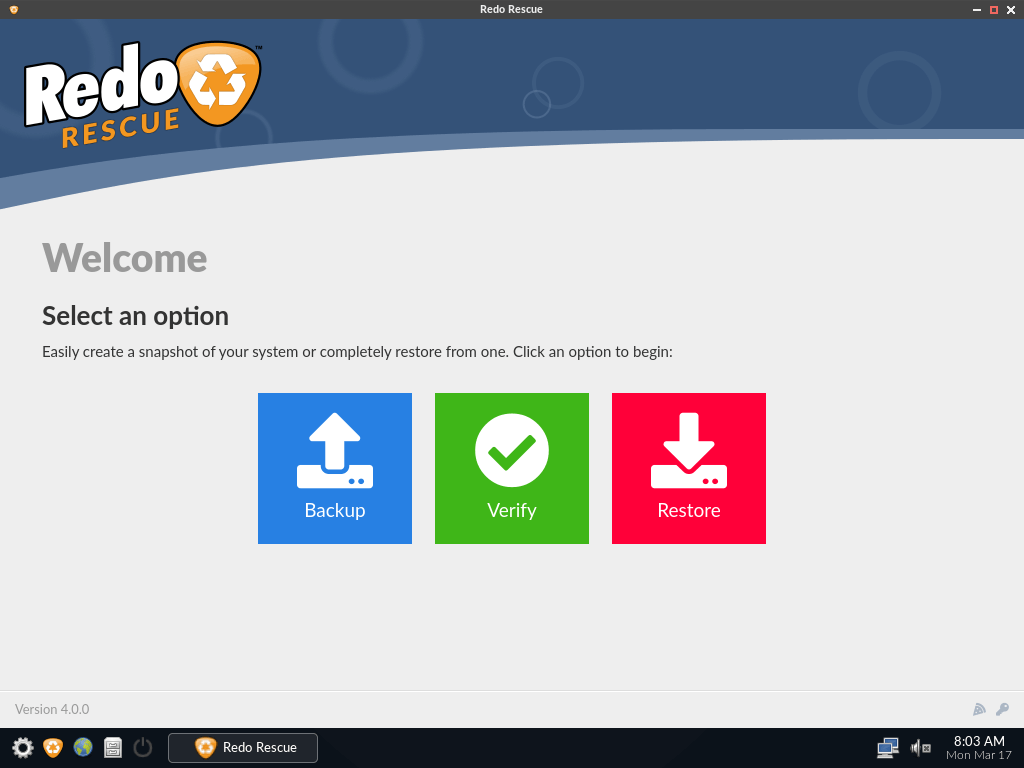
Once you boot up the system with the USB or Live CD, a lightweight operating system will load into memory, launching Redo Rescue. You can then choose whether to backup your system or restore it from a previously saved image.
For example, here I’m backing up my Ubuntu 24.04 system.
Redo Rescue – Create a Backup of Linux System
To create a backup of your system, click “Redo Rescue” from the welcome screen.
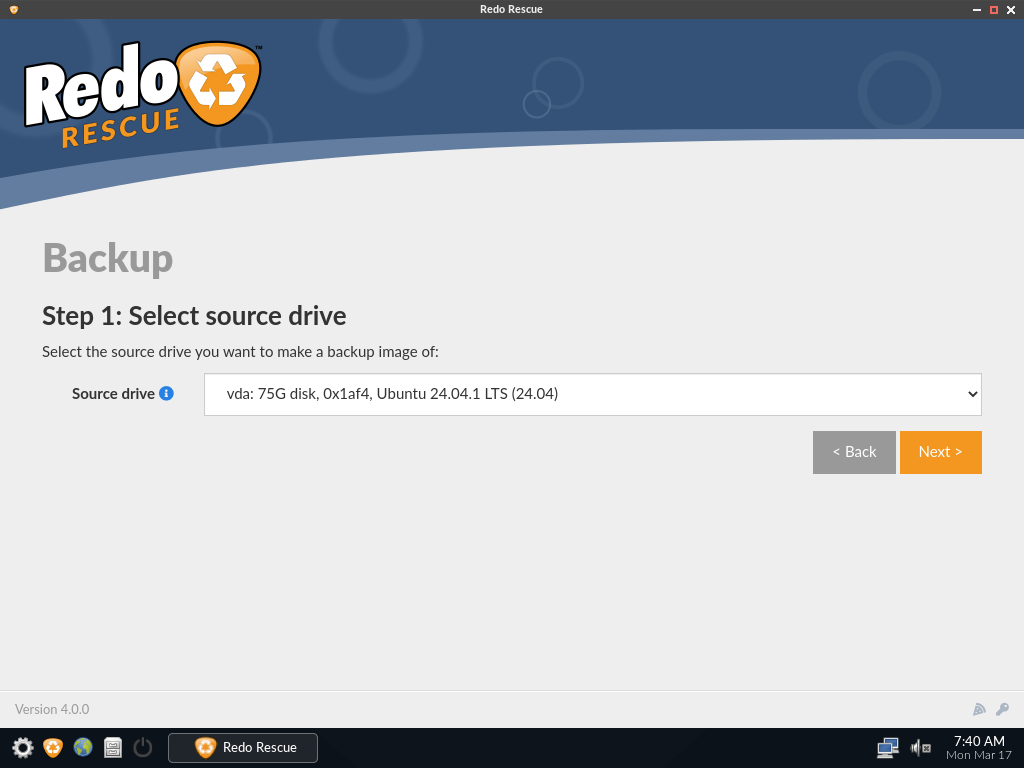
Select “Backup” to create a full system backup.

Choose the source drive (the drive you want to back up).
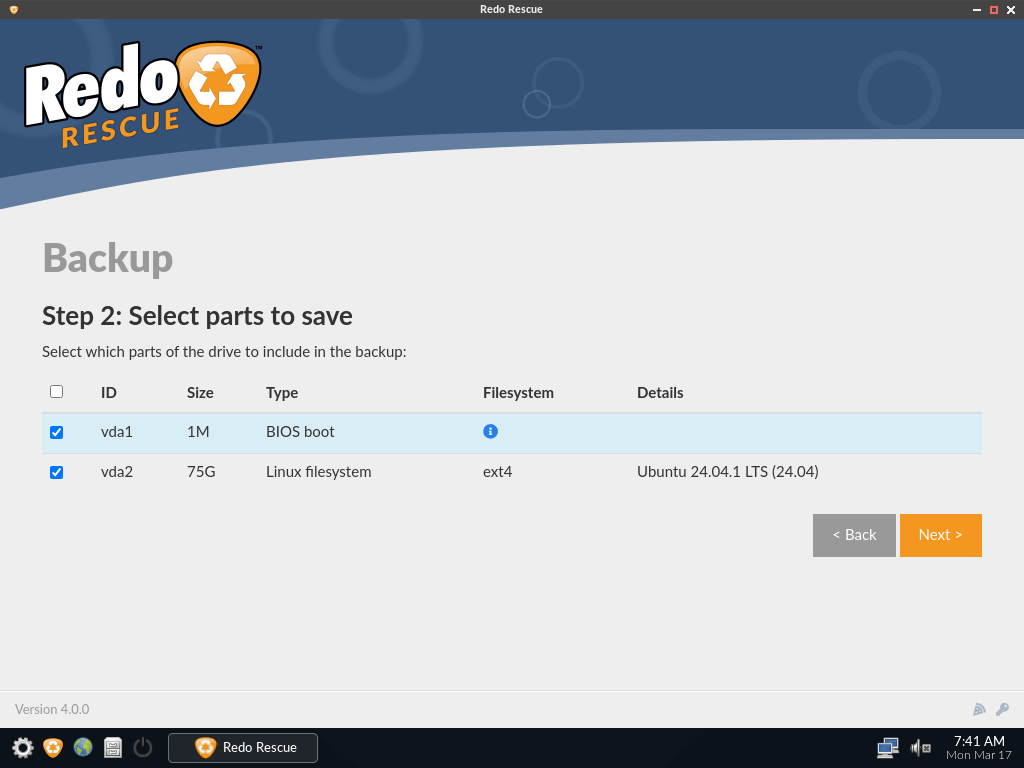
Select the partitions you want to include (leave all selected if unsure).
Choose the backup destination (local drive, external USB, or network storage).
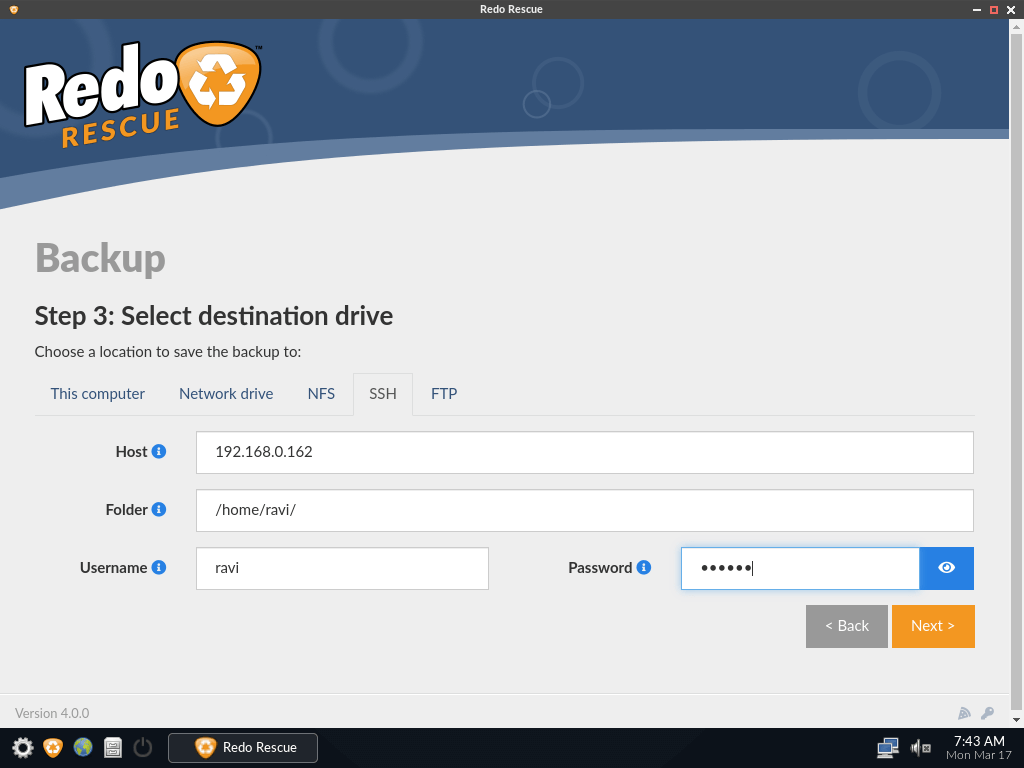
Enter a unique backup name (e.g., backup-20250317).
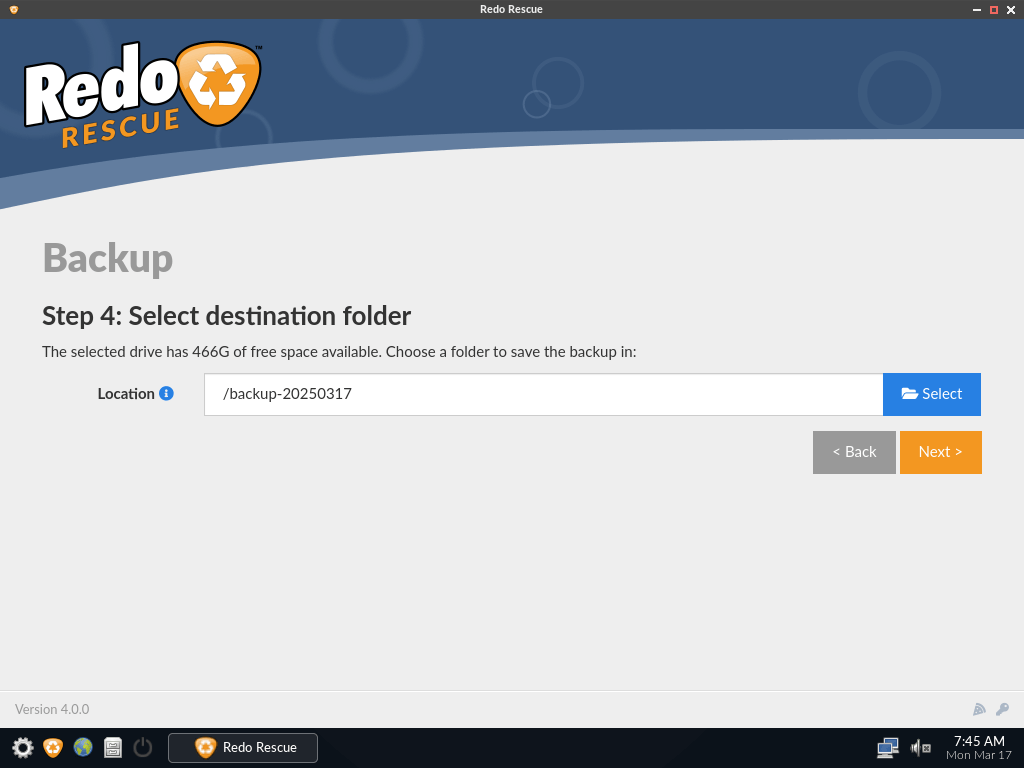
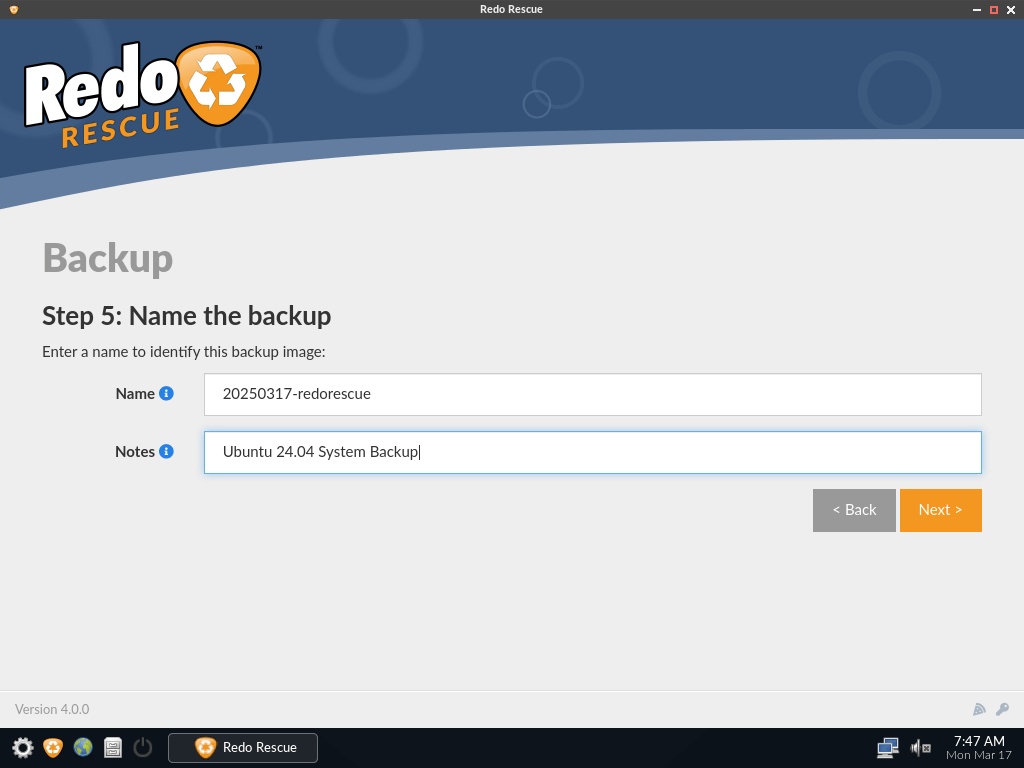
Click Next and wait for the backup to complete.

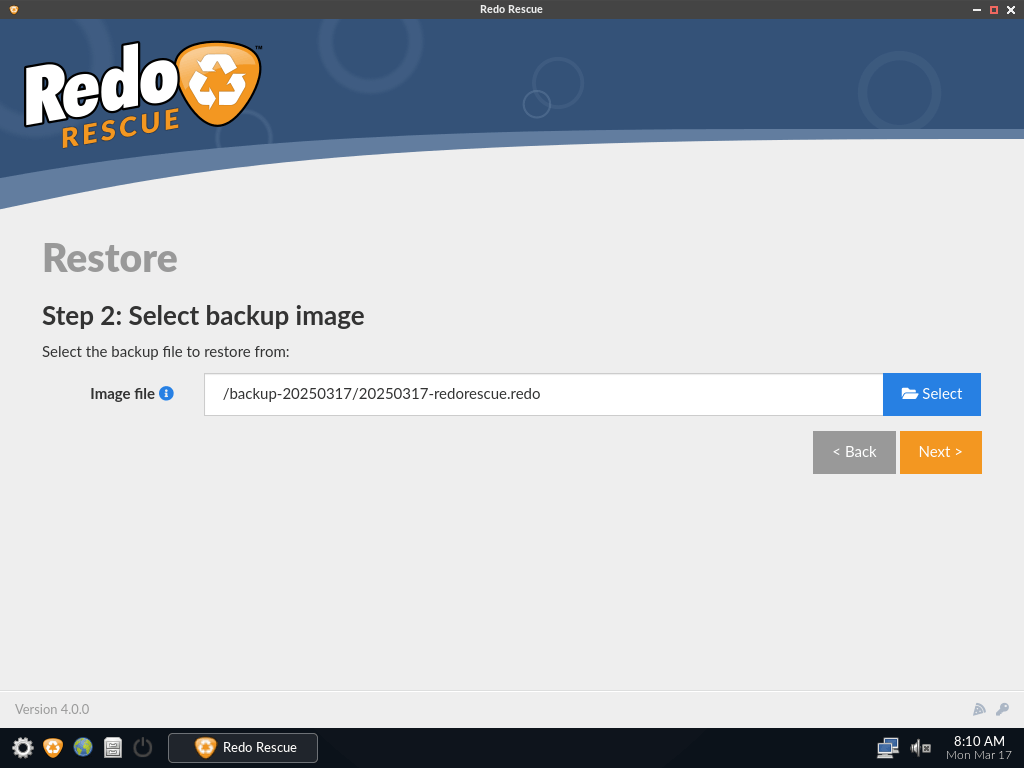
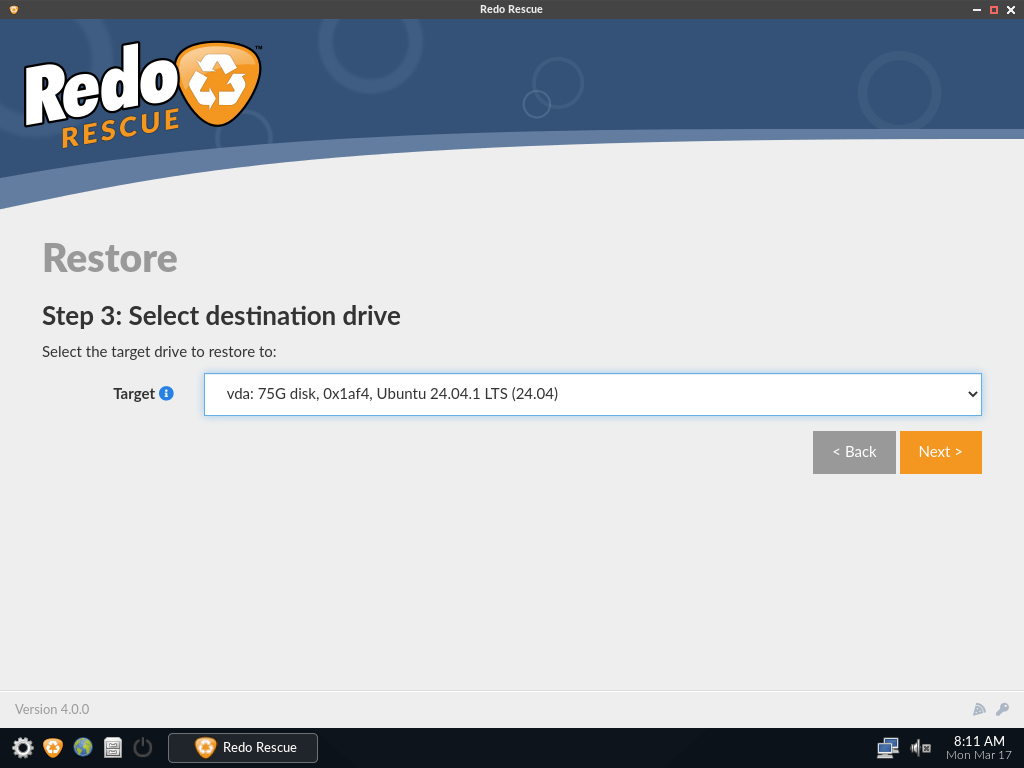
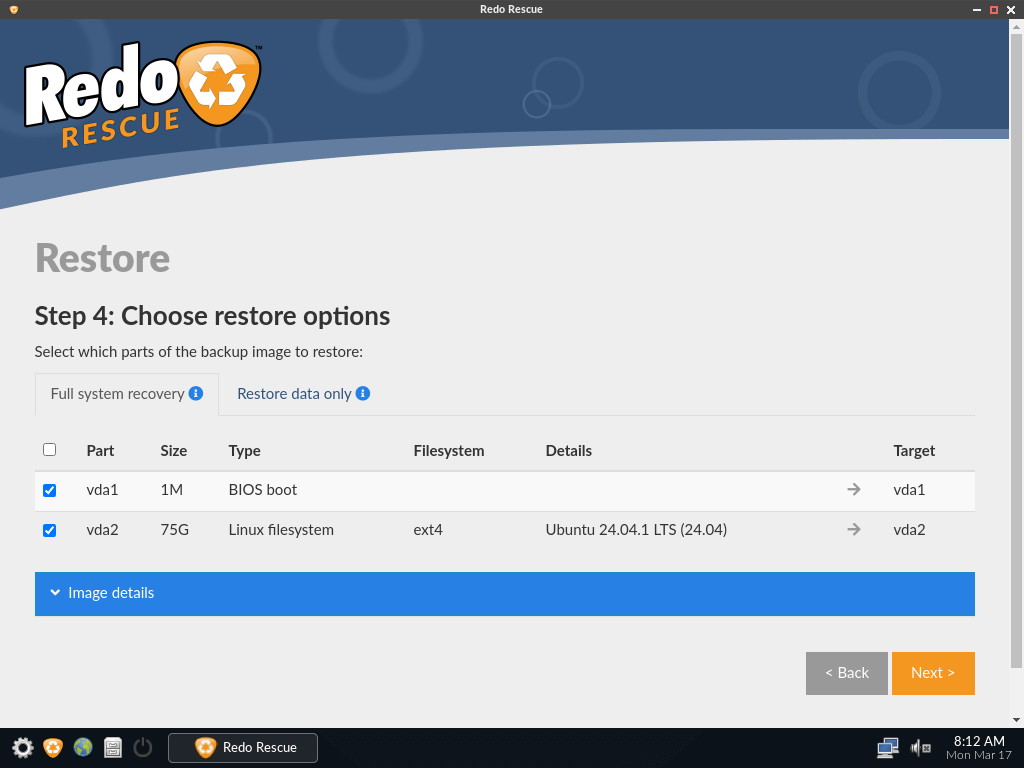
Redo Rescue – Restore Your System
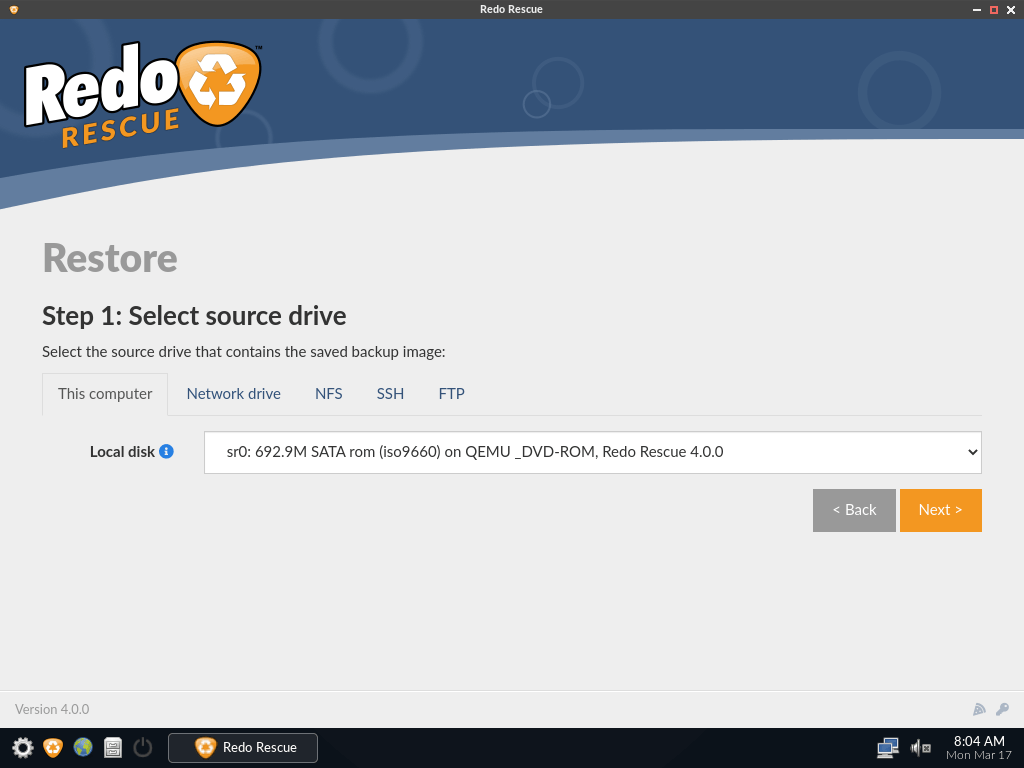
To restore a backup, boot into Redo Rescue and select “Restore” from the menu.
Choose the backup image from your selected storage location.
Select the destination drive where you want to restore the system.
Click Next and wait for the restore process to finish.
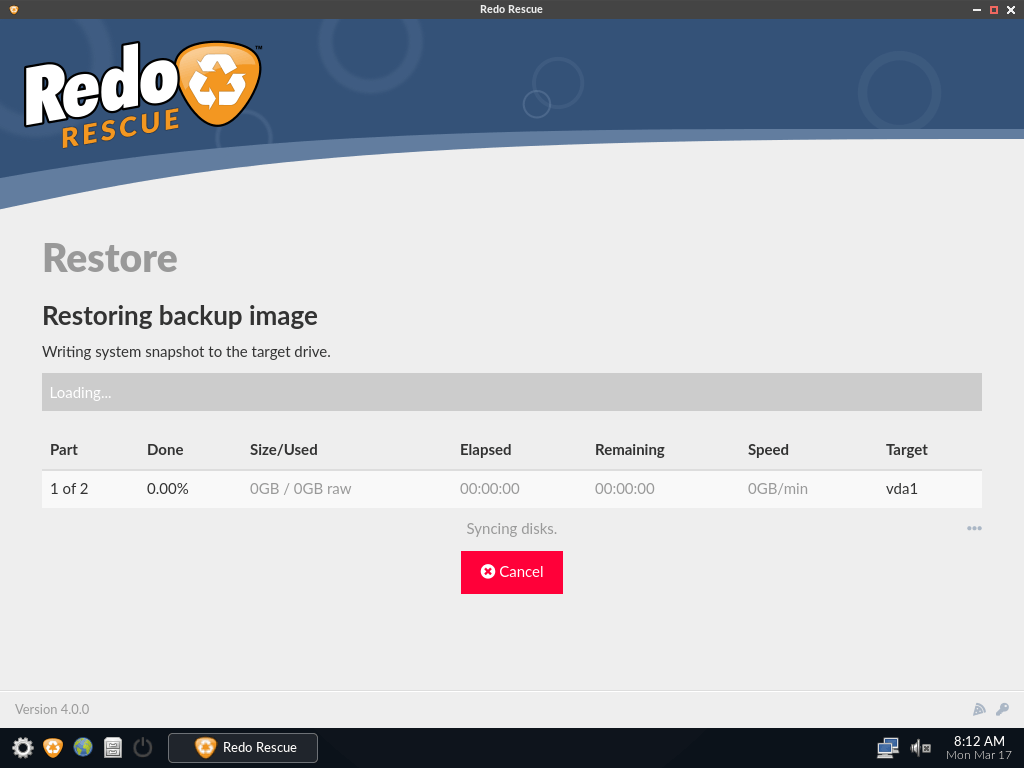
Once done, restart your computer and remove the bootable USB or CD/DVD.
Additional Features & Tools
Redo Rescue also comes with a few extra tools:
- File Recovery – Restore accidentally deleted files.
- Partition Editor – Resize, create, and manage partitions.
- Web Browser – Access the internet even if your system is down.
Conclusion
Redo Rescue is an efficient, free, and easy-to-use backup solution that ensures your data is safe and recoverable. Whether you’re an advanced Linux user or a Windows beginner, Redo Rescue makes system recovery seamless.

Just tried this on Aug 30th, 2018 and like others have commented, it does NOT work to USB thumb drive. On reboot, it doesn’t do anything and BIOS complains immediately, so not designed for USB booting
Who even uses CD’s anymore??! I don’t think I’ve used the CD unit in this desktop even once in 2 years. No need to, no reason to. Everything goes onto USB drives now for booting so please update your site to include USB drives.
Please update this site with more current and updated INFO.
@Don,
Yes, I too agree on on uses CD or DVD these days, yes the article is outdated and need a udpate. Give me a 2-3 days to update the article with latest information.
“Who even uses CD’s anymore??! I don’t think I’ve used the CD unit in this desktop even once in 2 years.”
What an arrogant and condescending statement! That’s like saying “Who uses 32 bit systems anymore”. The answer is, millions of people use CDs, DVDs AND 32 bit systems. Not everybody is able or willing to be on the bleeding edge.
BTW – as you probably know by now, it is moot if Redo works to a USB or not. Redo is no longer.
Hello Ravi, I salute your spirit of positive contributions to human endeavor. We inherited an application that was installed on Ubuntu 8.04 server. The company that supplied is no more in existence. But the application is still very useful. All I want to do now is to install Ubuntu 14.04 LTS or later version. Please can I still make use of Redo-Backup to save the application and setting and still be able to restore the old functionalities?
@Samuel,
Thanks for such kind words about me.. Regarding your application, not its not possible to restore older Ubuntu version to newer Ubuntu release. All I suggest you to take the backup of your application and database (if any) and install newer Ubuntu version and restore the application..
Ravi,
I know that this is a really old thread but maybe you can help me out.
First off I am backing up a server to a local workstation.
After my REDO disk has booted, I usually use the VPN option to put the server on the same network as the workstation.
Workstation:
IP – 192.168.1.10,
SUBNET – 255.255.255.0
GATEWAY – BLANK
Server I am backing up:
IP: 192.168.1.11
SUBNET: 255.255.255.0
GATEWAY: 0.0.0.0 (the VPN option forces you to enter a value)
Soon after you get a WIRED CONNECTION SUCCESSFUL message.
I get to the very last step that you have here.
In the SERVER SHARE LOCATION field I enter 192.168.1.10/D (so I save this to the workstation partitioned E drive), I put in the workstation admin account and password.
Then I get the following error: “Could not access the destination drive. If
the device is shared on a network, ensure that the username and password you
provided are correct and try again.”
In the past I have seen that you must use an IP instead of computer name file path…this helps some people, but obviously I’m already using an IP for the destination.
– I can see the network drive.
– Ping back and forth.
– File Sharing full access.
Have you seen this issue before?
@Vickram,
Thanks for sharing the tip with us, but to be fact I never seen such error while using with Computer Name file path, but may be in newer version of Redo Backup, you can mention IP as well. Also as you said, this article is very old and haven’t been updated for long time, so I am in process of updating this article with latest version..
Sounds good Ravi! I may have figured the problem out today…it might be a Windows Firewall issue, I’ll try to confirm.
Also, there’s a typo on my post:
**In the SERVER SHARE LOCATION field I enter 192.168.1.10/E (so I save this to the workstation partitioned E drive), I put in the workstation admin account and password.
I know this is an old thread, but I need to get this working from a USB stick, and after I create the USB from the Live CD, the USB boots, but then just sits at a blinking cursor. Is this program not supported any more at all?
@Michael,
On Which distro you’ve tried? yes the article is little outdated and may not work on latest distributions. Will soon review this article and will try to updated it to the latest…
I have tried for the past little while (four months or so) to put this on a USB drive. It was a simple enough process with Mint, you use the USB writer and format the USB right? Well did that several times and it gets to the stage where it is supposed to boot and it hangs. Nothing. Tried unetbootin, and same thing. I am starting to wonder since this site is so stale if the image is corrupted. I am as I write this sitting at 7minutes for a 250 mb download. When you consider my download speed is over 150MBPS this should be over with. Another sign something isn’t right. As per other comments something is up, as in not working with this.
when restoring centos using redo backup, am getting an error the backup has been succeeded but partition table can’t be created.
Hi,
If I’ve created a ext4 partition of 50GB, then for creating the back-up do I need a space of 50 GB?
or I will consume only that much space which have been used by the ubuntu-installation & added software on the system now.
It will consume the space used by filesystem.
Hi,
when trying to take a backup an error pops out
read error: is a directory(21) rsize=-1
please help
thanks
i’am try redo to backup my linux ubuntu server, its succesfully. but i can’t restore to another disk. everytime boot, screen is blank. any solutions..?
no idea man! may be something related RAM issue…
Hi Ravi , thanks for the great site and tutorials! Have a question regarding backups, I have a remote Linux Centos 6.4 root server. What would you recommend for backing up the file system and web sites? If something would happen , crash or virus what would be the best way then to restore? I currently just use daily automated tar backups of the “etc” and “www” directories on a remote FTP backup server.
The fastest and recommended way of backing up files is automated backups/replications via rsync and mysql replications for fail over. For full system cloning use the MondoResuce or Redo Backup.
Very useful tool..Essential tool for a system admin..
Thanks..