In this part of our tutorial we are going to discuss the operations and tasks such as Taking Snaphots, Creating Pools, Making Templates and Cloning are the main operations which could be performed on RHEV virtual machines hosted by RHEV environment.
Before going further, I request you to read the rest of the articles from this RHEV series here:
RedHat Enterprise Virtualization (RHEV) Administration Series – Part 1-7
Snapshots
Snapshot is used to save VM’s state at specific Point-Time. This is very useful and helpful during software testing process or revert something going wrong on your system as you could return back to the Point-Time which you took snapshot at.
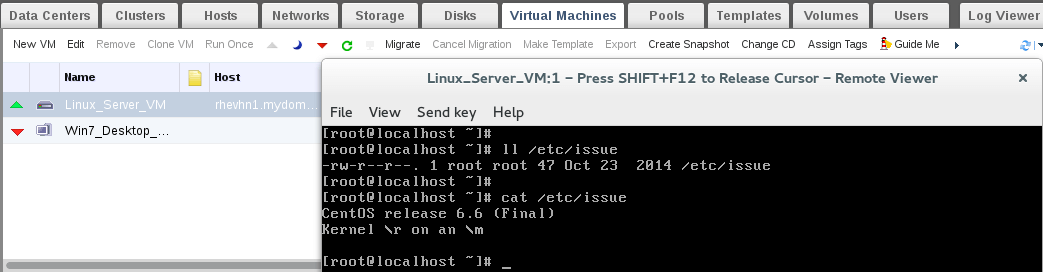
1. Start your linux-vm machine and verify the OS version and type before taking snapshot.
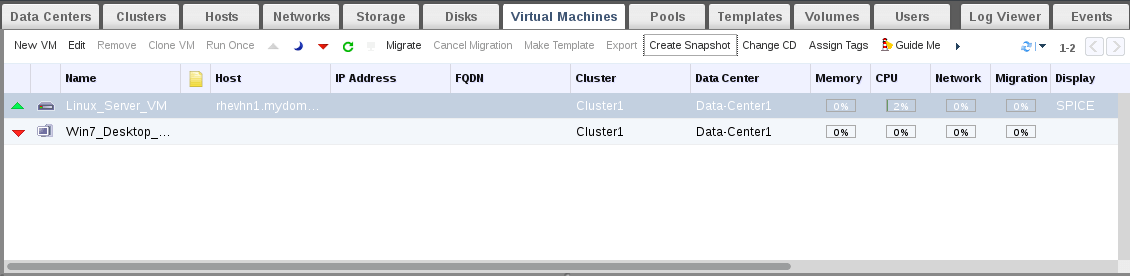
2. Click on “Create Snapshot”.
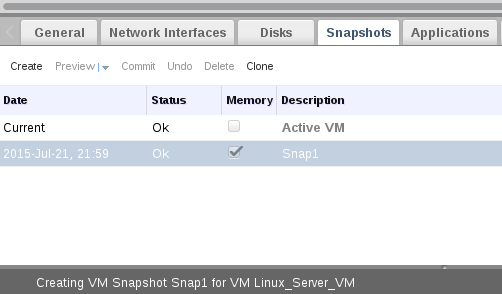
3. Add the description and select disks and saving memory then OK.

Check the status of snapshot and task status from tasks bar.

After finishing, you will note that status of snapshot changed from Lock to OK, which meaning that your snapshot is ready and created successfully.
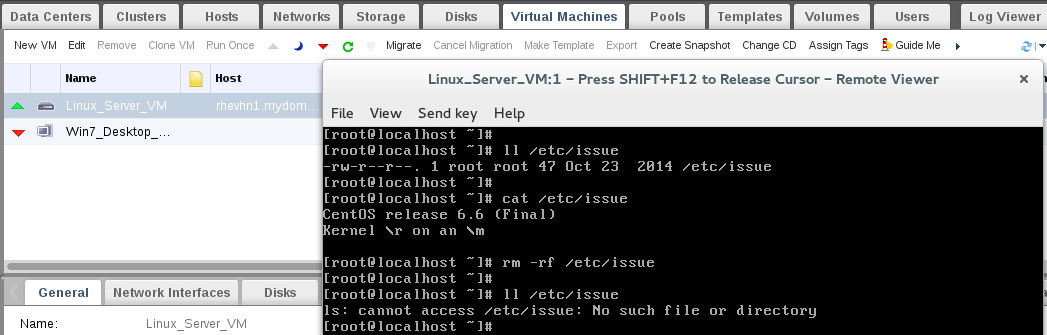
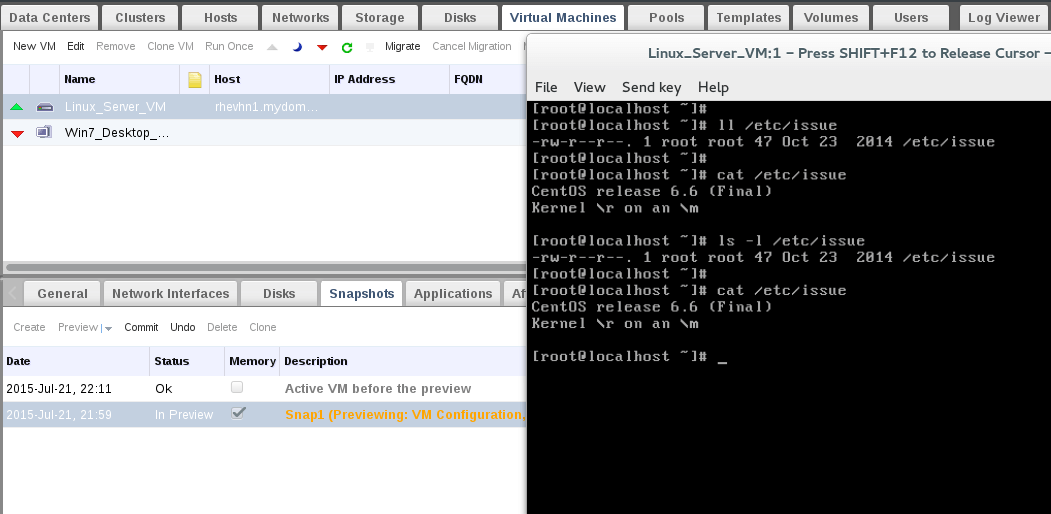
4. Lets go to the VM console and delete /etc/issue file.
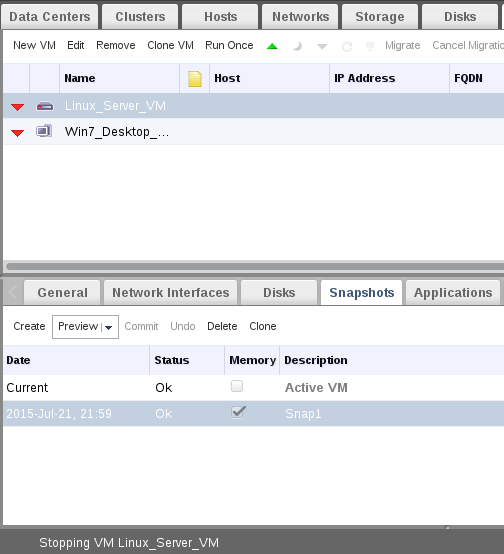
5. For reverting/restoring process, your virtual machine should be at down state. Make sure its powered off and then click “Preview” to check the snapshot and reverting on-fly to it.
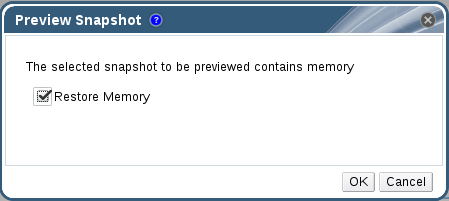
Now confirm Memory restoring.
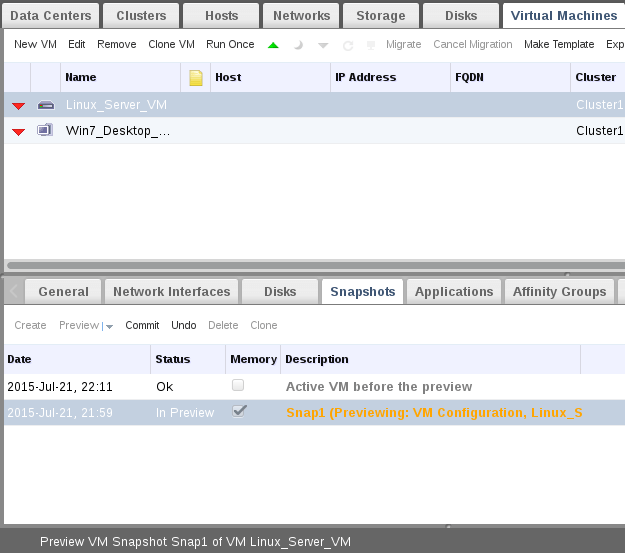
Wait for Previewing to be finished and after few minuets, you will noted that snapshot status is “In preview”.
Now we have two ways:
6. First one to directly “Commit” the restored snapshot to the original virtual machine and finishing the total reverting process.
Second one to check the reverted changes before commit the restored snapshot to original vm. After checking we will go to the first way “Commit”.
For this article, we will start via second way. So, we will need to power up the virtual machine and then check the /etc/issue file. You will find it without any changes.
7. Your VM should be powered off for reverting process. After powering off, Commit your snapshot to vm.
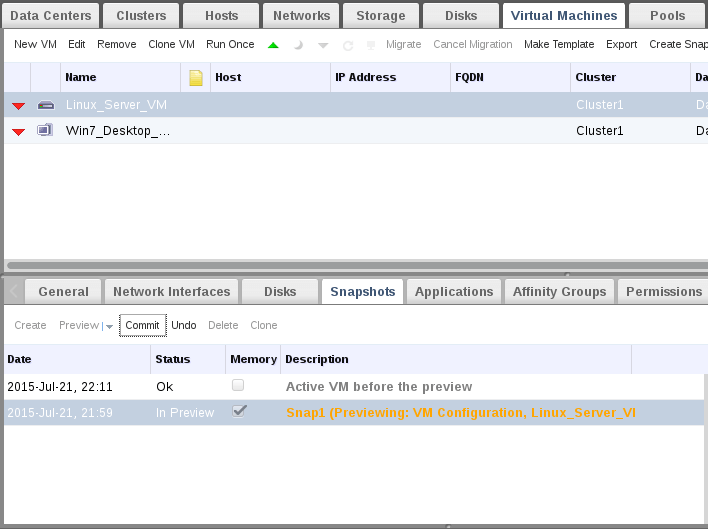
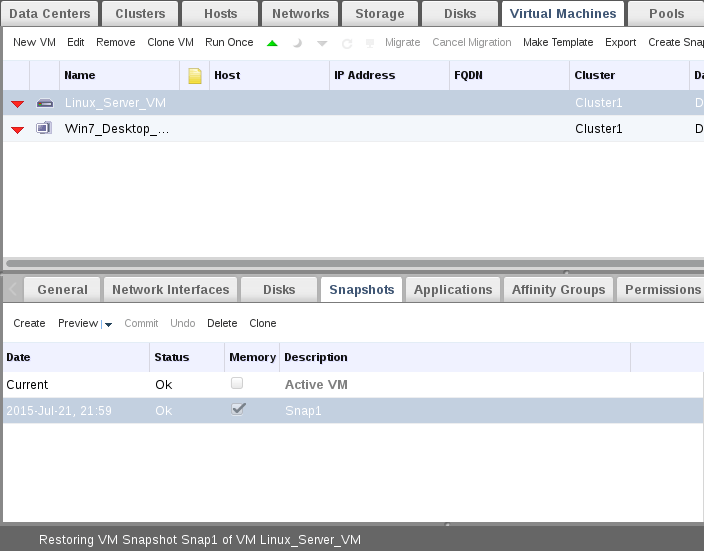
Then watch restoring commit process, after finishing commit process, you will find snapshot status is “OK”.
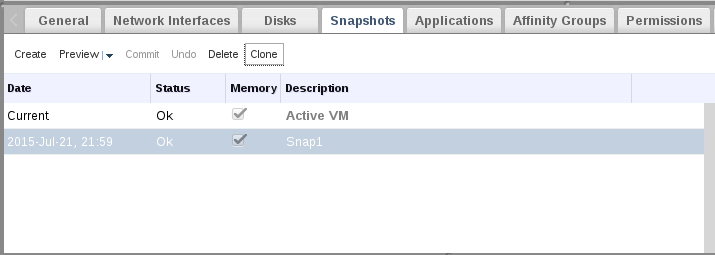
Hints : 1. If you don’t want to confirm reverting to snapshot after preview stage, just click on “Undo” to skip snapshot. Its always recommended to take snapshot of power down VM instead of be running. You can create new VM from current snapshot, just select your preferred snapshot and click on “Clone”.
Templates:
Actually, template is a very normal virtual machine copy, but without any pre-configuration related to the original vm operating system. Templates are used to improve the speed and decrease time of vm operating system installation.
Creating templates has two main process:
- A. Sealing the original virtual machine.
- B. Taking copy [Create Template] of the sealed vm to be separated template.
A. Sealing Process:
To seal RHEL6 Virtual Machine you should make sure about this points :
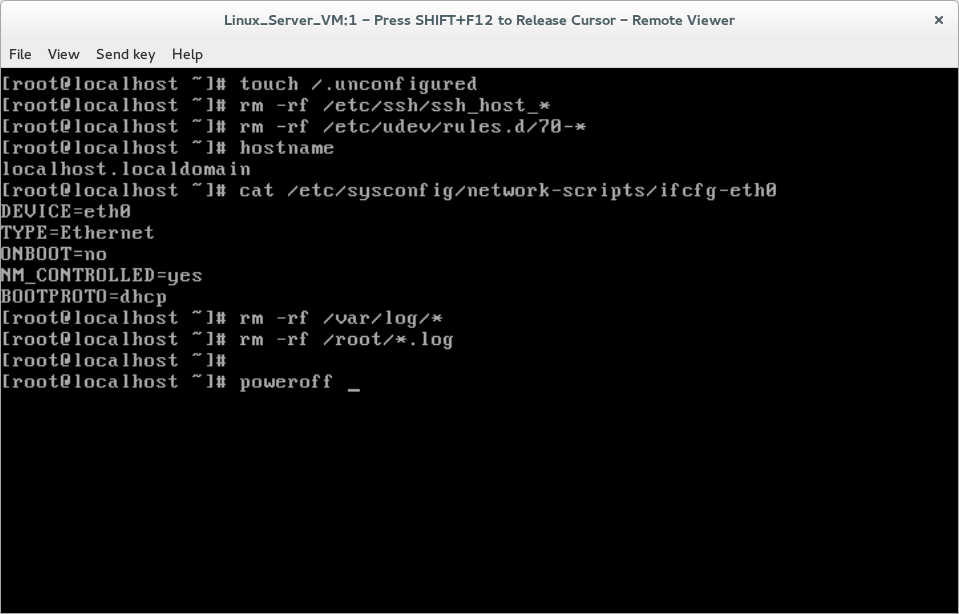
8. Flagging system for pre-configuration for next booting by creating this empty hidden file.
# touch /.unconfigured
9. Remove any ssh host keys and set hostname to be localhost.localdomain in /etc/sysconfig/network file and also remove system udev rules.
# rm -rf /etc/ssh/ssh_host_*
# rm -rf /etc/udev/rules.d/70-*
10. Remove MAC address from Network interface configuration file eg. [/etc/sysconfig/network-scripts/ifcfg-eth0] and delete all system logs under /var/log/ and finally Power off your virtual machine.
B. Creating Templates
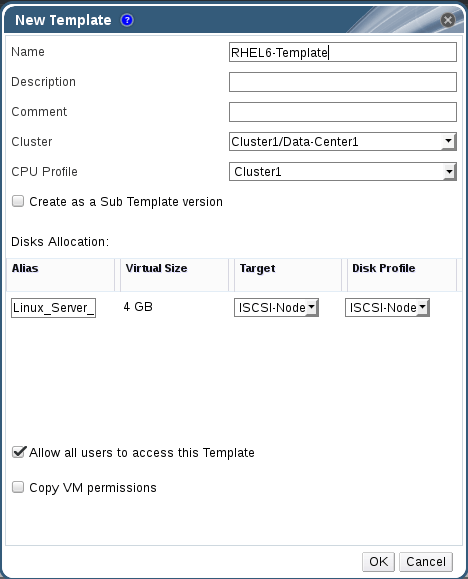
11. Select the sealed vm and click “Create Template”.

12. Provide details and proprieties about your new template.
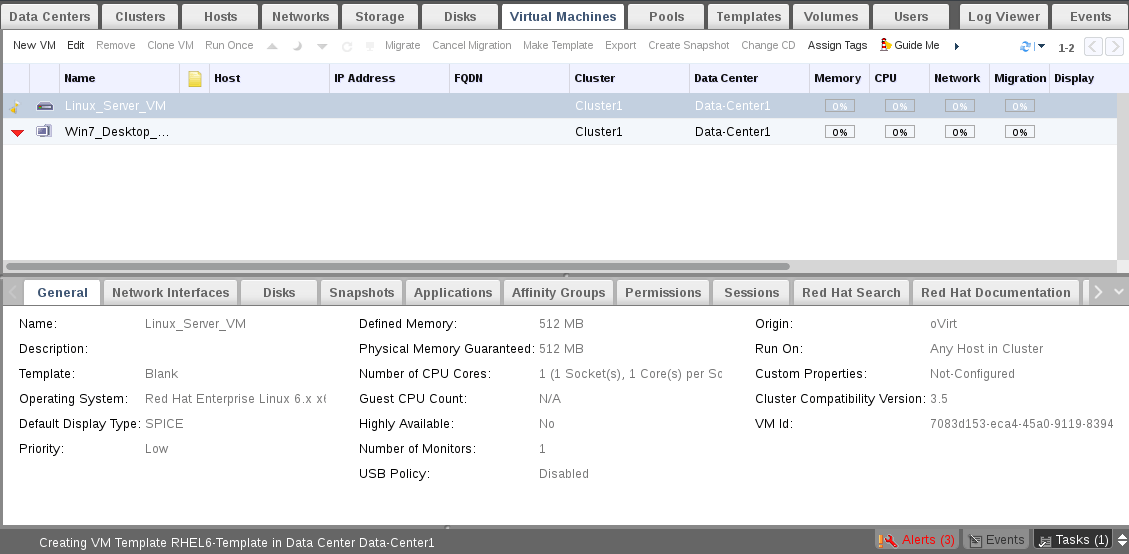
Now, you can check the process from tasks and also you could switch Templates tab to monitor the status of your new templates.

Wait a few minutes, then check template status again.
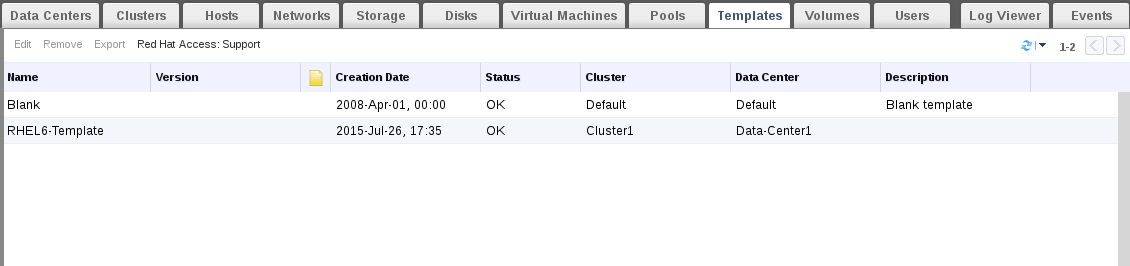
You will note that its converted from lock to OK. Now our new template is ready to be used. Actually we will use it in the next section.
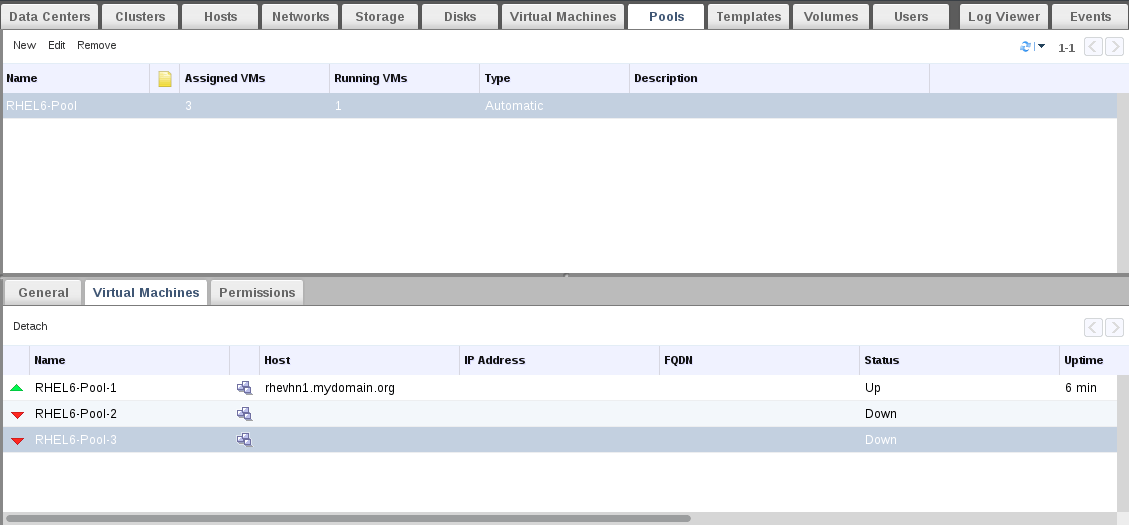
Creating Pools:
Pool is a group of identical virtual machines. Pooling is used to create a given number of identical virtual machines in one step. Those virtual machines could be based on pre-created template.
Creating New Pool
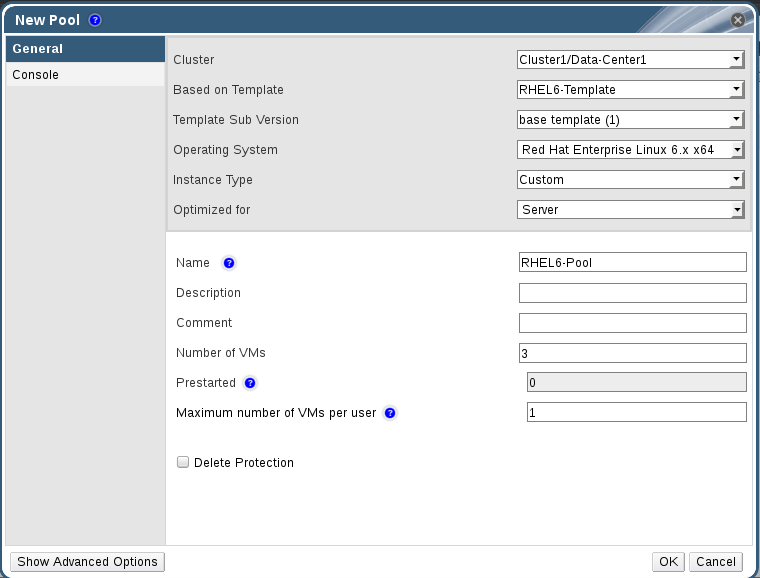
13. Switch to Pools tab and click New then fill the appeared wizard windows.
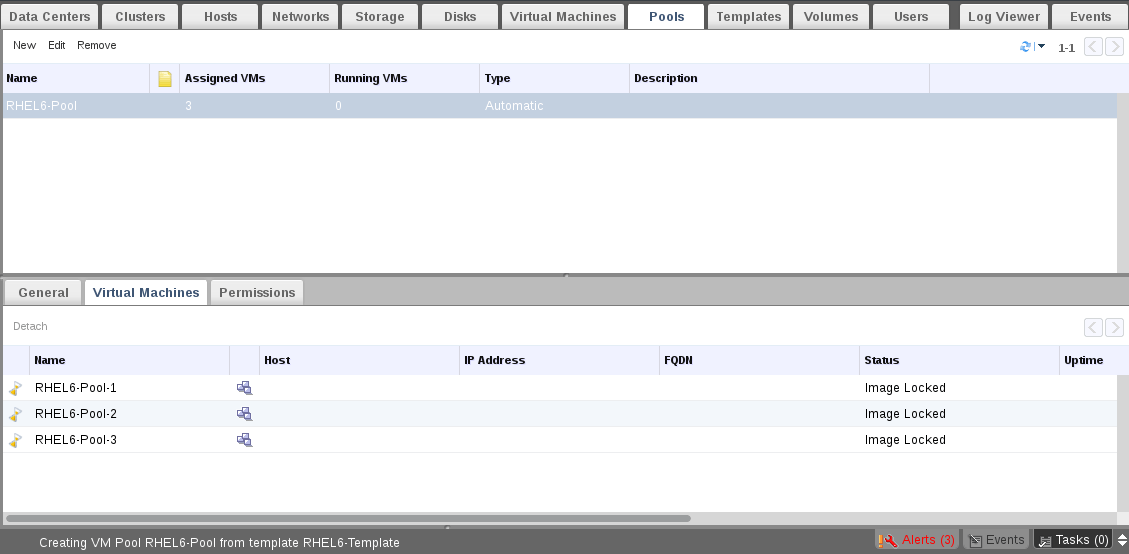
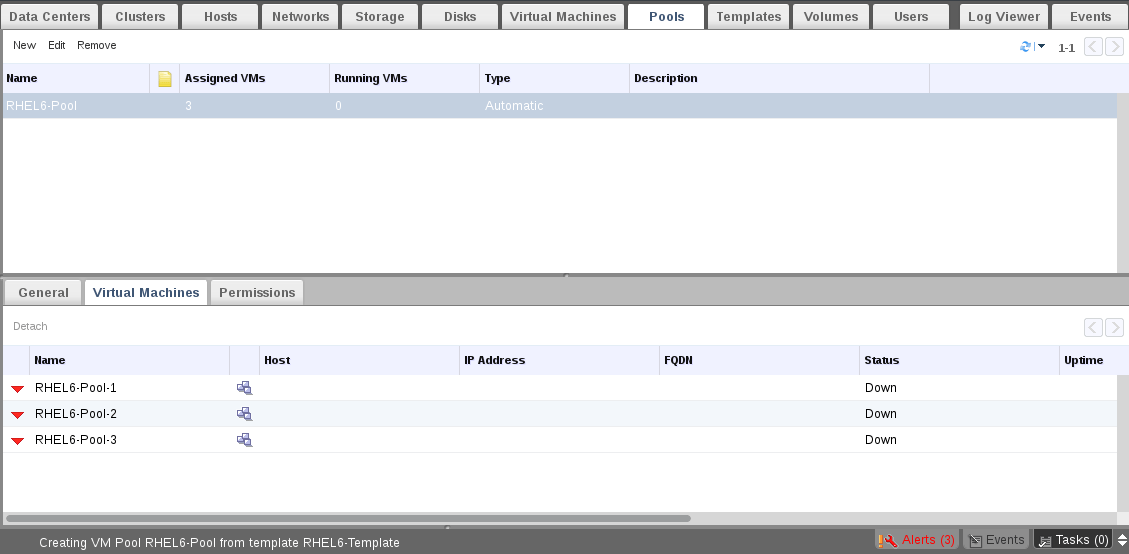
14. Now check the status of created Pool vms and wait few minutes, you will note the status of virtual machines changed from Lock to Down.
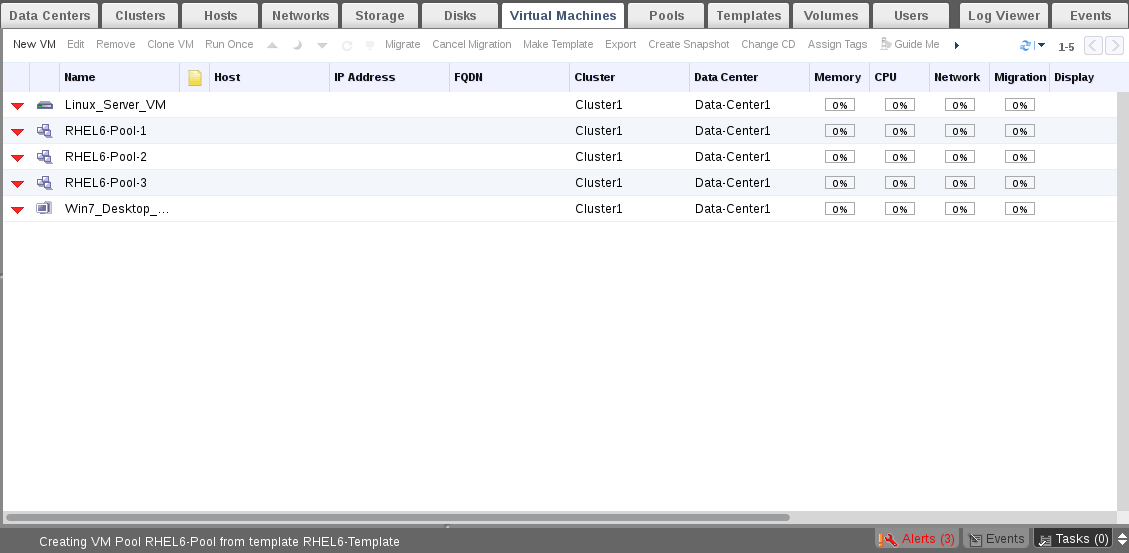
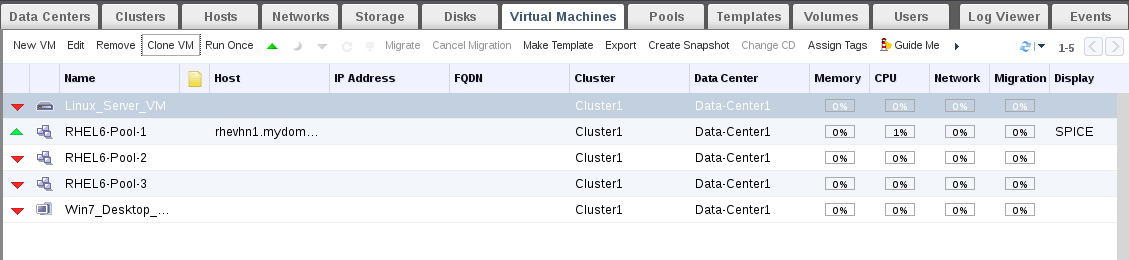
You could also check the status from Virtual Machines tab.
15. Lets try to run one of Pool virtual machines.

That’s right, you will be asked for new root password and also you will be asked about basic authentication configuration. Once finished your new vm is now ready for use.

Monitor VMs also from pools tab.
Notes:
- To delete Pool, You should detach all of VMs from the Pool.
- To detach VM from Pool, VM must be at down state.
- Compare VM installation time [Normal way VS. Template using].
Create VM Clones:
Cloning is normal Copy Process without any change to the Original Source. Cloning could done from Original VM or Snapshot.
To take Clone:
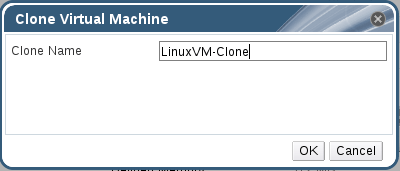
16. Select the Original source [VM or Snapshot] then click “Clone VM”.
Hint: If you will take clone from VM, VM must be at down state.
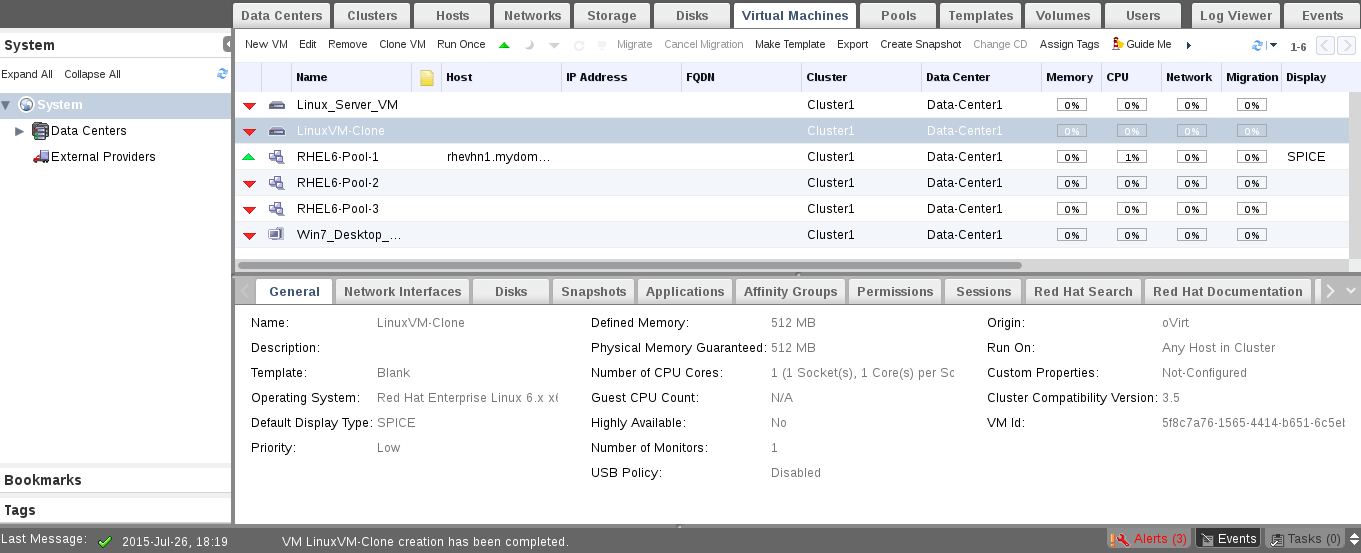
17. Provide name to your cloned VM and wait few minutes, you will find the cloning process is done and the new vm now is ready to be used.
Conclusion
As a RHEV administrator, there some main tasks to be done on environment virtual machines. Cloning, Creating Pools, Making Templates and Taking snapshots are basic and important tasks should be done by RHEV admin. This tasks also considered as the core tasks of any virtualization environment, So make sure you understood it well then do more and more,,, and more practical labs in your private environment.
Resources: RHEV Administration Guide


hi, Mohammad Dosoukey. I got a question either clone or snapshot,does both process required the same physical characteristics of the original VM? and what it´s the difference between those two?
thanks..
Hi Mohammad,
I liked your tutorial, it’s very useful. I’m preparing my Lab using your tutorial. Congratulations for you dedication and I’m waiting for your last part, users/groups management.
Thank you
Marcos