Rsync (Remote Sync) is the most commonly used command for copying and synchronizing files and directories remotely as well as locally in Linux/Unix systems.
With the help of the rsync command, you can copy and synchronize your data remotely and locally across directories, disks, and networks, perform data backups, and mirror between two Linux machines.
This article explains 16 basic and advanced uses of the rsync command to transfer your files remotely and locally in Linux-based machines. You don’t need to be a root user to run the rsync command.
Table of Contents
Advantages of Rsync Command
It offers several advantages, including:
- Efficient File Transfer – rsync uses a delta transfer algorithm, which means it only transfers the differences between source and destination files, which significantly reduces the amount of data transferred, making it efficient for syncing large files or directories.
- Remote File Synchronization – rsync supports both local and remote file transfers over SSH, which allows synchronization between local and remote systems or mirroring directories across multiple machines.
- Incremental Backups – rsync is well-suited for incremental backups, as it create and update backups efficiently by transferring only new or modified files.
- Preserves File Permissions – rsync can preserve various file attributes, such as permissions, ownership, timestamps, and symbolic links, which ensures that the copied files retain their original characteristics on the destination.
- Bandwidth Control – rsync allows you to limit the bandwidth usage during file transfers, as it uses compression and decompression method while sending and receiving data on both ends.
- Faster – rsync can be faster than scp (Secure Copy) for transferring files, especially when syncing large directories or when dealing with files that have already been partially transferred or exist on the destination.
Rsync Command Syntax
The rsync command follows the following syntax:
# rsync [OPTIONS] SOURCE DESTINATION
Here’s an explanation of the different components and options used with rsync commands:
-v– Verbose output, displaying detailed information about the transfer.-r– copies data recursively (but doesn’t preserve timestamps and permission while transferring data.-a– archive mode, which allows copying files recursively and it also preserves symbolic links, file permissions, user & group ownerships, and timestamps.-z– Compress files during transfer to reduce network usage.-h– human-readable, output numbers in a human-readable format.-P– Show progress during the transfer.SOURCE– Specifies the source file(s) or directory to be transferred, which can be a local or a remote location.DESTINATION– Specifies the destination path where the files or directories will be copied. Similar to the source, it can be a local path or a remote location.
Install Rsync in Linux System
We can install the rsync package with the help of the following package manager as per your Linux distribution.
$ sudo apt install rsync         [On Debian, Ubuntu and Mint]
$ sudo yum install rsync         [On RHEL/CentOS/Fedora and Rocky/AlmaLinux]
$ sudo emerge -a sys-apps/rsync  [On Gentoo Linux]
$ sudo apk add rsync            [On Alpine Linux]
$ sudo pacman -S rsync           [On Arch Linux]
$ sudo zypper install rsync      [On OpenSUSE]
1. Copy/Sync File Locally
To copy or sync a file locally, you can use the following command that will sync a single file on a local machine from one location to another location.
Here in this example, a file name backup.tar needs to be copied or synced to /tmp/backups/ folder.
[root@tecmint]# rsync -zvh backup.tar.gz /tmp/backups/

created directory /tmp/backups
backup.tar.gz

sent 224.54K bytes  received 70 bytes  449.21K bytes/sec
total size is 224.40K  speedup is 1.00
In the above example, you can see that if the destination is not already existed rsync will create a directory automatically for the destination.

2. Copy/Sync Directory Locally
The following command will transfer or sync all the files from one directory to a different directory in the same machine.
Here in this example, /root/rpmpkgs contains some rpm package files and you want that directory to be copied inside /tmp/backups/ folder.
[root@tecmint]# rsync -avzh /root/rpmpkgs /tmp/backups/

sending incremental file list
rpmpkgs/
rpmpkgs/httpd-2.4.37-40.module_el8.5.0+852+0aafc63b.x86_64.rpm
rpmpkgs/mod_ssl-2.4.37-40.module_el8.5.0+852+0aafc63b.x86_64.rpm
rpmpkgs/nagios-4.4.6-4.el8.x86_64.rpm
rpmpkgs/nagios-plugins-2.3.3-5.el8.x86_64.rpm

sent 3.47M bytes  received 96 bytes  2.32M bytes/sec
total size is 3.74M  speedup is 1.08

3. Copy a Directory from Local to Remote Server
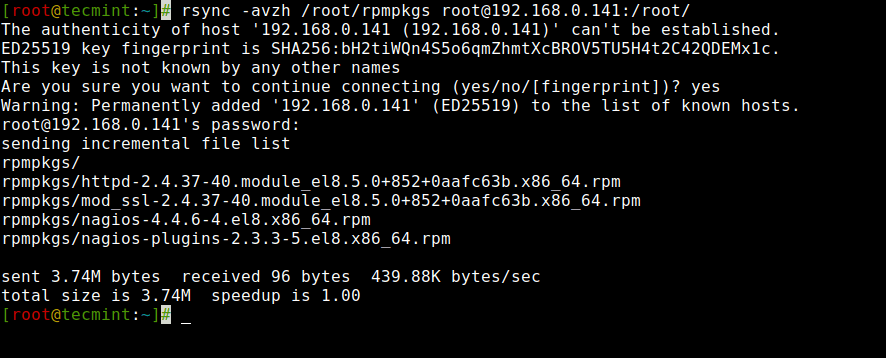
To copy a directory from a local server to a remote server, you can use the following command, which will sync a directory from a local to a remote machine.
For example, if there is a folder in your local computer “rpmpkgs” that contains some RPM packages and if you want that local directory’s content sends to a remote server, you can use the following command.
# rsync -avzh /root/rpmpkgs [email protected]:/root/

The authenticity of host '192.168.0.141 (192.168.0.141)' can't be established.
ED25519 key fingerprint is SHA256:bH2tiWQn4S5o6qmZhmtXcBROV5TU5H4t2C42QDEMx1c.
This key is not known by any other names
Are you sure you want to continue connecting (yes/no/[fingerprint])? yes
Warning: Permanently added '192.168.0.141' (ED25519) to the list of known hosts.
[email protected]'s password:
sending incremental file list
rpmpkgs/
rpmpkgs/httpd-2.4.37-40.module_el8.5.0+852+0aafc63b.x86_64.rpm
rpmpkgs/mod_ssl-2.4.37-40.module_el8.5.0+852+0aafc63b.x86_64.rpm
rpmpkgs/nagios-4.4.6-4.el8.x86_64.rpm
rpmpkgs/nagios-plugins-2.3.3-5.el8.x86_64.rpm

sent 3.74M bytes  received 96 bytes  439.88K bytes/sec
total size is 3.74M  speedup is 1.00
4. Copy a Directory from Remote to Local Server
This command will help you sync a remote directory to a local directory. Here in this example, a directory /root/rpmpkgs which is on a remote server is being copied into your local computer in /tmp/myrpms.
# rsync -avzh [email protected]:/root/rpmpkgs /tmp/myrpms

[email protected]'s password:
receiving incremental file list
created directory /tmp/myrpms
rpmpkgs/
rpmpkgs/httpd-2.4.37-40.module_el8.5.0+852+0aafc63b.x86_64.rpm
rpmpkgs/mod_ssl-2.4.37-40.module_el8.5.0+852+0aafc63b.x86_64.rpm
rpmpkgs/nagios-4.4.6-4.el8.x86_64.rpm
rpmpkgs/nagios-plugins-2.3.3-5.el8.x86_64.rpm

sent 104 bytes  received 3.49M bytes  997.68K bytes/sec
total size is 3.74M  speedup is 1.07

5. Rsync Over SSH
With rsync, we can use SSH (Secure Shell) for data transfer, using SSH protocol while transferring our data you can be ensured that your data is being transferred in a secured connection with encryption so that nobody can read your data while it is being transferred over the wire on the internet.
Also when we use rsync we need to provide the user/root password to accomplish that particular task, so using the SSH option will send your logins in an encrypted manner so that your password will be safe.
To use rsync over SSH, you can use the -e option to specify the remote shell command, which is typically ssh as shown.
# rsync [OPTIONS] -e ssh /path/to/source user@remote:/path/to/destination
6. Copy a File from a Remote Server to a Local Server with SSH
To synchronize a file from a remote server to a local server, you can specify a protocol with rsync using the “-e” option with the protocol name you want to use.
Here in this example, We will be using the “ssh” with the “-e” option and perform data transfer.
# rsync -avzhe ssh [email protected]:/root/anaconda-ks.cfg /tmp

[email protected]'s password:
receiving incremental file list
anaconda-ks.cfg

sent 43 bytes  received 1.10K bytes  325.43 bytes/sec
total size is 1.90K  speedup is 1.67

7. Copy a File from a Local Server to a Remote Server with SSH
To synchronize a file from a local server to a remote server using SSH, you can leverage the following command as shown.
# rsync -avzhe ssh backup.tar.gz [email protected]:/backups/

[email protected]'s password:
sending incremental file list
created directory /backups
backup.tar.gz

sent 224.59K bytes  received 66 bytes  64.19K bytes/sec
total size is 224.40K  speedup is 1.00

8. Show Progress While Transferring Data with Rsync
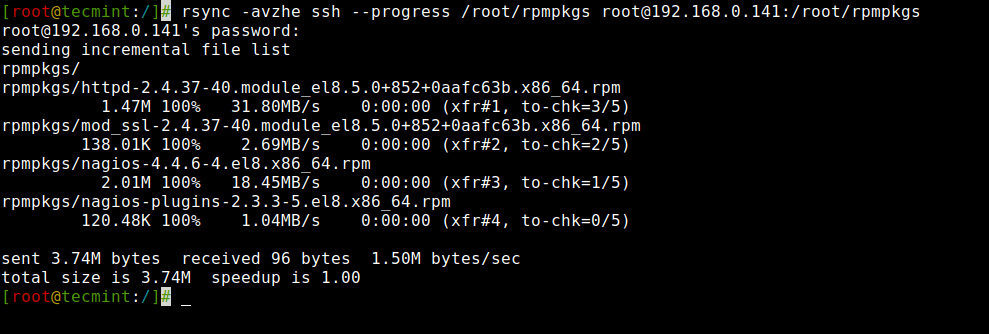
To show the progress while transferring the data from one machine to a different machine, we can use the ‘--progress' option, which displays the files and the time remaining to complete the transfer.
# rsync -avzhe ssh --progress /root/rpmpkgs [email protected]:/root/rpmpkgs

[email protected]'s password:
sending incremental file list
rpmpkgs/
rpmpkgs/httpd-2.4.37-40.module_el8.5.0+852+0aafc63b.x86_64.rpm
          1.47M 100%   31.80MB/s    0:00:00 (xfr#1, to-chk=3/5)
rpmpkgs/mod_ssl-2.4.37-40.module_el8.5.0+852+0aafc63b.x86_64.rpm
        138.01K 100%    2.69MB/s    0:00:00 (xfr#2, to-chk=2/5)
rpmpkgs/nagios-4.4.6-4.el8.x86_64.rpm
          2.01M 100%   18.45MB/s    0:00:00 (xfr#3, to-chk=1/5)
rpmpkgs/nagios-plugins-2.3.3-5.el8.x86_64.rpm
        120.48K 100%    1.04MB/s    0:00:00 (xfr#4, to-chk=0/5)

sent 3.74M bytes  received 96 bytes  1.50M bytes/sec
total size is 3.74M  speedup is 1.00
9. Include Files with Particular Extension with Rsync
To include specific files or patterns during a rsync operation, you can use the --include option with an extension that matches all files.
# rsync -avz --include='*.txt' /path/to/source/ user@remote:/path/to/destination/
In the provided example, rsync will include only files with the .txt extension from the /path/to/source/ directory during the transfer.
10. Exclude Files with Particular Extension with Rsync
Similarly, to exclude a specific extension during a rsync operation, you can use the --exclude option with a wildcard pattern.
# rsync -avz --exclude='*.ext' /path/to/source/ user@remote:/path/to/destination/
In the provided example, rsync will exclude files with the specified extension (*.ext) during the transfer, while including all other files and directories.
11. Include and Exclude Files with Rsync
To include and exclude specific files or patterns during a rsync operation, you can use both the --include and --exclude options with appropriate wildcard patterns.
These two options allow us to include and exclude files by specifying parameters these option helps us to specify those files or directories which you want to include in your sync and exclude files and folders with which you don’t want to be transferred.
Here in this example, the rsync command will include those files and directories only which starts with ‘R’ and exclude all other files and directories.
# rsync -avze ssh --include 'R*' --exclude '*' [email protected]:/var/lib/rpm/ /root/rpm

12. Use of –delete Option with Rsync
If a file or directory does not exist at the source, but already exists at the destination, you might want to delete that existing file/directory at the target while syncing.
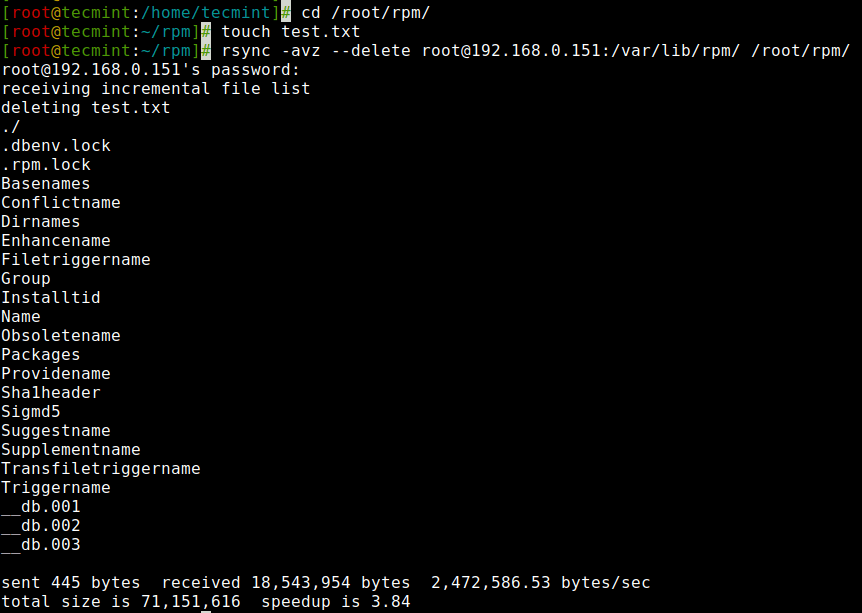
We can use the ‘--delete‘ option to delete files that are not there in the source directory.
The source and target are in sync. Now create a new file test.txt at the target.
[root@tecmint:~]# cd /root/rpm/
[root@tecmint:~/rpm]# touch test.txt
[root@tecmint:~/rpm]# rsync -avz --delete [email protected]:/var/lib/rpm/ /root/rpm/

[email protected]'s password:
receiving incremental file list
deleting test.txt
./
.dbenv.lock
.rpm.lock
Basenames
Conflictname
Dirnames
Enhancename
Filetriggername
Group
Installtid
Name
Obsoletename
Packages
Providename
Sha1header
Sigmd5
Suggestname
Supplementname
Transfiletriggername
Triggername
__db.001
__db.002
__db.003

sent 445 bytes  received 18,543,954 bytes  2,472,586.53 bytes/sec
total size is 71,151,616  speedup is 3.84
Target has the new file called test.txt when synchronizing with the source with the ‘–delete‘ option, it removed the file test.txt.
13. Set File Transfer Limit with Rsync
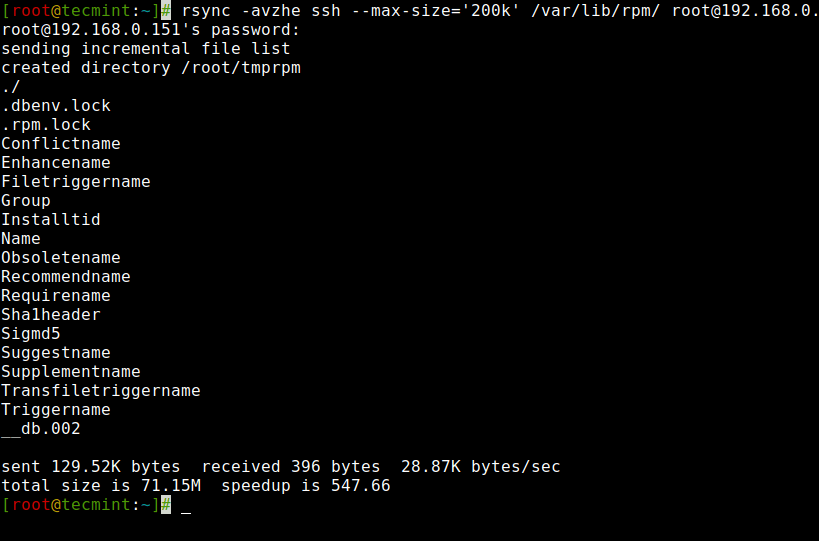
You can specify the Max file size to be transferred or synced. You can do it with the “--max-size” option. Here in this example, the Max file size is 200k, so this command will transfer only those files which are equal to or smaller than 200k.
# rsync -avzhe ssh --max-size='200k' /var/lib/rpm/ [email protected]:/root/tmprpm

[email protected]'s password:
sending incremental file list
created directory /root/tmprpm
./
.dbenv.lock
.rpm.lock
Conflictname
Enhancename
Filetriggername
Group
Installtid
Name
Obsoletename
Recommendname
Requirename
Sha1header
Sigmd5
Suggestname
Supplementname
Transfiletriggername
Triggername
__db.002

sent 129.52K bytes  received 396 bytes  28.87K bytes/sec
total size is 71.15M  speedup is 547.66
14. Automatically Delete Source Files After Transfer
Now, suppose you have the main web server and a data backup server, you created a daily backup and synced it with your backup server, but now you don’t want to keep that local copy of the backup in your web server.
So, will you wait for the transfer to complete and then delete that local backup file manually? Of Course NO. This automatic deletion can be done using the ‘--remove-source-files‘ option.
# rsync --remove-source-files -zvh backup.tar.gz [email protected]:/tmp/backups/

[email protected]'s password:
backup.tar.gz

sent 795 bytes  received 2.33K bytes  894.29 bytes/sec
total size is 267.30K  speedup is 85.40

[root@tecmint:~]# ls -l backup.tar.gz

ls: cannot access 'backup.tar.gz': No such file or directory

15. Do a Dry Run with Rsync
If you are a newbie using rsync and don’t know what exactly your command going to do. Rsync could really mess up the things in your destination folder and then doing an undo can be a tedious job.
Use of this option will not make any changes to the files and shows the output of the command, if the output shows exactly the same as you want to do then you can remove the ‘--dry-run‘ option from your command and run on the terminal.
# rsync --dry-run --remove-source-files -zvh backup.tar.gz [email protected]:/tmp/backups/

[email protected]'s password:
backup.tar.gz

sent 50 bytes  received 19 bytes  19.71 bytes/sec
total size is 267.30K  speedup is 3,873.97 (DRY RUN)

16. Rsync Set Bandwidth Limit and Transfer File
You can set the bandwidth limit while transferring data from one machine to another machine with the help of ‘--bwlimit‘ option. This option helps us to limit I/O bandwidth.
# rsync --bwlimit=100 -avzhe ssh  /var/lib/rpm/  [email protected]:/root/tmprpm/
[email protected]'s password:
sending incremental file list
sent 324 bytes  received 12 bytes  61.09 bytes/sec
total size is 38.08M  speedup is 113347.05
Also, by default rsync syncs changed blocks and bytes only, if you explicitly want to sync the whole file then you use the ‘-W‘ option with it.
# rsync -zvhW backup.tar /tmp/backups/backup.tar
backup.tar
sent 14.71M bytes  received 31 bytes  3.27M bytes/sec
total size is 16.18M  speedup is 1.10
Conclusion
That concludes our overview of rsync and its capabilities. For further exploration of its extensive options and functionalities, I encourage you to refer to the comprehensive manual pages (man pages) available.


From first example “if the destination is not already existed rsync will create a directory automatically for the destination.”
I am unable to do this. Getting error –
[root@pvvnl-hes-trill-nprod-web01 localhost]# rsync -avhP ROOT.xml /opt/TrilliantNetworks/uhes/conf/Catalina/localhost/sending incremental file list
rsync: mkdir "/opt/TrilliantNetworks/uhes/conf/Catalina/localhost" failed: No such file or directory (2)
rsync error: error in file IO (code 11) at main.c(663) [Receiver=3.1.3]
@Alok,
It seems like you’re encountering the error because rsync cannot create intermediate directories if they don’t already exist. The rsync command will only create the final directory, but if the parent directories (like /opt/TrilliantNetworks/uhes/conf/Catalina) don’t exist, it will fail.
To fix this, you need to create the intermediate directories before running rsync. You can do this by using the mkdir command with the
-poption, which creates the full directory structure:Then run your rsync command again:
This should resolve the issue. Let me know if you need more help!
RHEL no longer uses the yum command and now uses dnf by default. Although you can still run yum, it’s now an alias to dnf. Additionally, according to Red Hat calling yum is deprecated and no longer recommended.
@Fredrico,
Yes, it’s true that RHEL now uses dnf instead of yum as the default package manager. But, because we’ve been using yum for a long time in older versions of RHEL, it can be hard to switch to dnf. However, it’s important to know that yum has been made an alias to dnf, so it still works the same way for those who are used to it.
Why not alphabetically ordered [OPTION…]?
For example:
None of these commands will be executed as written. They are prefixed with a hash mark
(#)which in Linux indicates a comment.@deagonmouth,
In Linux, the
#symbol is used to indicate that the command is being run by the root user, which is a superuser, and has full administrative privileges on the system.When you are logged in as the root user, your prompt will be prefixed with a
#symbol, which is used to indicate that you are running commands with root privileges.I hope this helps!
For CentOS/RHEL 7.xx and older still need to use the “yum” command to install.
i.e.
$ sudo yum install rsync@Anthony,
Thanks, corrected the command in the article…
Hi,
How to create the Ubuntu iso file with installing the Magento 2 and all other config and not more than original iso file size and also restore with same as new installing os.