This topic will cover SysVol replication across two Samba4 Active Directory Domain Controllers performed with the help of a few powerful Linux tools, such as Rsync file synchronization utility, Cron scheduling daemon and SSH protocol.
Requirements:
Step 1: Accurate Time Synchronization Across DCs
1. Before starting to replicate the contents of the sysvol directory across both domain controllers you need to provide an accurate time for these machines.
If the delay is greater than 5 minutes on both directions and their clocks are not properly in sync, you should start experiencing various problems with AD accounts and domain replication.
To overcome the problem of time drifting between two or more domain controllers, you need to install and configure NTP server on your machine by executing the below command.
# apt-get install ntp
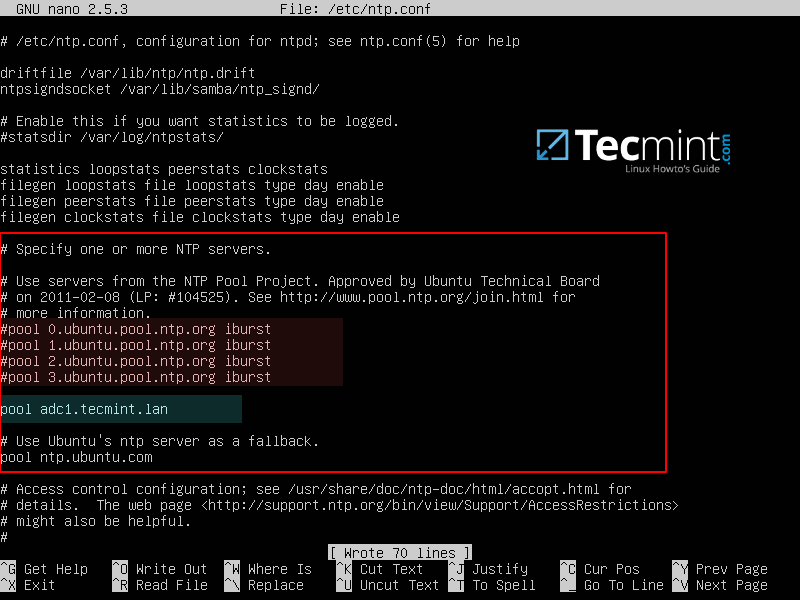
2. After NTP daemon has been installed, open the main configuration file, comment the default pools (add a # in front of each pool line) and add a new pool which will point back to the main Samba4 AD DC FQDN with NTP server installed, as suggested on the below example.
# nano /etc/ntp.conf
Add following lines to ntp.conf file.
pool 0.ubuntu.pool.ntp.org iburst
#pool 1.ubuntu.pool.ntp.org iburst
#pool 2.ubuntu.pool.ntp.org iburst
#pool 3.ubuntu.pool.ntp.org iburst

pool adc1.tecmint.lan

# Use Ubuntu's ntp server as a fallback.
pool ntp.ubuntu.com
3. Don’t close the file yet, move to the bottom of the file and add the following lines in order for other clients to be able to query and sync the time with this NTP server, issuing signed NTP requests, in case the primary DC goes offline:
restrict source notrap nomodify noquery mssntp
ntpsigndsocket /var/lib/samba/ntp_signd/
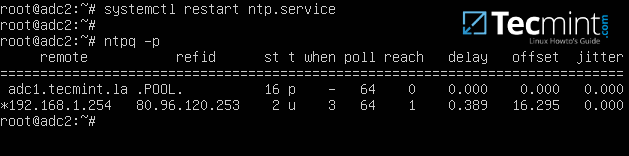
4. Finally, save and close the configuration file and restart NTP daemon in order to apply the changes. Wait for a few seconds or minutes for the time to synchronize and issue ntpq command in order to print the current summary state of the adc1 peer in sync.
# systemctl restart ntp
# ntpq -p
Step 2: SysVol Replication with First DC via Rsync
By default, Samba4 AD DC doesn’t perform SysVol replication via DFS-R (Distributed File System Replication) or the FRS (File Replication Service).
This means that Group Policy objects are available only if the first domain controller is online. If the first DC becomes unavailable, the Group Policy settings and logon scripts will not apply further on Windows machines enrolled into the domain.
To overcome this obstacle and achieve a rudimentary form of SysVol replication we will schedule a Linux rsync command combined with a SSH encrypted tunnel with key-based SSH authentication in order to securely transfer GPO objects from the first domain controller to the second domain controller.
This method ensures GPO objects consistency across domain controllers, but has one huge drawback. It works only in one direction because rsync will transfer all changes from the source DC to the destination DC when synchronizing GPO directories.
Objects which no longer exist on the source will be deleted from the destination as well. In order to limit and avoid any conflicts, all GPO edits should be made only on the first DC.
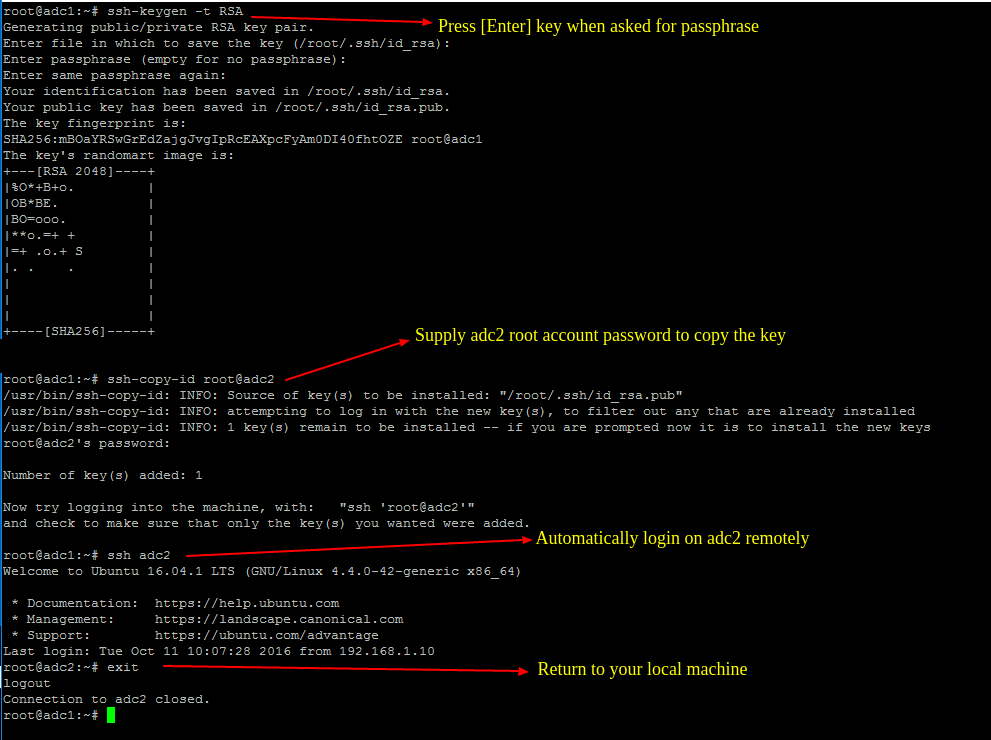
5. To start the process of SysVol replication, first generate a SSH key on the first Samba AD DC and transfer the key to the second DC by issuing the below commands.
Do not use a passphrase for this key in order for the scheduled transfer to run without user interference.
# ssh-keygen -t RSA
# ssh-copy-id root@adc2
# ssh adc2
# exit
6. After you’ve assured that the root user from the first DC can automatically login on the second DC, run the following Rsync command with --dry-run parameter in order simulate SysVol replication. Replace adc2 accordingly.
# rsync --dry-run -XAavz --chmod=775 --delete-after --progress --stats /var/lib/samba/sysvol/ root@adc2:/var/lib/samba/sysvol/
7. If the simulation process works as expected, run the rsync command again without the --dry-run option in order to actually replicate GPO objects across your domain controllers.
# rsync -XAavz --chmod=775 --delete-after --progress --stats /var/lib/samba/sysvol/ root@adc2:/var/lib/samba/sysvol/

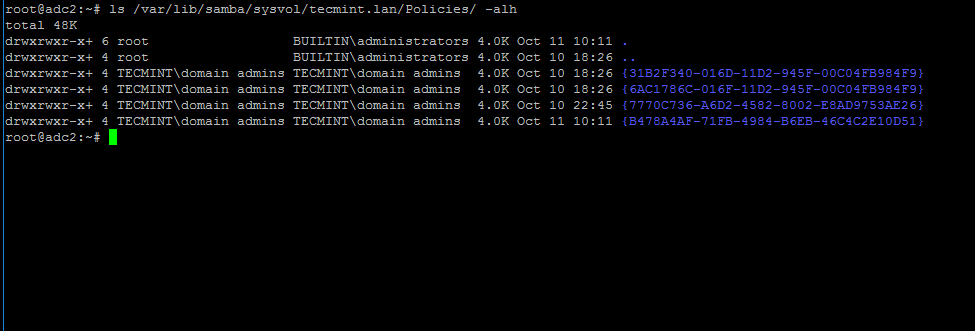
8. After SysVol replication process has finished, login to the destination domain controller and list the contents of one of the GPO objects directory by running the below command.
The same GPO objects from the first DC should be replicated here too.
# ls -alh /var/lib/samba/sysvol/your_domain/Policiers/
9. To automate the process of Group Policy replication (sysvol directory transport over network), schedule a root job to run the rsync command used earlier every 5 minutes by issuing the below command.
# crontab -e
Add rsync command to run every 5 minutes and direct the output of the command, including the errors, to the log file /var/log/sysvol-replication.log .In case something doesn’t work as expected you should consult this file in order to troubleshoot the problem.
*/5 * * * * rsync -XAavz --chmod=775 --delete-after --progress --stats /var/lib/samba/sysvol/ root@adc2:/var/lib/samba/sysvol/ > /var/log/sysvol-replication.log 2>&1
10. Assuming that in future there will be some related issues with SysVol ACL permissions, you can run the following commands in order to detect and repair these errors.
# samba-tool ntacl sysvolcheck
# samba-tool ntacl sysvolreset

11. In case the first Samba4 AD DC with FSMO role as “PDC Emulator” becomes unavailable, you can force the Group Policy Management Console installed on a Microsoft Windows system to connect only to the second domain controller by choosing Change Domain Controller option and manually selecting the target machine as illustrated below.
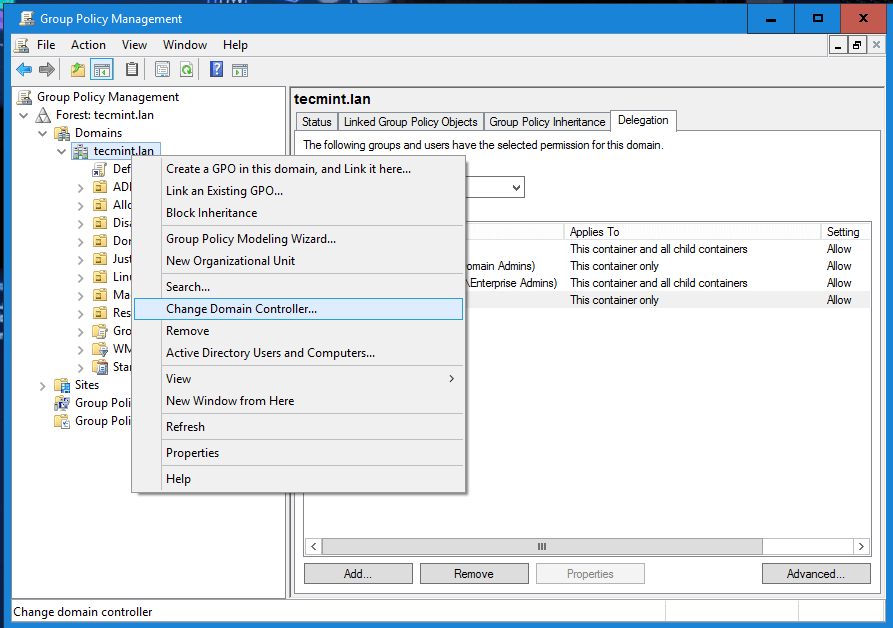
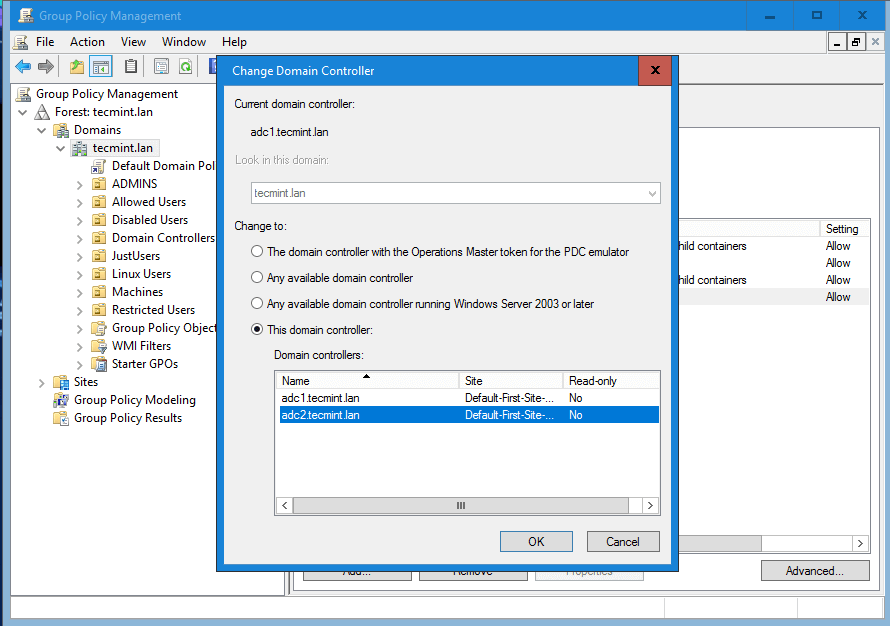
While connected to the second DC from Group Policy Management Console, you should avoid making any modification to your domain Group Policy. When the first DC will become available again, rsync command will destroy all changes made on this second domain controller.


I’m having difficulty with this, when copying the key, the remote server will not accept the root password (I have checked that the password is correct).
I’m using Ubuntu 20.04
Any ideas on how to fix this?
root@dc01:~# ssh-copy-id root@dc02
/usr/bin/ssh-copy-id: INFO: Source of key(s) to be installed: “/root/.ssh/id_rsa.pub”
/usr/bin/ssh-copy-id: INFO: attempting to log in with the new key(s), to filter out any that are already installed
/usr/bin/ssh-copy-id: INFO: 1 key(s) remain to be installed — if you are prompted now it is to install the new keys
root@dc02’s password:
Permission denied, please try again.
I tried to do this on our Zentyal servers but i get of permission errors when trying to use rsync
Is this step really necessary? I tried taking my first DC offline, and I can still see the GPOs in the second…
Never mind. I must have been fooled by some cache. This is indeed required.
In my oppinion you also need this:
systemctl disable systemd-timesyncd.service
– and insert in /etc/apparmor/init/network-interface-security/usr.sbin.ntpd, this line(bellow the samba comment):
/var/lib/samba/ntp_signd/socket rw,
– then reboot the server
This is an excellent how-to series, I followed along and every single step work out as described. This is really hard to find especially with such a complex issue. Keep doing the great work and I am looking forward to future articles from you.