In our last article, we have described in detail on how to install and configure an FTP server in RHEL 8 Linux. In this article, we will explain how to secure an FTP server using SSL/TLS to enable data encryption services for secure file transfer between systems.
We hope you already have an FTP server installed and running properly. If not, please use the following guide to install it on your system.
Step 1. Generating SSL/TLS Certificate and Private Key
1. Create the following directory to store the SSL/TLS certificate and key files.
# mkdir -p /etc/ssl/vsftpd
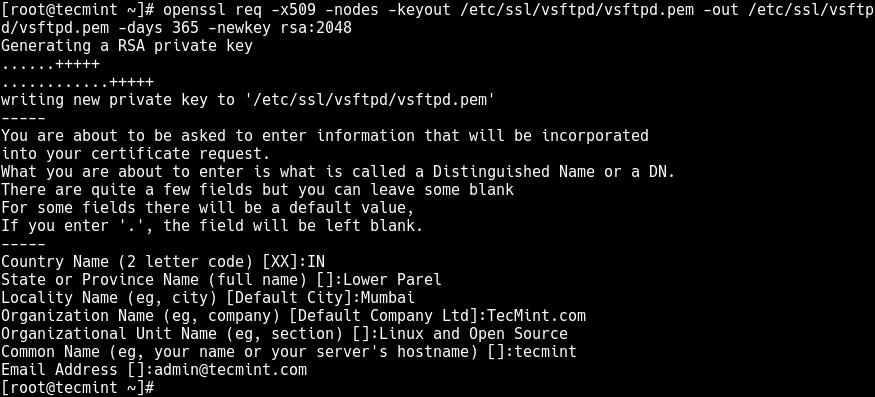
2. Next, generate a self-signed SSL/TLS certificate and private key using the following command.
# openssl req -x509 -nodes -keyout /etc/ssl/vsftpd/vsftpd.pem -out /etc/ssl/vsftpd/vsftpd.pem -days 365 -newkey rsa:2048
Following is the explanation of each flag used in the above command.
- req – is a command for X.509 Certificate Signing Request (CSR) management.
- x509 – means X.509 certificate data management.
- days – defines a number of days certificate is valid for.
- newkey – specifies certificate key processor.
- rsa:2048 – RSA key processor, will generate a 2048 bit private key.
- keyout – sets the key storage file.
- out – sets the certificate storage file, note that both certificate and key are stored in the same file: /etc/ssl/vsftpd/vsftpd.pem.
The above command will prompt you to answer the questions below, remember to use values that apply to your scenario.
Country Name (2 letter code) [XX]:IN
State or Province Name (full name) []:Lower Parel
Locality Name (eg, city) [Default City]:Mumbai
Organization Name (eg, company) [Default Company Ltd]:TecMint.com
Organizational Unit Name (eg, section) []:Linux and Open Source
Common Name (eg, your name or your server's hostname) []:tecmint
Email Address []:[email protected]
Step 2. Configuring VSFTPD To Use SSL/TLS
3. Open the VSFTPD configuration file for editing using your favorite command line editor.
# vi /etc/vsftpd/vsftpd.conf
Add the following configuration parameters to enable SSL, then select the version of SSL and TLS to use, at the end of the file.
ssl_enable=YES
ssl_tlsv1_2=YES
ssl_sslv2=NO
ssl_sslv3=NO
4. Next, add the rsa_cert_file and rsa_private_key_file options to specify the location of the SSL certificate and key file respectively.
rsa_cert_file=/etc/ssl/vsftpd/vsftpd.pem
rsa_private_key_file=/etc/ssl/vsftpd/vsftpd.pem
5. Now add these parameters to disable anonymous connections from using SSL and force all non-anonymous connections over SSL.
allow_anon_ssl=NO			# disable anonymous users from using SSL
force_local_data_ssl=YES		# force all non-anonymous logins to use a secure SSL connection for data transfer
force_local_logins_ssl=YES		# force all non-anonymous logins  to send the password over SSL
6. Next, add these option to disable all reuse of SSL data connections and set the SSL ciphers HIGH to allow encrypted SSL connections.
require_ssl_reuse=NO
ssl_ciphers=HIGH
7. You also have to specify the port range (min and max port) of passive ports to be used by vsftpd for secure connections, using the pasv_min_port and pasv_max_port parameters respectively. In addition, you can optionally enable SSL debugging for troubleshooting purposes, using the debug_ssl option.
pasv_min_port=40000
pasv_max_port=50000
debug_ssl=YES
8. Finally, save the file and restart the vsftpd service for the above changes to take effect.
# systemctl restart vsftpd
9. One more critical task to perform before you can securely access the FTP server is to open the ports 990 and 40000-50000 in the system firewall. This will allow TLS connections to vsftpd service and open the port range of passive ports defined in the VSFTPD configuration file respectively, as follows.
# firewall-cmd --zone=public --permanent –add-port=990/tcp
# firewall-cmd --zone=public --permanent –add-port=40000-50000/tcp
# firewall-cmd --reload
Step 3: Install FileZilla to Securely Connect to the FTP Server
10. To securely connect to the FTP server, you need an FTP client that supports SSL/TLS connections such as FileZilla – is an open source, widely-used, cross-platform FTP, SFTP, and FTPS client that supports SSL/TLS connections by default.
Install FileZilla in Linux using your default package manager as follows:
$ sudo apt-get install filezilla   		#Debian/Ubuntu
# yum install epel-release filezilla		#On CentOS/RHEL
# dnf install filezilla			        #Fedora 22+
$ sudo zypper install filezilla			#openSUSE
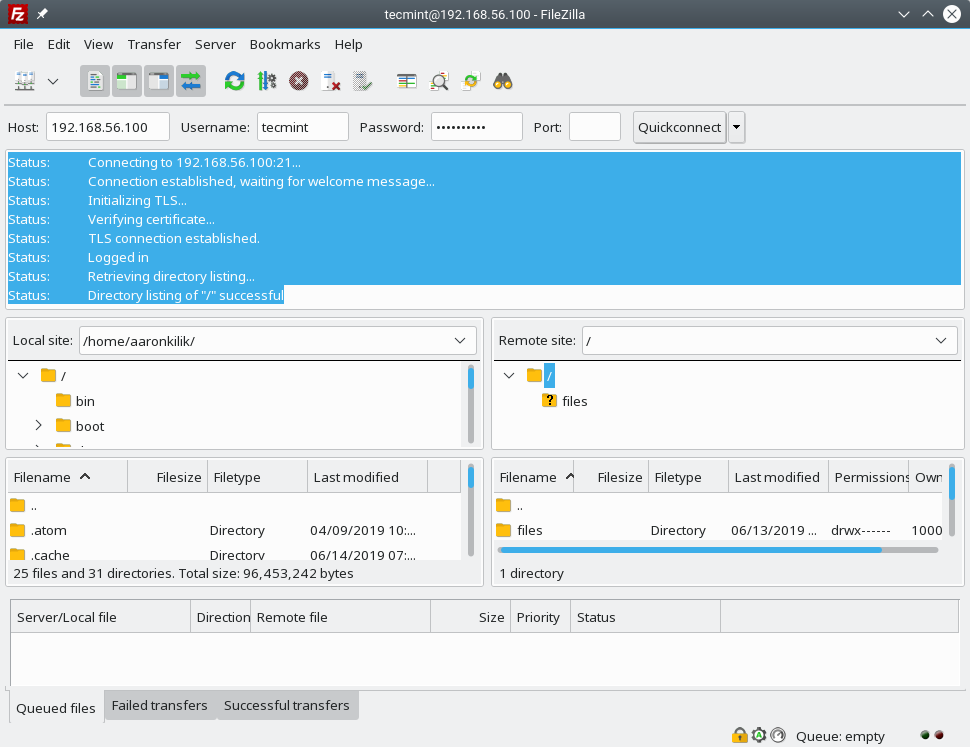
11. After the Filezilla package is installed, search for it in the system menu and open it. To quickly connect the remote FTP server, from the main interface, provide the Host IP address, Username, and user’s Password. Then click QuickConnect.

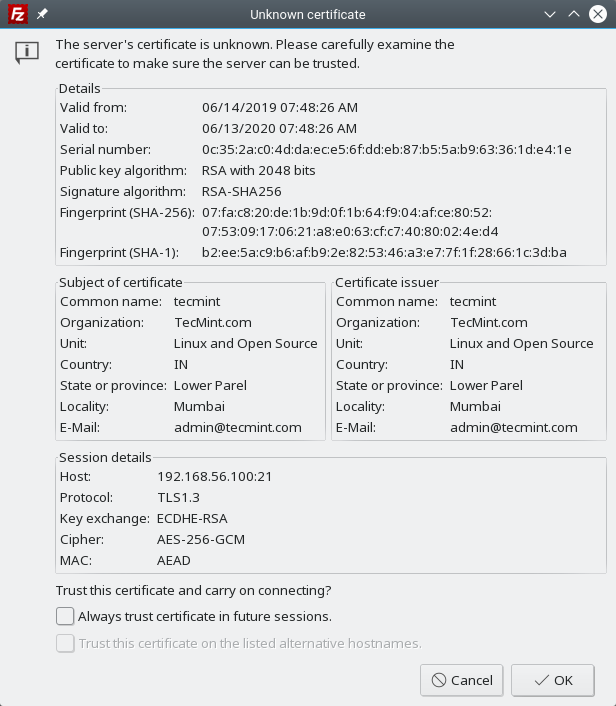
12. Then the application will ask you to allow secure connection using the unknown, self-signed certificate. Click OK to proceed.
If the configuration at the server is fine, the connection should be successful as shown in the following screenshot.
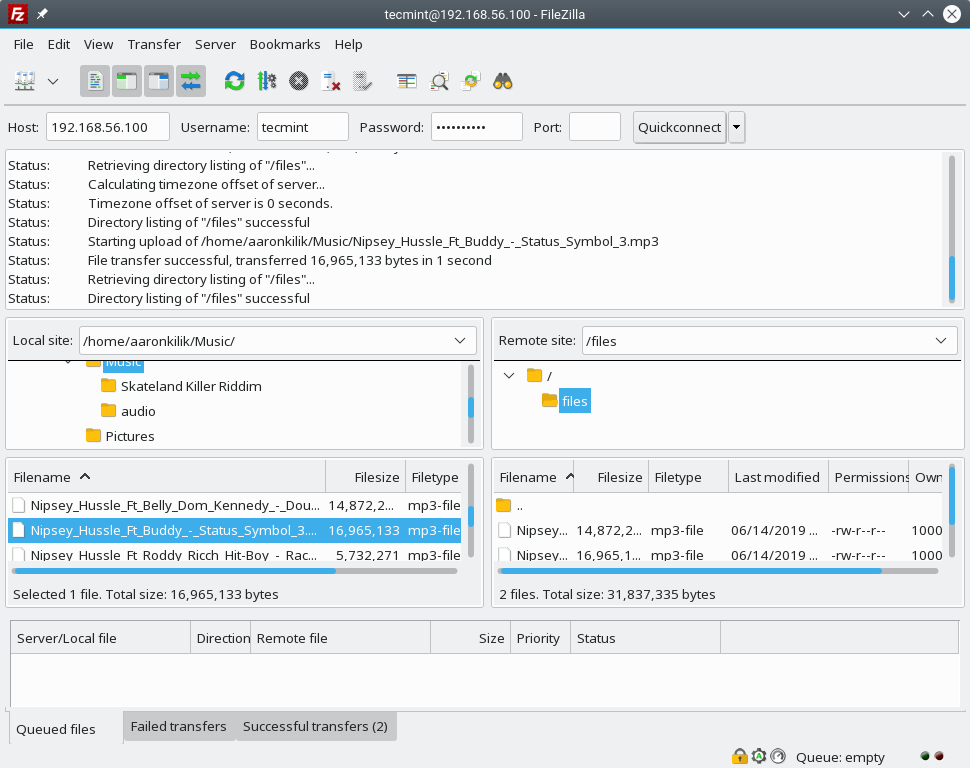
13. Finally, test the FTP secure connection status by trying to upload files from your machine to the server as shown in the next screenshot.
That’s all! In this article, we showed how to secure an FTP server using SSL/TLS for secure file transfer in RHEL 8. This is the second part of our comprehensive guide to install, configure and secure an FTP server in RHEL 8. To share any queries or thoughts, use the feedback form below.