FTP (stands for “File Transfer Protocol”) is a standard and old network protocol used for the transfer of files between a client and server on a computer network. It is built on a client-server model architecture, which offers access to files and directories via an FTP client, to upload files to the server as well as download files from it.
In our previous article, we have explained how to install, configure and secure FTP Server in CentOS/RHEL 7 for the transfer of computer files between a client and server on a computer network.
In this article, we will describe how to install, configure and secure an FTP server on RHEL 8 for basic file sharing between computers.
Install FTP Server on RHEL 8
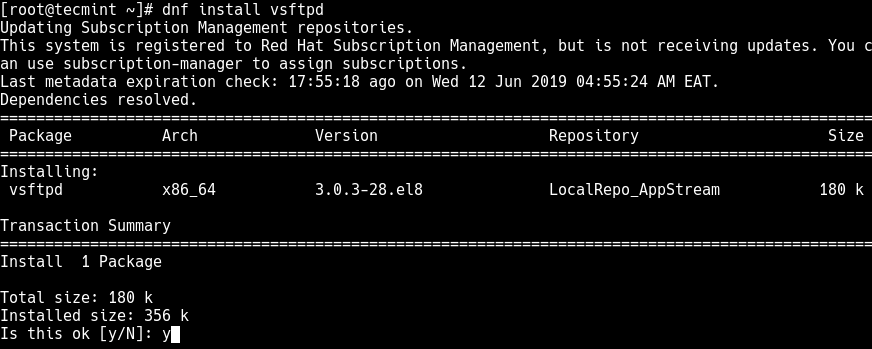
1. To install secure FTP package, use the following dnf command.
# dnf install vsftpd
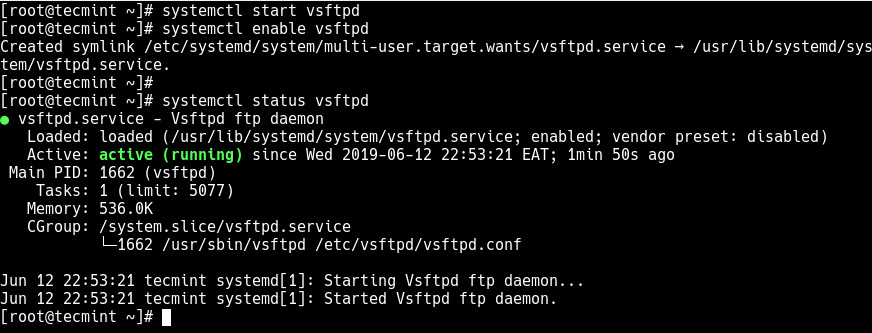
2. When the installation is complete, you need to start the vsftpd service for the meantime, enable it to start automatically at system boot and then verify the status using the following systemctl commands.
# systemctl start vsftpd
# systemctl enable vsftpd
# systemctl status vsftpd
3. Next, you need to open FTP port 21 on the system firewall to allow access to FTP services from external systems.
# firewall-cmd --zone=public --permanent --add-port=21/tcp
# firewall-cmd --zone=public --permanent --add-port=45073/tcp
# firewall-cmd --reload
Configure FTP Server on RHEL 8
4. To configure an FTP server, you need to take the backup of the main FTP configuration file /etc/vsftpd/vsftpd.conf using the following copy command.
# cp /etc/vsftpd/vsftpd.conf /etc/vsftpd/vsftpd.conf.orig
5. Then open the configuration file using your favorite command line editor.
# vi /etc/vsftpd/vsftpd.conf
Set the following parameters with these corresponding values (see man vsftpd.conf for meanings of the configuration parameters):
anonymous_enable=NO
local_enable=YES
write_enable=YES
local_umask=022
dirmessage_enable=YES
xferlog_enable=YES
connect_from_port_20=YES
xferlog_std_format=YES
listen=NO
listen_ipv6=YES
pam_service_name=vsftpd
6. Next, you need to configure FTP to allow/deny users access to FTP services based on the user list file /etc/vsftpd.userlist.
By default, users listed in /etc/vsftpd.userlist file are denied access with the userlist_deny option set to YES, if userlist_enable=YES, it enables access.
But, setting the parameter userlist_deny=NO alters the setting, meaning that only users explicitly listed in userlist_file=/etc/vsftpd.userlist will be permitted to log in.
Therefore, add the following lines in your vsftpd.conf configuration file (or if there already exist, uncomment them and set their values as shown):
userlist_enable=YES                   # allow access to list of usernames from the userlist_file
userlist_file=/etc/vsftpd.userlist    # stores usernames.
userlist_deny=NO
7. Now add the following lines in your vsftpd.conf configuration file to restrict FTP users to their Home directories.
chroot_local_user=YES		#means local users will be placed in a chroot jail, their home directory after login by default settings.
user_sub_token=$USER
local_root=/home/$USER/ftp
Save the changes in the file and close it.
8. Set the following SELinux boolean rule to enable FTP to read/write files of user’s home directory.
# semanage boolean -m ftpd_full_access --on
9. Finally restart the vsftpd service to affect all the changes we made so far above:
# systemctl restart vsftpd
Testing FTP Server on RHEL 8
10. To test if the above FTP setup is running fine, start by creating an FTP user with useradd command and create a password for that user.
# useradd -m -c "Tecmint HowTos" -s /bin/bash tecmint
# passwd tecmint
11. Then add the user tecmint to the file /etc/vsftpd.userlist using the echo command as follows.
# echo "tecmint" | tee -a /etc/vsftpd.userlist
# cat /etc/vsftpd.userlist
12. Then create the alternative local root directory for the user (tecmint, yours is probably different) and set the appropriate permissions on this directory.
# mkdir -p /home/tecmint/ftp
# chown nobody:nobody /home/tecmint/ftp
# chmod a-w /home/tecmint/ftp
13. Next, create a directory inside the local root location, where user’s will keep his/her files.
# mkdir /home/tecmint/ftp/files
# chown tecmint:tecmint /home/tecmint/ftp/files
# chmod 0700 /home/tecmint/ftp/files/
14. Now connect to the FTP server using any FTP client as follows.
# ftp [email protected]
Sample Output
Connected to 192.168.56.100
220 Welcome to TecMint.com FTP service.
331 Please specify the password.
Password:
230 Login successful.
Remote system type is UNIX.
Using binary mode to transfer files.
ftp> ls
That’s it! In this article, we described how to install, configure as well as secure an FTP server in RHEL 8. In our next article, we will show how to secure FTP server using SSL/TLS connections. Until then, stay with us.