Samba is an open source, fast, secure, stable and widely-used network file system that provides file sharing and print services for all clients using the SMB/CIFS protocol, such as Linux, all versions of DOS and Windows, OS/2, and so many other operating systems.
In our previous article, we have explained how to install Samba4 on CentOS/RHEL 7 for basic file sharing between CentOS/RHEL systems and Windows machines. Where we learned how to configure Samba for anonymous as well as secure file sharing between machines.
In this article, we will describe how to install and configure Samba4 on RHEL 8 for basic file sharing with Windows machines.
Install Samba4 in RHEL 8
1. To install the Samba 4 along with its dependencies use the DNF package manager as shown.
# dnf install samba samba-client samba-common
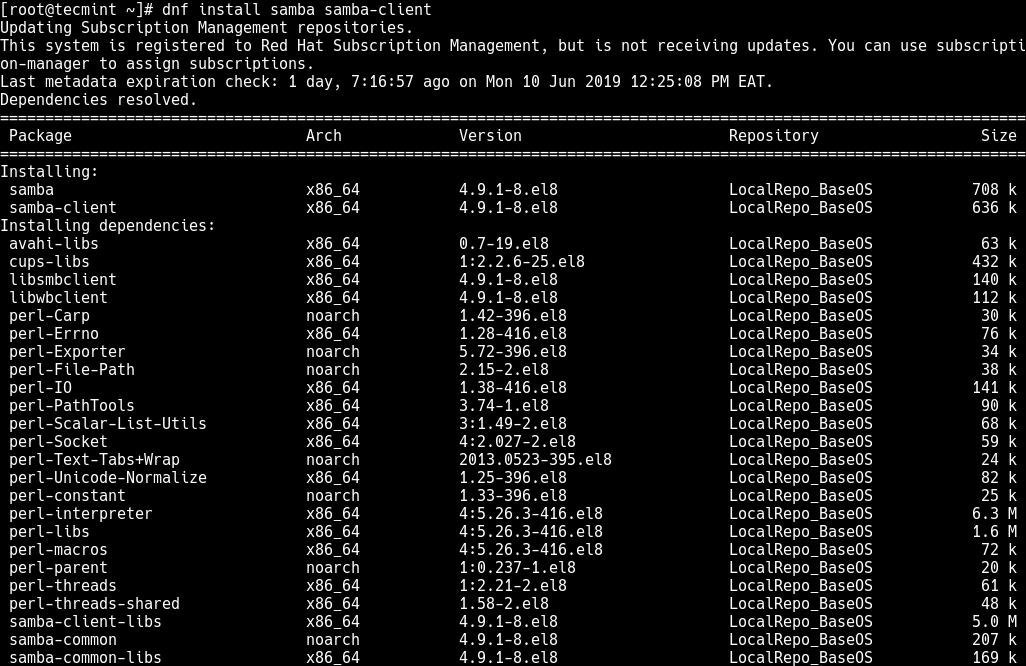
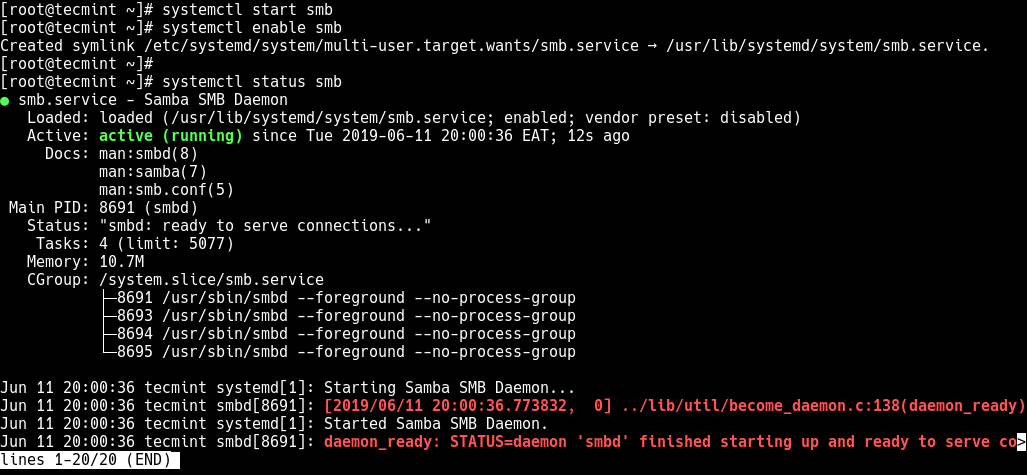
2. Once the installation is complete, start the Sambe service, enable it to auto-start at system boot time and verify that service using the systemctl commands as follows.
# systemctl start smb
# systemctl enable smb
# systemctl status smb
3. Next, if you have a firewalld configured, you need to add the Samba service in the firewall configuration to allow access to shared directories and files through system.
$ sudo firewall-cmd --permanent --add-service=samba
$ sudo firewall-cmd --reload
Configure Samba4 on RHEL 8
4. To configure Samba for file sharing, you need to create a backup copy of default samba configuration file which comes with pre-configuration settings and various configuration directives.
# cp /etc/samba/smb.conf /etc/samba/smb.conf.orig
Now, proceed further to configure samba for anonymous and secure file sharing services as explained below.
Setting Up Samba4 Anonymous File Sharing on RHEL 8
5. In this section, the first step is to create the shared directory which will store files on the server. Then define the appropriate permissions on the directory as shown.
# mkdir -p /srv/samba/anonymous
# chmod -R 0777 /srv/samba/anonymous
# chown -R nobody:nobody /srv/samba/anonymous
6. Next, using the chcon utility, change the SELinux security context for the created samba shared directory.
# chcon -t samba_share_t /srv/samba/anonymous
7. Now open the configuration file using your favorite text-based file editor to configure the anonymous unsecured file sharing on a shared directory.
# vim /etc/samba/smb.conf
Modify the following global parameters and add a section for the Anonymous share. Note that you can set your own values where necessary (read man smb.conf for more information).
[global]
        workgroup = WORKGROUP
        netbios name = rhel
        security = user
...
[Anonymous]
        comment = Anonymous File Server Share
        path = /srv/samba/anonymous
        browsable =yes
        writable = yes
        guest ok = yes
        read only = no
        force user = nobody
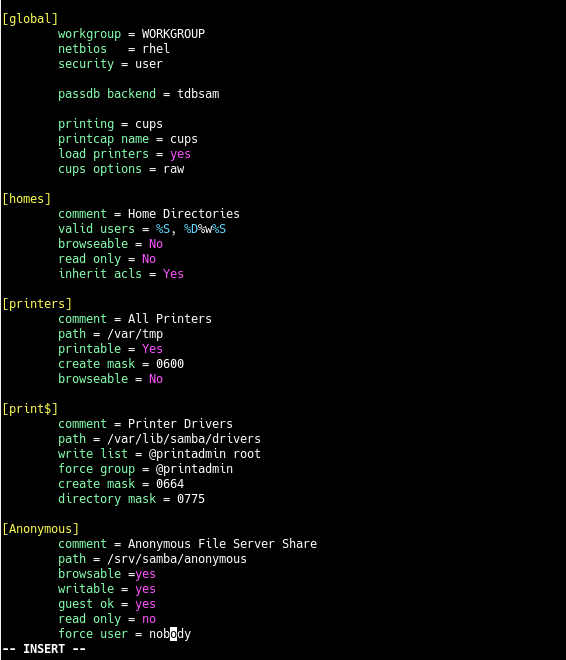
Save the changes in the file and close.
8. Then run the following command to verify if the configuration is correct.
# testparm
Load smb config files from /etc/samba/smb.conf
rlimit_max: increasing rlimit_max (1024) to minimum Windows limit (16384)
Unknown parameter encountered: "netbios"
Ignoring unknown parameter "netbios"
Processing section "[homes]"
Processing section "[printers]"
Processing section "[print$]"
Processing section "[Anonymous]"
Loaded services file OK.
Server role: ROLE_STANDALONE

Press enter to see a dump of your service definitions

# Global parameters
[global]
       printcap name = cups
       security = USER
       idmap config * : backend = tdb
       cups options = raw
[homes]
       browseable = No
       comment = Home Directories
       inherit acls = Yes
       read only = No
       valid users = %S %D%w%S

[printers]
       browseable = No
       comment = All Printers
       create mask = 0600
       path = /var/tmp
       printable = Yes

[print$]
       comment = Printer Drivers
       create mask = 0664
       directory mask = 0775
       force group = @printadmin
       path = /var/lib/samba/drivers
       write list = @printadmin root


[Anonymous]
       comment = Anonymous File Server Share
       force user = nobody
       guest ok = Yes
       path = /srv/samba/anonymous
       read only = No
9. If the Samba configuration is OK, go ahead and restart the samba service for the recent changes to take effect.
# systemctl restart smb
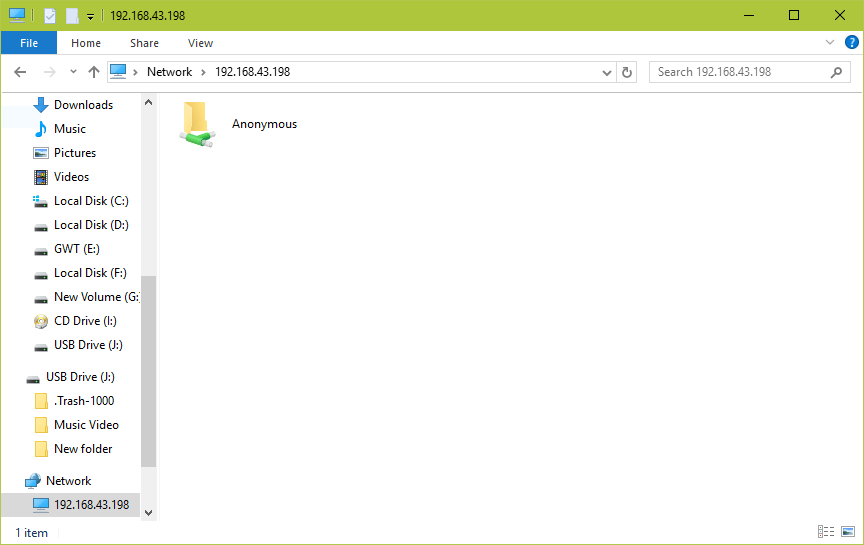
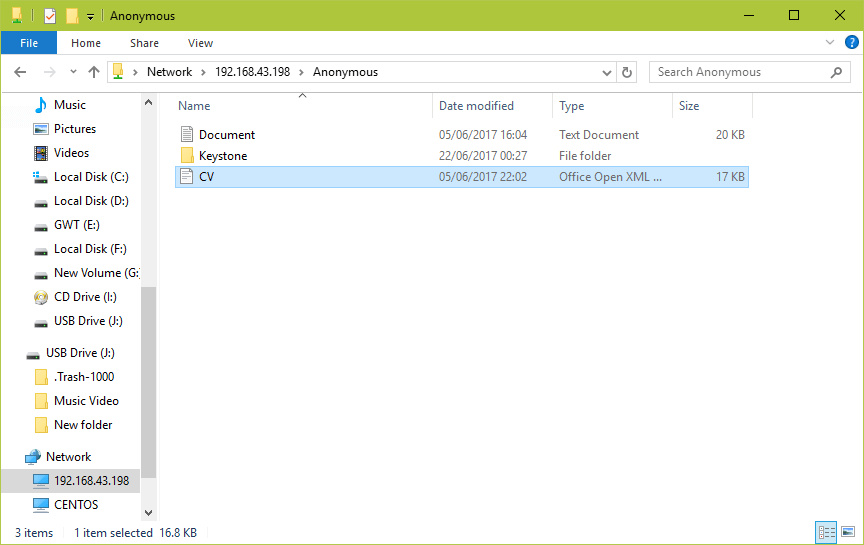
10. Finally, test if the Anonymous share is working fine, log into your Windows machine, open the Windows Explorer, click on Network, then click on the RHEL host, or use the server IP address to access it (running ip add command on the server can help you to view the IP address).
e.g. 2.168.43.198
11. Next, open the Anonymous directory and try to add files in there to share with other users.
Setting Up Samba4 Secure File Sharing on RHEL 8
12. In order to create a securely shared directory, you need to create a Samba system group. All users of the secured share will be added to this group. You can use the groupadd command to create the group as follows.
# groupadd smbgrp
Then use usermod command to add all users, for example, tecmint to the group and set a password for each user as shown.
# usermod tecmint -aG smbgrp
# smbpasswd -a tecmint
13. Next, create the secure directory which will securely store shared files, then set the appropriate permissions on the directory. Also, change the SELinux security context for the directory as follows.
# mkdir -p /srv/samba/secure
# chmod -R 0770 /srv/samba/secure
# chown -R root:smbgrp /srv/samba/secure
# chcon -t samba_share_t /srv/samba/secure
14. Next, open the configuration file for editing.
# vim /etc/samba/smb.conf
And add the following section at the end of the file.
[Secure]
        comment = Secure File Server Share
        path =  /srv/samba/secure
        valid users = @smbgrp
        guest ok = no
        writable = yes
        browsable = yes
Save the changes and close the file.
15. Next, verify the samba configuration again, by running the testparm command.
# testparm
16. Restart Samba services to apply the changes.
# systemctl restart smb.service
# systemctl restart nmb.service
Testing Secure Samba File Sharing
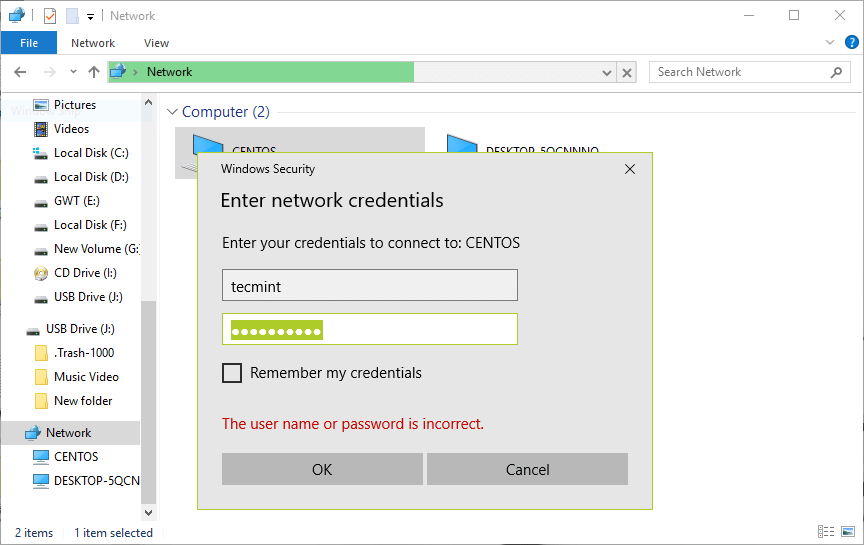
17. Lastly, test if the Secure share is working fine. From your Windows machine, open the Windows Explorer, click on Network, then click on the RHEL host, or else try to access the server using its IP address as explained before.
e.g. 2.168.43.198
You’ll be asked to enter your username and password to login the RHEL 8 server.
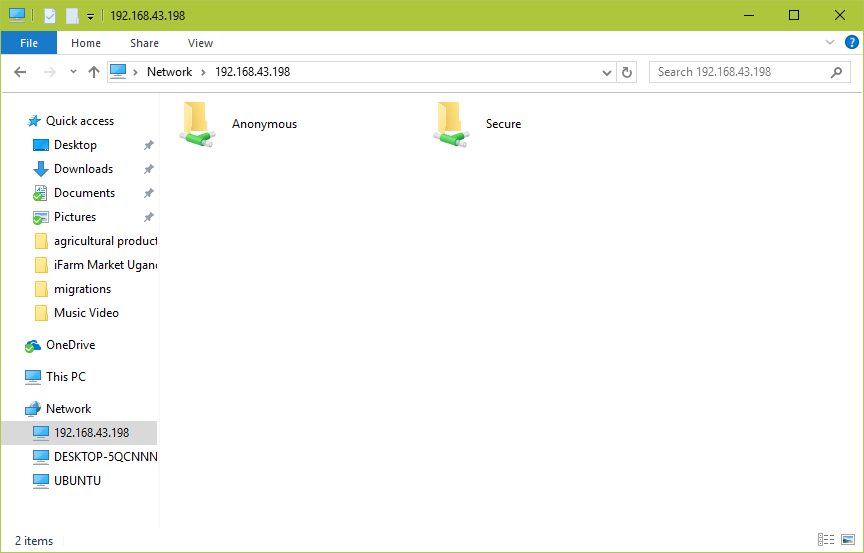
18. Once you log in, you will get a list of all samba shared directories. Now you can securely share some files with other permitted users on the network by adding files in Secure directory.
That’s all! In this article, we have shown how to install and configure Samba 4 in RHEL 8 for anonymous and secure file sharing with Windows machines. Do you have any questions or comments concerning this guide, use the feedback form below to reach us.




I am not getting access to the RHEL 8.2 share from Windows 10. I am receiving an error that says: “You do not have permission to access \\10.103.1.10. Contact your network administrator to request access.”
I’m lost at this point.
Hi there! Great tutorial!
Btw, I Just want to point out details that you may have overlooked.
# This will not survive a reboot.
# Perhaps, this is what you want.
I used your instruction to setup samba 4 on Redhat Linux 8.2. Create multiple users and folders for sharing. but I can only map a single folder with a single user name and password. if I want to map two folders in a windows pc I cant. there some multiple user errors is shown. Only the first user and password are workable. please tell me what to do.
I used your instruction to create a public folder, but when I try to access a shared folder from Windows 10, or Android, a username and password are ever requested…