System Tar and Restore is a versatile system backup script for Linux systems. It comes with two bash scripts, the main script star.sh and a GUI wrapper script star-gui.sh, which perform in three modes: backup, restore and transfer.
Read Also: 14 Outstanding Backup Utilities for Linux Systems
Features
- Full or partial system backup
- Restore or transfer to the same or different disk/partition layout.
- Restore or transfer backup to an external drive such as USB, SD card etc.
- Restore a BIOS-based system to UEFI and vice versa.
- Arrange a system in a virtual machine (such as virtualbox), back it up and restore it in a normal system.
Requirements:
- gtkdialog 0.8.3 or later (for the gui).
- tar 1.27 or later (acls and xattrs support).
- rsync (for Transfer Mode).
- wget (for downloading backup archives).
- gptfdisk/gdisk (for GPT and Syslinux).
- openssl/gpg (for encryption).
How to Install System Tar and Restore Tool in Linux
To install System Tar and Restore program, you need to first install all the required software packages as listed below.
$ sudo apt install git tar rsync wget gptfdisk openssl  [On Debian/Ubuntu]
# yum install git tar rsync wget gptfdisk openssl       [On CentOS/RHEL]
# dnf install git tar rsync wget gptfdisk openssl       [On Fedora]
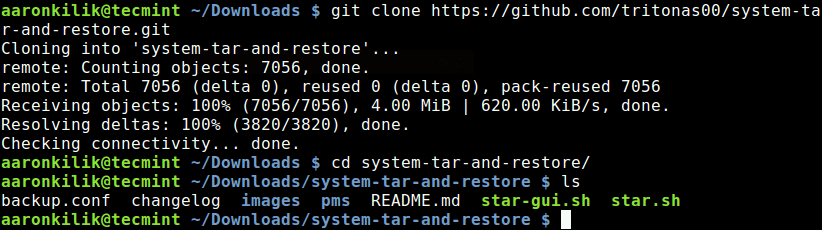
Once all the required packages installed, now it’s time to download these scripts by cloning the system tar and restore repository to your system and run these scripts with root user privileges, otherwise, use the sudo command.
$ cd Download
$ git clone https://github.com/tritonas00/system-tar-and-restore.git
$ cd system-tar-and-restore/
$ ls
Linux System Backup
First create a directory where your system backup files will be stored (you can actually use any other directory of your choice).
$ sudo mkdir /backups
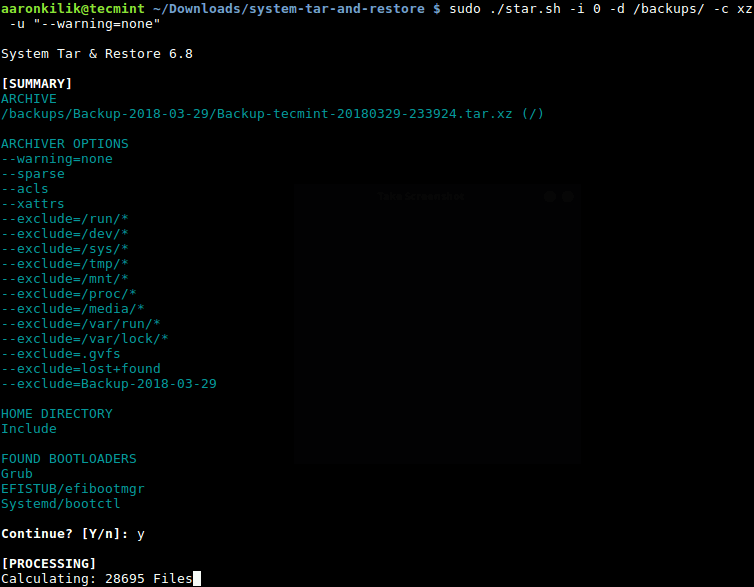
Now run the following command to create a system backup file in /backups directory, the archive file will be compressed using the xz utility, where the flags are.
-i– specifies the operation mode(0 meaning backup mode).-d– specifies destination directory, where the backup file will be stored.-c– defines the compression utility.-u– allows for reading additional tar/rsync options.
$ sudo ./star.sh -i 0 -d /backups -c xz -u "--warning=none"
To exclude the /home in the backup, add the -H flag, and use gzip compression utility as shown.
$ sudo ./star.sh -i 0 -d /backups -c gzip -H -u "--warning=none"
Restore Linux System Backup
You can also restore a backup as in the following command.
$ sudo ./star.sh -i 1 -r /dev/sdb1 -G /dev/sdb -f /backups/backup.tar.xz
where the option are:
-i– specifies operation mode (1 meaning restore mode).-r– defines targeted root (/) partition.-G– defines the grub partition.-f– specified the backup file path.
The final example show how to run it in transfer mode (2). The new option here is -b, which sets the boot partition.
$ sudo ./star.sh -i 2 -r /dev/sdb2 -b /dev/sdb1 -G /dev/sdb
In addition, if you have mounted /usr and /var on separate partitions, considering the previous command, you can specify them using the -t switch, as shown.
$ sudo ./star.sh -i 2 -r /dev/sdb2 -b /dev/sdb1 -t "/var=/dev/sdb4 /usr=/dev/sdb3" -G /dev/sdb
We have just looked a few basic options of System Tar and Restore script, you can view all available options using the following command.
$ star.sh --help
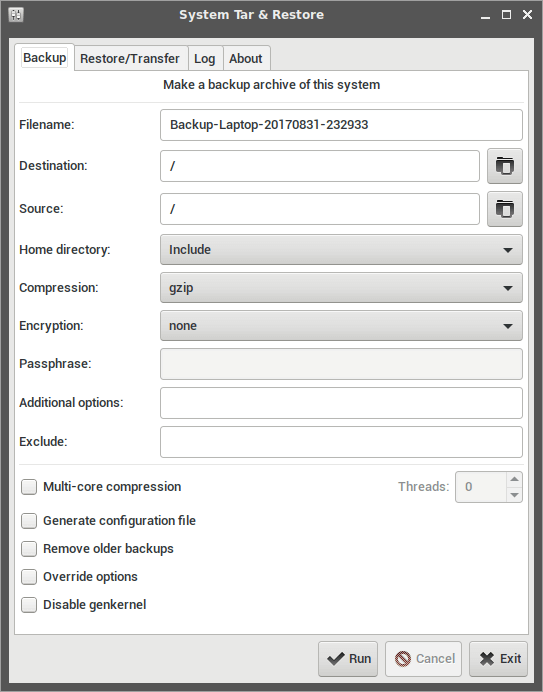
If you are accustomed to graphical user interfaces, you can use the GUI wrapper star-gui.sh instead. But you need to install gtkdialog – used to create graphical (GTK+) interfaces and dialog boxes using shell scripts in Linux.
You can find more command-line usage examples from the System Tar and Restore Github repository: https://github.com/tritonas00/system-tar-and-restore.
Summary
System Tar and Restore is a simple yet powerful, and versatile system backup script for Linux systems. Try it out comprehensively and share your thoughts about it via the feedback form below.
Hi,
I’ve done a few backups with your tool… Unfortunately, I’ll get stocked with a restore to do.
I’ve set up a raspberry-pi with an SD card mmcblk0 with 2 partitions on it. mmcblk0p1 for /boot and mmcblk0p2 for /.
I’ve tried to restore all I’ve backed to the same locations.
star.sh -i 1 -r /dev/mmcblk0p2 -b /dev/mmcblk0p1 -S /dev/mmcblk0 -f Backup-rsplx001-20201223-062518.tar.xzI’ve always got an error:
[ERROR] No partitions foundCan you help me?
Kind regards
Ruedi
How would you use this to build a custom system locally in VirtualBox or VMware Workstation and then restore the backup image to a VPS ?
Clearly a couple significant config issues will be:
But that’s something we can deal with.. the question is really how can you carbon-copy your working local system to a bare-install VPS image?
The required packages don’t appear to be available, in Linux Mint Xfce 18.3, without adding unspecified repositories.
Awesome project ! Thank’s a lot for sharing this.
I bookmark this article right now !
I have to try it.
Merci
@Jonathan
Welcome, thanks for the feedback.
Any way source directory can be specified rather than whole
/? i want it to be able to backup a directory and restore it later if required?@viktor
This is actually a system backup tool, but check out the help page to see if you can backup only a specific directory and restore it later if required