How to Upgrade to Linux Mint 20 Ulyana

Linux Mint 19.3 receives support until April 2023, but you may want to upgrade to the latest version of Mint – Linux Mint 20 – to enjoy the numerous enhancements and cool features.

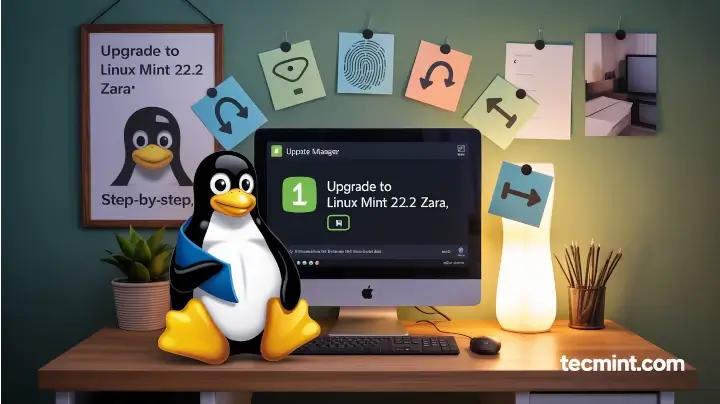
In this guide, you will learn how to Upgrade Linux Mint 19.3, codenamed Tricia, to Linux Mint 20 which is based on Ubuntu 20.04.

NOTE: This guide applies ONLY to 64-bit systems.

Check Linux Mint Architecture

If you are running a 32-bit instance of Linux Mint 19.3, then a fresh installation of Linux Mint 20 is recommended, otherwise, this procedure won’t work.

To verify your system’s architecture, run the command:

$ dpkg --print-architecture

If you are running a 64-bit system your output should give you 'amd64' as shown.

Check Linux Mint System Architecture

However, if you get 'i386' as the output, then you are running a 32-bit version on Linux Mint 19.3 and you cannot upgrade to Linux Mint 20. You should either stick to Linux 19.3 or perform a fresh installation of Linux Mint 20.

Upgrade all the Packages on Linux Mint

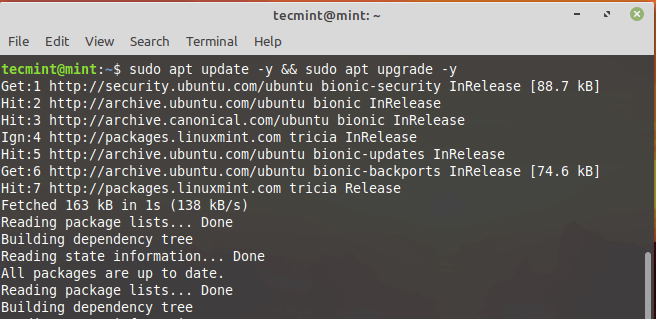
To start off, apply all the package updates by running the command:

$ sudo apt update -y && sudo apt upgrade -y
Upgrade Linux Mint
Upgrade Linux Mint

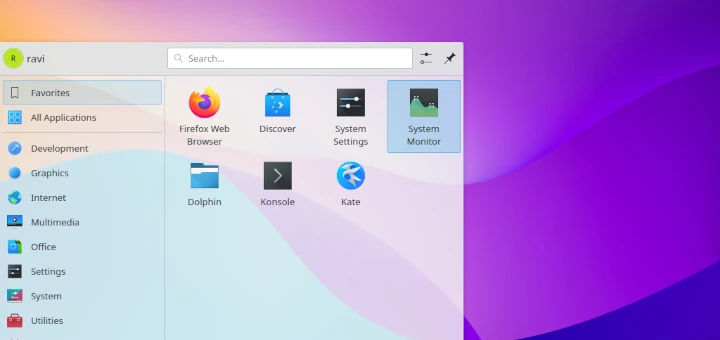
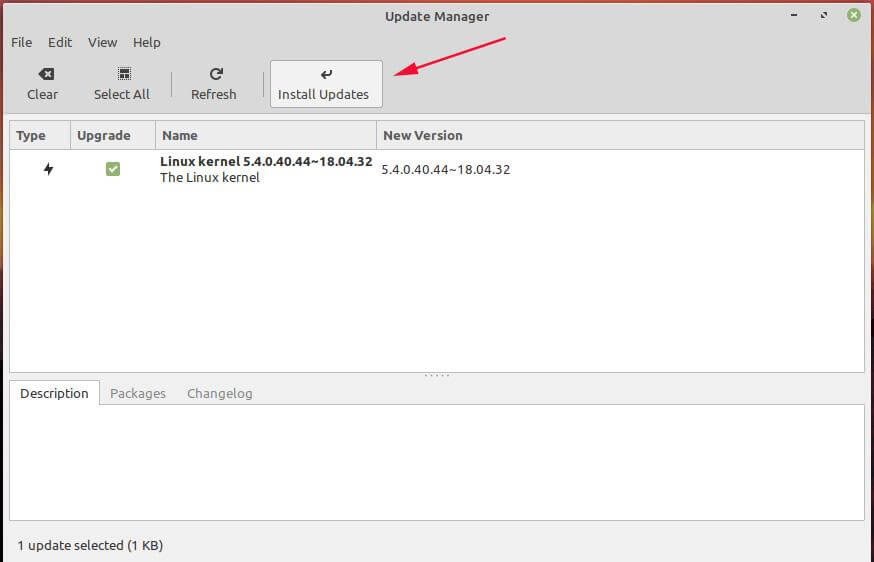
Alternatively, you can use the Update Manager to apply all the system & package updates. Simply navigate to Menu > Administration then select ‘Update Manager’.

Linux Mint Update Manager

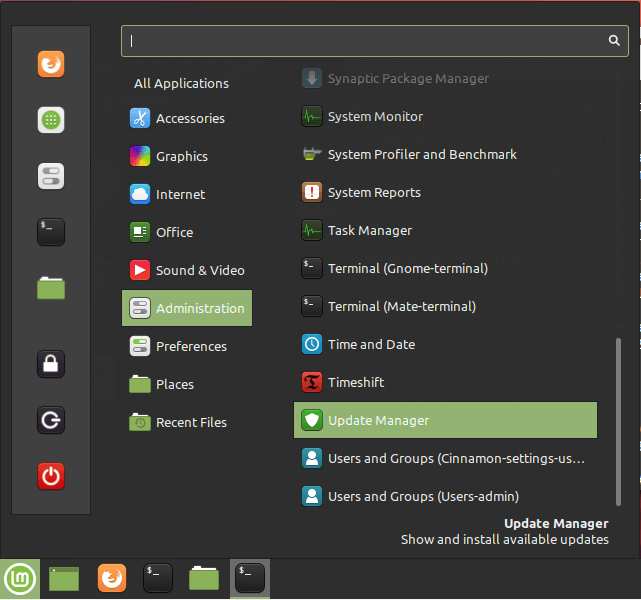
On the Update Manager Window, click on the ‘Install Updates’ button to upgrade the packages to their latest versions.

Install Linux Mint Updates

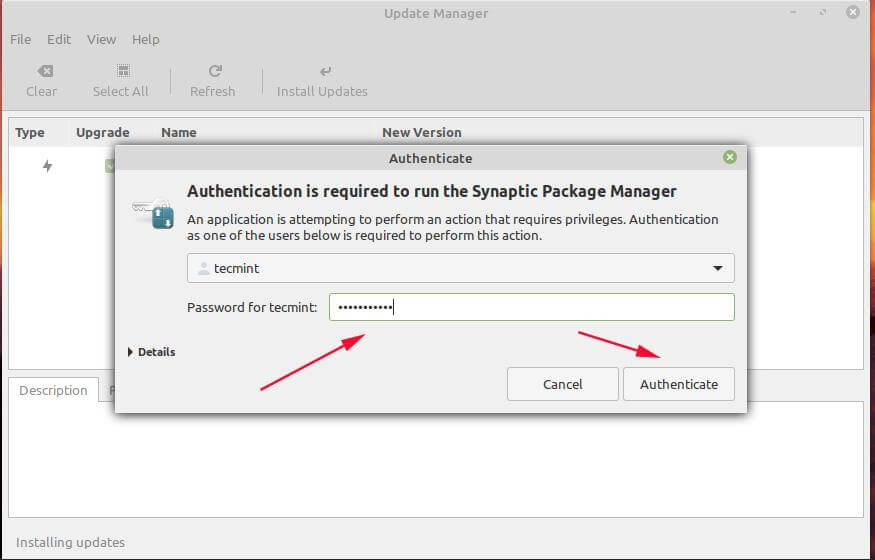
Provide your password and hit ENTER or click on the ‘Authenticate’ button to authenticate and proceed with the upgrade.

Linux Mint Authentication

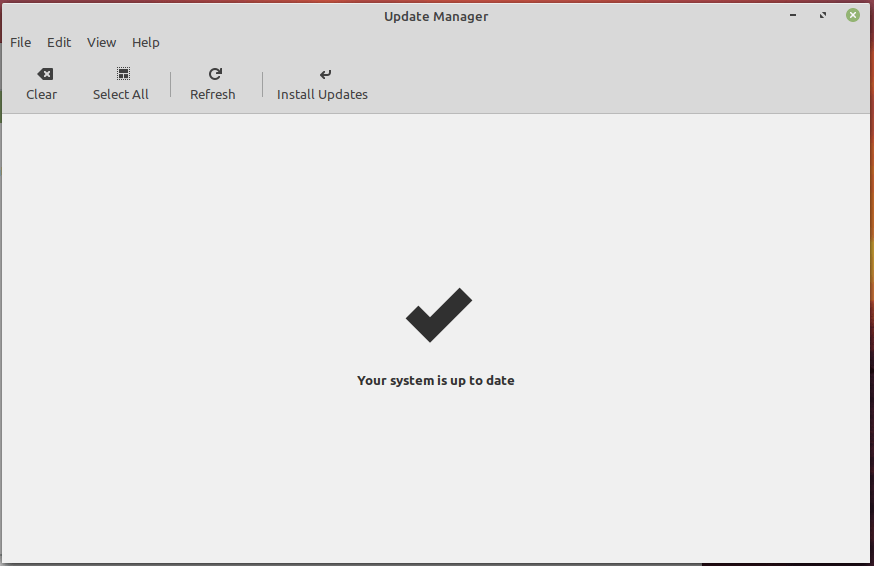
If it’s been a while since you last upgraded your packages, this might take quite a while to complete and some patience will do.

Linux Mint Updated
Linux Mint Updated

Backup Linux Mint Files

We cannot stress enough the importance of taking a backup copy of all your files. A backup will save you the agony of losing your crucial files in the event that something goes wrong during the system upgrade.

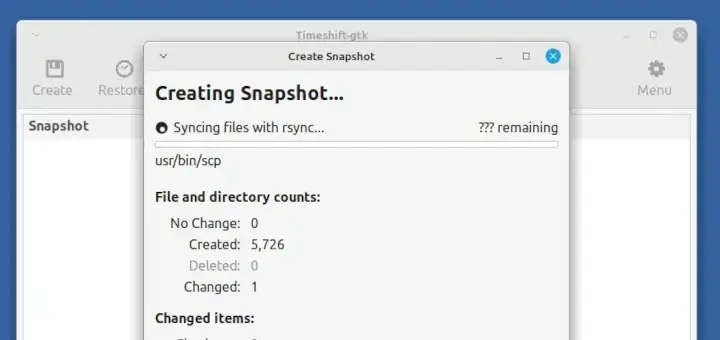
Additionally, you can create a snapshot of your system files and settings using the Timeshift tool. This will make a backup copy of all your system files and help you to restore your system using the latest snapshot in case anything goes wrong.

Be advised that this does not back up your user data such as movies, images, audio files, etc. This, therefore, informs the need to have a backup of your personal files.

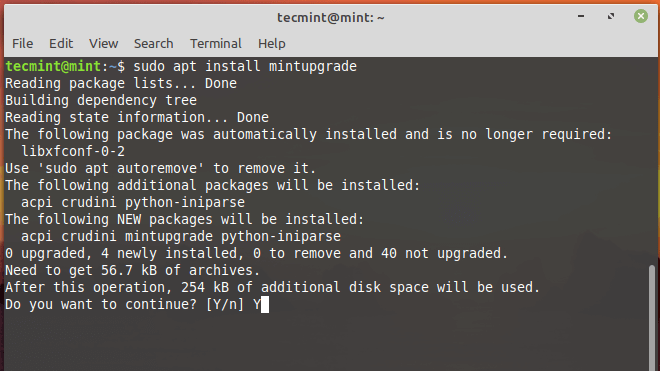
Install the Mintupgrade Utility in Linux Mint

The next step will require you to install the mintupgrade utility. This is a command-line tool provided by Linux Mint solely for upgrading from one Mint release to another.

Therefore, run the following command:

$ sudo apt install mintupgrade 
Install Mintupgrade in Linux Mint

Check Linux Mint Upgrade

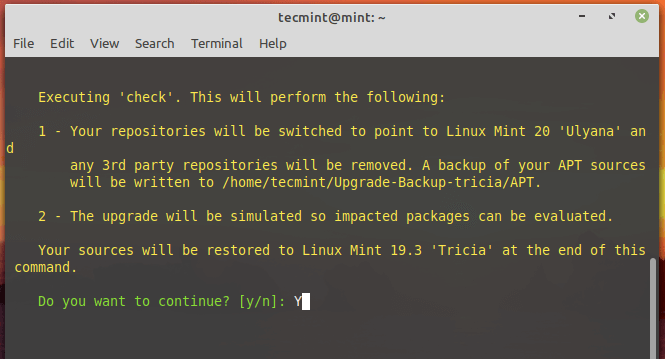
With mintupgrade installed, you can simulate the upgrade to Linux Mint 20 Ulyana by running the command:

$ sudo mintupgrade check

Since it’s a simulation, the command won’t upgrade your system, but will temporarily point your current system to Linux Mint 20 repositories and thereafter restore your repositories back to Linux Mint 19.3. It’s basically a dry run that gives you a peek on what will happen during the upgrade including the packages to be upgraded and installed or removed.

Check Linux Mint Upgrades

Download Linux Mint Upgrades

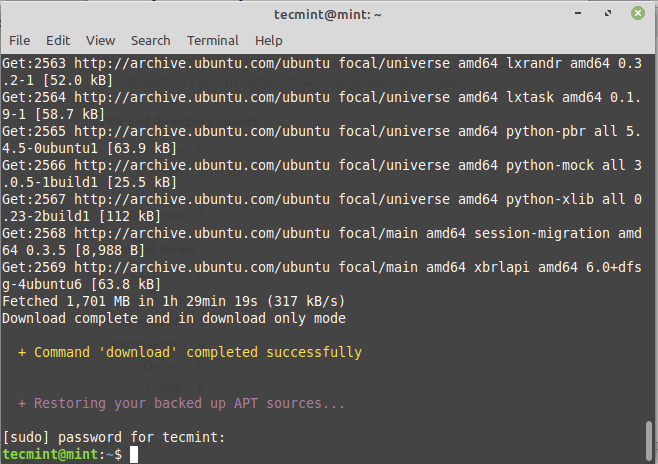
After the simulation is complete, initiate the download of packages required for the upgrade using the mintupgrade command shown:

$ sudo mintupgrade download

Bear in mind that this command only downloads the packages meant for upgrading your system and doesn’t perform the upgrade itself. Once done, you should get the notification that ‘Command ‘download’ has completed successfully’.

Download Linux Mint Upgrades

Upgrade to Linux Mint 20

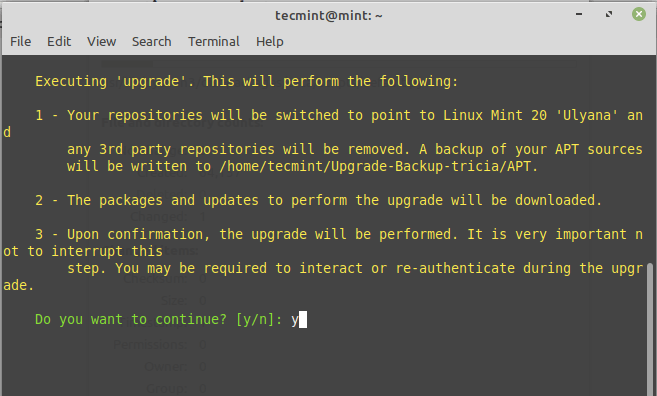
Finally to upgrade to Linux Mint 20, execute:

$ sudo mintupgrade upgrade

Before you proceed, kindly note that this process is irreversible and should not be interrupted. The only way to go back is to restore your system using the snapshot you created earlier on.

Upgrade to Linux Mint 20

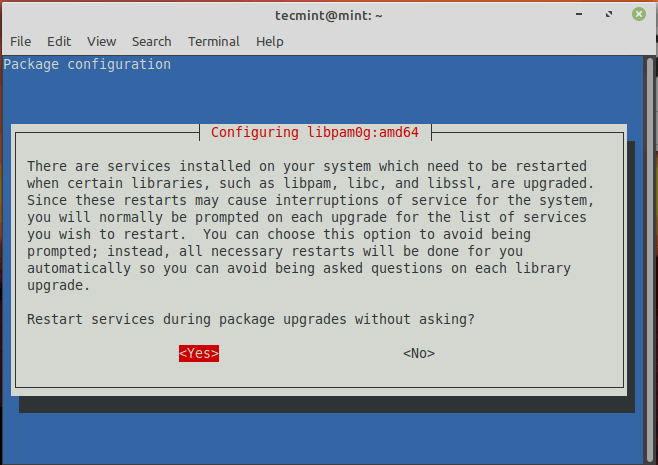
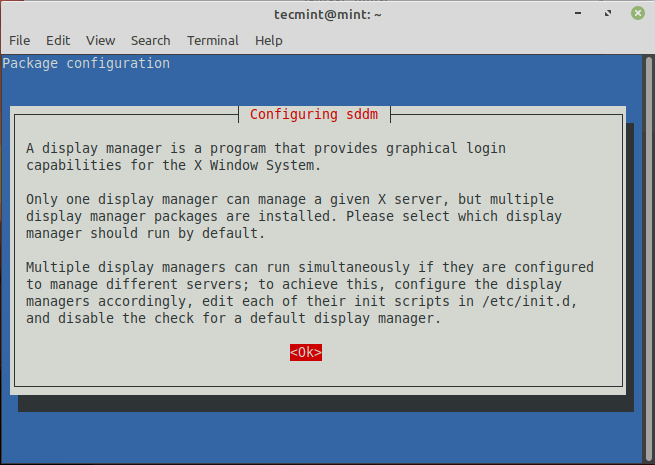
The upgrade is quite massive and intensive and will take roughly 2-3 hours. Also, during the upgrade process, you will be required to re-authenticate a couple of times and interact with any prompts on the terminal. For example, you will be required to choose between restarting services during the upgrade or not as shown.

Configure Linux Mint Services

If you have multiply display managers, you will come across this prompt. Simply hit ENTER to proceed.

Configure Linux Mint Display Manager

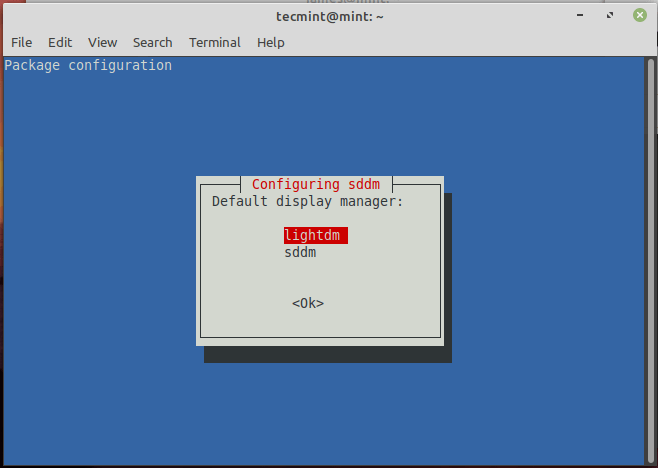
Then select your preferred display manager. In my case, I chose ‘Lightdm’.

Set Linux Mint Display Manager

The entire upgrade took about 3 hours for my case. It may take longer or shorter for your case, but one thing’s for sure – it’s quite time-consuming.

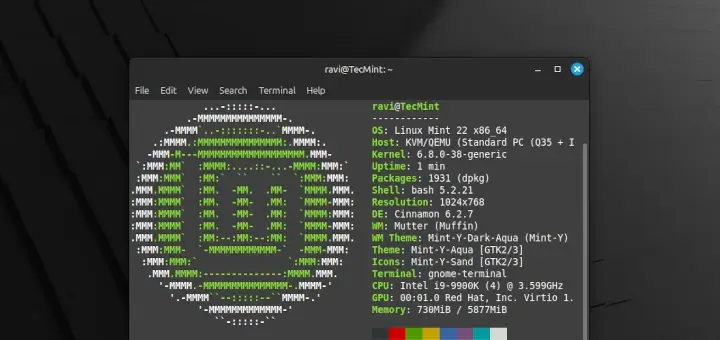
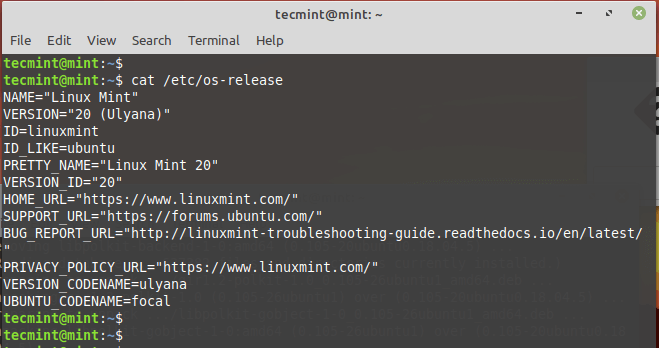
After the upgrade, you can verify your system’s version by running the command:

$ cat /etc/os-release
Verify Linux Mint Version

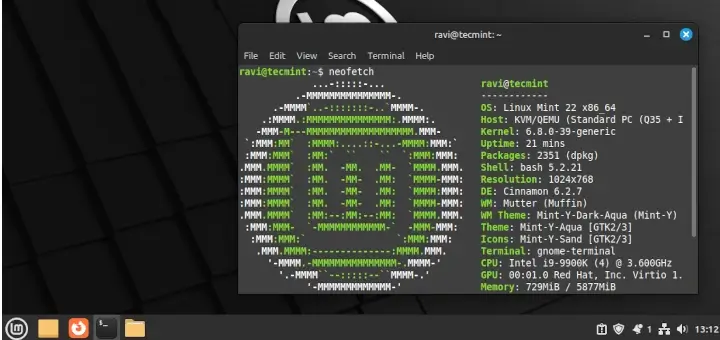
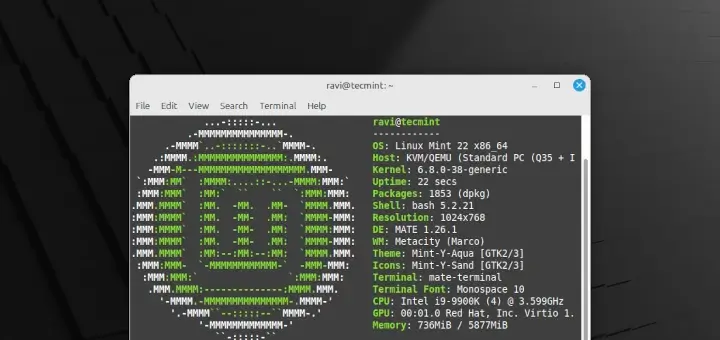
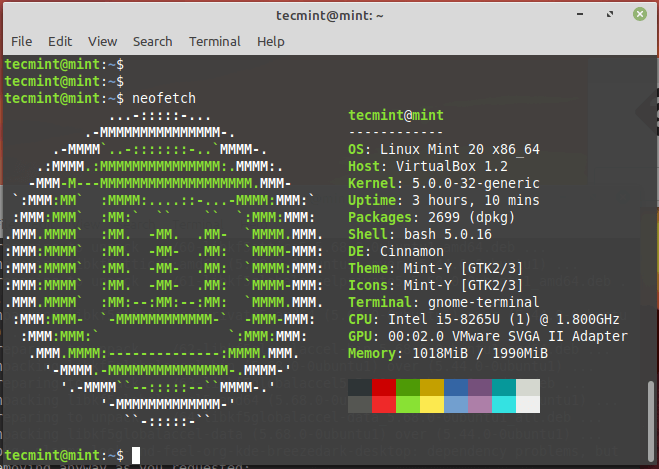
Additionally, you can use the Neofetch command-line utility to display system information as shown.

$ neofetch
Show Linux Mint 20 Information

NOTE: The upgrade will overwrite the default configuration files in the /etc directory. To restore the files, use the snapshot you created earlier before upgrading.

If you wish not to use the Timeshift tool, you can instruct the upgrader to ignore it by running the command.

$ sudo touch /etc/timeshift.json

Again, the upgrade takes a while. If you are busy elsewhere, It’s advisable to keep checking your terminal every now and then for any prompts that might require your intervention.

If you read this far, tweet to the author to show them you care. Tweet a thanks
James Kiarie
This is James, a certified Linux administrator and a tech enthusiast who loves keeping in touch with emerging trends in the tech world. When I'm not running commands on the terminal, I'm taking listening to some cool music. taking a casual stroll or watching a nice movie.

Each tutorial at TecMint is created by a team of experienced Linux system administrators so that it meets our high-quality standards.

Join the TecMint Weekly Newsletter (More Than 156,129 Linux Enthusiasts Have Subscribed)
Was this article helpful? Please add a comment or buy me a coffee to show your appreciation.

101 thoughts on “How to Upgrade to Linux Mint 20 Ulyana”

  1. I just want my old Petra-mint16 OS back. My HD was recently replaced and I’ve been unable to reboot the backup.img I made. I was able to restore all the old packages in /var/cache/apt/archive using apt-on-cd but now am getting errors that the old Petra – Ubuntu-Saucy libs no longer exisit. I tried changing Software-Sources to different mirros but nothing seems to work. I pointed my local repositry to “deb file:/var/cache/apt/archive and ran Apt-update then it forked. Is there and easy way to restore old packages with outhitting the lib-dependancy issue?

    Reply
    • Try to upgrade the system to e newer version of Linux Mint! Looks like the support period for Ubuntu Saucy has expired and the official repositories had been removed!

      Reply
  2. I’m getting this error:

    Preparing to unpack …/usb-modeswitch-data_20140327-1_all.deb …
    Unpacking usb-modeswitch-data (20140327-1) over (20120815-2) …
    Preparing to unpack …/wine-compholio_1.7.41~ubuntu14.04.1_i386.deb …
    Unpacking wine-compholio (1.7.41~ubuntu14.04.1) over (1.7.22~ubuntu13.10.1) …
    dpkg: error processing archive /var/cache/apt/archives/wine-compholio_1.7.41~ubuntu14.04.1_i386.deb (–unpack):
    trying to overwrite ‘/opt/wine-compholio/bin/wine’, which is also in package wine-compholio-i386 1.7.22~ubuntu13.10.1
    Preparing to unpack …/wine-compholio-i386_1.7.41~ubuntu14.04.1_i386.deb …
    Unpacking wine-compholio-i386 (1.7.41~ubuntu14.04.1) over (1.7.22~ubuntu13.10.1) …
    Processing triggers for ureadahead (0.100.0-16) …
    Processing triggers for doc-base (0.10.5) …
    Processing 9 changed doc-base files…
    Registering documents with scrollkeeper…
    Processing triggers for install-info (5.2.0.dfsg.1-2) …
    Processing triggers for ccache (3.1.9-1) …
    Updating symlinks in /usr/lib/ccache …
    Processing triggers for initramfs-tools (0.103ubuntu4.2) …
    update-initramfs: Generating /boot/initrd.img-3.11.0-12-generic
    Warning: No support for locale: en_US.utf8
    Errors were encountered while processing:
    /var/cache/apt/archives/wine-compholio_1.7.41~ubuntu14.04.1_i386.deb
    E: Sub-process /usr/bin/dpkg returned an error code (1)

    I’m new with Linux so I don’t know what to do. It’s gone so well up to this point.

    Reply
    • First try:
      sudo apt-get install -f
      sudo dpkg –configure -a

      If no success then run:
      sudo dpkg -i –force-overwrite /var/cache/apt/archives/wine-compholio_1.7.41~ubuntu14.04.1_i386.deb
      sudo apt-get autoremove
      sudo apt-get install -f

      Reply
  3. Very nicely done article. New to Linux, but have tried Zorin OS 9, and I like the feature that it automatically points the way to upgrade from older versions, by downloading sources, etc. I hope Linux Mint might consider this for the not so software inclined people such as myself. :-p Thank you!

    Reply
  4. During upgrade – the last step…. When GRUB came up to chane or install, or to see differences, I chose “D”,
    but when I exited the editor that it started, I am unable to continue the upgrade,
    and if I run sudo apt-get upgrade -f again, it get the following:
    E: Could not get lock /var/lib/dpkg/lock – open (11: Resource temporarily unavailable)
    E: Unable to lock the administration directory (/var/lib/dpkg/), is another process using it?

    How do I continue the process ?

    Reply
    • @Mlkem24,
      To fix such error, you need to delete the lock file with the below commands.

      $ sudo rm -rf /var/lib/apt/lists/lock
      # sudo rm -rf /var/cache/apt/archives/lock
      

      Restart the machine and try again…

      Reply
  5. I was using mint mate petra/saucy. I thought I would upgrade to trusty because it is lts. A lot of things (mate-settings-daemon, cairo-dock,nm-applet, etc) won’t start now with the following error:
    symbol lookup error: /usr/lib/x86_64-linux-gnu/libgdk-3.so.0: undefined symbol: cairo_surface_set_device_scale
    Any help out there would be appreciated! Thanks

    Reply
  6. Processing triggers for hicolor-icon-theme (0.12-1ubuntu2) …

    (gtk-update-icon-cache:30354): GdkPixbuf-WARNING **: Cannot open pixbuf loader module file ‘/usr/lib/x86_64-linux-gnu/gdk-pixbuf-2.0/2.10.0/loaders.cache’: No such file or directory

    This likely means that your installation is broken.
    Try running the command:

      gdk-pixbuf-query-loaders > /usr/lib/x86_64-linux-gnu/gdk-pixbuf-2.0/2.10.0/loaders.cache
    

    to make things work again for the time being.

    (gtk-update-icon-cache-3.0:30355): GdkPixbuf-WARNING **: Cannot open pixbuf loader module file ‘/usr/lib/x86_64-linux-gnu/gdk-pixbuf-2.0/2.10.0/loaders.cache’: No such file or directory

    This likely means that your installation is broken.
    Try running the command

      gdk-pixbuf-query-loaders > /usr/lib/x86_64-linux-gnu/gdk-pixbuf-2.0/2.10.0/loaders.cache
    

    to make things work again for the time being.
    dpkg: libmatemenu: dependency problems, but removing anyway as you requested:
    mate-panel depends on libmatemenu; however:
    Package libmatemenu is to be removed.
    mate-menus depends on libmatemenu (= 1.6.0-1+petra).
    mate-control-center depends on libmatemenu; however:
    Package libmatemenu is to be removed.
    python-mate-menu depends on libmatemenu; however:
    Package libmatemenu is to be removed.

    Why? What’s wrong? :(

    Reply
  7. to block this line in the file sources.list, getdeb.list, official-package-repositories.list (###) with : ###deb cdrom:[Linux Mint 17 _Qiana_ – Release i386 20140530]/ trusty contrib main non-free

    Reply
  8. for bloquear -file- with “deb” -sources.list, official-package-repositories.list-
    File “sources.list” :
    Only U Push It: ###

    ###deb cdrom:[Linux Mint 17 _Qiana_ – Release i386 20140530]/ trusty contrib main non-free

    Reply

Got something to say? Join the discussion.

Thank you for taking the time to share your thoughts with us. We appreciate your decision to leave a comment and value your contribution to the discussion. It's important to note that we moderate all comments in accordance with our comment policy to ensure a respectful and constructive conversation.

Rest assured that your email address will remain private and will not be published or shared with anyone. We prioritize the privacy and security of our users.