Phabricator is an open source application that helps software companies to create/build better software, which is built using PHP language and available under Apache 2.0 open source license for Linux, MacOSX and can be run in any platform, it can even run in windows but it is totally based on Linux support. Phabricator has been used by Facebook before. The first version of phabricator was built by facebook with lots of features such as reviewing and auditing codes, tracking bugs etc.

We can use phabricator as a repository same as git and svn. There are several privacy settings available to secure the code among particular development teams. We can review the code of coworkers before finalizing the code.
I hope everyone is aware about git, if not please have a quick look at the GIT article below, that explain how to use it.
Same like git, phabricator also has lots of features and used by most of the popular companies like Facebook, Dropbox, Groupon to develop there web applications.
Requirements
Phabricator can run in a normal computer, with following required packages. We don’t need specification with high resources.
- Apache2.2.7 or higher
- MySQL and PHP 5.2 or higher
- Git and some of the php extensions.
NOTE: Phabricator can only be installed on an entire domain (tecmint.com) or on an sub domain (phabricator.tecmint.com). You cannot install it to a specific path on any existing domain, say “tecmint.com/phabricator”.
Step 1: Installing Required Components
There are scripts available for setting-up in Ubuntu and Redhat based Linux, choose this option if you are not familiar with Linux.
- RedHat Derivatives – http://www.phabricator.com/rsrc/install/install_rhel-derivs.sh
- Ubuntu Derivatives – http://www.phabricator.com/rsrc/install/install_ubuntu.sh
If you are an Advance user, you just need to setup a LAMP server to run a phabricator. Okay, now let us start installing Phabricator on RHEL/CentOS and Ubuntu/Debian.
On RHEL/CentOS
Install LAMP server and include some php extensions, while installing.
# yum install mysql-server httpd git php php-mysql php-gd php-curl php-apc php-cli -y
On Ubuntu/Debian
$ sudo apt-get install mysql-server apache2 git-core git php5 php5-mysql php5-gd php5-curl php-apc php5-cli -y
NOTE: On Ubuntu based distributions, during installation it will ask you to enter root password for MysQL.
Step 2: Downloading Phabricator Files
Once, you have all the above stuff installed, now pick install directory. Here I’m going to create a directory called ‘myprojectapp‘ under DocumentRoot of Apache directory.
# mkdir /var/www/html/myprojectapp		[On RedHat]

$ sudo mkdir /var/www/myprojectapp		[On Ubuntu]
If you are installing, as a normal user you need to add current user (in my case ‘tecmint‘) in Apache group to get the write permission. This step can be ignored if you are switched to root user.
# chown -R tecmint:apache /var/www/html		[On RedHat]
$ sudo chown -R tecmint:www-data /var/www	[On Ubuntu]
Then navigate to the newly created directory i.e. myprojectapp.
# cd /var/www/html/myprojectapp			[On RedHat]

$ cd /var/www/myprojectapp			[On Ubuntu]
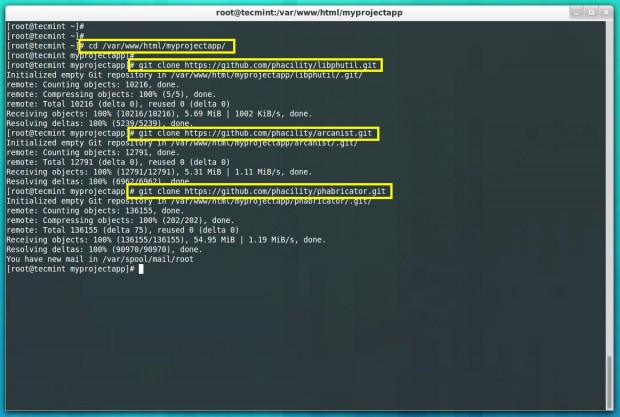
Now, start pulling the phabricator and its dependencies from there official git repository.
git clone https://github.com/phacility/libphutil.git
git clone https://github.com/phacility/arcanist.git
git clone https://github.com/phacility/phabricator.git
Step 3: Configure Apache for Phabricator
On Ubuntu based distributions, you need to enable mod_php, mod_rewrite and mod_ssl modules, during installation most of these modules enabled by default, but we need to confirm.
# sudo a2enmod rewrite
# sudo a2enmod ssl

Once, these modules enabled, next restart the web server to reflect changes.
$ sudo /etc/init.d/apache2 restart [On Ubuntu]
Next, create a separate Virtualhost in your Apache configuration file.
# vi /etc/httpd/conf/httpd.conf			[On RedHat]

$ sudo nano /etc/apache2/sites-available/phabricator.conf	[On Ubuntu]
Append the following Virtualhost entry at the bottom of the file and change the DocumentRoot path to match exact location of phabricator files.
<VirtualHost *:80>
        ServerAdmin [email protected]
        ServerName phab.tecmintlocal.com
        DocumentRoot /var/www/html/myprojectapp/phabricator/webroot
        RewriteEngine on
        RewriteRule ^/rsrc/(.*)     -                       [L,QSA]
        RewriteRule ^/favicon.ico   -                       [L,QSA]
        RewriteRule ^(.*)$          /index.php?__path__=$1  [B,L,QSA]
<Directory "/var/www/html/myprojectapp/phabricator/webroot">
        Order allow,deny
        Allow from all
</Directory>
</VirtualHost>
On Ubuntu, you need to enable the newly created virtualhost entry using following command. For RedHat based systems, no need to enable anything.
$ sudo a2ensite phabricator.conf
Finally, restart the Apache service to reflect new changes.
# service httpd restart				[On RedHat]

$ sudo /etc/init.d/apache2 restart		[On Ubuntu]
Step 4: Configure MySQL for Phabricator
Now, it’s time to configure MySQL, but before heading up for setup, make sure your MySQL is running and you able to connect to it. So, that you can load the mysql settings into it.
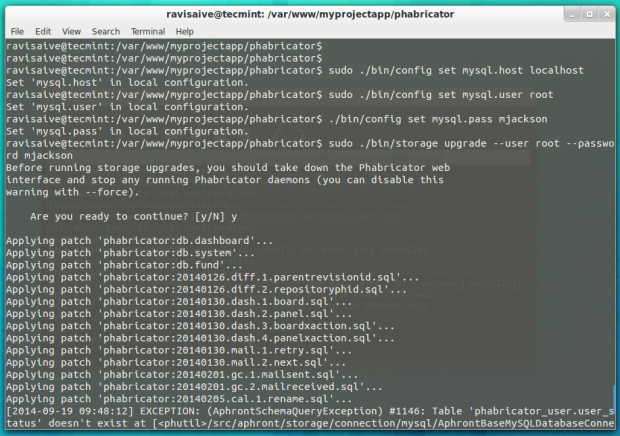
# cd /var/www/html/myprojectapp/phabricator/		[On RedHat]

# cd /var/www/myprojectapp/phabricator/			[On Ubuntu]

# ./bin/config set mysql.host localhost
# ./bin/config set mysql.user root
# ./bin/config set mysql.pass mjackson
Next, run the storage upgrade script to load database schema into it. While processing, it will prompt you to press ‘y‘ to continue, this will take little time to complete the setup for setting-up data schema.
# ./bin/storage upgrade --user root --password mjackson
Once, scheme added to mysql, restart the service to take new settings.
# service mysql restart

$ sudo service mysql restart
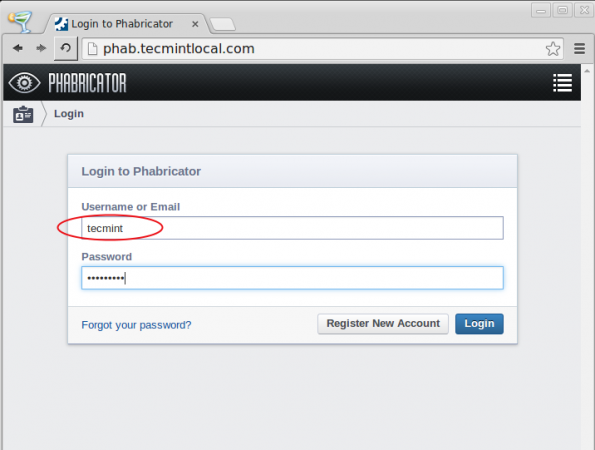
Step 5: Configuring Phabricator Web UI
Now you can access the web UI at the following locations, but we need to create an admin login account.
http://phab.tecmintlocal.com/

OR

http://ipaddress

If the above admin setup page is not displayed we need to create admin login manually from the terminal. This step only required, if incase we get the error cause admin account was not defined.
# ./bin/accountadmin
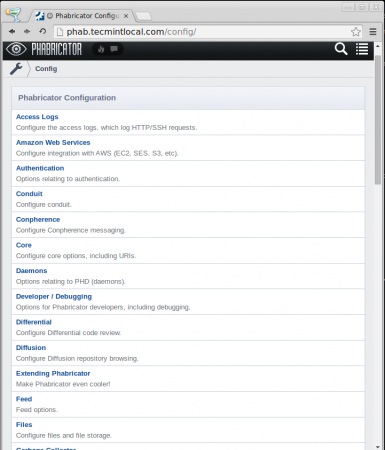
Once admin account created, you can login into admin section using same credentials. After login you can see some setup issue in the top left corner, that needs to be resolved before start using it.
Here are some of the steps to get fix, each and every issues can be resolved very easily as they have pointed how to resolve it.
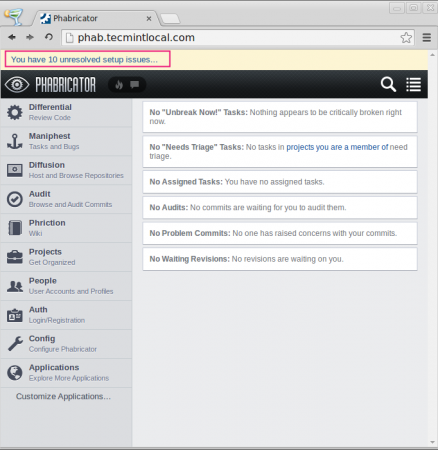
Total, there are 10 setup issue mentioned as shown in the image below.
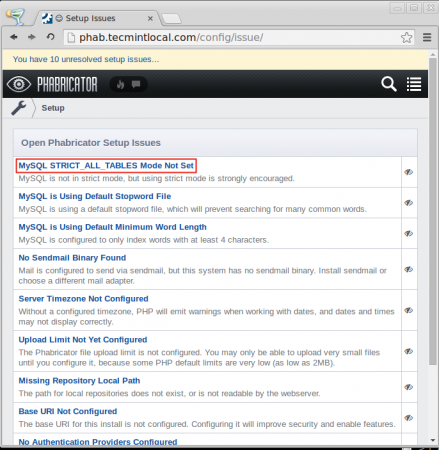
Here, I can’t show how to resolve each issue, but will try to show how to resolve one of the issue as mentioned in the error page. Let’s take first issue, MYSQL STRICT_ALL_TABLES Mode Not Set, clicking on the link will get the instructions on how to solve the issue.
So, let’s follow those instructions as described in the page. Open and edit the mysql configuration file.
# /etc/my.cnf		[On RedHat]

# sudo vim /etc/mysql/my.conf	[On Ubuntu]
Next, append the code under the mysqld section of conf file, what we get from while clicked on “MYSQL STRICT_ALL_TABLES Mode Not Set“.
sql_mode	= STRICT_ALL_TABLES
ft_min_word_len	= 3
After resolving each errors, you must restart the MySQL and Apache service to reflect new changes.
------------ On Red Hat Systems  ------------
# service mysqld restart
# service apache restart


------------ On Ubuntu Systems  ------------
$ sudo service mysql restart
$ sudo service apache2 restart
After, solving all issues, you can login into the panel again and check for the status, you will see “Ready to Use” message.
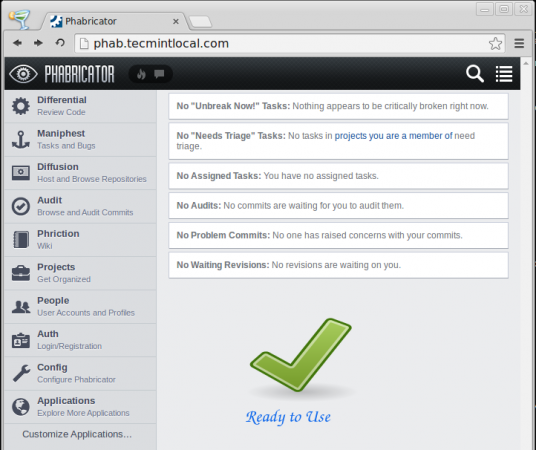
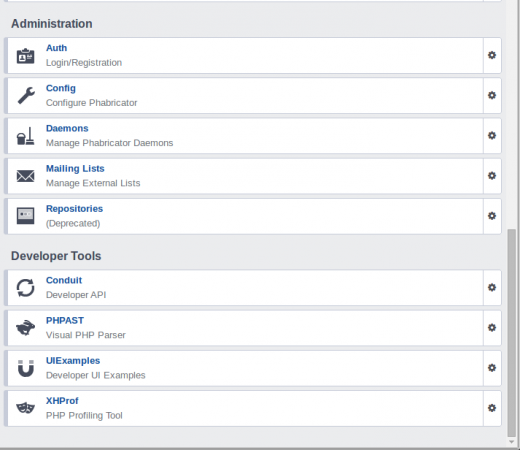
Step 6: Browsing Phabricator Features
You can see some of the user available features as shown in the pictures below.
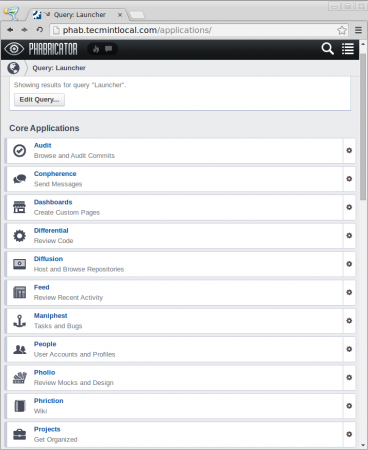

For Creating a normal user account, click on top-left corner icon then Scroll down the page, then click on “People“. Now to create a new user we have to Click on “Create New User“.
Step 7: Recover Phabricator Admin Password
If incase, you forget your admin password and you want to recover it, just follow the below command.
# ./bin/auth recover tecmint
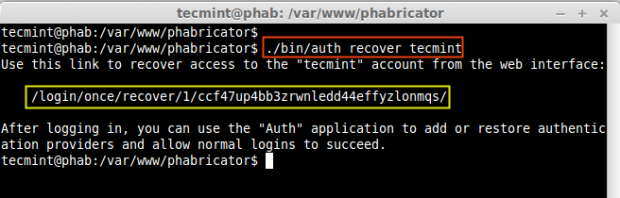
Next, copy the given access code and access the URL to recover, as shown in the images below.
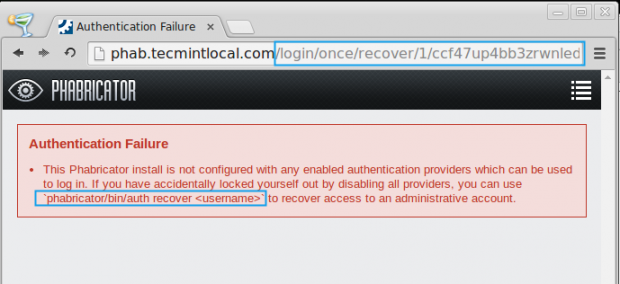
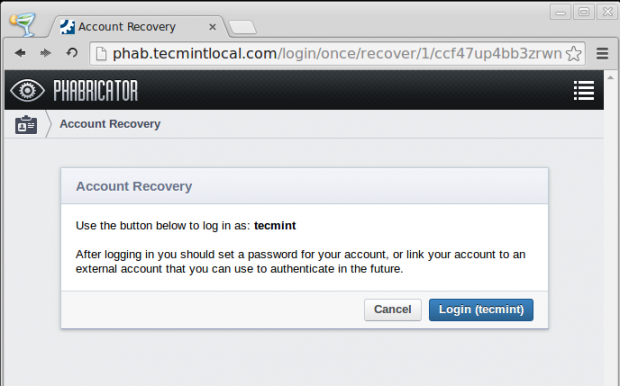
That’s all for now, we’ve successfully installed and configured “Phabricator“an open source project management tool without any glitches. I hope you too setup with any errors, if any let me know via comments, I would love to help you out.

Hi,
I am facing the below error on doing recover auth.
Usage Exception: This account (“root”) can not establish web sessions, so it is not possible to generate a functional recovery link. Special accounts like daemons and mailing lists can not log in via the web UI.
Can you please help
hello i am trying to execute the comands, and nothing happend
#iso001:/users/rub/web/html/tn/pabri/phabricator/bin
# ./config set mysql.pass mjackson
: No such file or directory
#iso001:/users/rub/web/html/tn_web/pabri/phabricator/bin
# cat ./config
../scripts/setup/manage_config.php
iso001:/users/rub/web/html/tn/pabri/phabricator/bin
# ls ../scripts/setup/manage_config.php
../scripts/setup/manage_config.php
i dont know why
@ Shankar May i know in which distribution you have tried ? Could you please provide the log ?
I tried the installation steps in VMware workstation on Ubuntu 14.04 desktop edition .
I will try to do it again and post the logs soon.
Babin,
Great post, thank you very much for bringing Phabricator to light :)
There is one point I’d like to mention. The first sentence is “Phabricator is an open source Project Management tool, which is built using PHP language and available under Apache 2.0 open source license… “, which made me think that the application is a direct Project Server / Project Manager competitor. And frankly I have read your post with this understanding (or assumption if you will). However, looking at the application’s web site, it is explicitly stated that “Phabricator is a collection of open source web applications that help software companies build better software.”
I think it can be a good idea to review the opening sentence to precisely reflect what the application is all about.
Thank you,
Tolga
Can you cross check the installation steps again, i tried to troubleshoot the steps and i am unable to rectify it.
Not able to get the home page of phabricator.
This post contains a lot of security concerns that are completely glossed over.
Take the time to learn how to set up the system securely before allowing any external access to this application if it was installed following this guide.