LEMP stack is the combination of of Nginx, MySQL/MariaDB and PHP installed on Linux environment.
The abbreviation comes from the first letters of each: Linux, Nginx (pronounced Engine x), MySQL/MariaDB and PHP.
This article will include step by step instructions how to install each of the software in the group on a Ubuntu 15.04 based server with PhpMyAdmin tool to manage database from a web browser.
Requirements:
Before setting up LEMP, there are few requirements that should be met:
- Minimal installation of Ubuntu 15.04.
- Access to server through SSH (if you don’t have direct access).
- If the system will be treated as server you must have static IP address configured.
Step 1: Setting System Hostname and System Update
1. Login into your Ubuntu 15.04 server via a SSH and setup server hostname. This can be easily achieved by running following command:
$ sudo hostnamectl set-hostname your-hostname.com
$ hostnamectl
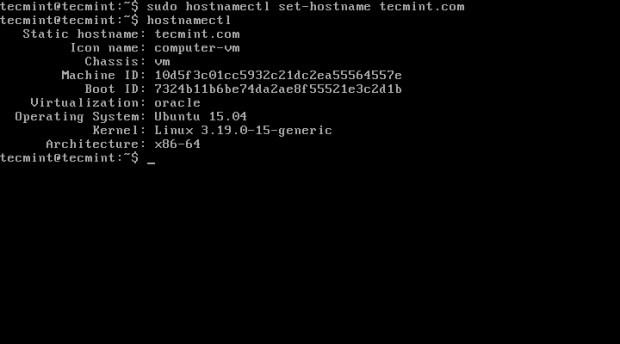
Of course you must replace “your-hostname.com” with the actual name of your hostname that you will going to use.
2. Next, make sure to do a full system upgrade to keep Ubuntu packages up-to-date, run the following command:
$ sudo apt-get update && sudo apt-get upgrade

Step 2: Install and Configure Nginx Webserver
3. Nginx is a fast web server that can be used as reverse proxy, load balancing meant to be low on memory consumption in order to handle even more concurrent connections.
It is often use for enterprise solutions and it currently powers 40% of the top 10000 busiest sites. Nginx currently powers sites such as CloudFlare, DropBox, GitHub, WordPress, TED, NETFLIX, Instagram and many others.
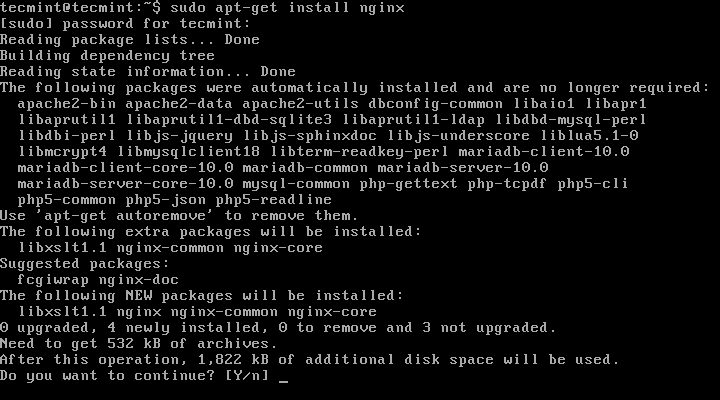
The installation of Nginx is done relatively easy, by issuing the following command:
$ sudo apt-get install nginx
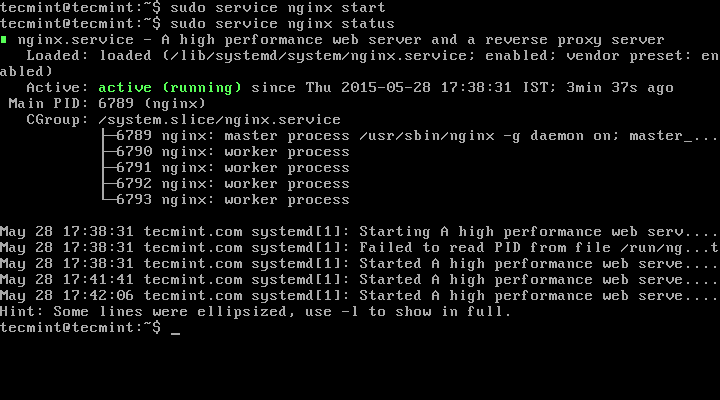
Nginx will not start automatically after installation, so you will need to start manually by running:
$ sudo service nginx start
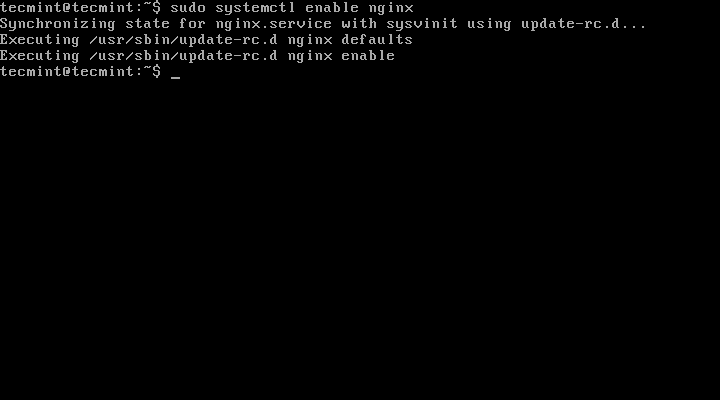
4. To configure nginx to start upon system boot issue the following command:
$ sudo systemctl enable nginx
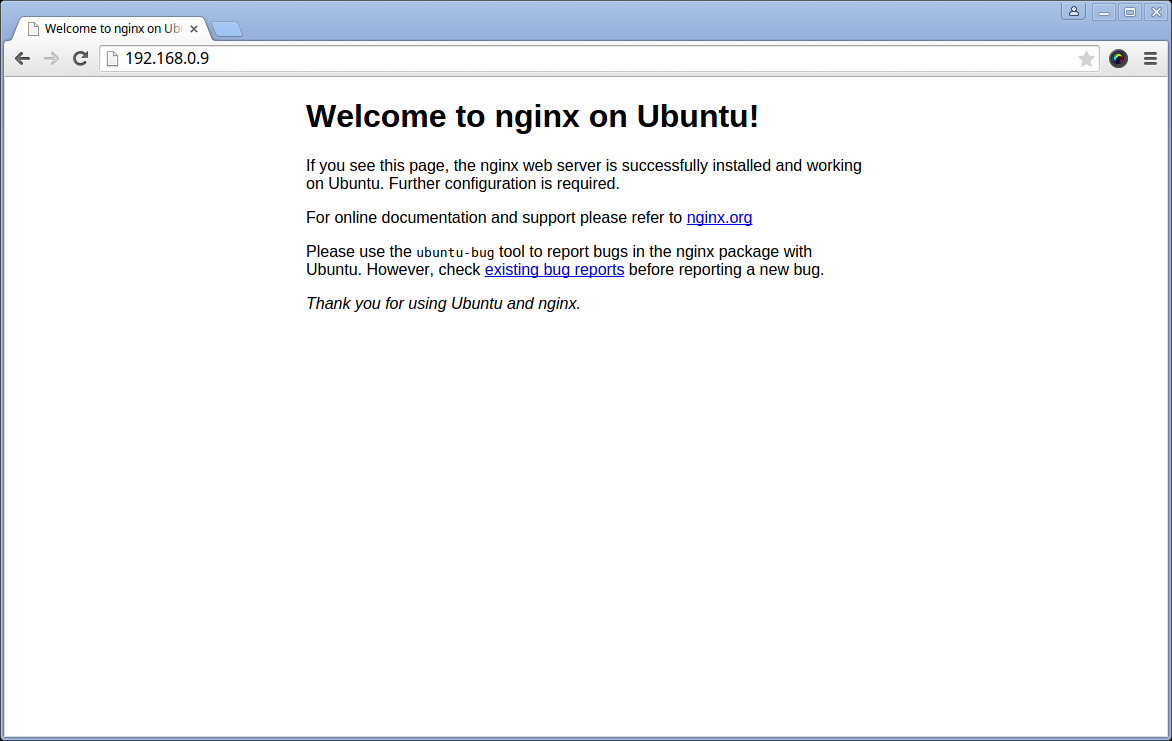
5. To test if nginx is started and working simply access http://server-ip-address in your browser. You should see a page similar to this:
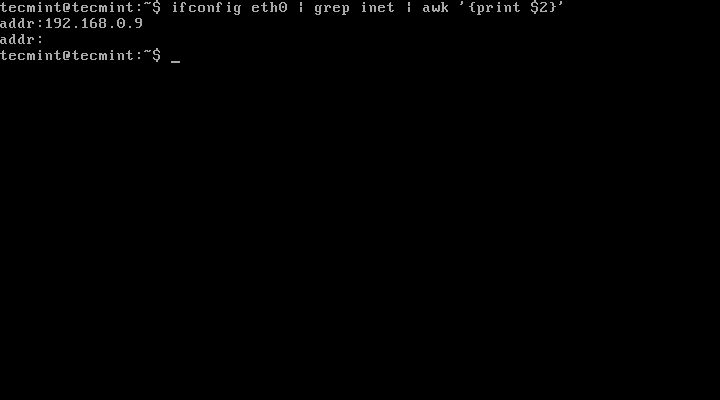
If incase, you don’t know the server IP address, you can find your IP address using following command:
# ifconfig eth0 | grep inet | awk ‘{print $2}’
Note: In the above example you will need to change “eth0” with the identified for your network adapter.
When you access the IP address in web browser, you should see a page similar to this:
6. Now it’s time to open nginx configuration file and make following changes.
$ sudo vim /etc/nginx/sites-available/default
Now make the following highlighted changes as shown below.
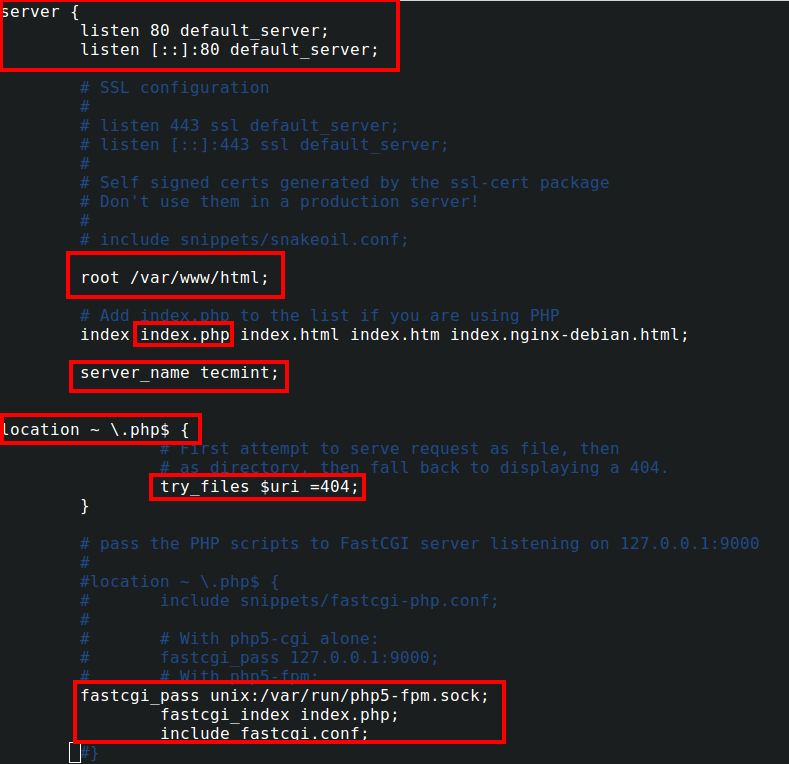
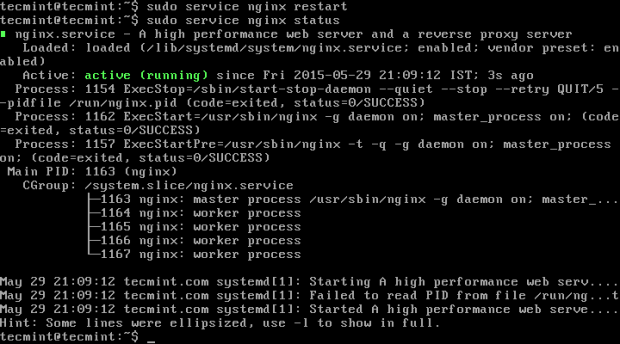
Save the file and restart nginx so the new settings can take effect:
$ sudo service nginx restart
Step 3: Installing MariaDB
7. MariaDB is a open source database management tool that was forked from MySQL, meant to remain free under the GNU GPL. MariaDB is a community based project and its development is being led by the original developers of MySQL. The reason for forking his project was concerns over the Oracle acquisition of MySQL.
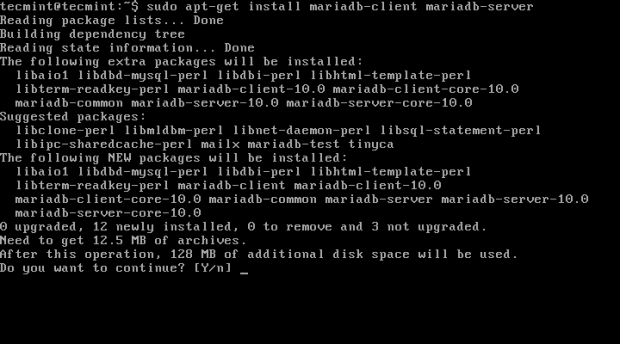
You can easily install MariaDB in Ubuntu 15.04 by running the following commands:
$ sudo apt-get install mariadb-server mariadb-client
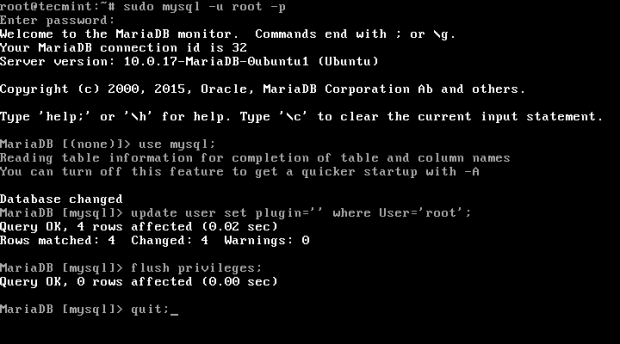
8. During mariadb installation, it will won’t ask you to setup root password for MariaDB. To do this, you will need to issue the following set of commands:
$ sudo mysql –u root
$ use mysql;
$ update user set plugin='' where User='root';
$ flush privileges;
$ quit
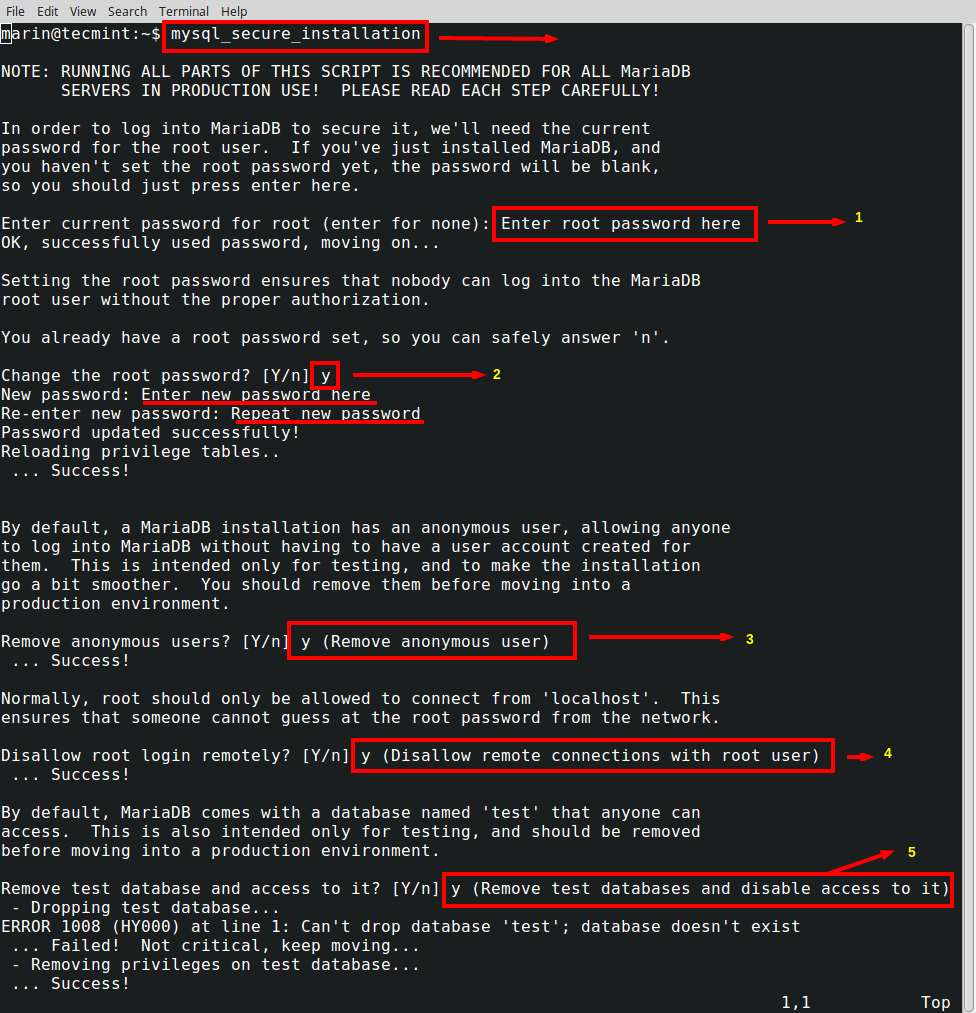
9. Now it’s time to secure MySQL installation by issuing following command and series of questions..
$ mysql_secure_installation

Step 4: Installing PHP and PHP Libraries
10. PHP is a powerful programming language used to generate dynamic content on websites. It powers millions of websites and is probably one of the most frequently languages used in web development.
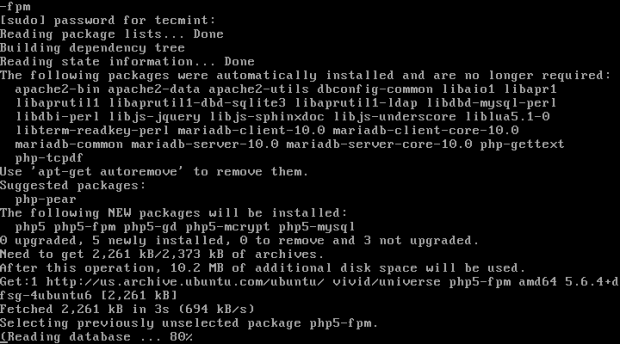
To install PHP in Ubuntu 15.04 run the following command:
$ sudo apt-get install php5 php5-mysql php5-mcrypt php5-gd php5-fpm
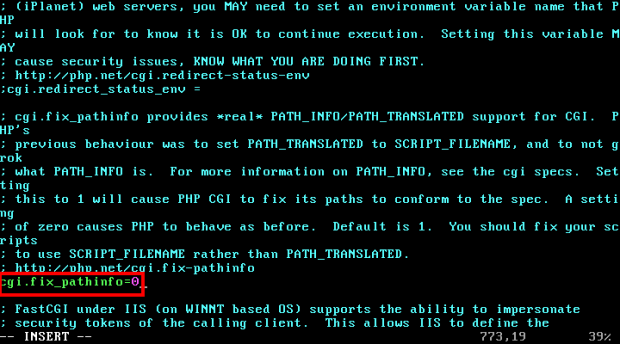
11. Now it’s time to configure PHP properly to server PHP based websites.
$ sudo vim /etc/php5/fpm/php.ini
Find the following line:
; cgi.fix_pathinfo=1
And change it to:
cgi.fix_pathinfo=0
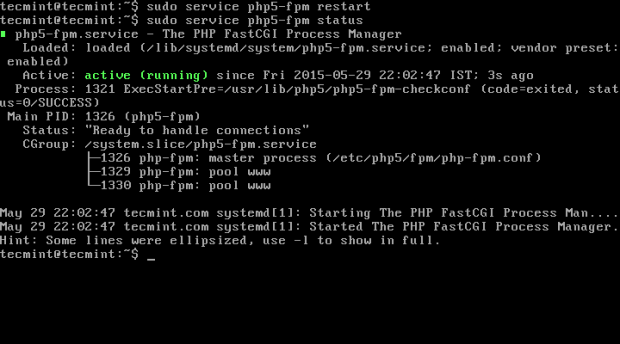
Now restart php-fpm service and verify status.
$ sudo service php5-fpm restart
$ sudo service php5-fpm status
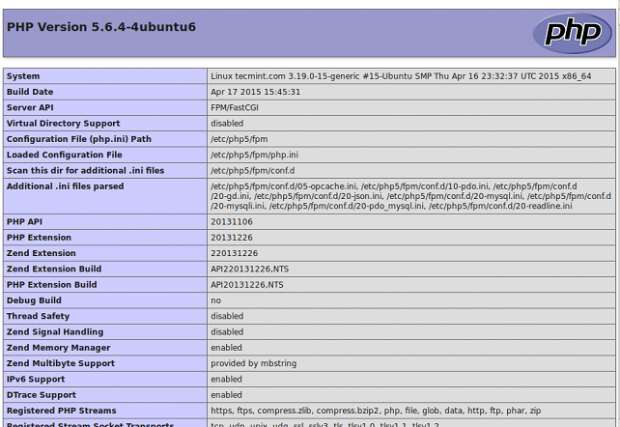
12. Now we will test our PHP setup by creating a simple php_info.php page. Start by navigating to your web root:
$ cd /var/www/html/
$ sudo vim php_info.php
Insert the following code:
<?php phpinfo(); ?>
13. Now navigate to the web browser and type http://your-ip-address/php_info.php, to see the php information:
Step 5: Installing PhpMyAdmin
14. Finally we will install a database management frontend – phpMyAdmin a web based frontend tool for administrating MySQL/MariaDB databases.
$ sudo apt-get install phpmyadmin

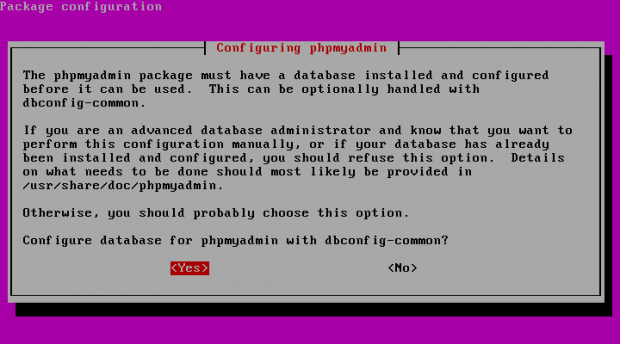
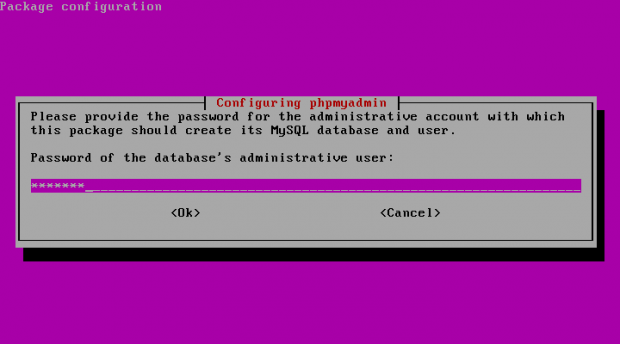
15. Now enter the password for the MySQL/MariaDB administrative user so the installer can create database for phpMyAdmin.
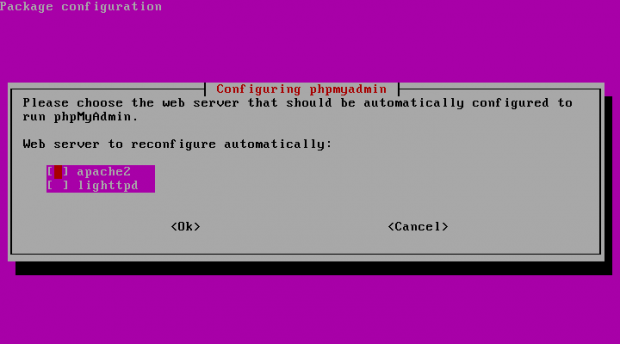
16. On the next step you will be asked to choose server that should be configured to run phpMyAdmin. Nginx is not part of the listed web servers so simply press TAB and proceed:
17. At this point the install will be complete. To be able to access the phpMyAdmin interface in your browser create the following symlink:
$ cd /var/www/html
$ sudo ln –s /usr/share/phpmyadmin phpmyadmin
18. Now point your browser To access PhpMyAdmin at http://your-ip-address/phpmyadmin:
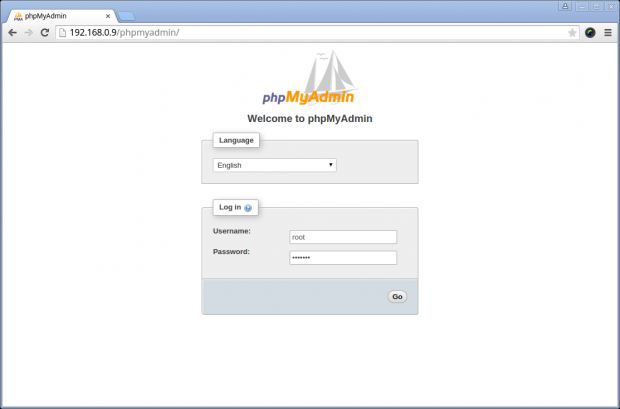
To authenticate in the phpMyAdmin you can use your MySQL/MariaDB root user and password.
Conclusion
Your LEMP stack is now setup and configured on your Ubuntu 15.04 server. You can now start building your web projects. If you have any questions, comments or would like me to elaborate the install process for you, please submit a comment in the comment section below.


Thanks for the post. Could you please point me to some tools for performance testing?! I was using this instruction – http://sysadm.pp.ua/linux/nginx-lamp.html but not helped me much… Thank you.
if i want to install lemp in a local server, what steps i have to skip?