In the previous two articles of this Ansible Series, we’ve explained Core Components of Ansible and Setting Up Ansible Control Node. In this part 3, we will demonstrate how you can configure Ansible managed nodes to run ad-hoc commands on remote hosts.
Setup Passwordless SSH Authentication to Ansible Managed Nodes
As a recap on our last topic, managing remote hosts with Ansible requires setting up of Passwordless SSH authentication between the Ansible control node and the managed hosts. This involves the generation of a key pair (Public and Private SSH key pair) on the Ansible Control node and copying the Public key to all of the remote hosts. This will be a crucial step going forward and will make your work much easier.
Configure Privilege Escalation on Managed Nodes
When logged in as a regular user, you may be required to perform certain tasks on managed nodes that require elevated privileges or root privileges. These tasks include package management, adding new users & groups, and modifying system configurations to mention just but a few. To achieve this, you need to invoke certain directives in the playbook to run the tasks as a privileged user on the remote hosts.
become
Ansible allows you to ‘become’ another user on the managed node different from the one currently logged in. The become:yes directive elevates your privileges and allows you to perform tasks that require root privileges such as installing and updating packages and rebooting the system.
Consider a playbook httpd.yml that installs and starts Apache webserver as shown:
---
- name: install and start Apache webserver
  hosts: webservers

  tasks:
       - name: install httpd
         yum: name=httpd  state=latest
         become: yes
       - name: check httpd status
         service: name=httpd state=started
The become: yes the directive allows you to execute commands as a root user on the remote host.
become_user
Another directive that you can use to become another user is the become_user. This allows you to switch to a sudo user on the remote host upon logging in and not the user you log in as.
For example, to run a command as tecmint user on the remote use the directive as shown.
- name: Run a command as the apache user
  command: somecommand
  become: yes
  become_user: tecmint
become_method
This directive will override the default method set in ansible.cfg file which is usually set to sudo.
become_flags
These are used at play or task level, for instance when you need to switch to a user when the shell is set to nologin.
For example,
- name: Run a command as nobody
  command: somecommand
  become: true
  become_method: su
  become_user: nobody
  become_flags: '-s /bin/sh'
Command-line Options in Privilege Escalation
Let’s take a look at some of the command-line options that you can use to elevate your privileges when running commands:
--ask-become-pass,-K– This prompts you for the password of the sudo user on the remote system that you are trying to connect.
$ ansible-playbook myplaybook.yml --ask-become-pass

--become,-b– This allows you to run the task as a root user without prompting for a password.
$ ansible-playbook myplaybook.yml --become
--become-user=BECOME_USER– It allows you to run tasks as another user.
$ ansible-playbook myplaybook.yml --become-user=tecmint

Validate a Working Configuration using Ad-Hoc Ansible Commands
Sometimes, you may want to perform quick and simple tasks on remote hosts or servers in Ansible without necessarily having to create a playbook. In that case, you would require to run an ad-hoc command.
What is an Adhoc Command?
An ansible ad-hoc command is a one-line command that helps you execute simple tasks in a simple yet efficient manner without the need of creating playbooks. Such tasks include copying files between hosts, rebooting servers, adding & removing users and installing a single package.
In this tutorial, we explore various applications of Ansible Ad-Hoc commands. We are going to use the inventory file below for a demonstration.
[webservers]
173.82.115.165

[database_servers]
173.82.202.239
Basic Usage of Adhoc Commands
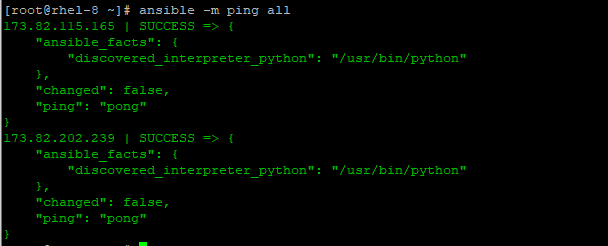
The most basic usage of Ansible-Adhoc commands is pinging a host or a group of hosts.
# ansible -m ping all
In the above command, the -m parameter is the module option. Ping is the adhoc command and the second parameter all represents all hosts in the inventory file. The output of the command is shown below:
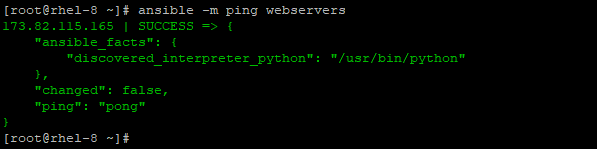
To ping, a particular group of hosts, replace ‘all’ parameter with the group name. In the example below, we are testing connectivity with hosts under the webservers group.
# ansible -m ping webservers
Additionally, you can use the -a attribute to specify regular Linux commands in double quotation marks. For example, to check system uptime of remote systems, run:
# ansible -a "uptime" all

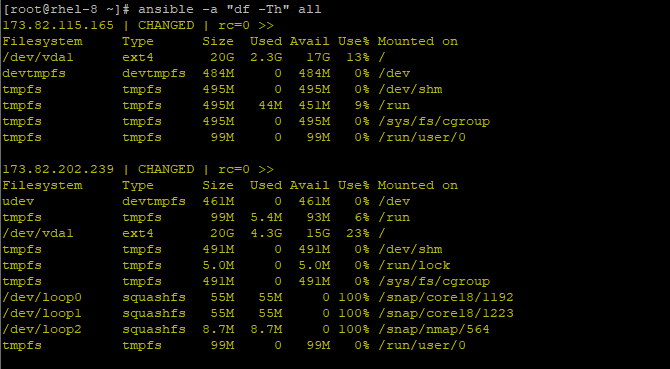
To check disk usage of remote hosts run.
# ansible -a "df -Th" all
There are hundreds upon hundreds of modules that you can use with Adhoc command. To view the entire list of modules with their descriptions, run the command below.
# ansible-doc -l
To view detailed information about a particular module, run the command.
# ansible-doc module_name
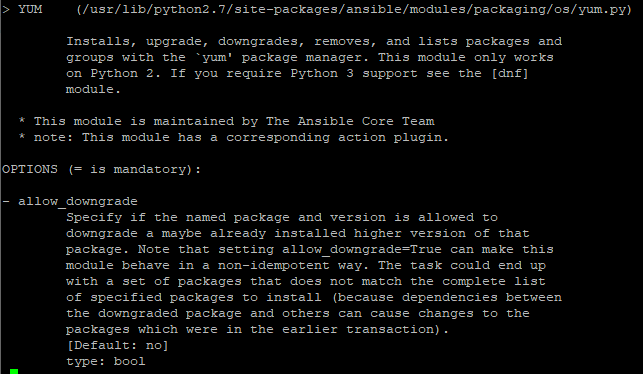
For example, to search for more details about the yum module run:
# ansible-doc yum
Managing Packages / Services with Ansible
Ansible adhoc commands can be used for the installation and removal of packages using yum and apt package managers.
To install Apache web server on the CentOS 7 host under webservers group in the inventory file run the command:
# ansible webservers -m yum -a "name=httpd state=present"

To verify the installation of the Apache web server, log in to the remote client and run.
# rpm -qa | grep httpd

To uninstall Apache, simple change the state from present to absent.
# ansible webservers -m yum -a "name=httpd state=absent"
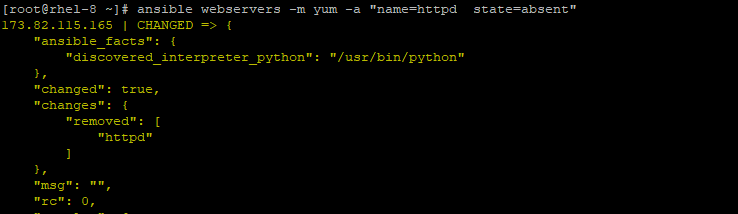
Again, to confirm the removal of httpd run.
# rpm -qa | grep httpd

As observed, Apache web server packages have been purged.
Creating Users and Groups Using Ansible
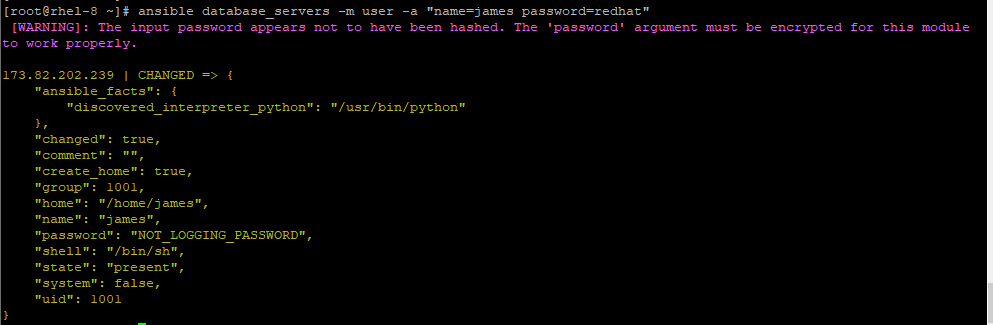
When creating users, the ‘user‘ module comes in handy. To create a new user james with password redhat on the client system database_server, issue the command.
# ansible database_server -m user -a "name=james password=redhat"
To confirm the creation of the new user, run the command:
# ansible database_servers -a "id james"

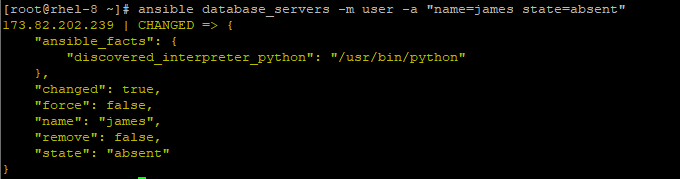
To remove the user, run the command:
# ansible database_servers -m user -a "name=james state=absent"
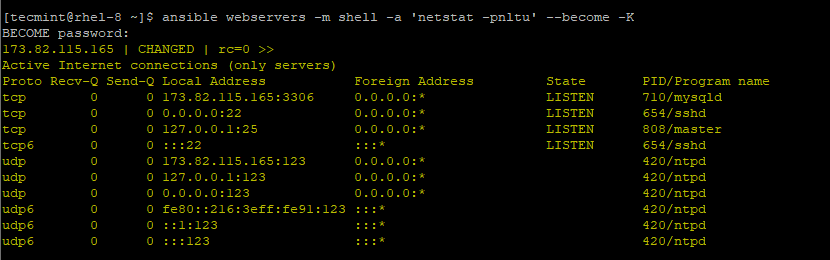
Privilege Escalation
If you are running Ansible as a regular user, Ansible provides privilege escalation in remote hosts using the --become option to acquire root privileges and -k to prompt for the password.
For example, to run the Ansible adhoc command ‘netstat -pnltu‘ with the privileged option –-become and option -K to prompt for the root user’s password to run the command.
$ ansible webservers -m shell -a 'netstat -pnltu' --become -K
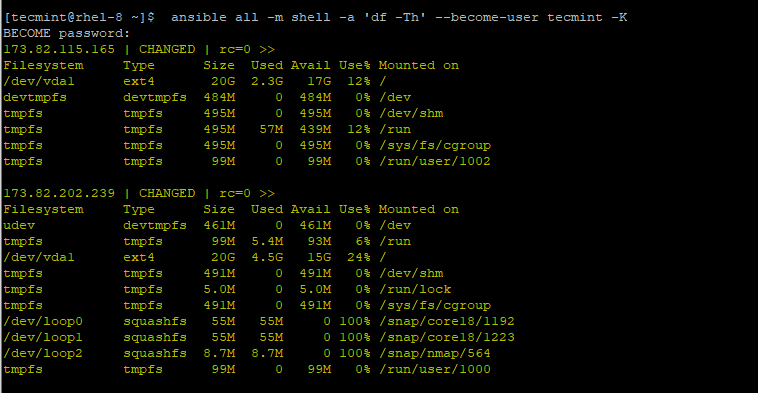
To become another user other than root, use the --become-user attribute.
For example to run ‘df -Th‘ as tecmint user on the remote hosts and prompt for the password run:
$ ansible all -m shell -a 'df -Th' --become-user tecmint -K
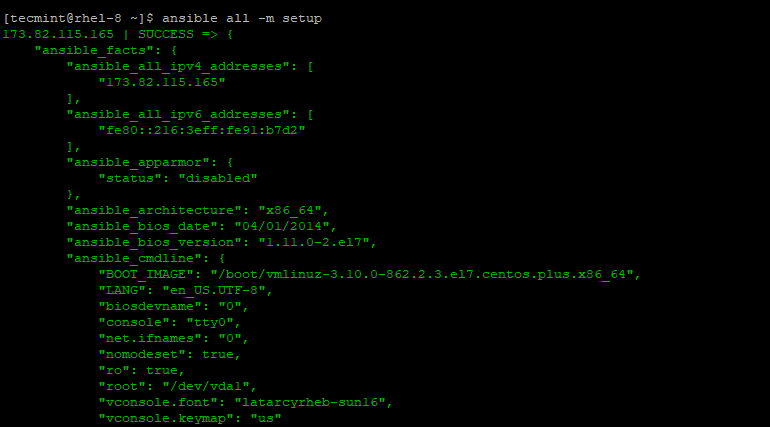
Gathering Facts about Host Systems
Facts refer to detailed information about a system. This includes information about the IP address, system architecture, memory, and CPU to mention a few.
To retrieve information about remote hosts, run the command:
$ ansible all -m setup
File Transfer / Copy Files
Ansible uses the module copy to securely copy files from the Ansible control to multiple remote hosts.
Below is an example of a copy operation:
# ansible webservers -m copy -a "src=/var/log/secure dest=/tmp/"
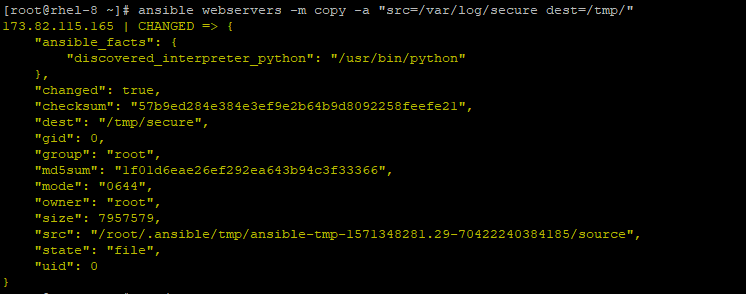
The command copies the /var/log/secure file in the Ansible Control node to remote hosts in the webservers group in the /tmp destination.
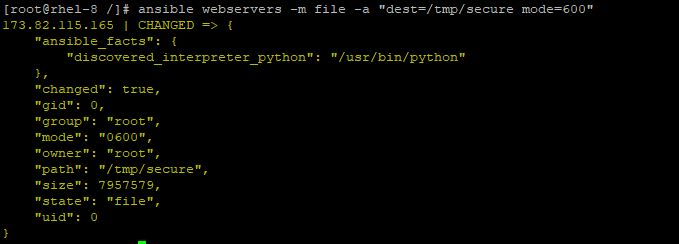
You can use the file module to change permissions and file ownership.
# ansible webservers -m file -a "dest=/tmp/secure mode=600"
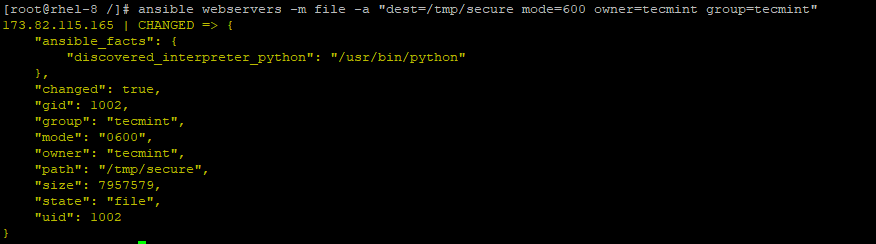
Additionally, you can append the owner and group arguments as shown:
# ansible webservers -m file -a "dest=/tmp/secure mode=600 owner=tecmint group=tecmint"
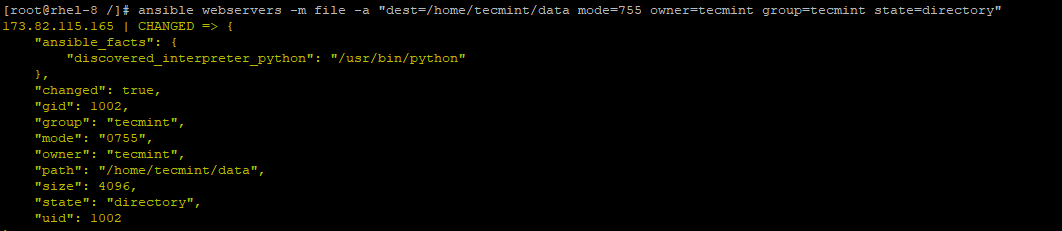
You can also create directories, in a similar manner to mkdir -p as shown.
$ ansible webservers -m file -a "dest=/path/to/directory mode=755 owner=tecmint group=tecmint state=directory"
For example,
$ ansible webservers -m file -a "dest=/home/tecmint/data mode=755 owner=tecmint group=tecmint state=directory"
Conclusion
In this article, we shed light on how you can configure managed nodes to run Ansible ad-hoc commands to manage remote hosts. We do hope you found it useful. Give it a shot and let us know how it went.


I think you need both
--becomeand--become-userfor--become-userto work. See: https://stackoverflow.com/a/38290243/13203944