At times, you may need to host more than one domain or website on your Nginx web server. For that to happen, a Server Block (Virtual Hosts) needs to be configured to encapsulate all of your domain’s configuration. Nginx server blocks are synonymous with Apache virtual host files and serve the same purpose.
This topic demonstrates how to set up an Nginx server block on Ubuntu 20.04.
Prerequisites:
- An
Arecord defined on your domain name hosting provider. AnArecord is a DNS record that points the domain name to the Public server IP address. For this guide, we will use the domain namecrazytechgeek.infofor illustration purposes. - An Nginx Server or LEMP Stack installed on Ubuntu 20.04 LTS instance.
- A login user with Sudo privileges.
With all the requirements met, let’s explore how you can set up an Nginx server block in Ubuntu.
Step 1: Create an Nginx Document Root Directory
To get started, we will create a separate directory for our domain that will contain all the settings related to the domain.
$ sudo mkdir -p /var/www/crazytechgeek.info/html
Next, assign the directory’s ownership using the $USER environment variable. This assigns the directory’s ownership to the currently logged in user. Ensure that you are logged in using a regular user’s account and not as root.
$ sudo chown -R $USER:$USER /var/www/crazytechgeek.info/html
Next, assign the appropriate permissions to the directory, granting the logged-in user all the rights (read, write and execute) and the group and other users read and execute permissions only.
$ sudo chmod -R 755 /var/www/crazytechgeek.info
With the directory permissions and ownership correctly configured, we need to create a sample web page for the domain.
Step 2: Create a Sample Page for the Domain
In this step, we are going to create an index.html file for testing purposes. This file will serve content that will be displayed on the web browser when the domain is called on the browser.
$ sudo vim /var/www/crazytechgeek.info/html/index.html
Paste the following HTML content.
<html>
    <head>
        <title>Welcome to your_domain!</title>
    </head>
    <body>
  <h1>Bravo! Your server block is working as expected!</h1>
    </body>
</html>
Save and exit the configuration file.
Step 3: Create an Nginx Server Block in Ubuntu
Nginx server blocks are located in the /etc/nginx/sites-available directory. The default Nginx server block is /etc/nginx/sites-available/default which serves the default HTML file at /var/www/html/index.nginx-debian.html.
For our case, we need to create a server block that will serve the content in the index.html file that we created earlier.
So, create the server block file shown.
$ sudo vim /etc/nginx/sites-available/crazytechgeek.info
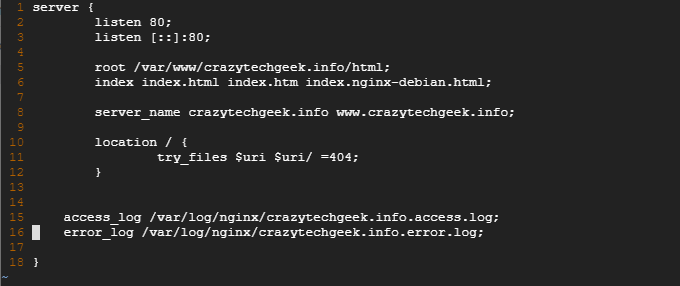
Paste the content below:
server {
        listen 80;
        listen [::]:80;

        root /var/www/crazytechgeek.info/html;
        index index.html index.htm index.nginx-debian.html;

        server_name crazytechgeek.info www.crazytechgeek.info;

        location / {
                try_files $uri $uri/ =404;
        }


    access_log /var/log/nginx/crazytechgeek.info.access.log;
    error_log /var/log/nginx/crazytechgeek.info.error.log;

}
Save and exit the file.
Step 4: Enable Nginx Server Block in Ubuntu
To enable the Nginx server block, you need to symlink it to the /etc/nginx/sites-enabled/ directory as shown.
$ sudo ln -s /etc/nginx/sites-available/crazytechgeek.info /etc/nginx/sites-enabled/
At this point, we are pretty much done. However, it’s prudent to confirm that all the configurations are in order. To do so, execute the command:
$ sudo nginx -t
If you followed our steps correctly, you should get the output shown:

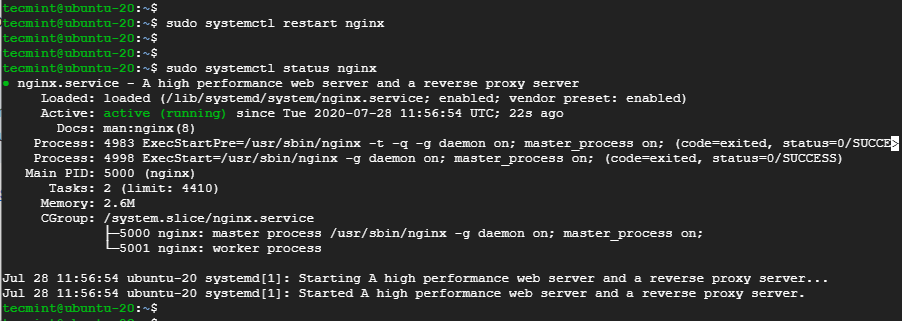
Finally, restart Nginx for the changes made to the configuration files to take effect.
$ sudo systemctl restart Nginx
Then confirm if Nginx is running by running the command shown:
$ sudo systemctl status Nginx
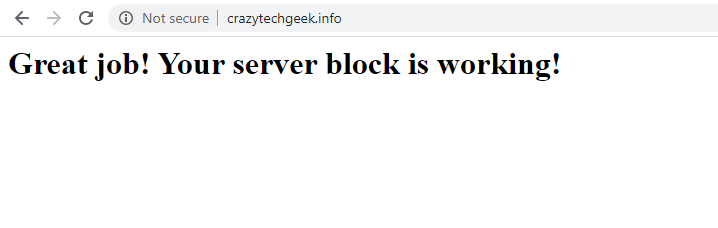
Step 5: Testing the Nginx Server Block in Ubuntu
To confirm whether the server block is working as expected and is serving content in the /var/www/crazytechgeek.info directory, open your web browser and browse your server’s domain name:
http://domain-name
You should get content contained in the HTML file in your server block as shown.
Conclusion
In this guide, we have shown you how to set up an Nginx server block using a single domain on Ubuntu Linux. You can repeat the same steps for different domains and still achieve the same results. We do hope that the guide was insightful.


Very good step-by-step instructions, but maybe I missed something at the end where one is advised to “open your web browser and browse [to] your server’s domain name:
http://domain-name"which I did thusly –http://localhost.The trouble is, that that results in the contents of the “default” file index.nginx-debian.html in the /var/www/html folder being displayed due (I believe) to having symlink references both to the “default” and “crazytechgeek.info” folders in the /etc/nginx/sites-enabled folder.
Once I deleted the former, I saw the contents of the index.html file in the /var/www/crazytechgeek.info/html folder.
So, is there some other solution here? Maybe not just entering domain-name in the browser address window, but that and something else?
Hi there, I’m getting the following response when using
http://This site can’t be reached
test-app.test took too long to respond.
However, when using
http://, then it works. I’m implementing virtual hosts on the following specs:nginx version: nginx/1.18.0 (Ubuntu)
Linux 5.8.0-1041-aws x86_64
thanks for the help.
Has anyone scripted this at all? So that something like > spinup domain.com would do all the above steps?