An Nginx server block is the equivalent of an Apache virtual host and makes it possible for you to host more than one domain or website on your server.
In this article, you will learn how to set up an Nginx server blocks (virtual hosts) on CentOS 8 and RHEL 8 Linux.
Prerequisites:
- An
Arecord for your domain. In simple terms, anArecords refers to a DNS entry where the domain name is pointed to the Public IP of the server, in this case the Nginx web server. Throughout this guide , we will use the domain namecrazytechgeek.info. - An Nginx Server or LEMP Stack installed on CentOS 8 or RHEL 8 instance.
- A login user with Sudo privileges.
Let’s get started!
Step 1: Create an Nginx Document Root Directory
Right off the bat, you need to create a custom web root directory for the domain you want to host. For our case, we will create the directory as shown using the mkdir -p option to create all the necessary parent directories:
$ sudo mkdir -p /var/www/crazytechgeek.info/html
Thereafter assign the directory permissions using the $USER environment variable. As you do so, ensure that you are logged in as a regular user and not the root user.
$ sudo chown -R $USER:$USER /var/www/crazytechgeek.info/html
Next, assign the right directory permissions recursively as shown:
$ sudo chmod -R 755 /var/www/crazytechgeek.info/html
Step 2: Create a Sample Page for the Domain
Next, we are going to create an index.html file inside the custom web root directory that will be served by the domain once a request is made.
$ sudo vim /var/www/crazytechgeek.info/html/index.html
Inside the file, paste the following sample content.
<html>
    <head>
        <title>Welcome to your_domain!</title>
    </head>
    <body>
  <h1>Awesome! Your Nginx server block is working!</h1>
    </body>
</html>
Save and exit the configuration file.
Step 3: Create an Nginx Server Block in CentOS
For the Nginx web server to serve the content in the index.html file we created in step 2, we need to create a server block file with the appropriate directives. Therefore, we shall create a new server block at:
$ sudo vim /etc/nginx/conf.d/crazytechgeek.info.conf
Next, paste the configuration that appears below.
server {
        listen 80;
        listen [::]:80;

        root /var/www/crazytechgeek.info/html;
        index index.html index.htm index.nginx-debian.html;

        server_name crazytechgeek.info www.crazytechgeek.info;

        location / {
                try_files $uri $uri/ =404;
        }


    access_log /var/log/nginx/crazytechgeek.info.access.log;
    error_log /var/log/nginx/crazytechgeek.info.error.log;

}
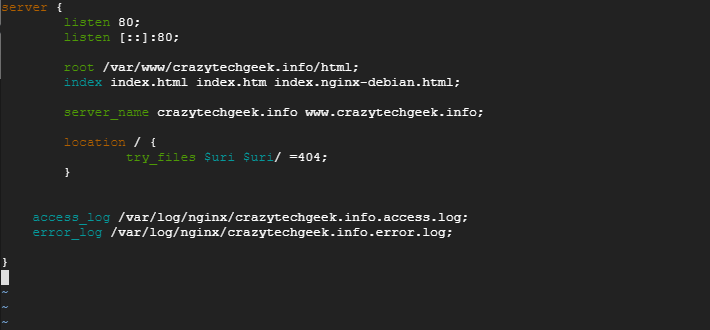
When you are done, save the changes and exit the configuration file. To confirm that all Nginx configurations are sound and error-free, execute the command:
$ sudo nginx -t
The output below should be a confirmation that you are good to go!

Finally, restart your Nginx web server and confirm that it’s running as expected:
$ sudo systemctl restart nginx
$ sudo systemctl status nginx

Step 4: Testing the Nginx Server Block in CentOS
We are all done with the configurations. The only part remaining is to confirm if our server block is serving content in the web root directory defined earlier in the index.html file.
To do this, simply open your browser and go to your server’s domain as shown:
http://domain-name
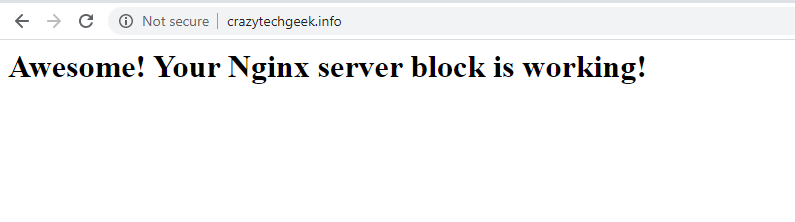
As observed, our content is being served by the server block, a clear indication that all went well.
Step 5: Enable HTTPS on Domain Hosted on Nginx
You may consider encrypting your domain using Lets Encrypt SSL to add a layer of protection and secure traffic to and from the webserver.
$ sudo dnf install certbot python3-certbot-nginx
$ sudo certbot --nginx
To confirm that your domain is correctly configured on HTTPS, visit https://yourwebsite.com/ in your browser and look for the lock icon in the URL bar.
Conclusion
We have successfully set up a Nginx server block on CentOS 8 and RHEL 8. You can repeat the same for multiple domains using the same procedure.


Just a quick Note:
should be:
The Capitalised “Nginx” on line two caused an issue :)
@Lachy,
Thanks, corrected the command in the article…