FFmpeg is a handy multimedia framework that helps you work with different kinds of media files like videos, audio, and images. It allows you to do things like converting one type of video file to another, changing audio formats, or even modifying pictures. Think of it as a tool that lets you easily manage and transform your multimedia files on your computer.
In this article, we are going to look at some options and examples of how you can use the FFmpeg multimedia framework to perform various conversion procedures on audio and video files in Linux.
Before diving into the essential FFmpeg commands, let’s first ensure you have FFmpeg installed on your Linux system.
Useful FFmpeg Command Examples
FFmpeg utility supports almost all major audio and video formats, if you want to check the ffmpeg-supported available formats you can use ffmpeg -formats command to list all supported formats.
ffmpeg -formats
If you are new to the ffmpeg tool, here are some handy commands that will give you a better idea about the capabilities of this powerful tool.
1. How to Get Video Info Using FFmpeg
To get information about a file (say video.flv), run the following command. Remember you have to specify an output file, but in this case, we only want to get some information about the input file.
ffmpeg -i video.flv -hide_banner
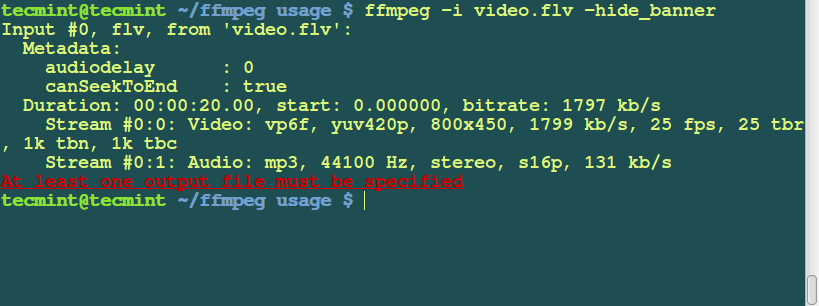
The -hide_banner option is used to hide a copyright notice shown by ffmpeg, such as build options and library versions. This option can be used to suppress printing this information.
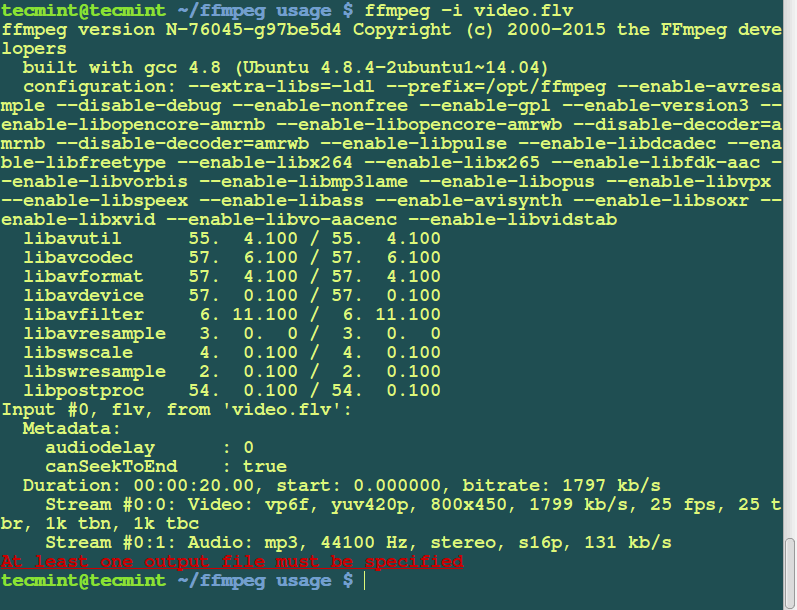
For example, if you run the above command without adding -hide_banner option it will print all FFmpeg tool’s copyright information as shown.
ffmpeg -i video.flv
2. How to Extract Images from a Video Using FFmpeg
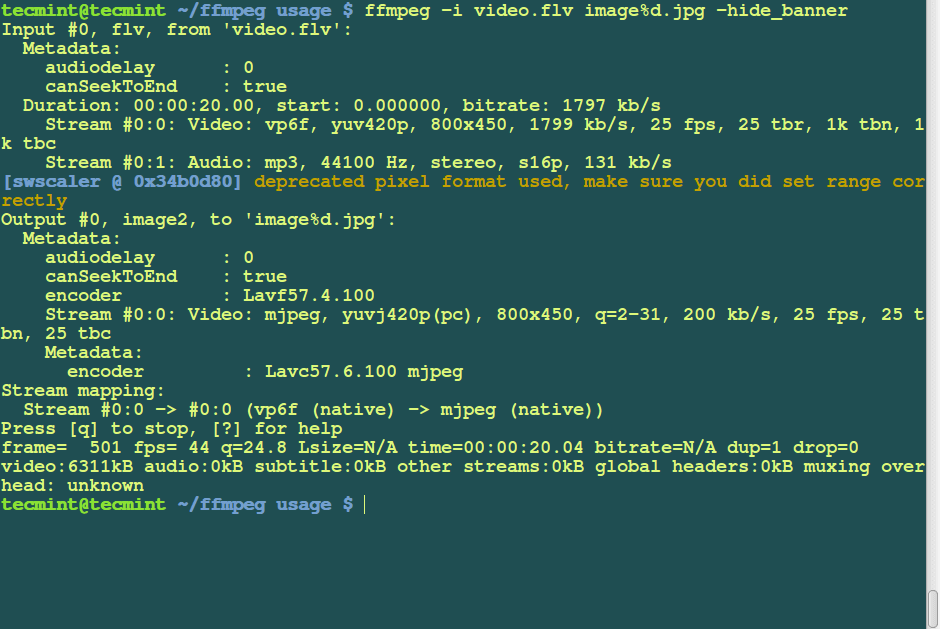
The following command is used to extract individual frames from a video file (in this case, “video.flv“) and save them as separate image files named image1.jpg, image2.jpg, and so on.
ffmpeg -i video.flv image%d.jpg
After successful execution of the above command, you can verify that the video turns into multiple images using the following ls command.
ls -l | less

total 11648
-rw-r--r-- 1 tecmint tecmint   14592 Oct 19 13:19 image100.jpg
-rw-r--r-- 1 tecmint tecmint   14603 Oct 19 13:19 image101.jpg
-rw-r--r-- 1 tecmint tecmint   14584 Oct 19 13:19 image102.jpg
-rw-r--r-- 1 tecmint tecmint   14598 Oct 19 13:19 image103.jpg
-rw-r--r-- 1 tecmint tecmint   14634 Oct 19 13:19 image104.jpg
-rw-r--r-- 1 tecmint tecmint   14693 Oct 19 13:19 image105.jpg
-rw-r--r-- 1 tecmint tecmint   14641 Oct 19 13:19 image106.jpg
-rw-r--r-- 1 tecmint tecmint   14581 Oct 19 13:19 image107.jpg
-rw-r--r-- 1 tecmint tecmint   14508 Oct 19 13:19 image108.jpg
-rw-r--r-- 1 tecmint tecmint   14540 Oct 19 13:19 image109.jpg
-rw-r--r-- 1 tecmint tecmint   12219 Oct 19 13:18 image10.jpg
-rw-r--r-- 1 tecmint tecmint   14469 Oct 19 13:19 image110.jpg
3. How to Convert Images into Video in FFmpeg
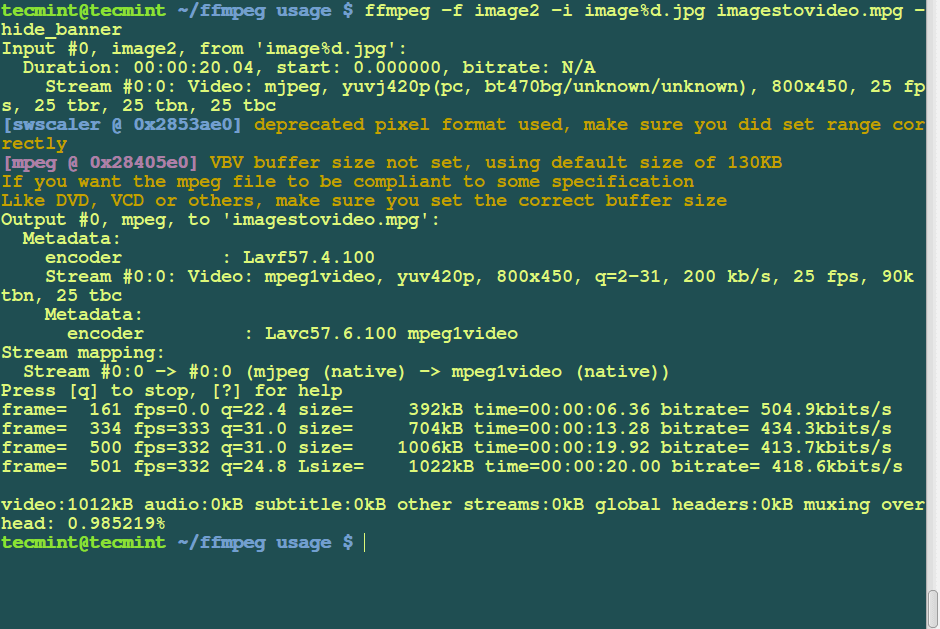
To create a video from a bunch of images, use the following command, which will take all the images in the current folder (like “image1.jpg“, “image2.jpg“, etc.) and make a video file called “imagestovideo.mpg“.
There are many other image formats (such as jpeg, png, jpg, etc) you can use.
ffmpeg -f image2 -i image%d.jpg imagestovideo.mpg
4. How to Convert a Video to MP3 Format Using FFmpeg
To convert a .flv format video file to Mp3 format, run the following command.
ffmpeg -i video.flv -vn -ar 44100 -ac 2 -ab 192 -f mp3 audio.mp3
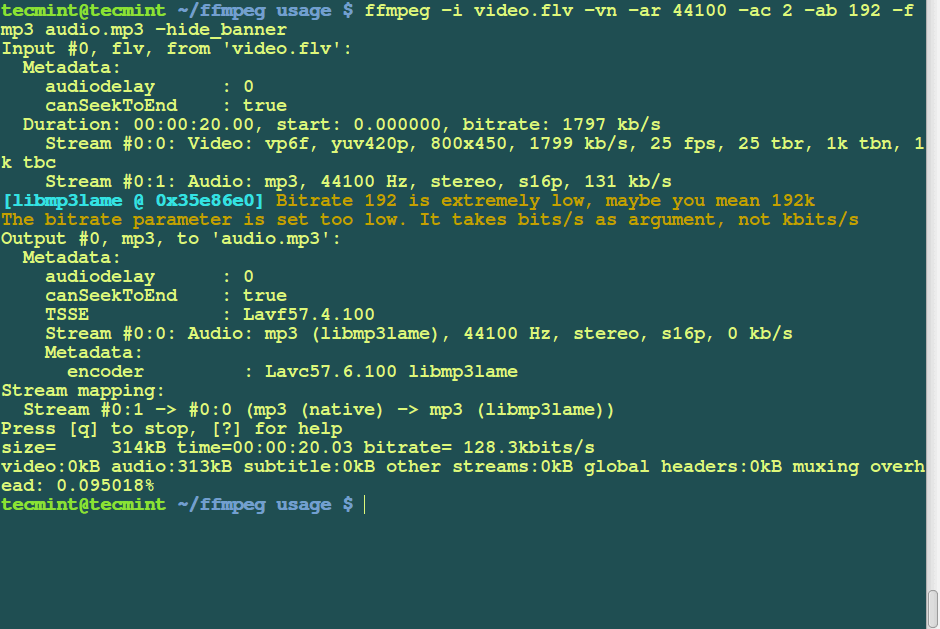
Description about the options used in the above command:
vn: helps to disable video recording during the conversion.ar: helps you set the audio sampling rate in Hz.ab: set the audio bitrate.ac: to set the number of audio channels.-f: format.
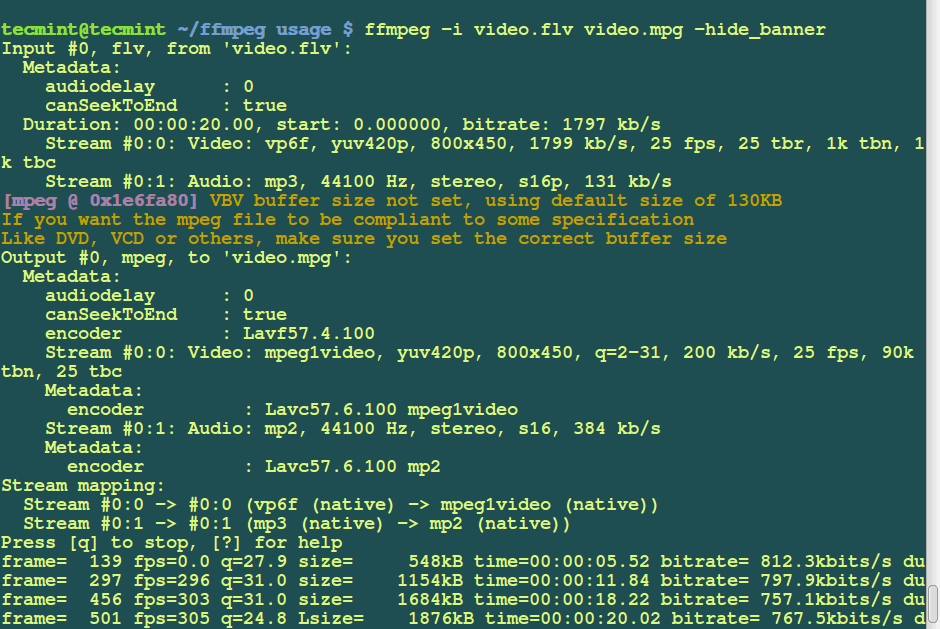
5. How to Covert FLV to MPEG Format Using FFmpeg
To convert a .flv video file to .mpg, use the following command.
ffmpeg -i video.flv video.mpg
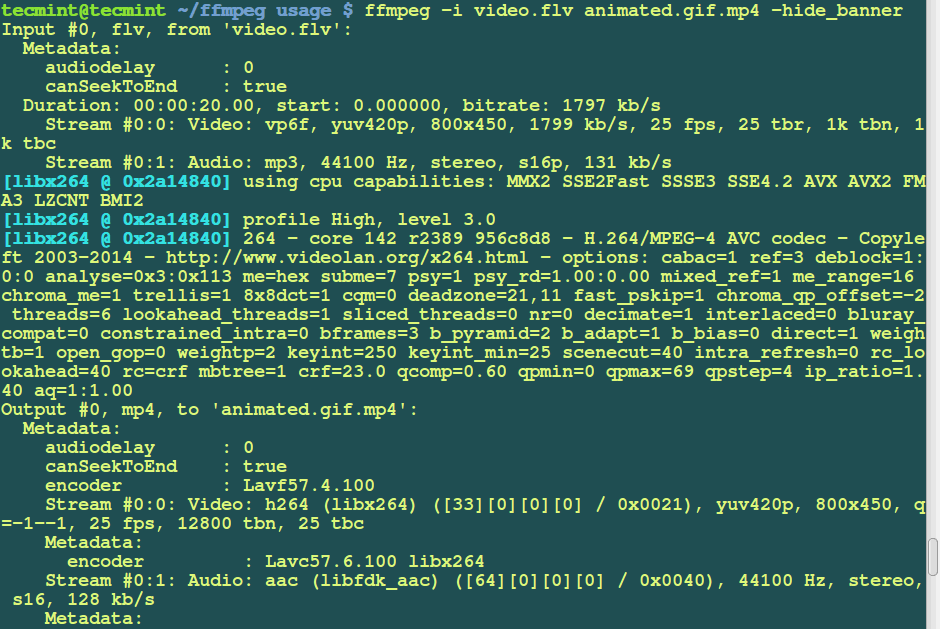
6. How to Convert Video to GIF using FFmpeg
To convert a .flv video file to an animated, uncompressed gif file, use the command below.
ffmpeg -i video.flv animated.gif.mp4
7. How to Convert MPG to FLV Using FFmpeg
To convert a .mpg file to .flv format, use the following command.
ffmpeg -i video.mpg -ab 26k -f flv video1.flv

8. How to Convert AVI to MPEG Using FFmpeg
To convert a .avi file to an mpeg for dvd players, run the command below:
ffmpeg -i video.avi -target pal-dvd -ps 2000000000 -aspect 16:9 video.mpeg
Explanation of the options used in the above command.
- target pal-dvd : Output format
- ps 2000000000 maximum size for the output file, in bits (here, 2 Gb).
- aspect 16:9 : Widescreen.

9. How to Convert a Video to CD/DVD Using FFmpeg
To create a video CD or DVD, FFmpeg makes it simple by letting you specify a target type and the format options required automatically.
You can set a target type using -target type option – type can of the following be vcd, svcd, dvd, dv, pal-vcd, or ntsc-svcd on the command line.
To create a VCD, you can run the following command:
ffmpeg -i video.mpg -target vcd vcd_video.mpg

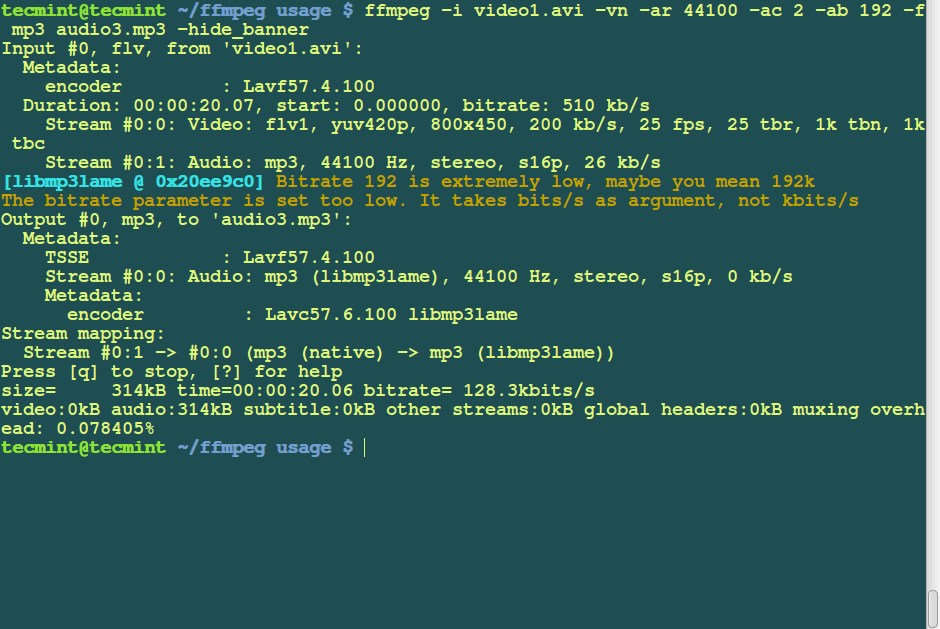
10. How to Extract Audio From Video Using FFmpeg
To extract audio or sound from a video file, and save it as MP3 file, use the following command:
ffmpeg -i video1.avi -vn -ar 44100 -ac 2 -ab 192 -f mp3 audio3.mp3
Explanation of the options used in the above command.
- Source video : video.avi
- Audio bitrate : 192kb/s
- output format : mp3
- Generated sound : audio3.mp3
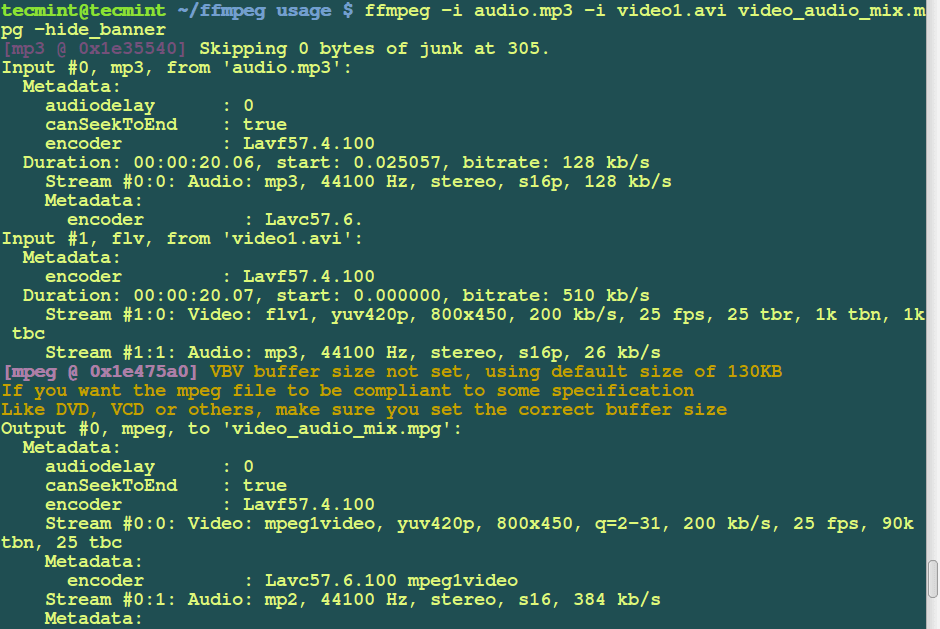
11. How to Merge Audio and Video Using FFmpeg
The command is used to combine an audio file (“audio.mp3“) and a video file (“video.avi“) into a single multimedia file (“video_audio_mix.mpg“).
ffmpeg -i audio.mp3 -i video.avi video_audio_mix.mpg
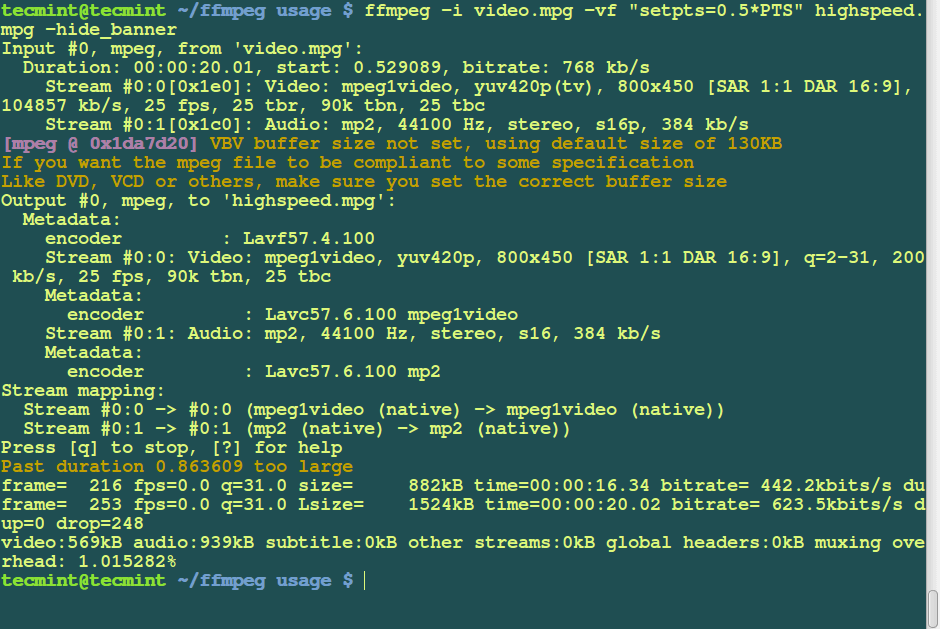
12. How to Adjust Video Speed with FFmpeg
To increase video playback speed, run the following command with the -vf option, which sets the video filters that help to adjust the playback speed.
ffmpeg -i video.mpg -vf "setpts=0.5*PTS" highspeed.mpg
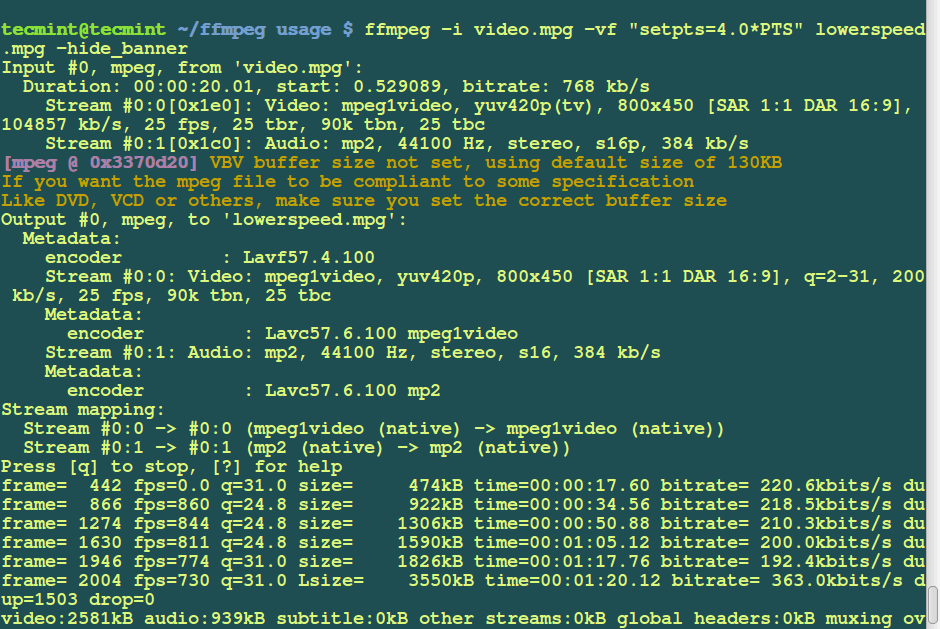
You can also reduce video speed as follows:
ffmpeg -i video.mpg -vf "setpts=4.0*PTS" lowerspeed.mpg -hide_banner
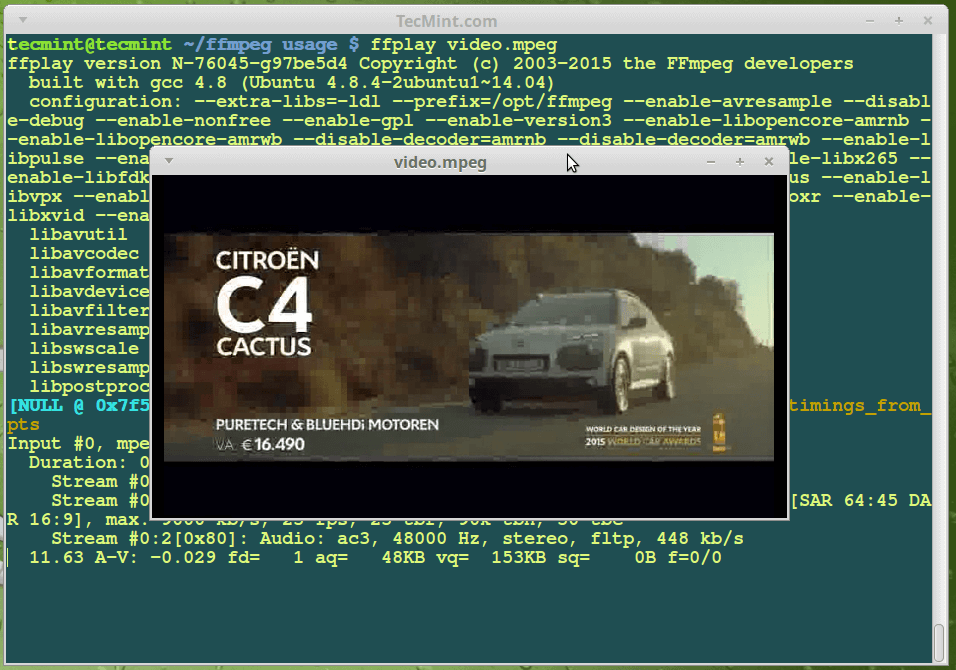
13. How to Play Videos with FFplay
The command ffplay is used to play a video file named “video1.mp4” using FFplay, which is a simple media player included with the FFmpeg software suite.
$ ffplay video1.mp4
To test audio quality simply use the name of the audio file as follows:
ffplay audio_filename1.mp3
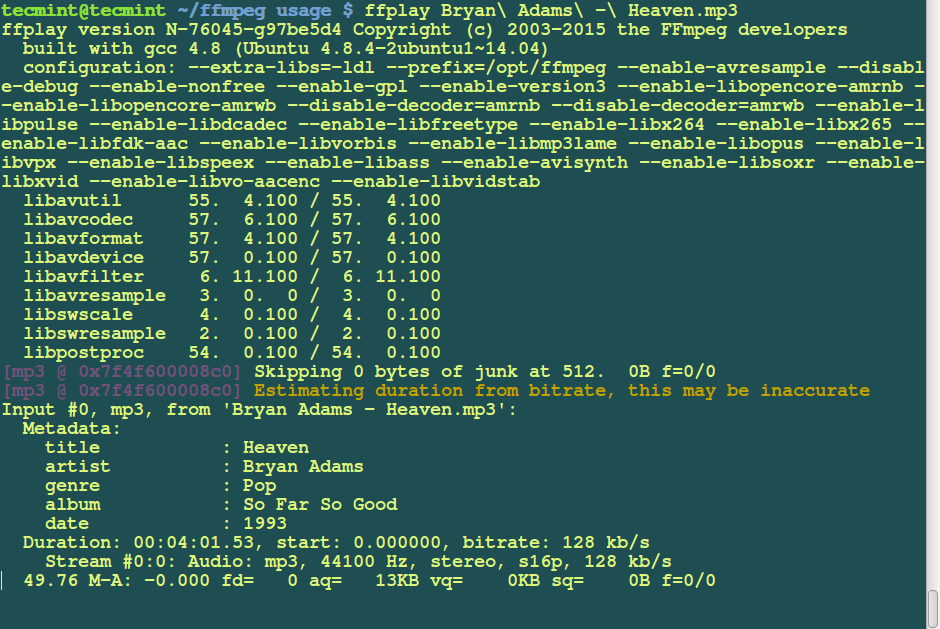
You can listen to them while they play and compare the qualities of the sound.
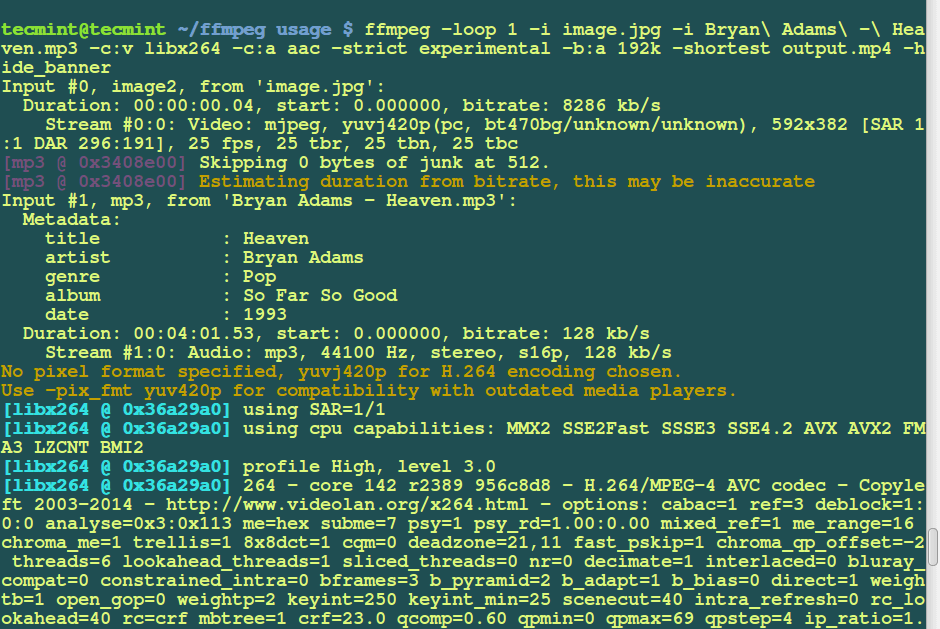
14. How to Add Photo or Banner to Audio Using FFmpeg
You can add a cover poster or image to an audio file using the following command, this is very useful for uploading MP3s to YouTube.
ffmpeg -loop 1 -i image.jpg -i Bryan\ Adams\ -\ Heaven.mp3 -c:v libx264 -c:a aac -strict experimental -b:a 192k -shortest output.mp4
15. How to Add Subtitles to a Movie Using FFmpeg
If you have a separate subtitle file called subtitle.srt, you can use the following command to add a subtitle to a movie file:
ffmpeg -i video.mp4 -i subtitles.srt -map 0 -map 1 -c copy -c:v libx264 -crf 23 -preset veryfast video-output.mkv
Summary
That is all for now but these are just a few examples of using FFmpeg, you can find more options for what you wish to accomplish.
Remember to post a comment to provide information about how to use FFmpeg or if you have encountered errors while using it.


Awesome tutorial and command examples!
I’m fairly new to Linux and need to convert some
.m4vfiles to.mp4. This webpage will help tremendously with the conversion and also opens the door to other cool video projects.Thanks!
@Tony,
Glad you found it helpful! Enjoy your video projects!
Also, there’s so much more you can explore with Linux for your video projects. Feel free to reach out if you have any questions along the way.
Hi tecMint,
Elsewhere
(https://larryjordan.com/articles/change-your-movies-poster-frame/)a solution was provided several years ago – Can I ask if you think this command (by PAJ) will work to change a movie files poster-image and hence finder icon on Big Sur in 2021ffmpeg : ffmpeg -i in.mp4 -I yourposterimage.jpg -map 0 -map 1 -c copy -c:v:1 mjpeg -disposition:v:1 attached_pic out.mp4Thanks
Hi, I do not know how to edit the comment. If the formula as a bat file also, I would be happy.
thank you
@jraju
Try to understand the command syntax, it is easy. Give it a try. You can start by running the same commands in the guide.
Hi, can you please tell the ffmpeg, ffprobe, or ffplay command to test all the files in a folder that has the same video codec and audio codec? For eg, if the video is x264 and audio mp3 is in a reference file I want all the files that differ from it has to be shown through the command. I do not want any other parameters.
can you supply the command?
In a number of the examples above, you have missed off the
"k"[kilo] for the -ab [bitrate] parameter.In your screen grabs, it even shows the warning message from ffmpeg stating that the bit rate is extremely low and did you forget to include the
"k".So in the examples it should be
"-ab 192k","-ab 320k"etc …@Erik
Thanks for mentioning this.
it is possible to reduce the image size but not the resolution ?
If possible how?
@Kamal
I guess it it possible, we will find a way to do that and let you know soon.
command using ffmpeg for live video streaming ???
how to change volume of video or audio file without re-encoding that?
Very useful.
Can we change/set codec value of video file without compressing file.
@Rakesh
Yes, you can change/set the codec of a video file without compressing it. For instance:
ffmpeg -i input.avi -vcodec h264 output.avi
Very useful.
Hi
How can we compress the output image in ffmpeg. What parameter I need to add to make it.
eg: ffmpeg -i input.jpg -vf scale=320:240 output_320x240.png I need compressed version of the output image
@shams
Make use of -compression_level especially for PNG output as in the example command above. The compression values range from 0-100 and the default is 100, the highest compression value meaning that it offers the smallest output file size. I hope this will help.
I have stupid question, if i just need my visitor play video from my website, why use ffmpeg to stream video on my website if i just want display a video
Thanks for sharing.Can you please show me to convert avi video to :(mediainfo) Format : MPEG-4
Format profile : Base Media / Version 2
Codec ID : mp42
File size : 57.7 MiB
Duration : 21mn 39s
Overall bit rate mode : Variable
Overall bit rate : 372 Kbps
Encoded date : UTC 2016-03-06 07:59:42
Tagged date : UTC 2016-03-06 07:59:42
gsst : 0
gstd : 1299690
Video
ID : 1
Format : AVC
Format/Info : Advanced Video Codec
Format profile : [email protected]
Format settings, CABAC : No
Format settings, ReFrames : 1 frame
Format settings, GOP : M=1, N=60
Codec ID : avc1
Codec ID/Info : Advanced Video Coding
Duration : 21mn 39s
Bit rate : 274 Kbps
Maximum bit rate : 698 Kbps
Width : 640 pixels
Height : 360 pixels
Display aspect ratio : 16:9
Frame rate mode : Constant
Frame rate : 25.000 fps
Color space : YUV
Chroma subsampling : 4:2:0
Bit depth : 8 bits
Scan type : Progressive
Bits/(Pixel*Frame) : 0.048
Stream size : 42.5 MiB (74%)
Tagged date : UTC 2016-03-06 07:59:48
Audio
ID : 2
Format : AAC
Format/Info : Advanced Audio Codec
Format profile : LC
Codec ID : 40
Duration : 21mn 39s
Bit rate mode : Variable
Bit rate : 96.0 Kbps
Maximum bit rate : 104 Kbps
Channel(s) : 2 channels
Channel positions : Front: L R
Sampling rate : 44.1 KHz
Compression mode : Lossy
Stream size : 14.9 MiB (26%)
Title : IsoMedia File Produced by Google, 5-11-2011
Encoded date : UTC 2016-03-06 07:59:45
Tagged date : UTC 2016-03-06 07:59:48
@Adam,
Try the following ffmpeg command to convert AVI files to MP4 as shown.
Thanks for this follow-up tutorial on FFmpeg. FFmpeg is an excellent, full-featured media toolkit, but its total capabilities can be quite overwhelming. The code examples help with understanding and as a starting point for further exploration.
Before using FFmpeg, I usually want to know more about the input media file formats I will be using. For this, I usually use FFprobe (one of the useful utility programs included with the FFmpeg suite). FFprobe was created to extract detailed configuration info from a media file. For example:
$ ffprobe -v quiet -pretty -of default -show_format -show_streams “video.flv” > “video.flv.info”
FFprobe will produce a nicely formatted report saved to an output file as documentation and for further follow-up analysis. FFprobe can also generate the report in several other print formats (including JSON and XML).
For repeat usage, I placed the above FFprobe command in a script file, and execute the script passing just the input filename as a parameter. The script handles the rest (including creating the output filename by appending ‘.info’ to the input filename). The double-quotes around the filenames are optional, but are required if the filenames contain spaces. Recommend including double-quotes in the script file to avoid later potential run-time errors.
@Dennis Thanks for the info about FFprobe. It can help new FFmpeg users to learn more.
There are several errors: 1. hide_banner is a global option, so it should go before -i. 3. “-f image2” is superfluous. 4. You really don’t need any of those other options, and you should have used -ab 192k, not -ab 192. 6. This example does not make an animated GIF at all. 8. -ps does not limit file size; -fs does, but you shouldn’t use it anyway because it will just end when it reaches the specified limit. 10. The input already was MP3, so stream copy would be better (-c:a copy).
@Hangover Man thanks for catching the errors, hope users will identify them and use the options carefully.
Extremely useful. Thanks.