Git is the most popular version control system (VCS) used by developers and development teams to keep track of changes made to source code. In fact, it is the most popular version control system used in DevOps.
A Version Control System is software that tracks or records changes made to software code over time in a special database referred to as a repository. With Git, you can track project history and see what changes were made and who made them.
You can also roll back the changes to get back to your original code. In addition, Git allows multiple people to collaborate on the same project irrespective of their location.
Version Control Systems can be categorized into two: Centralized and Distributed.
[lwptoc]
What Is a Centralized Version Control System
In a centralized system, all users connect to a central server to get a copy of software code and share it with others. Examples of centralized Version Control Systems include Subversion which is distributed under the Apache License and Microsoft Team Foundation Server (Microsoft TFS).
The drawback of centralized VCS is the existence of a single point of failure. When the central server goes down, the team members can no longer collaborate on the project.
What Is a Distributed Version Control System
With distributed systems, each team member gets to have a copy of the code project on their local machine. If the central server experiences downtime, users can synchronize the software code with others without a problem.
Examples of distributed Version Control Systems include Git and Mercurial.
Why Use Git?
Of all the Version Control Systems that we have mentioned, Git is the most popular and widely used VCS. And for good reasons. It’s free and open-source, scalable, fast, and reliable.
You can track changes made to code and easily collaborate on a project with other team members. In addition, operations such as branching and merging are far much easier in Git than in Mercurial or any other VCS.
Nowadays, Git is ubiquitous and is used by both small companies and large enterprises to efficiently manage software code. For that reason, it’s one of the most in-demand skills for developers or those getting into software development.
So if you are looking into getting a job as a software developer, bear in mind that Git is a prerequisite. You should have a thorough knowledge and understanding of this Version Control System tool.
In this tutorial, we will walk you through Git basics and how you can efficiently manage your code.
Introduction to Git and GitHub
We cannot talk about Git without mentioning GitHub. These two are intertwined and often go hand in hand. In fact, a lot of people think that Git and GitHub are the same. However, these are two separate things that integrate with each other.
GitHub is a code hosting platform for Git repositories. It’s essentially a website where developers and project managers host their software projects.
It makes it easy for team members or developers to coordinate and track changes made to code, as well as make updates where needed. In doing so, GitHub promotes collaboration, transparency and helps team members to work from anywhere and stay up to date with the latest changes made to code.
In GitHub packages can be published publicly, allowing access to the outside world, or privately within team members. Once shared publicly, users can download the code and try it out on their personal computers.
In summary, GitHub is an online code hosting platform that provides a cool UI and allows you to host remote Git repositories and work collaboratively with other developers from anywhere.
On the other hand, Git is what handles the version control operations like pushing and merging code, making commits, cloning repositories, etc. Now let us explore various Git commands that you can use to work with GitHub.
How to Install Git on Linux
Before you get started with using Git, let’s first install it. If you are running Ubuntu or Debian-based distribution, run the following apt commands to install it.
$ sudo apt update
$ sudo apt install git -y
For Red Hat-based distributions such as RHEL, Fedora, CentOS Stream, AlmaLinux, and Rocky Linux execute the following dnf commands:
$ sudo dnf update
$ sudo dnf install git -y
To confirm that Git is installed run the command:
$ git --version

git version 2.34.1
Initializing a Git Repository
The initial step in using git is to initialize a git repository, which is essentially converting a directory on your local system into a git repository where all your project files and code will be stored before being pushed to GitHub.
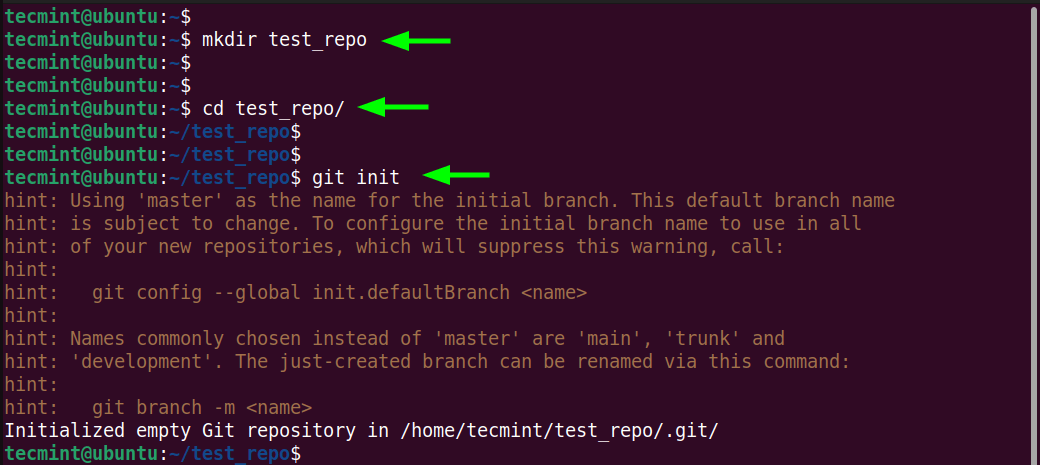
To demonstrate this, we will create a directory called test_repo and navigate into it.
$ mkdir test_repo
$ cd test_repo
To initialize the repository run the following command:
$ git init
You will get a bunch of hint messages and at the end of the output, you will see a notification that the Git repository has been initialized on a branch which, by default, is called master.
Commit Changes to Git Repository
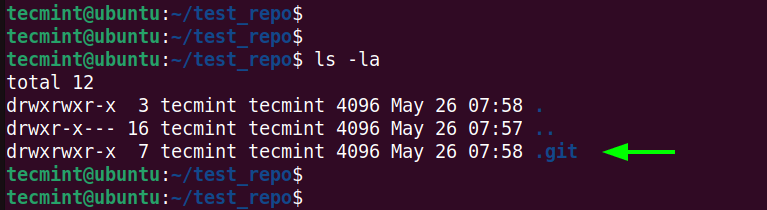
Once a directory has been initialized, a hidden directory called .git is created, which contains all the files Git requires to track changes made to code. To view this directory, run the ls command with the -la options as shown.
$ ls -la
Tracking a project only happens once changes are committed for the first time. We will come to this later.
Configuring Git Repository
Once we have initialized the Git repository, the next step is to set a few configuration variables for Git. We will add a username and email address which will be associated with the commits.
To add a username and email address to all the commits by the current user, run the following commands. Be sure to provide your preferred name and email address.
$ git config --global user.name "your_name"
$ git config --global user.email "email_address"
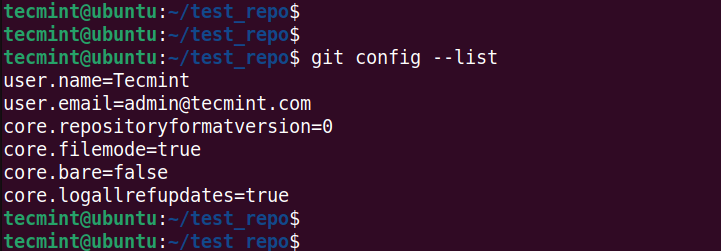
To confirm the variables set, run the command:
$ git config --list
Add File to a Git Repository
To make changes to the git repository, first, run the git add command, followed by git commit. The git add command adds files to the staging area. This is essentially a special area where we propose the changes for the next commit.
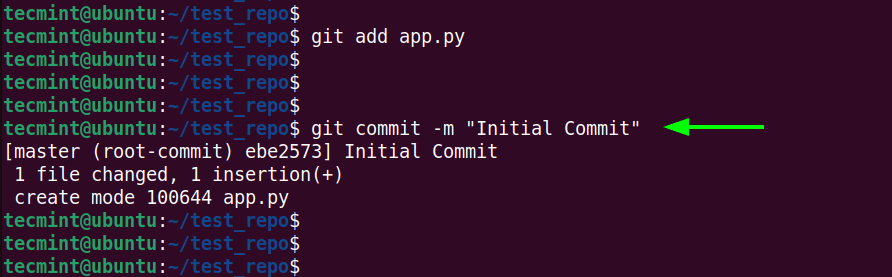
In our setup, we have a Python file called app.py. To add this file to the staging area, we will run the following command.
$ git add app.py
If you have multiple project files, you can add all of them at a go as shown.
$ git add -A
OR
$ git add --all
Once you have added all the files to the staging area, commit them to the repository using the git commit command. A commit is like taking a snapshot of your project.
$ git commit -m "Some Message"
-m option allows you to attach a tag or message to your commit. The string between quotation marks is the message associated with the commit. This message is essential for having a meaningful history to refer to.The following output shows that we have successfully committed the changes to the Git repository.
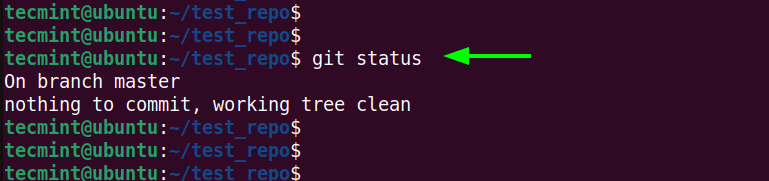
To check the status of commits, run the command:
$ git status
If there are no pending commits, you will get the notification that there’s nothing to commit.
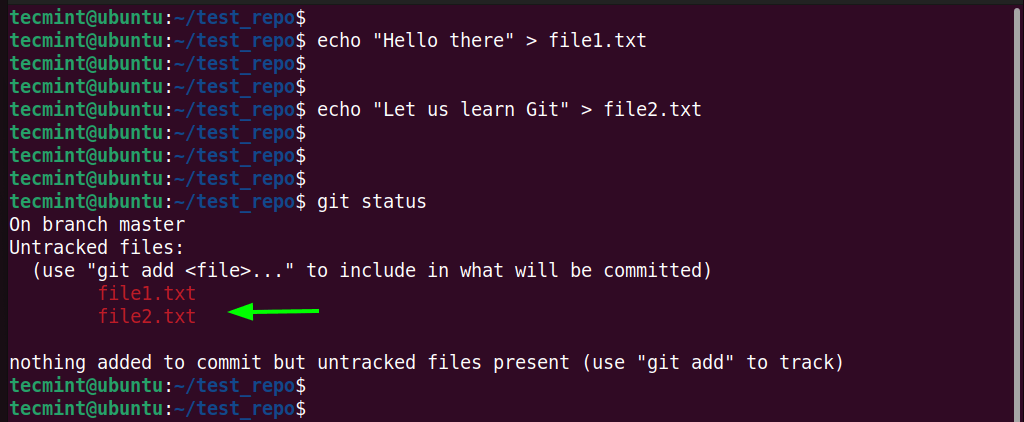
Now, let us create two more files and check the status of the commits.
$ echo "Hello there" > file1.txt
$ echo "Let us learn Git" > file2.txt
Next, display the state of the staging area.
$ git status
This time around, the newly added files will appear in red and will be marked as ‘untracked’. In order for Git to track them, you will need to add them to the staging area.
To add all the files at a go, run the command:
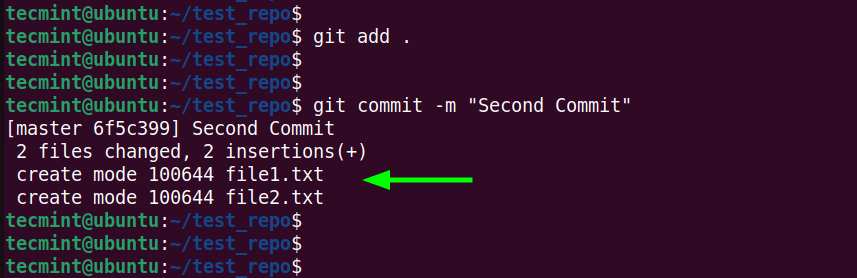
$ git add .
Next, commit the changes made.
$ git commit -m "Second Commit"
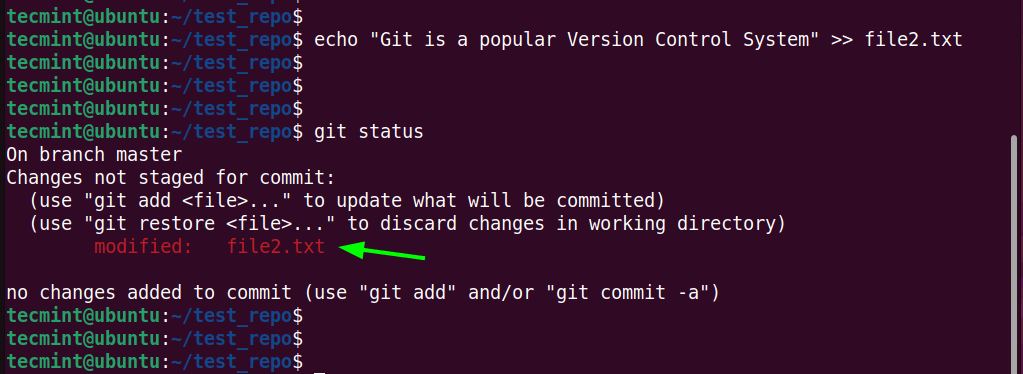
Now, let’s try something more ambitious. We will modify one file.
$ echo "Git is a popular Version Control System" >> file2.txt
Once again, the file appears in red since the changes made have not been committed.
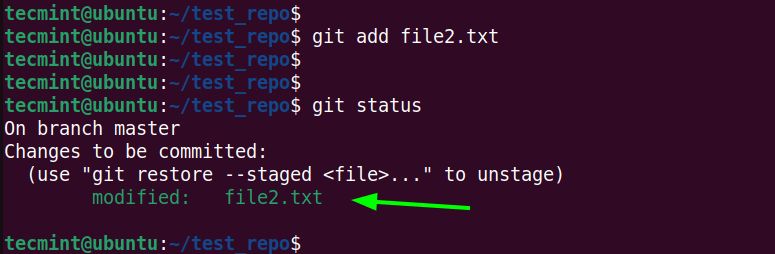
Once again, you need to add the modified file to the staging area.
$ git add file2.txt
$ git status
When you check the status of the staging area, the file appears in green and is ready to be committed.
Remove File from Git Repository
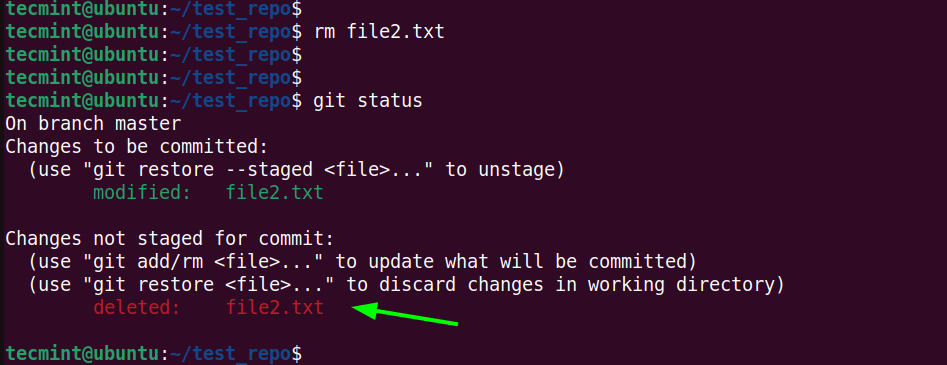
Suppose we realize that we no longer need file2.txt in our project since it has unused code. You can remove it using the rm command as shown.
$ rm file2.txt
When you check the status, you see that the deleted file is marked in red and that the change has not been committed yet.
$ git status
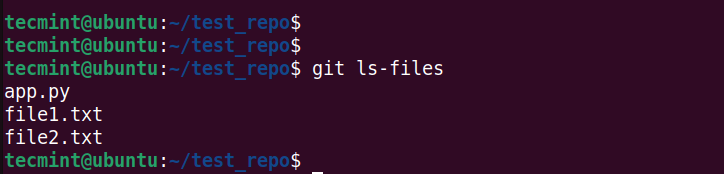
We have removed file2.txt from our working directory. However, it still exists in the staging area. To confirm this, run the command:
$ git ls-files
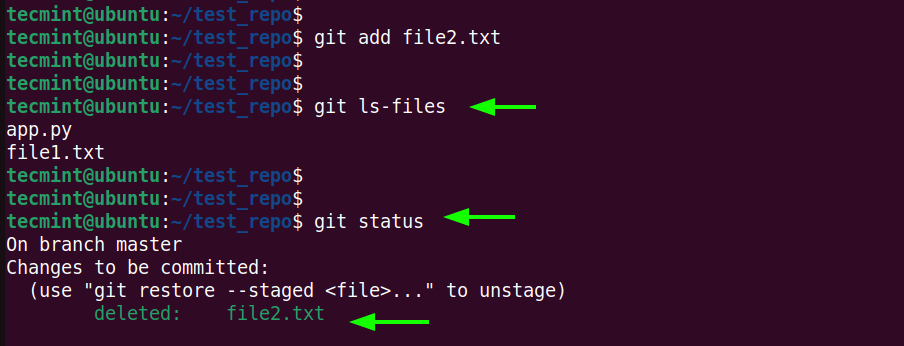
To stage the deletion, run the git add command as shown
$ git add file2.txt
Once again, list the files in the staging area.
$ git ls-files
This time, you see that file2.txt no longer exists in the staging area. When you check the status, you can see that the change is ready to be committed.
So now let us commit to the change made.
$ git commit -m "Remove unused code files"

Pushing Local Repository to GitHub
With the local repository ready, you can now opt to push your project to GitHub for collaboration and for other users to access your project.
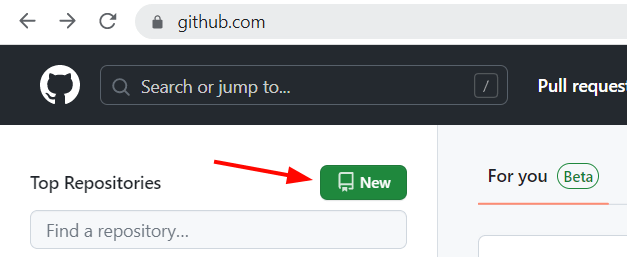
But first things first. You need to create a GitHub account if you don’t have one already.
Next, you need to create a new empty repository. This is the repository that you will push your local repository to. So, click the ‘New’ button.
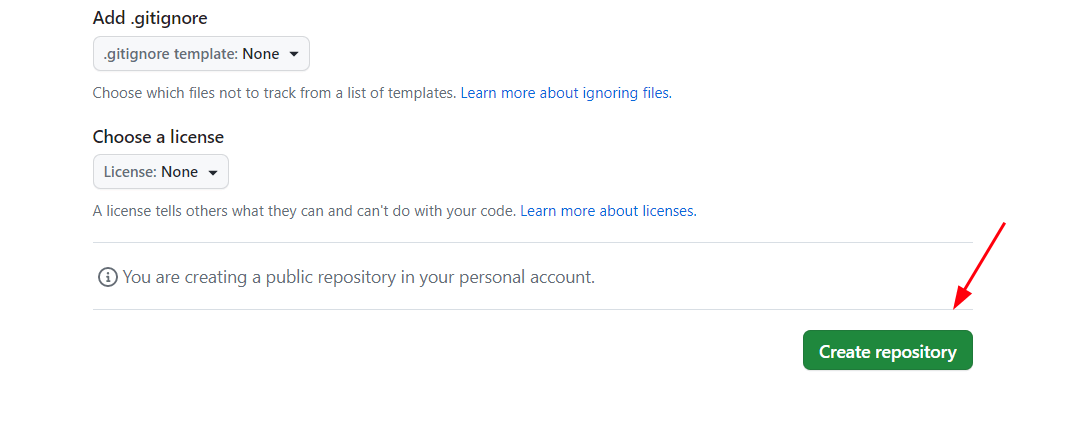
Fill in the repository name and set it to ‘Public’. You can either opt to initialize a README file or not. This is a file that briefly describes what your code is all about. This doesn’t really matter for now.
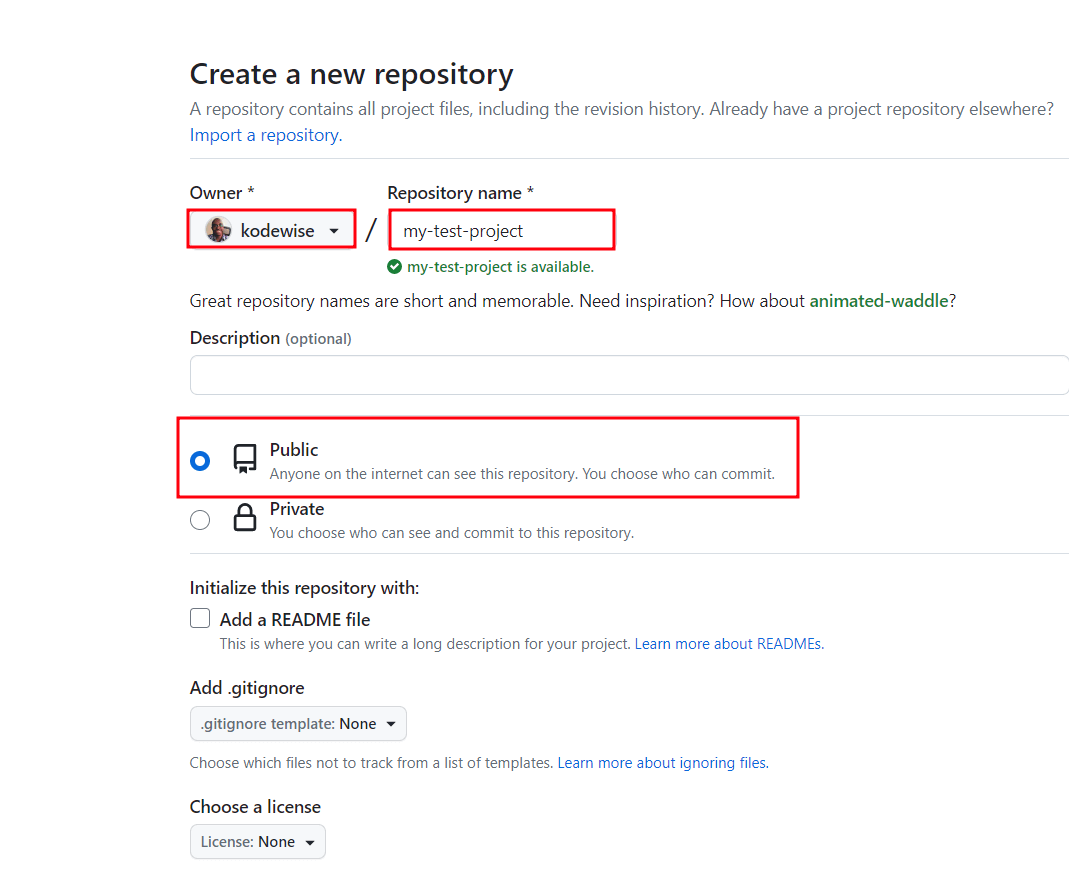
Then click the ‘Create repository‘ button to create the repository with the details provided. In this example, we have created a repository called ‘my-test-project‘.
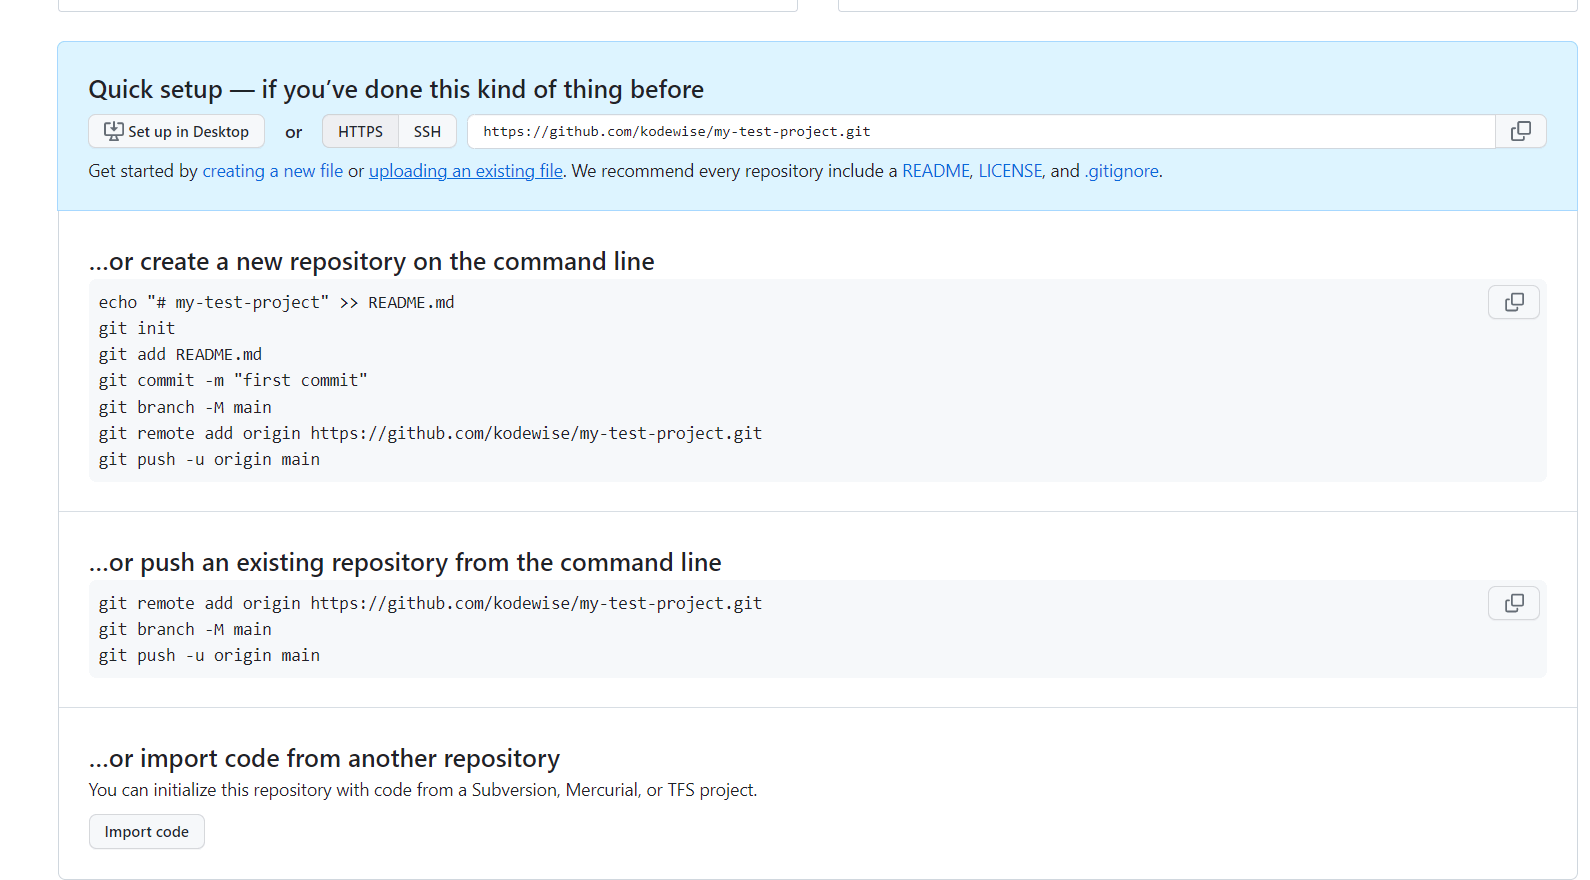
A quick setup will be provided which includes a link to your newly created repository and instructions on how you can push your local repository to GitHub.
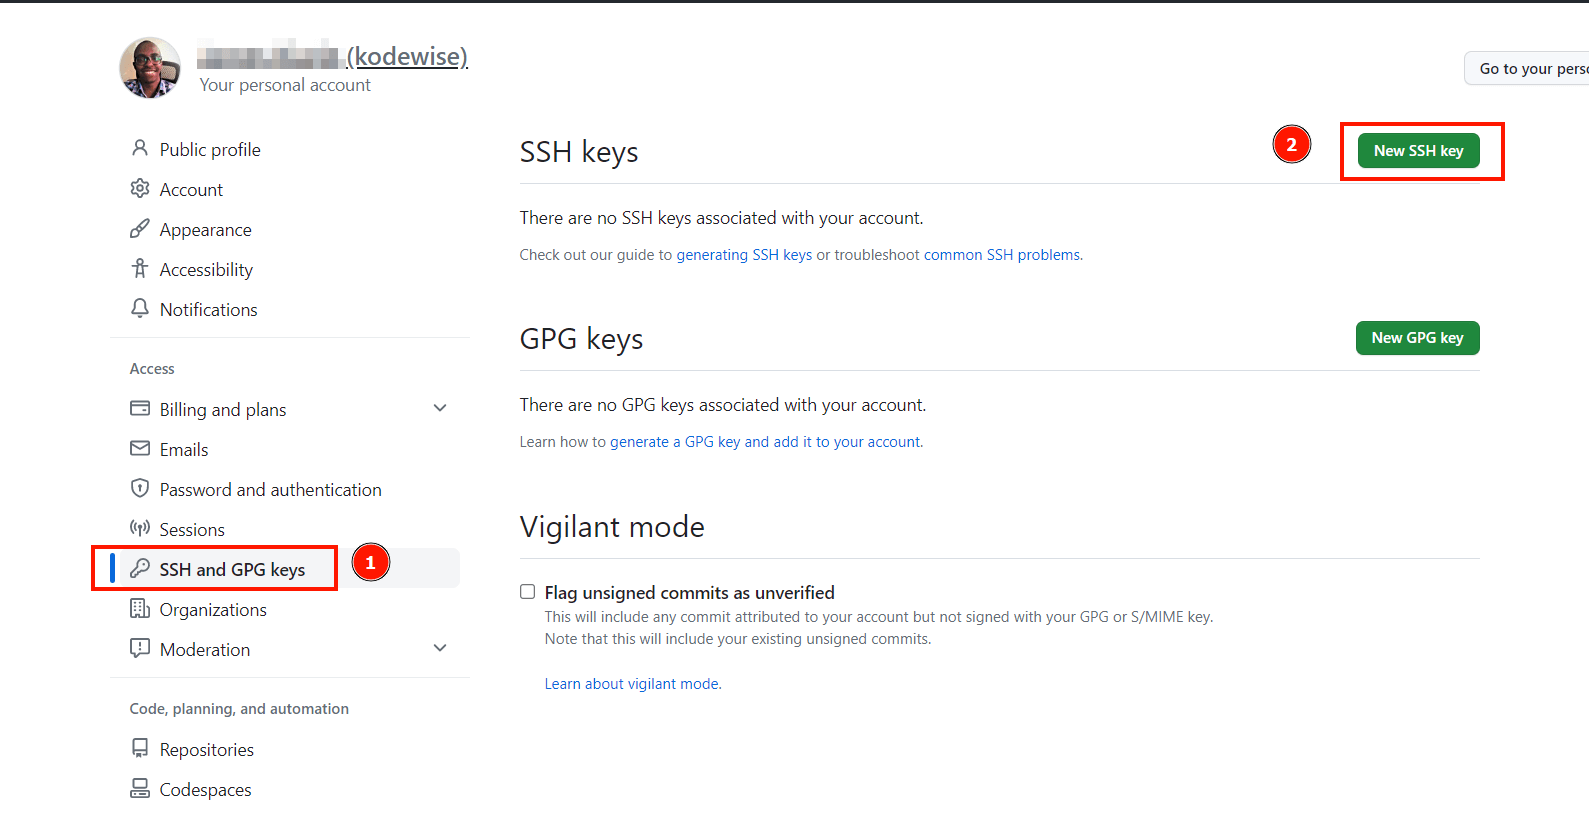
The next step is to enable authentication to GitHub on the command line using SSH keys.
To do so, click on your profile icon at the right-hand corner, and select ‘Settings’.

Next, navigate to the ‘SSH and GPG’ keys, then click ‘New SSH Key‘.
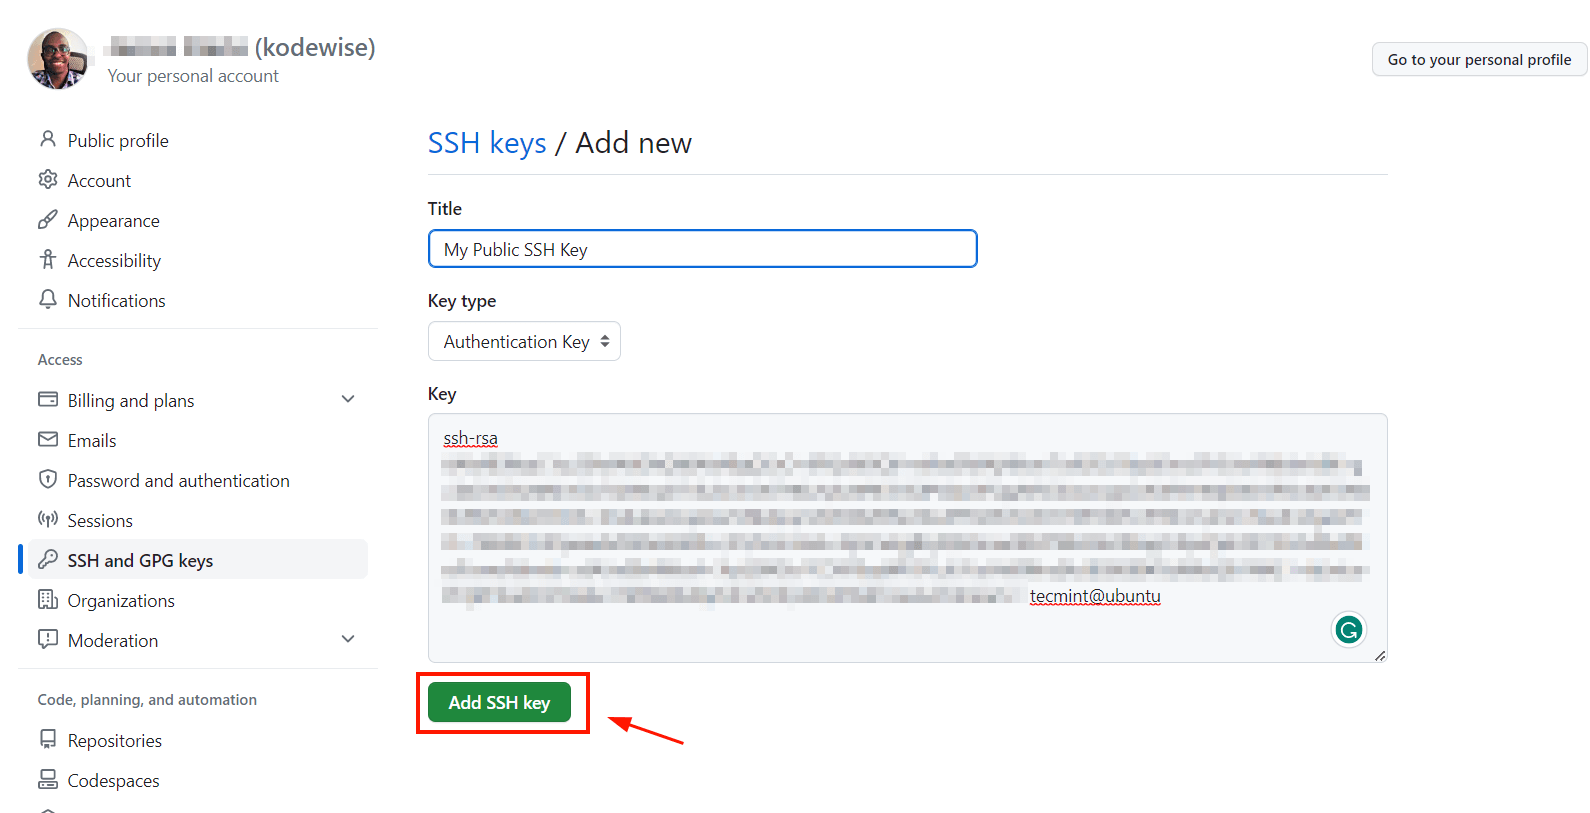
Next, copy the public SSH key and provide a meaningful title to your key. Then press ‘Add SSH Key’.
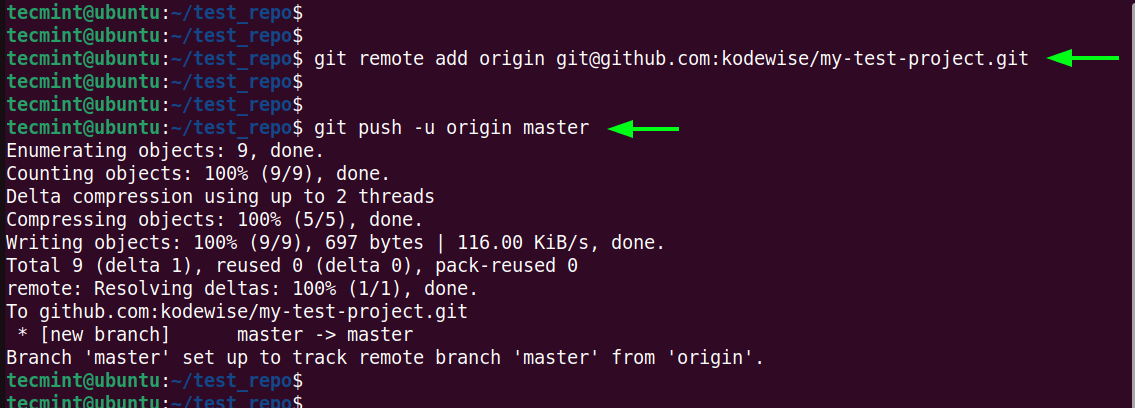
All is set now to push your repository to GitHub. Add the remote GitHub repository using the git remote add command syntax.
$ git remote add origin [REMOTE REPOSITORY URL HERE]
In the above syntax, ‘remote‘ stands for the remote repository version while ‘origin‘ is the name given to a remote server.
In our case, the command will appear as shown.
$ git remote add origin https://github.com/kodewise/my-test-project.git
Thereafter, run the git push command to push the local repository to GitHub. Here, the master is the default branch name.
$ git push -u origin master
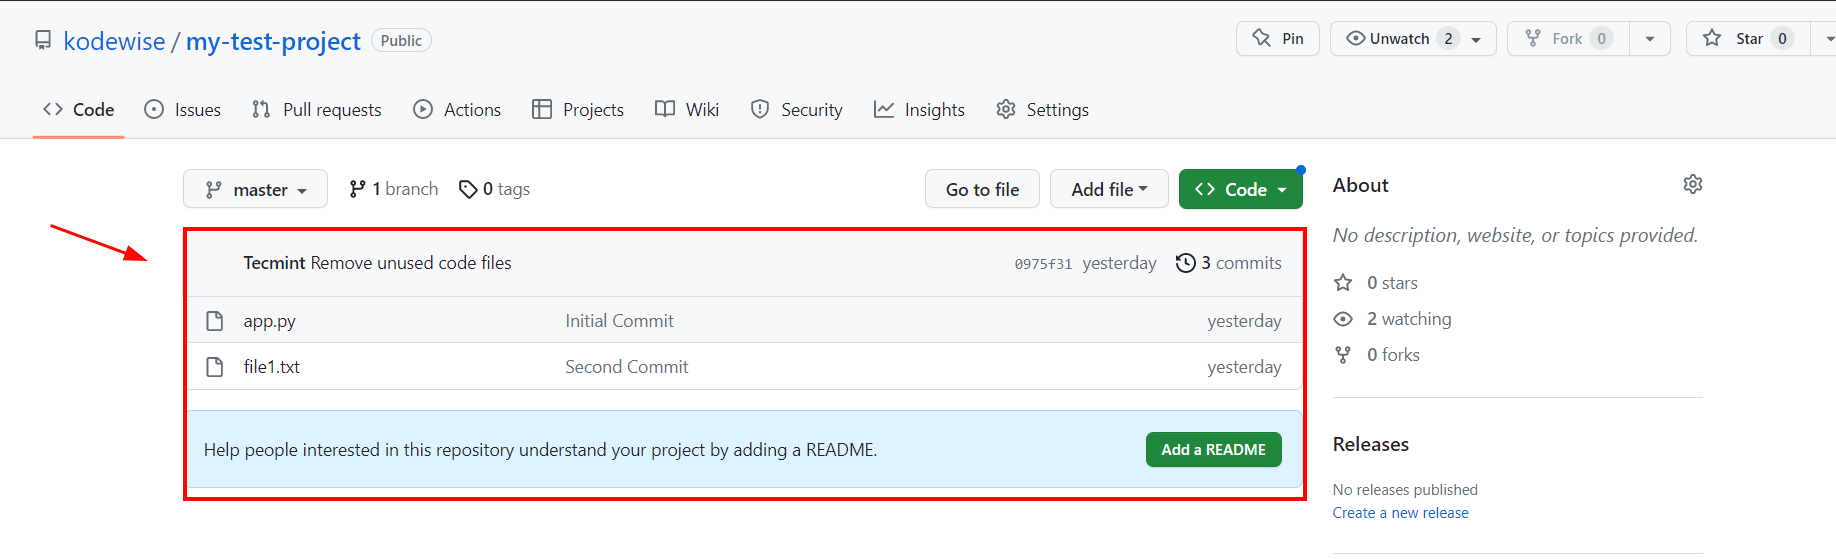
When you visit your repository on Github, you will see all your project files.
Going forward, if you want to add a new file to your repository, just repeat the same steps of adding the file to the staging area, committing it, and pushing the changes to the repository.
$ git add -A
$ git commit -m 'Added my project'
$ git push -u origin main
Update Local Repository with Changes Made on GitHub
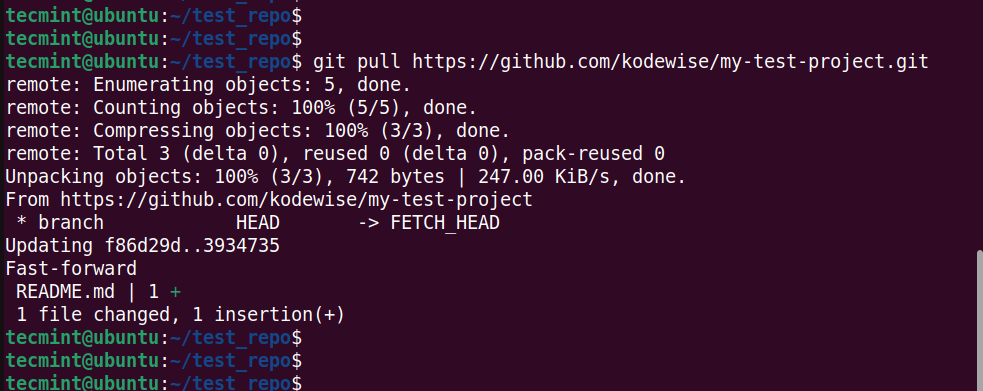
The git pull command is used to update the local repository with upstream changes on the remote repository. It essentially downloads the changes made to code on GitHub and updates the local repository on your system accordingly. It combines git fetch and git merge commands.
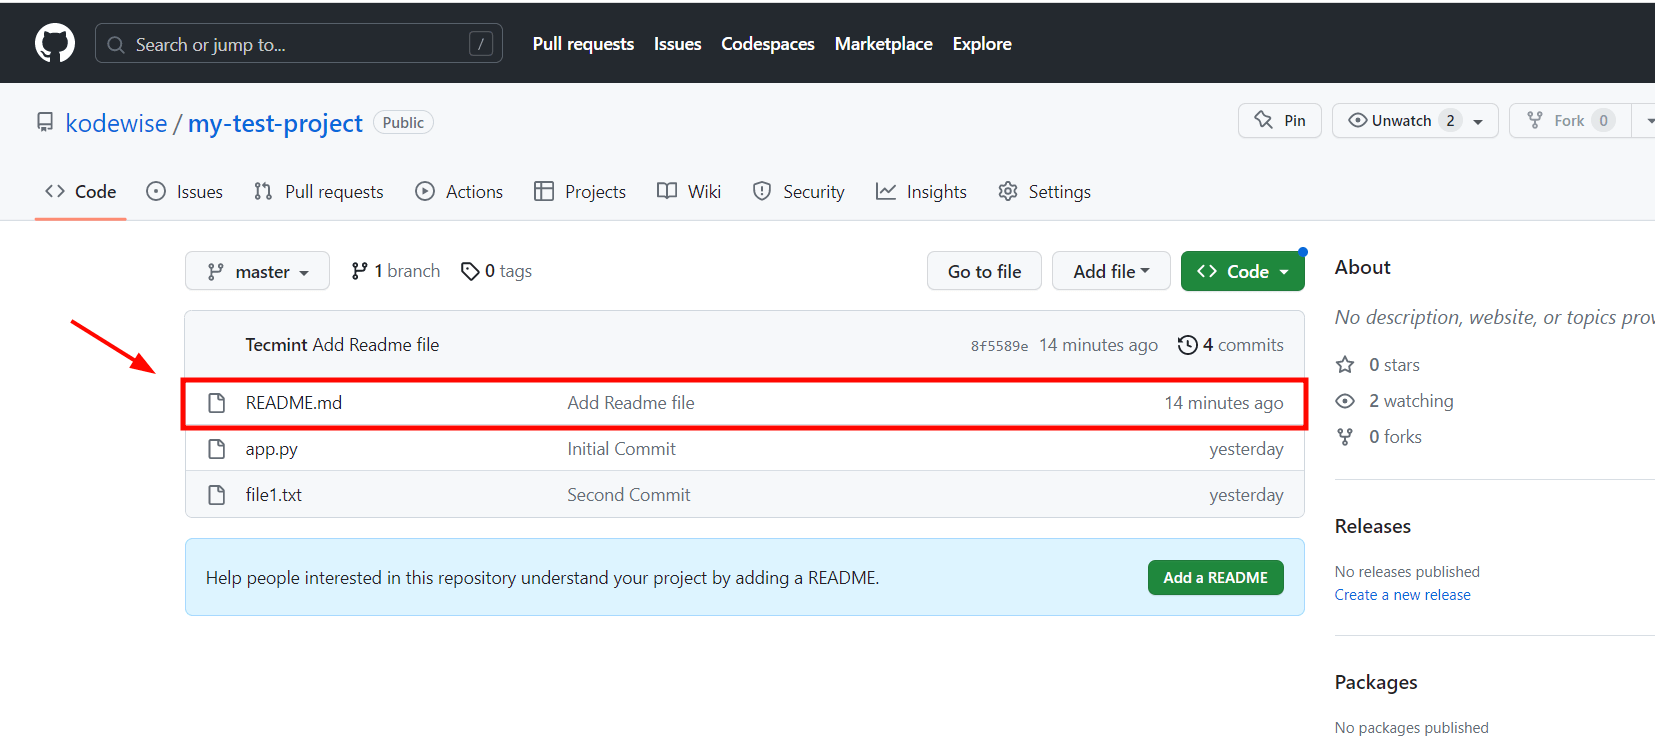
In this example, we have edited the README file on the remote repository hosted on GitHub. To ensure that we have the same copy on our local repository, we will run the command:
$ git pull https://github.com/kodewise/my-test-project.git
Cloning a Git Repository
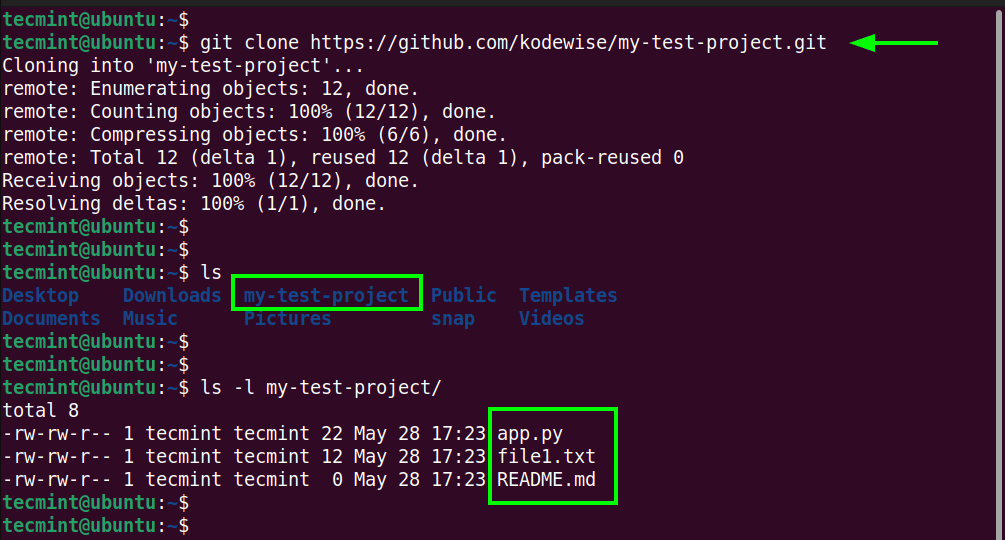
The git clone command downloads an exact copy of the project files on a GitHub repository. You can clone a public repository on any system or directory using the following syntax.
$ git clone [REMOTE REPOSITORY URL HERE]
On the GitHub project’s page, click ‘Code’ and copy the URL as highlighted below.
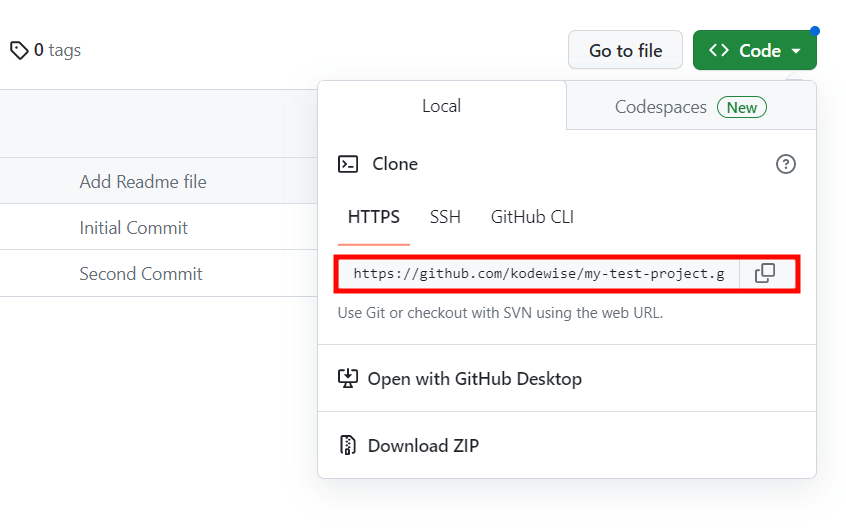
Then clone the Github repository as shown.
$ git clone https://github.com/kodewise/my-test-project.git
This downloads the entire repository along with the project files.
Conclusion
In this Git tutorial, we have introduced git and demonstrated basic commands used to create and manage files in a Git repository. Lastly, we walked you through how to push your repository to GitHub for collaboration. That’s it for now. We hope that you found this tutorial useful.