Markdown is a formatting language that is created for the web. The purpose of markdown is to make life easy when we are writing on the internet. Over time there are many flavors of markdown created. But in this article, our focus will be mainly on Github Flavored Markdown (GFM).
Github is based on CommonMark. There are a lot of additional features supported in GFM like tables, code fencing, etc. Let’s jump in and explore the syntax for GFM and how to use it in different cases.
I am using VScode to demonstrate this but you can choose any Linux editor that is suitable for you. Some editors like Atom and Vscode come with markdown support and for some editors, we need to install a markdown plugin.
To work with markdown the file should be saved with .md or .markdown as an extension.
How to Add Headings to Markdown Editor
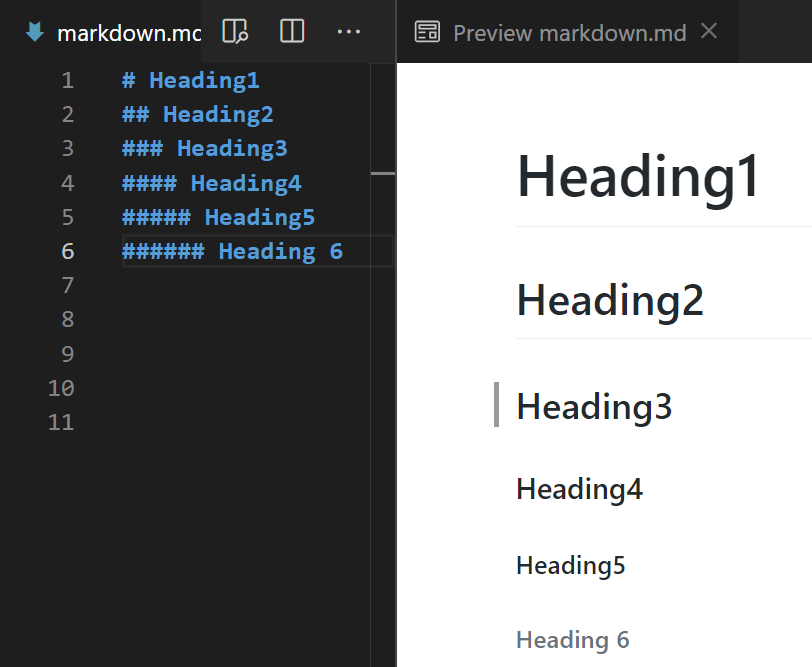
There are 6 levels of heading supported in markdown. To create a heading use the Hash (#) symbol followed by a space and name of the heading. Higher the hash value lower the size of the heading.
NOTE: H1 and H2 will have an underline style by default.
# Heading1
## Heading2
### Heading3
#### Heading4
##### Heading5
###### Heading 6
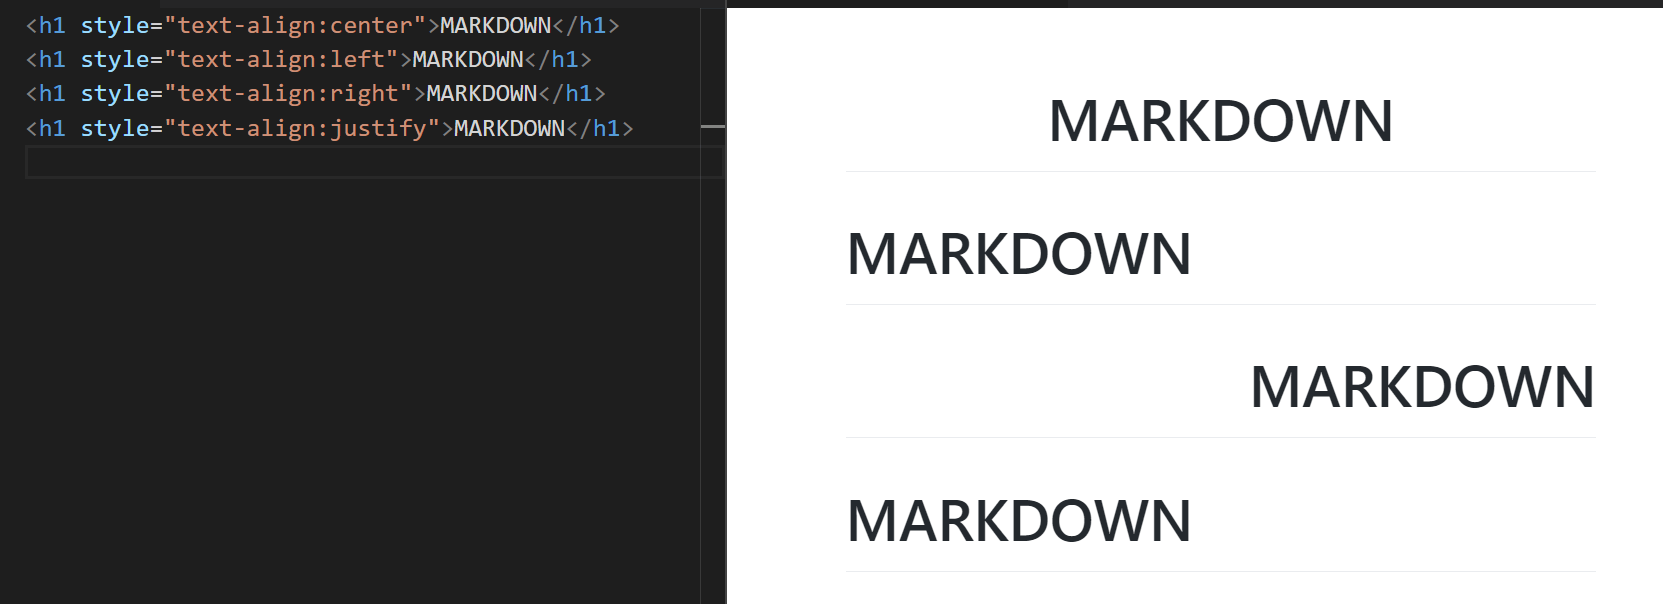
Sometimes you may wish to align the heading towards the center. But the sad story is alignment is not supported by default in markdown. By default, headings are rendered with left alignment. You can embed HTML/CSS tags within markdown to achieve alignment.
<h1 style="text-align:center">MARKDOWN</h1>
<h1 style="text-align:left">MARKDOWN</h1>
<h1 style="text-align:right">MARKDOWN</h1>
<h1 style="text-align:justify">MARKDOWN</h1>
How to Add Comments to Markdown Editor
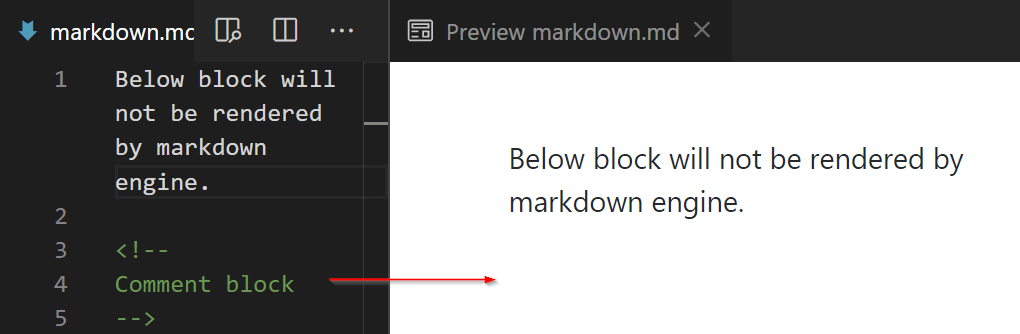
Comments are a way to document certain things for a better understanding of code/Documents. This will not be rendered by the markdown engine.
<!--
Comment block
-->
How to Render Text as a Single Line
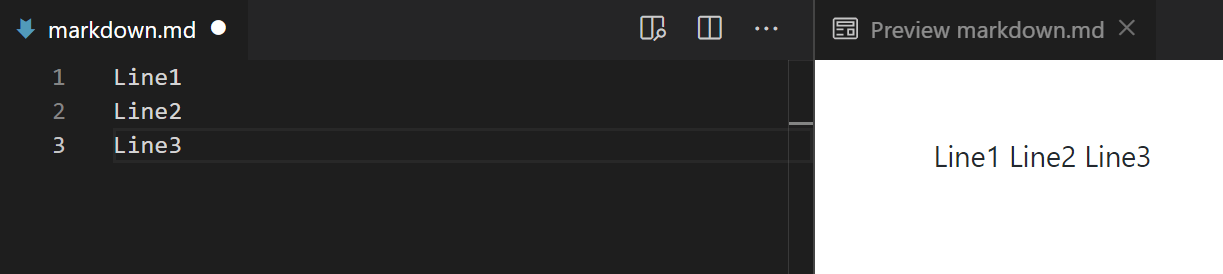
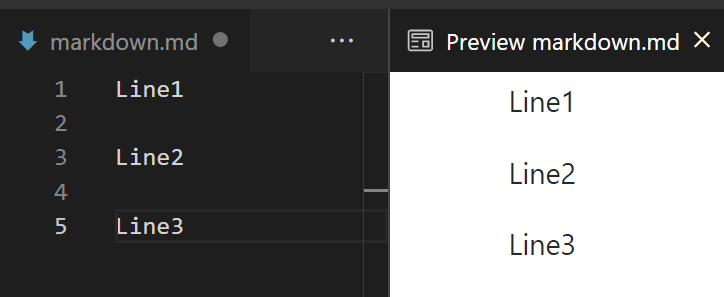
Normally when you type something in separate lines one after another markdown will render it as a single line.
You can create line breaks in two ways.
- Soft line break
- Hardline break
Soft line breaks can be created by adding two spaces at the end of the line. This way markdown will render each line to be separate lines.
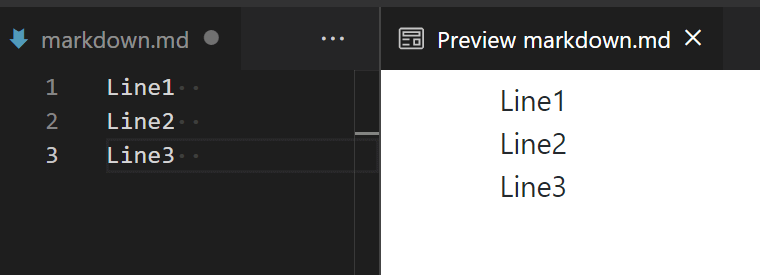
Hardline breaks can be created by inserting an empty line between each line.
How to Add Horizontal Lines
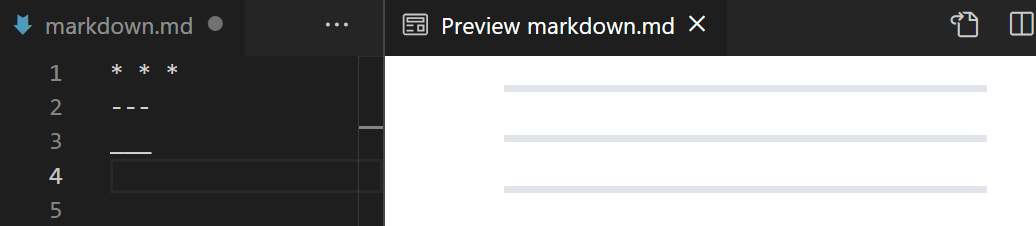
The horizontal rule can be created by placing three or more asterisks (*), hyphens(-), or underscores(_) on a single line. It is also ok to add space between them.
* * *
---
___
How to Make a Text Bold
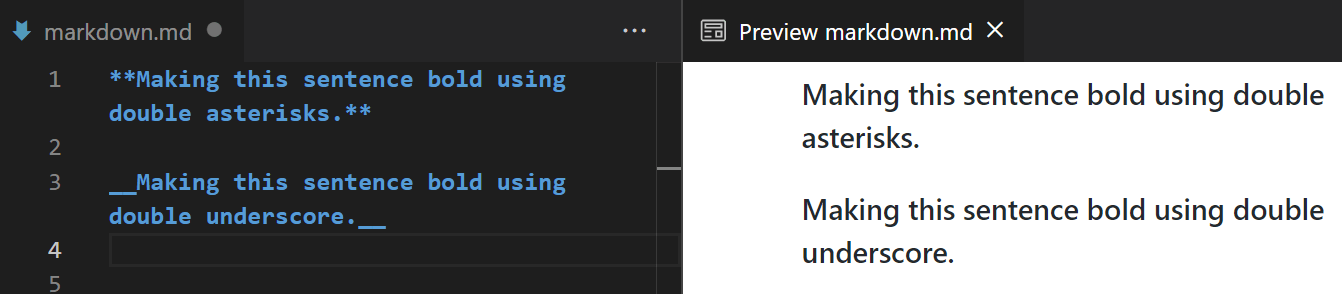
To make word or lines BOLD, surround the word or lines between double asterisks (**) or double underscore (__).
**Making this sentence bold using double asterisks.**

__Making this sentence bold using double underscore.__
How to Make a Text Italics
To make words or lines ITALICS, surround the word or lines between single asterisks (*) or single underscore (_).
*Making this line to be italicized using asterisks.*

_Making this line to be italicized using underscore._

How to Add a Strike-Through to Lines
To strike anything you have to use a double tilde. Surround whatever you need to strike through between double tildes (~~).
I am just striking the word ~~Howdy~~.

~~I am striking off the entire line.~~

How to Add a Blockquote
Use Greater than a symbol (>) for blockquote.
> Single line blockquote.

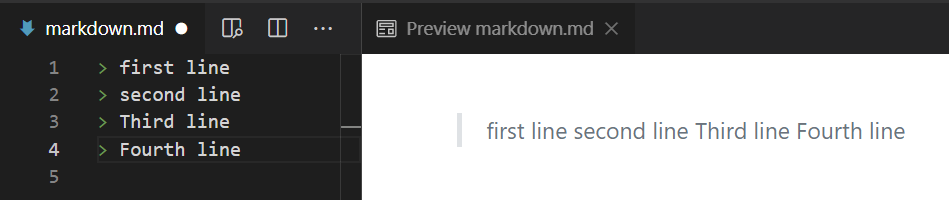
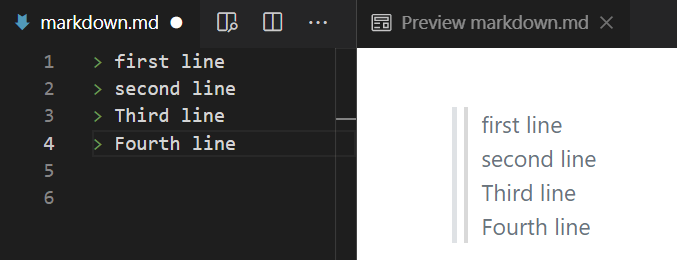
See how the below block quote is rendered. Both the lines are rendered in the same line.
> first line
> Second line
> Third line
> Fourth line
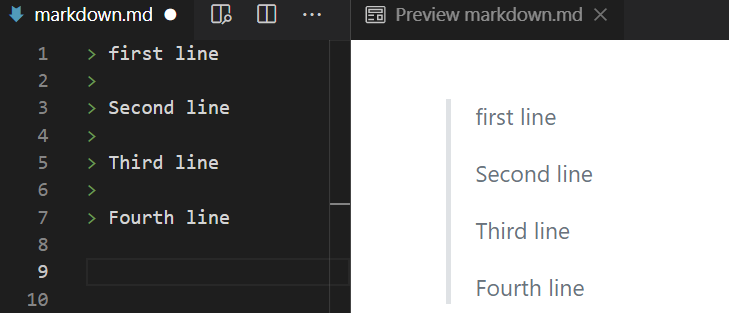
You can use line return by leaving two spaces at the end of each line. This way each line will not be rendered in a single line.
Leave the alternate lines empty prefixed by greater than a symbol. This way you can create a line break between each line within the same block.
> first line
>
> Second line
>
> Third line
>
> Fourth line
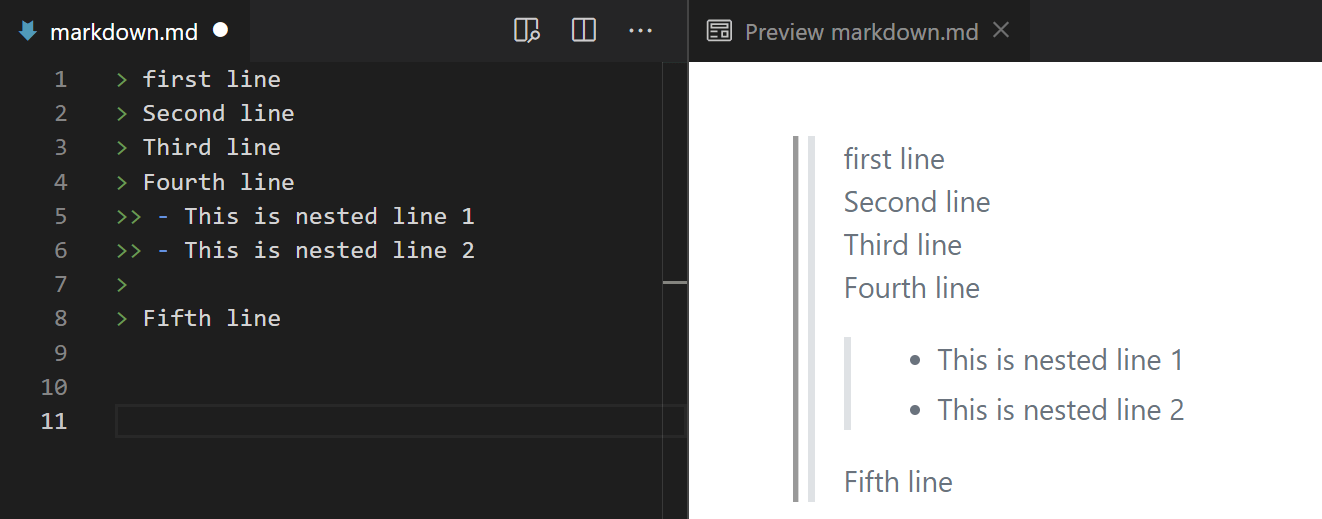
You can also create nested block quotes too by adding two greater than symbols (>>).
Create Inline Code
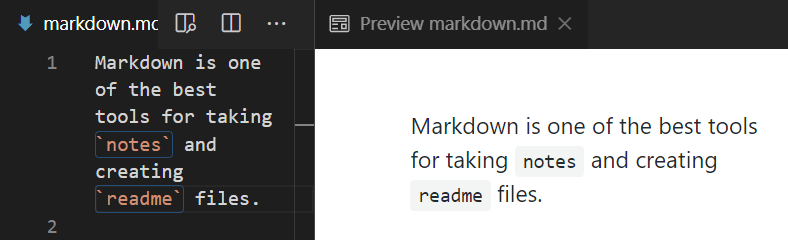
Use BACKTICK to make inline code. The below example demonstrates how to create inline code. Look at the word notes and readme which was rendered as inline code.
Markdown is one of the best tools for taking `notes` and creating `readme` files.
Add Code Block Syntax Highlighting
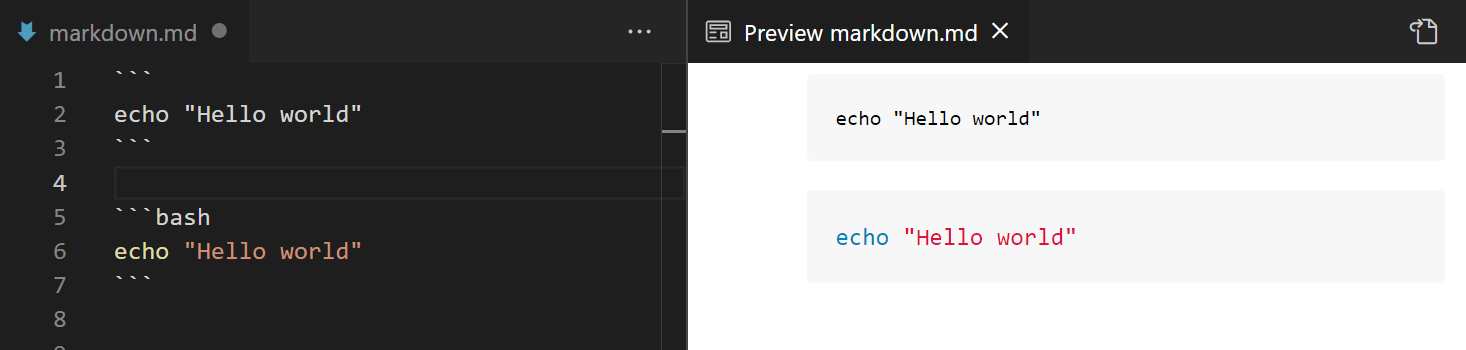
Add tabs or 4 spaces and place your code to render it as a code block. Alternatively, place your code between three backticks to make the block to be rendered as a code block. The important feature to be noted here is syntax highlighting. Normally when you place the code within the block there is no color scheme applied to it.
```
echo "Hello world"
```
Now look at the same example, the color scheme is applied automatically. This is possible by adding the programming language name after three backticks which will apply the color scheme to the code.
```bash
echo "Hello world"
```
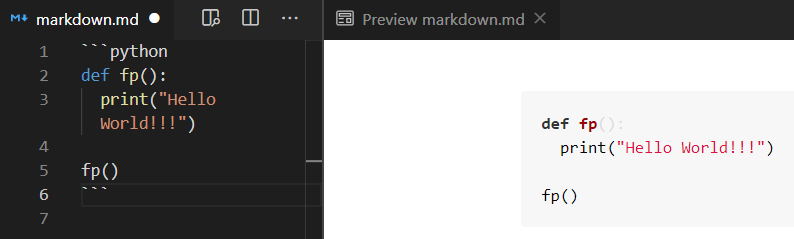
Sample python code.
```python
def fp():
  print("Hello World!!!")
fp()
```
Sample SQL query.
```sql
SELECT MAX(SALARY_EMP) FROM EMPLOYEE_TABLE
WHERE SALARY_EMP<(SELECT MAX(SALARY_EMP) FROM EMPLOYEE_TABLE)
```

Create Ordered and Unordered Lists
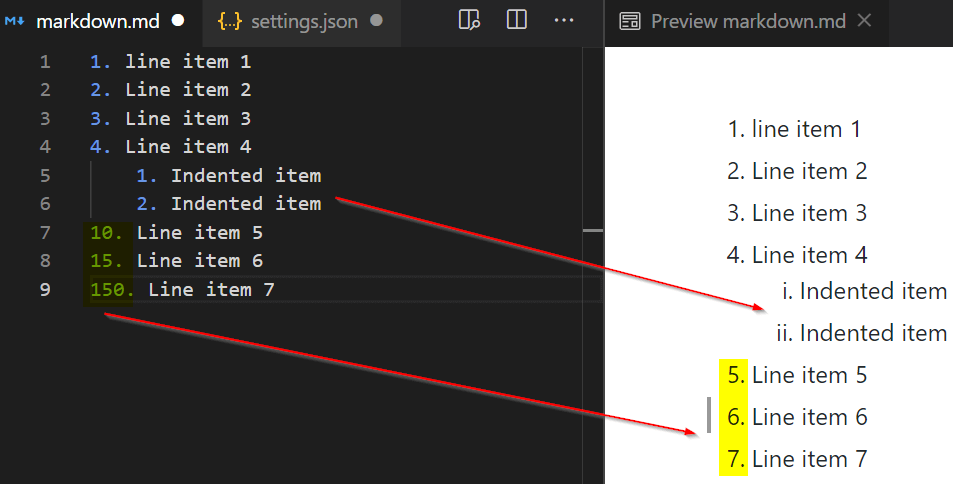
Items can be organized into ordered lists and unordered lists in markdown. To create an ordered list, add numbers followed by a period. The interesting part to note here is number need not be sequential. Markdown engine is smart enough to understand that it is an ordered list even if we do the non-sequential ordering.
In the below example, you can see I created an ordered list with non-sequential ordering (10, 15, 150) but the markdown engine renders it in proper ordering. You can also create a nested list as shown in the image.
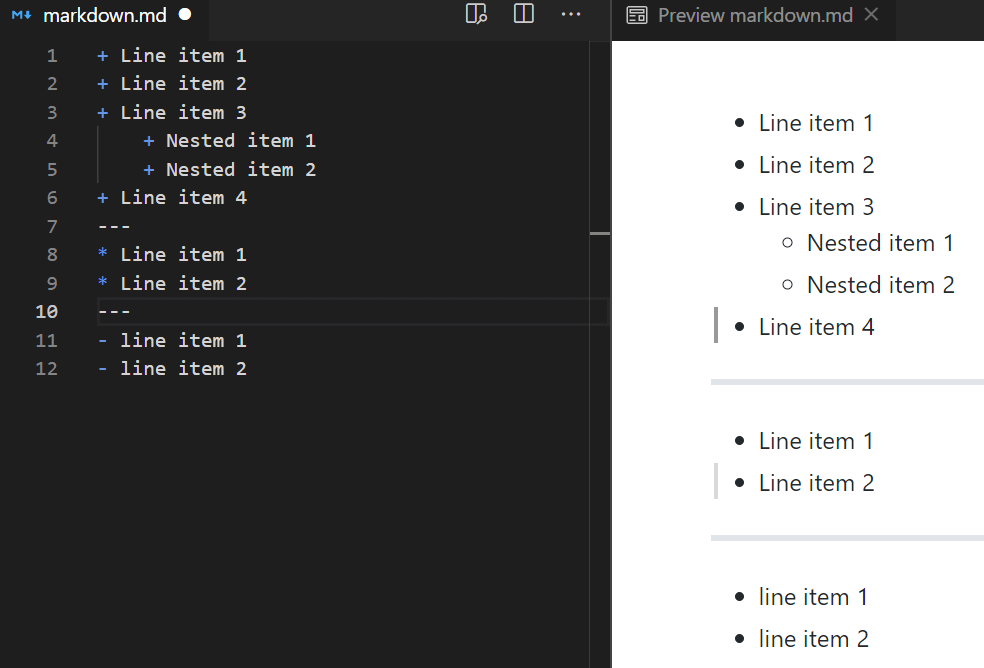
To create unordered list use plus sign (+) asterisks (*) or dash (-) followed by a space and content of the list. Similar to the ordered list you can create a nested list here too.
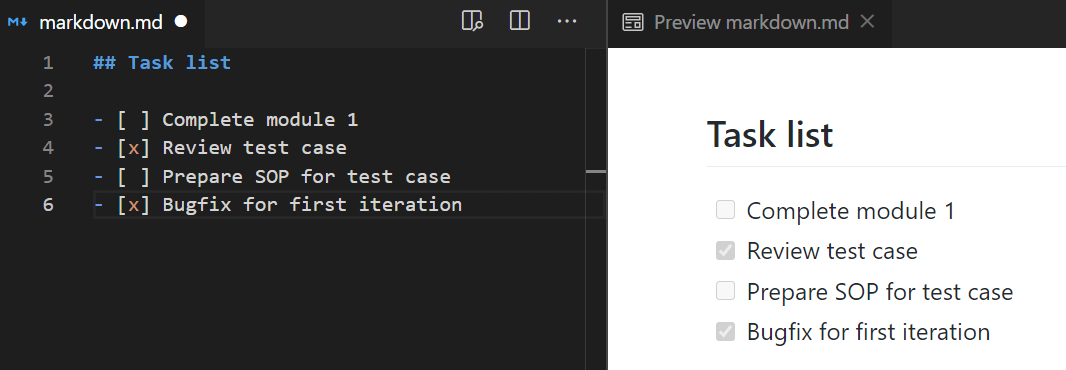
Create Task List
This is a special feature of GFM. You can create a task list as shown in the below image. To mark the task as completed, you have to add ‘x’ between square braces as shown in the image.
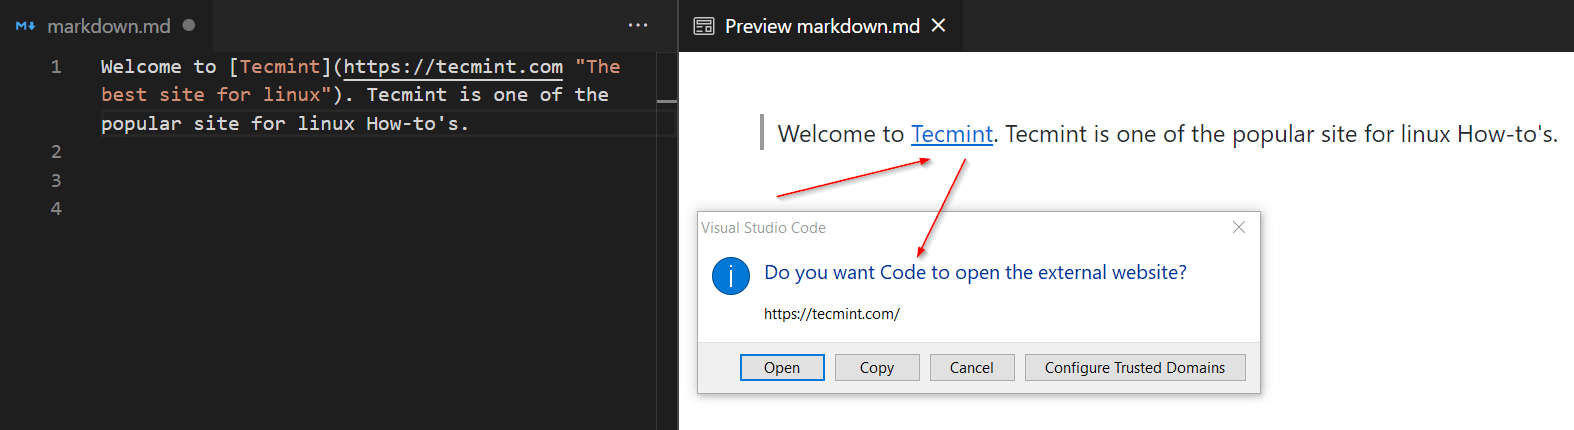
Add Links to Text
To add a link, follow the below syntax.
[Tecmint](https://tecmint.com "The best site for Linux")
Let’s break down the syntax into 3 parts.
- Text to be displayed – This is the text that will be placed inside square braces ([Tecmint]).
- Link – you will place the actual link inside the parenthesis.
- Title – When you hover your mouse over the text it will show a tooltip for the link. The title should be placed within quotes as shown in the image.
From the below image you can see “Tecmint” is my display text and when I click that it will redirect me to “Tecmint.com”.
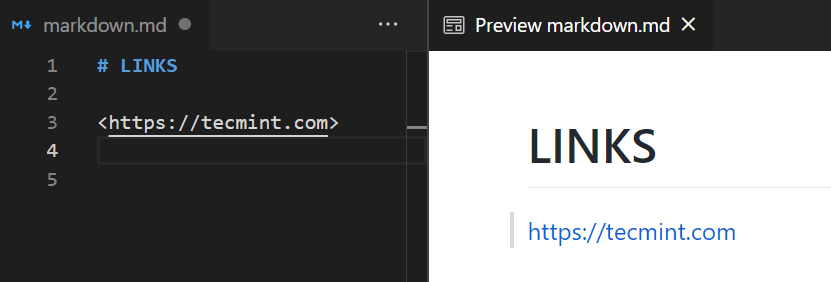
You can also create links by placing them inside angle brackets < >.
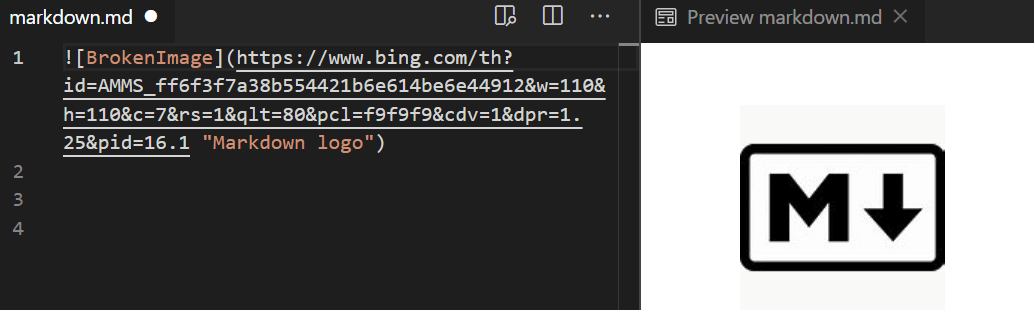
Add Links to Images
The syntax for the image looks similar to adding links. To add an image, follow the below syntax.

Let’s break down the syntax into 3 parts.
- Alternate text – Alternate text will be placed between square brackets (![alt-text]). If an image is broken or not able to load this text will be displayed along with a broken symbol.
- Link – Inside the brackets, you will place the actual link to the image.
- Title – When you hover your mouse over the image it will show the name of the image. The title should be placed within quotes as shown in the image.
You can also create a link with images. When a user clicks the image it will be redirected to an external link. The syntax remains the same with few modifications. Surround the same syntax we used to insert an image within square brackets followed by a link inside the parenthesis.
[](https://en.wikipedia.org/wiki/Markdown)
Create a Table
Tables are not supported in the original flavor of markdown. It is one of the special features that come with GFM. Let’s see how to build a table in a step-by-step manner.
The first part is to create column names. Column names can be created by separating them with pipes (|).
| EMPLOYEE_NAME | EMPLOYEE_AGE | EMPLOYEE_ID |
On the second line, use dashes (-) in combination with a colon (:). Dashes tell the markdown engine that this is to be rendered as a table and the colon decides whether our text should be center, left, or right-aligned.
| EMPLOYEE_NAME | EMPLOYEE_AGE | EMPLOYEE_ID |
|:-------------:|:-------------|------------:|

:---:  ⇒ Center alignment
:---   ⇒ Left alignment
---:   ⇒ Right alignment
From the third line, you can start creating records. Records should be separated by a pipe (|).
| EMPLOYEE_NAME | EMPLOYEE_AGE | EMPLOYEE_ID |
|:-------------:|:-------------|------------:|
|  Ravi         |   30         |  127        |
|  karthick     |   27         |  128        |
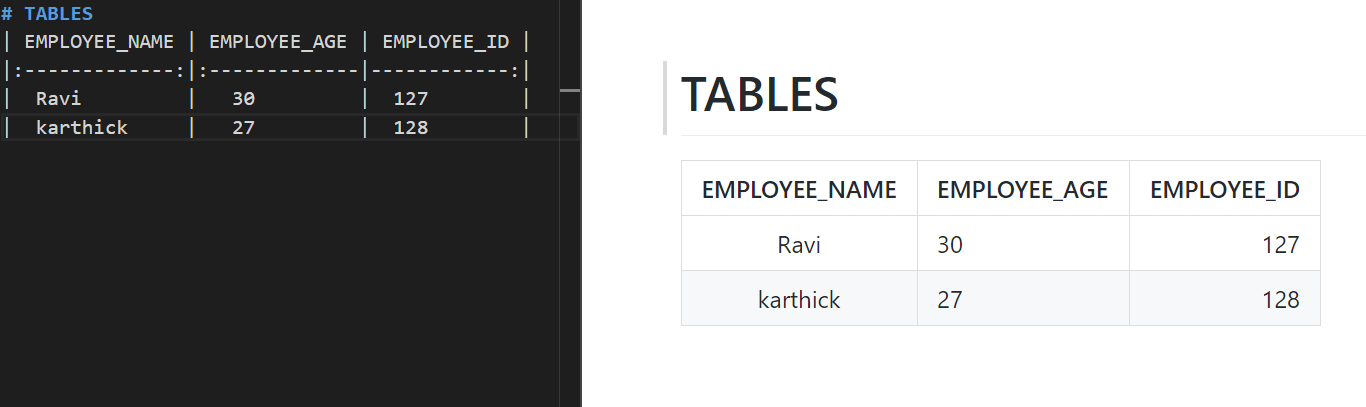
From the above image, you can see the table is rendered properly. Column 1 is center aligned, columns 2 and 3 are left and right-aligned. If you are using Vscode, you can use “Markdown Table Prettifier” to format the table neatly.
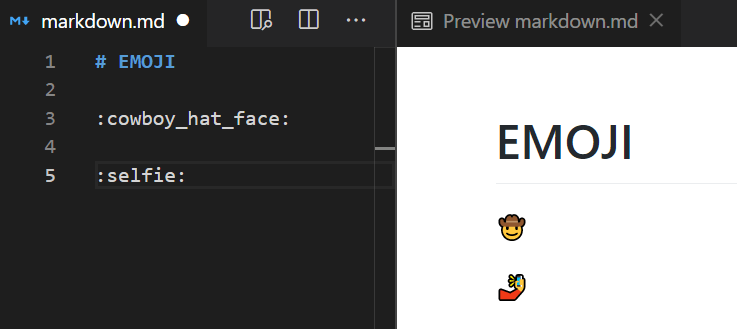
Create an Emoji
GFM supports a wide range of emojis. Take a look at the emoji cheat sheet.
That’s it for this article. If you have any feedback please post it in the comment section.