To access or work with a remote Git repository, you can either use SSH or HTTP(S) protocols; with the former, when it comes to private repositories, you can simply configure SSH keys without a passphrase which allows you to securely transfer data without typing in your username and password.
However, with HTTP(S), every connection will prompt you to enter your username and password (when Git needs authentication for a particular URL context) – Github users know this well.
In this article, we will show you how to fix Git always asking for user credentials for access over HTTP(S). We will explain different ways of preventing Git from repeatedly prompting for username and password when interacting with a remote repository over HTTP(S).
How to Install Git in Linux
If you don’t have the Git package installed on your system, run the appropriate command for your Linux distribution to install it (use the Sudo command where necessary).
$ sudo apt install git      [On Debian/Ubuntu]
# yum install git           [On CentOS/RHEL/Fedora]
$ sudo zypper install git   [On OpenSuse]
$ sudo pacman -S git        [On Arch Linux]
Entering Git Username and Password in Remote URL
As we had mentioned earlier on, when cloning a remote Git repository over HTTP(S), every connection needs a username and password as shown.

To prevent Git from asking for your username and password, you can enter the login credentials in the URL as shown.
$ sudo git clone https://username:[email protected]/username/repo_name.git
OR
$ sudo git clone https://username:[email protected]/username/repo_name.git local_folder

The main drawback of this method that your username and password will be saved in the command in the Shell history file.

as well as in the .git/config file under the local folder, which posses a security risk.
$ cat .git/config

Note: For Github users who have enabled two-factor authentication, or are accessing an organization that uses SAML single sign-on, you must generate and use a personal access token instead of entering your password for HTTPS Git (as shown in the sample outputs in this guide). To generate a personal access token, in Github, go to Settings => Developer Settings => Personal access tokens.
Saving Remote Git Repository Username and Password on Disk
The second method is to use the Git credentials helper to save your username and password in a plain file on disk as shown.
$ git config credential.helper store
OR
$ git config --global credential.helper store
From now on, Git will write credentials to the ~/.git-credentials file for each URL context, when accessed for the first time. To view the content of this file, you can use the cat command as shown.
$ cat ~/.git-credentials

For subsequent commands for the same URL context, Git will read your user credentials from the above file.
Just like the previous method, this way of passing user credentials to Git is also unsecure since the storage file is unencrypted and it is protected only by standard filesystem permissions.
The third method explained below, is considered more secure.
Caching Remote Git Repository Username and Password in Memory
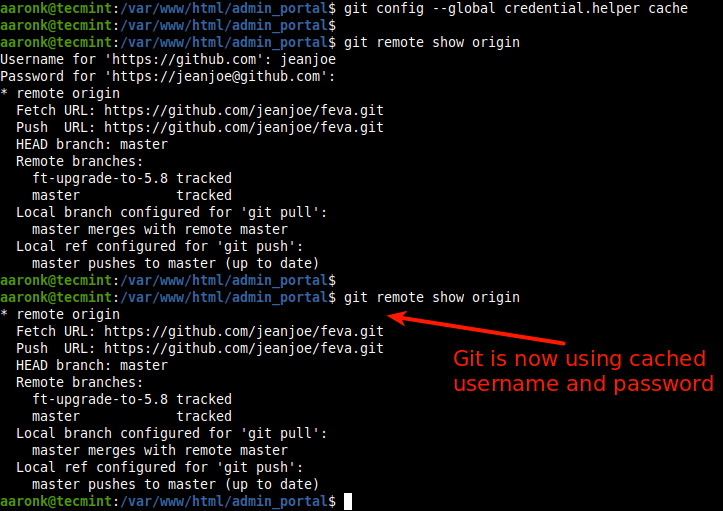
Last but not least, you can also use the Git credentials helper to temporarily save your credentials in memory for some time. To do that, issue the following command.
$ git config credential.helper cache
OR
$ git config --global credential.helper cache
After running the above command, when you try to access a remote private repository for the first time, Git will ask for your username and password and save it in memory for some time.

The default caching time is 900 seconds (or 15 minutes), after which Git will prompt you to enter your username and password again. You can change it as follows (1800 seconds = 30 minutes or 3600 seconds = 1hour).
$ git config --global credential.helper 'cache --timeout=18000'
OR
$ git config --global credential.helper 'cache --timeout=36000'
For more information on Git and credentials helpers, see their man pages.
$ man git
$ man git-credential-cache
$ man git-credential-store
Was this guide helpful? Let us know via the feedback form below. You can as well share any questions or thoughts about this topic.


