When systems encounter issues, as they sometimes will, you need to know your way around the problem and restore them back to a normal and functioning state. In this section, we focus on fundamental network troubleshooting skills that any Linux systems administrator should have.
Fundamental Understanding of Network Troubleshooting
In most cases, there is a wide gap between network admins and sysadmins. Sysadmins lacking network visibility will usually blame network administrators for outages and downtimes while network admins will insufficient server knowledge will often turn the blame of sysadmins for endpoint device failure. However, the blame game doesn’t help solve problems and in a work environment, this can antagonize relationships between colleagues.
As a sysadmin, having a fundamental understanding of network troubleshooting will help resolve issues faster and help promote a cohesive working environment. It’s for this reason that we have put together this section to highlight some of the basic network troubleshooting tips that will come in handy when diagnosing network-related problems.
A Recap of the TCP / IP Model
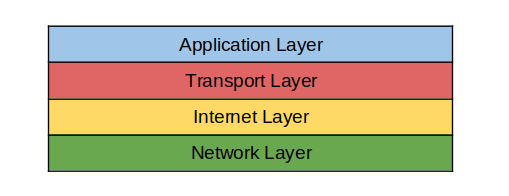
In our previous topic of the LFCA series, we looked at the TCP/IP conceptual model that shows the transmission of data in a computer and the protocols that are found in each layer.
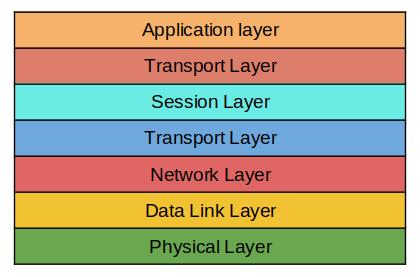
Another equally important conceptual model is the OSI model (Open Systems Interconnection) model. It’s a 7 layer TCP/IP framework that breaks down a networking system, and computing functions as every layer.
In the OSI model, these functions are segmented into the following layers starting from the bottom. Physical Layer, Data Link Layer, Network Layer, Transport Layer, Session Layer. Presentation Layer, & finally Application Layer at the very top.
It is impossible to talk about network troubleshooting without making reference to the OSI model. For this reason, we will walk you through each layer and find out the various network protocols used and how to troubleshoot faults associated with every layer.
Layer 1: Physical Layer
This is probably one of the most overlooked layers, yet it’s one of the most essential layers required for any communication to take place. The Physical layer encompasses the physical PC networking components of a PC such as network cards, Ethernet cables, optical fibers, etc. Most problems begin here and are mostly caused by:
- Unplugged network/ethernet cable
- Damaged network/ethernet cable
- Missing or damaged network card
In this layer, the questions that come to mind are:
- “Is the network cable plugged in?”
- “Is the physical network link up?”
- “Do you have an IP address?”
- “Can you ping your default gateway IP?”
- “Can you ping your DNS server?”
To check the status of your network interfaces, run the ip command:
$ ip link show
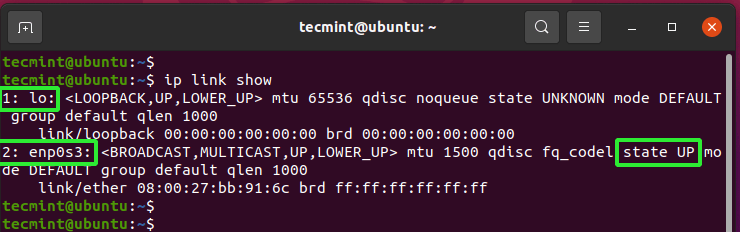
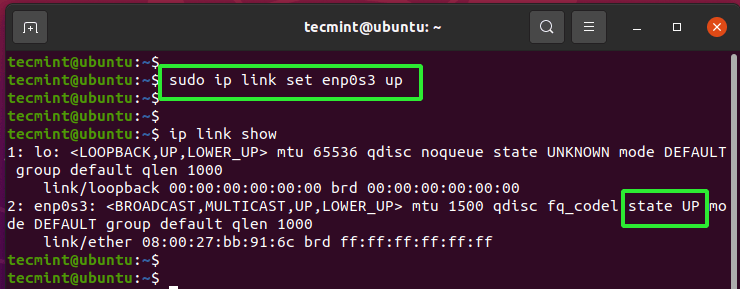
From the output above, We have 2 interfaces. The first interface – lo – is the loopback address and is usually not used. The active network interface that provides connectivity to the network and the internet is the enp0s3 interface. We can see from the output that the state of the interface is UP.
If a network interface is down, you will see the state DOWN output.
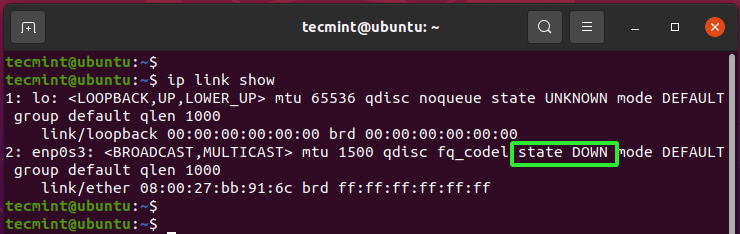
If that is the case, you can bring the interface up using the command:
$ sudo ip link set enp0s3 up
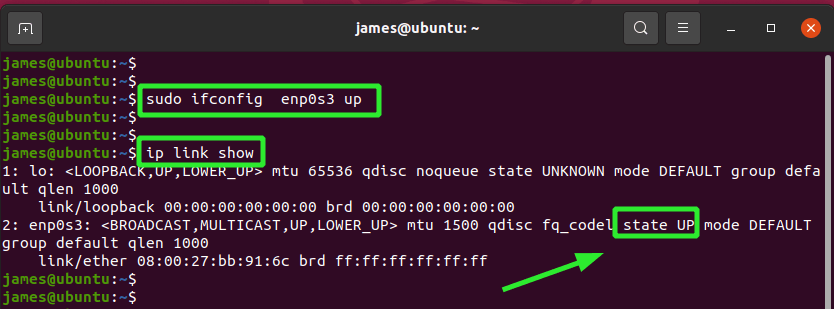
Alternatively, you can run the ifconfig command shown below.
$ sudo ifconfig enp0s3 up
$ ip link show
Just to confirm that your PC has picked an IP address from the router or DHCP server, run the ifconfig command.
$ ifconfig
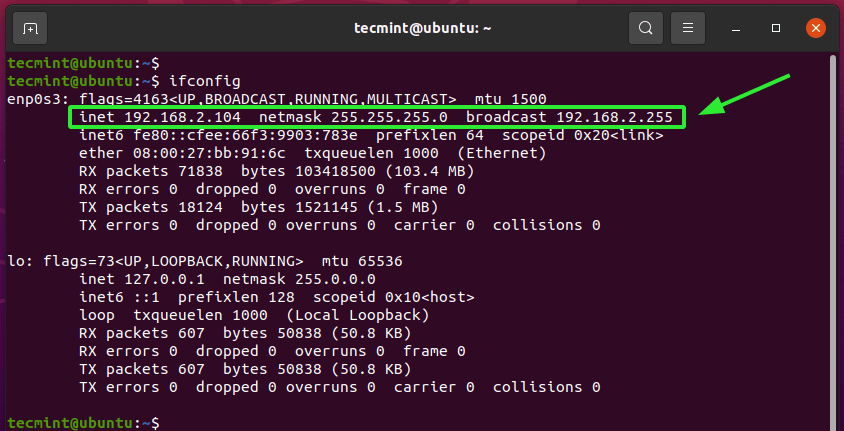
The IPv4 address is prefixed by the inet parameter as shown. For example, the IP address for this system is 192.168.2.104 with a subnet or netmask of 255.255.255.0.
$ ifconfig
Alternatively, you can run the ip address command as follows to check your system’s IP address.
$ ip address
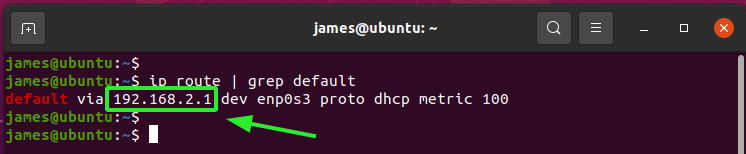
To check the IP address of the default gateway, run the command:
$ ip route | grep default
The IP address of the default gateway, which in most cases is the DHCP server or router, is indicated as shown below. In an IP network, you should be able to ping the default gateway.
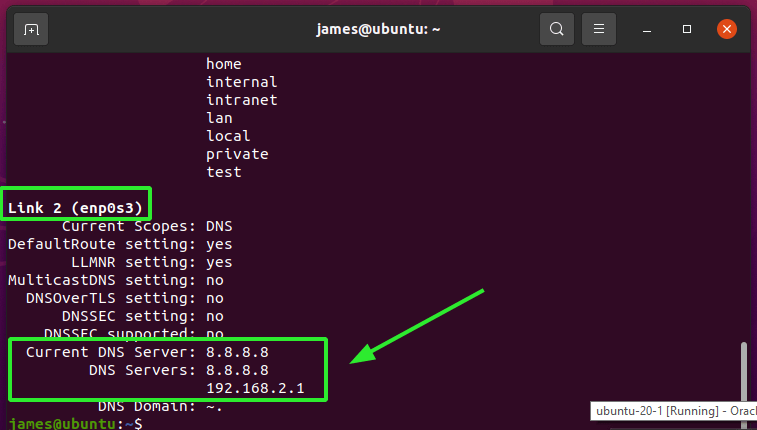
To check the DNS servers you are using, run the following command on systemd systems.
$ systemd-resolve --status
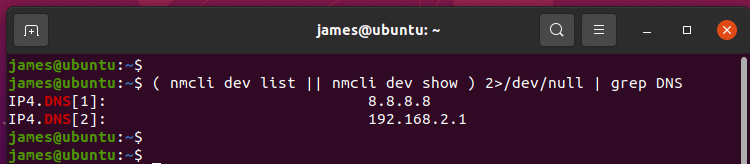
A better way to check the DNS servers in use is to run the nmcli command shown
$ ( nmcli dev list || nmcli dev show ) 2>/dev/null | grep DNS
As you have observed, quite a huge chunk of network troubleshooting happens here.
Layer 2: Data Link Layer
Essentially, the data link layer determines the data format on the network. This is where the communication of data frames between hosts takes place. The predominant protocol in this layer is the ARP ( Address Resolution Protocol).
ARP is responsible for discovering link-layer addresses and performs mapping of IPv4 addresses on layer 3 to MAC addresses. Usually, when a host contacts the default gateway, chances are that it already has the host’s IP, but not the MAC addresses.
The ARP protocol bridges the gap between layer 3 and layer 2 by translating the 32-bit IPv4 addresses on layer 3 to 48-bit MAC addresses on layer 2 and vice-versa.
When a PC joins a LAN network, the router ( default gateway ) assigns it an IP address for identification. When another host sends a data packet destined to the PC to the default gateway, the router requests ARP to look out for the MAC address that goes with the IP address.
Every system has its own ARP table. To check your ARP table, run the command:
$ ip neighbor show

As you can notice, the router’s MAC address is populated. If there’s a resolution problem, the command returns no output.
Layer 3: Network / Internet Layer
This is the layer that you exclusively work with IPv4 addresses that are familiar with system administrators. It provides multiple protocols such as ICMP and ARP which we have covered and others such as RIP (Routing Information Protocol).
Some of the common problems include device misconfiguration or problems with network devices such as routers and switches. A good place to start troubleshooting is to check if your system has picked an IP address as follows:
$ ifconfig
Also, you can use the ping command to check internet connectivity by sending an ICMP echo packet to Google’s DNS. The -c flag denotes the number of packets being sent.
$ ping 8.8.8.8 -c 4
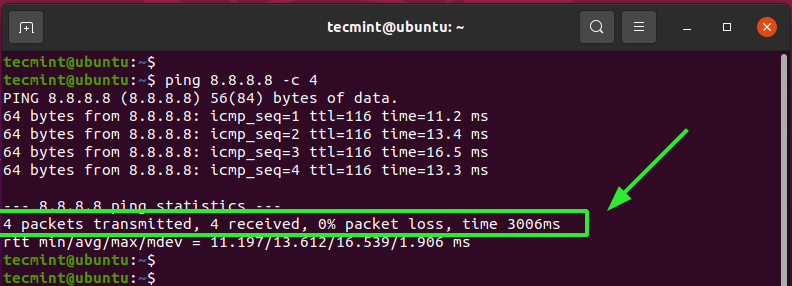
The output shows a positive reply from Google’s DNS with zero packet loss. If you are having an intermittent connection, you can check which point the packets are being dropped using the traceroute command as follows.
$ traceroute google.com
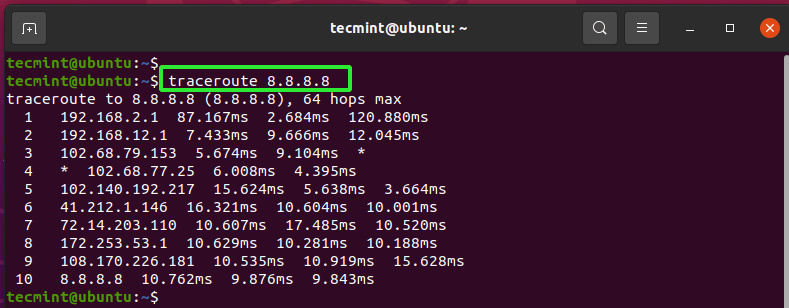
The asterisks indicate the point at which packets are being dropped or lost.
The nslookup command queries the DNS to obtain the IP address associated with a domain or hostname. This is referred to as the Forward DNS lookup.
For example.
$ nslookup google.com
The command reveals the IP addresses associated with the google.com domain.
Server:		127.0.0.53
Address:	127.0.0.53#53

Non-authoritative answer:
Name:	google.com
Address: 142.250.192.14
Name:	google.com
Address: 2404:6800:4009:828::200e
The dig command is yet another command used for querying DNS servers associated with a domain name. For example, to query the DNS nameservers run:
$ dig google.com
Layer 4: Transport Layer
The transport layer handles data transmission using TCP and UDP protocols. Just to recap, TCP is a connection-oriented protocol while UDP is connectionless. Running application listen on sockets which comprise of ports and IP addresses.
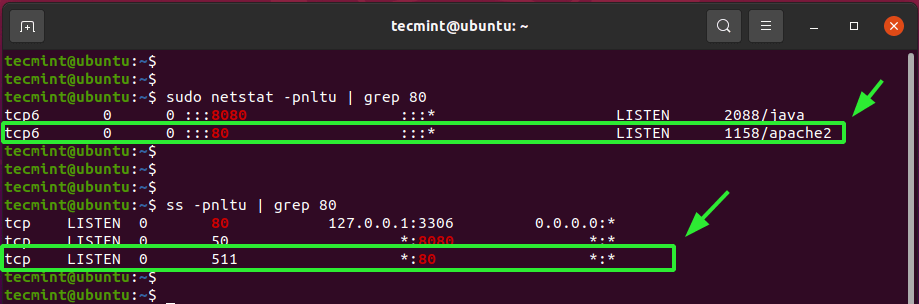
Common problems that may occur including blocked TCP ports which may be required by applications. If you have a web server and you want to verify its running state, use the netstat or ss command to check if the web service is listening to port 80
$ sudo netstat -pnltu | grep 80
OR
$ ss -pnltu | grep 80
Sometimes a port may be in use by a running service in the system. If you want another service to use that port, you may be forced to configure it to use a different port.
If you are still having problems, check the firewall and verify if the port you are interested in is blocked.
Most of the troubleshooting will happen across these 4 layers. Very little troubleshooting is done in the session, presentation, and application layers. This is because they play a less active role in the functioning of a network. However, let’s quickly have an overview of what happens in those layers.
Layer 5: Session Layer
The session layer opens communication channels referred to as sessions and ensures that they remain open during data transmission. It also closes then once the communication is terminated.
Layer 6: Presentation Layer
Also known as the syntax layer, the presentation layer synthesizes data to be used by the application layer. It spells out how devices should encrypt, encode and compress data with the objective of ensuring it is well received on the other end.
Layer 7: Application Layer
Lastly, we have the application layer which is the closest to the end-users and allows them to interact with the application software. The application layer is rich with protocols such as HTTP, HTTPS, POP3, IMAP, DNS, RDP, SSH, SNMP, and NTP to mention a few.
Conclusion
When troubleshooting a Linux system, the layered approach using the OSI model comes highly recommended, starting from the bottom layer. This gives you insights into what’s going wrong and helps you to narrow down to the problem.


Hi,
Thanks a lot for this great article with a clear explanation…
Thanks, Jalal. You are most welcome.