You’ve finally made the bold decision to make a switch from Windows 10 to CentOS 7, which is a cool decision by the way. You may have tried running CentOS 7 as a virtual machine or you may have tried it out using a CentOS 7 Live CD and now, you are ready to install it on your hard drive without losing your Windows 10 installation.
Read Also: How to Install CentOS 7 in a USB Drive
So, how do you go about having the two bootable operating systems on the same system? This guide will take you through a step-by-step procedure on how to dual boot Windows 10 with CentOS 7.
Before proceeding, you need to take note of the following:
- Dual-booting any Linux distribution (not just CentOS 7) will not slow down your Windows system. The two operating systems will be independent of each other and will not impact each other.
- In a dual boot setup, you can only use one operating system at a time. During the booting process, you will be presented with a list of operating systems to choose from by the boot loader.
Before we begin, let’s take note of a few safety guidelines:
- Ensure you back up all your data in the Windows system. This is crucial so that in case of any mishaps or accidental formatting of the hard drive, you will still have your data intact.
- It’s prudent to a have a Windows repair disk in case the Windows installation gets messed up and you cannot boot into it.
NOTE: In this tutorial, you are installing CentOS 7 on a PC with Windows 10 already installed and not the other way around.
Prerequisites:
Before you begin with the installation, perform a flight check and ensure you have the following:
- An installation media – 8 GB (or more) USB Drive or a blank DVD.
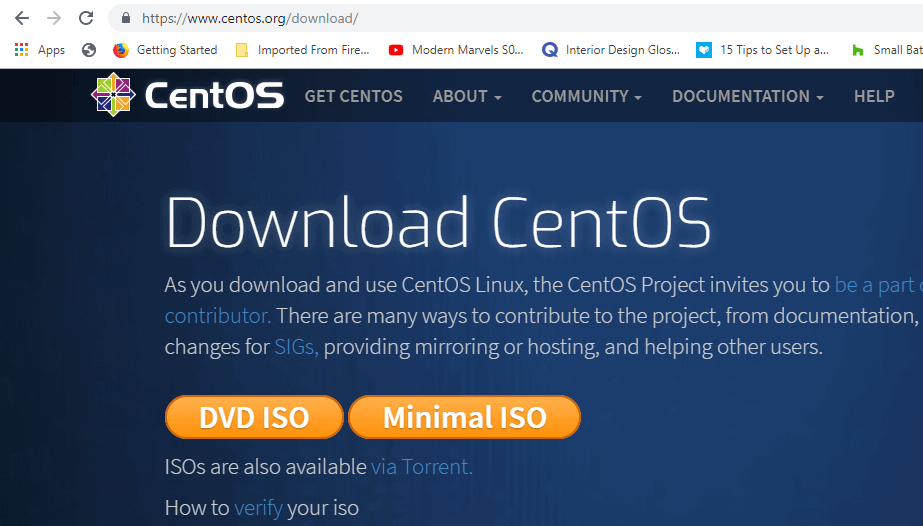
- A CentOS 7 ISO image. This can be downloaded at CentOS main website.
You can choose to download the ‘DVD ISO‘ which comes with added options of installing a Graphical User Interface and other services or you can opt for the ‘Minimal ISO‘ which comes devoid of the GUI and added features.
- A utility for making the USB bootable or burning the CentOS 7 ISO image on the DVD. In this guide, we will use Rufus tool.
Creating Bootable CentOS USB Drive
With all the requirements in place, it’s time now to create the USB drive bootable by downloading a copy of Rufus utility.
Once the download is done, double click on the installer and the Window below will be shown. Be sure to select your USB drive and the CentOS 7 ISO image.
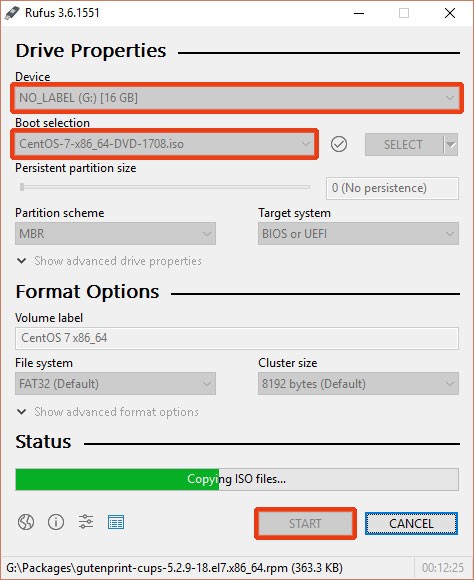
With everything in place, press the ‘START‘ button to start copying the installation files onto the USB drive.
When the process is done, remove the USB drive and connect it into a PC and reboot. Ensure to set the correct boot order in the BIOS settings so that the system first boots from the USB drive.
Save the changes and allow the system to boot.
Creating a Partition for Installing CentOS 7 on Windows 10
To successfully install CentOS 7 (or any other Linux OS), you need to set aside a free partition in one of your drives.
Press the Windows button + R to open the Run dialogue box and type.
diskmgmt.msc
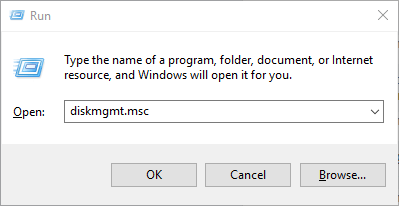
Click OK or hit ‘ENTER‘ to open the disk management Window.
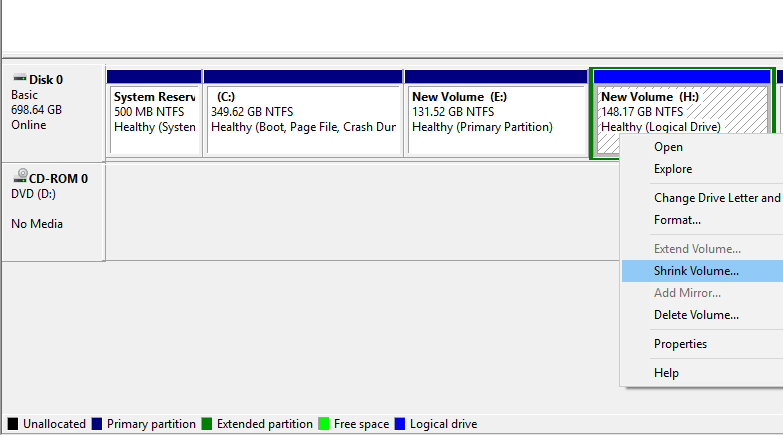
As discussed earlier, you need to create a sizable free partition for your CentOS 7 installation from one of the Windows volumes. To create a free partition, we need to shrink one of the volumes.
In this guide, we will shrink volume H as shown below.
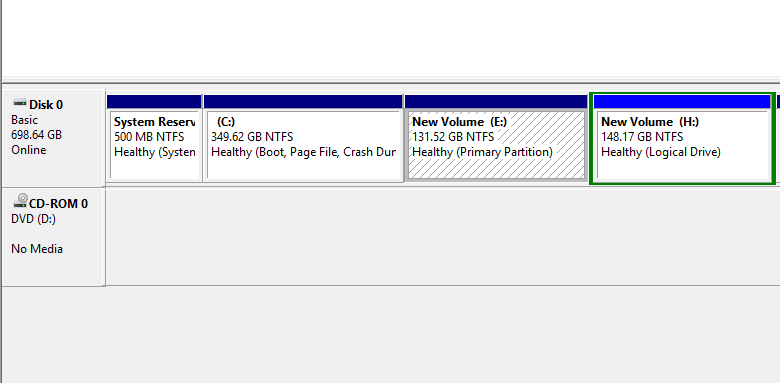
Right click on the volume and select the ‘Shrink‘ option.
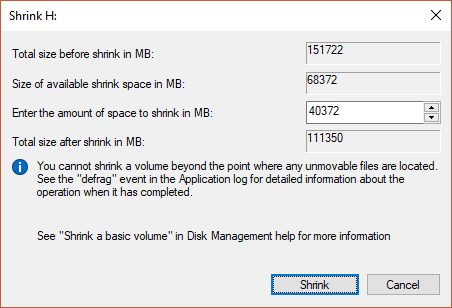
In the pop-up window that appears, specify the amount to shrink the volume in Megabytes. This will be equivalent to the size of the Free partition on which we will install CentOS 7. In the example below, we have specified 40372 Megabytes (about 40GB) for the free partition.
Click on ‘Shrink‘ to begin shrinking the partition.
After a few seconds, the Free space will be created as shown below.
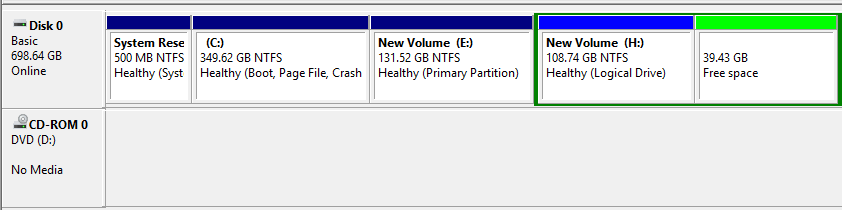
You can now close the Window.
Plug the bootable USB drive into your PC or insert the DVD media into the DVD ROM and reboot.
Be sure to set your PC to boot from your installation media from the BIOS options and save the changes.
Installing CentOS 7 Alongside Windows 10 Dual Boot
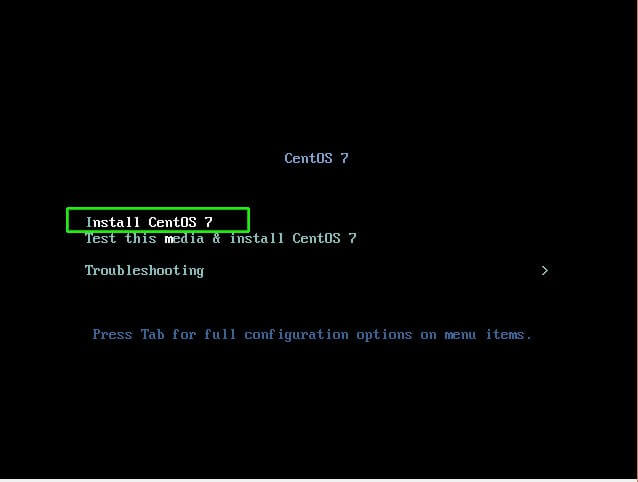
Upon rebooting, the first screen presents you with a list of choices to choose from. Select the first option “Install CentOS 7” to begin the installation process.
Select the Language
In the next step, select your preferred language and hit the ‘Continue‘ button.
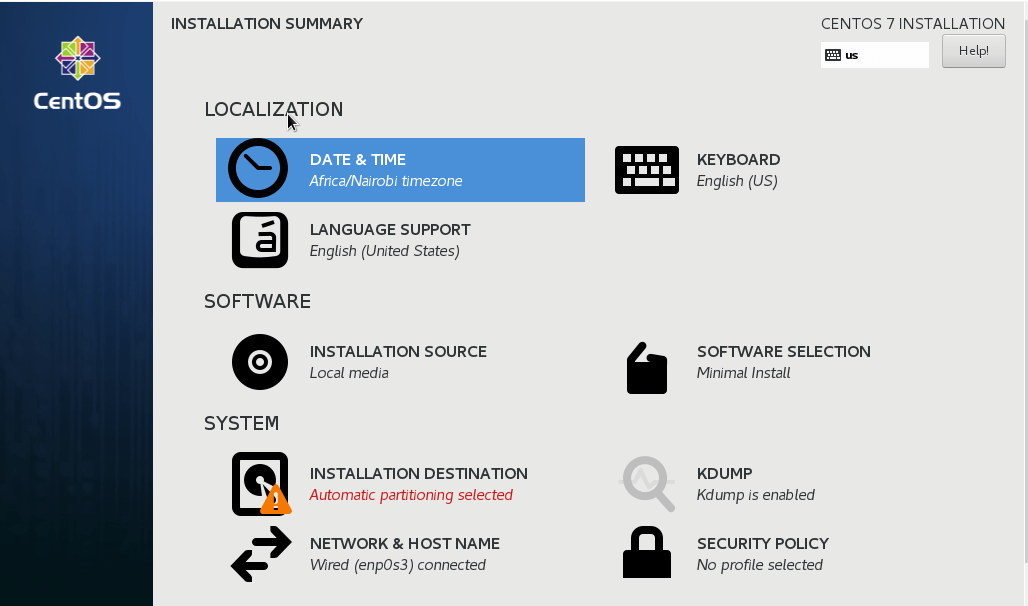
Configure the Date and Time
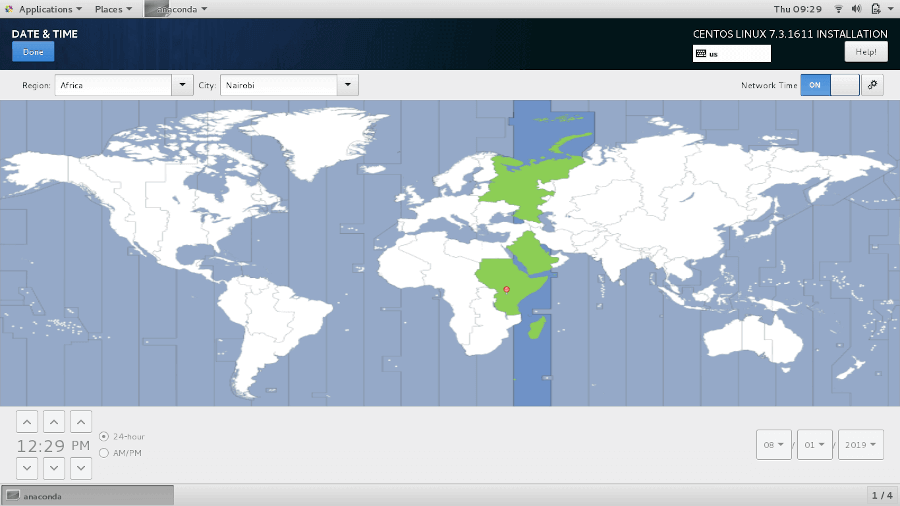
In the next page, you will be presented with the following interface with a few parameters that need to be configured. First online is the DATE & TIME configuration.
The world’s map will be displayed. Click on your current physical location on the map to set your time and hit the ‘DONE‘ button to save the changes.
This brings you back to the previous page.
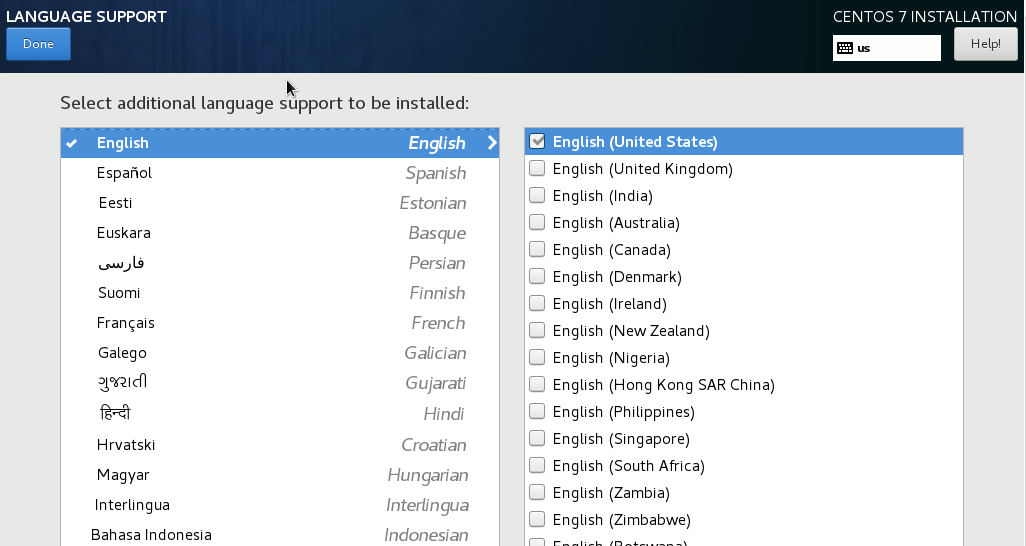
Configure Language Support
Next, click on the ‘LANGUAGE SUPPORT‘ option to configure your language settings.

Select your preferred language and as before, hit the ‘DONE‘ button to save the settings.

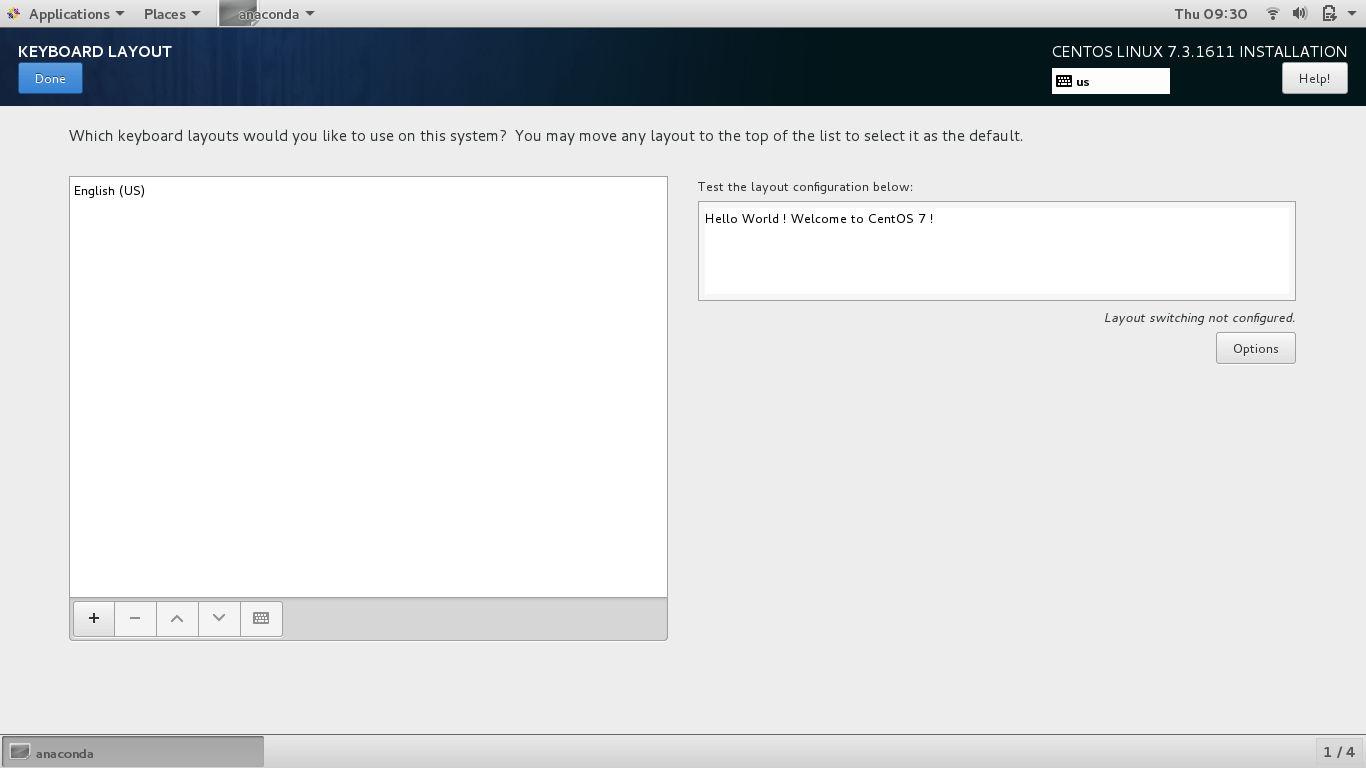
Configure Keyboard
Next online is the keyboard configuration. Click on the keyboard option.
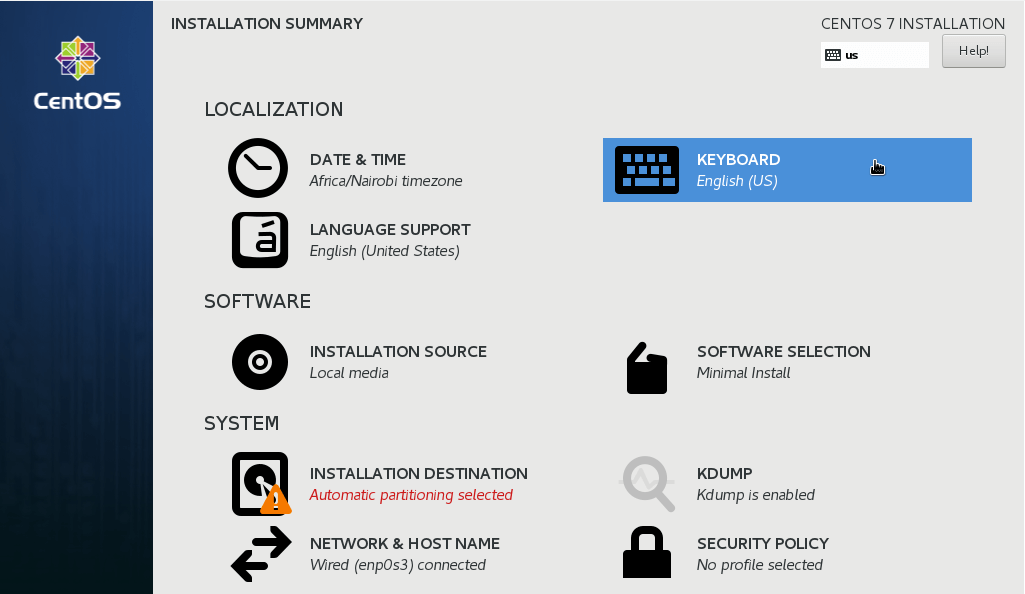
You can test the keyboard configuration and when you are satisfied with the ouputs, click on the ‘DONE‘ button as before.
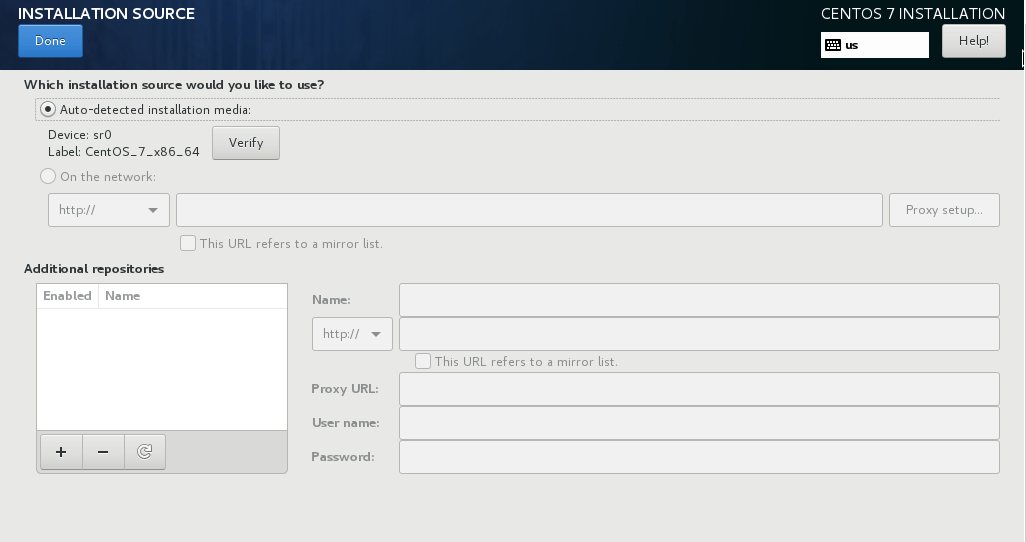
Select Installation Source
In the next step, click on ‘INSTALLATION SOURCE‘ to customize your installation using other sources other than the traditional USB/DVD.
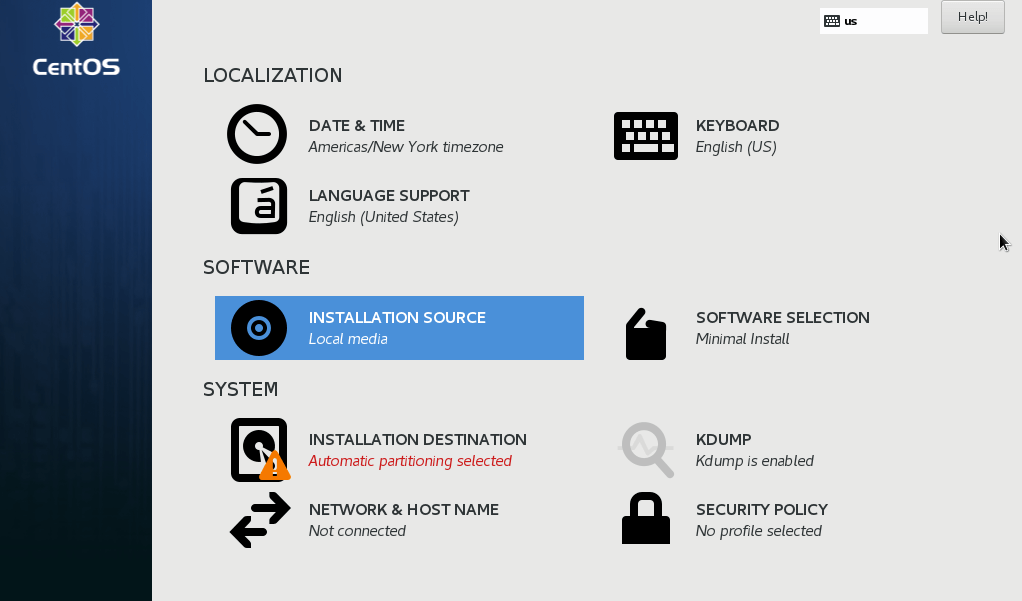
It’s recommended however to leave this option in its default setting as ‘Auto-detected installation media‘. Hit ‘DONE‘ to save the changes.
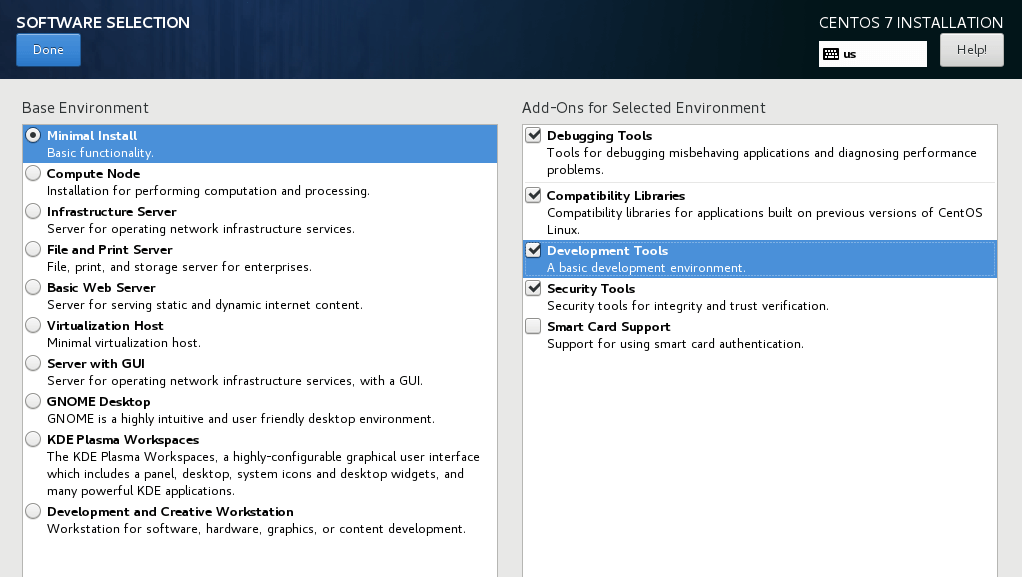
Configure Software Selection
This is the step where you will select your preferred system installation software. CentOS offers a myriad of Desktop and Server installation environments to choose from.
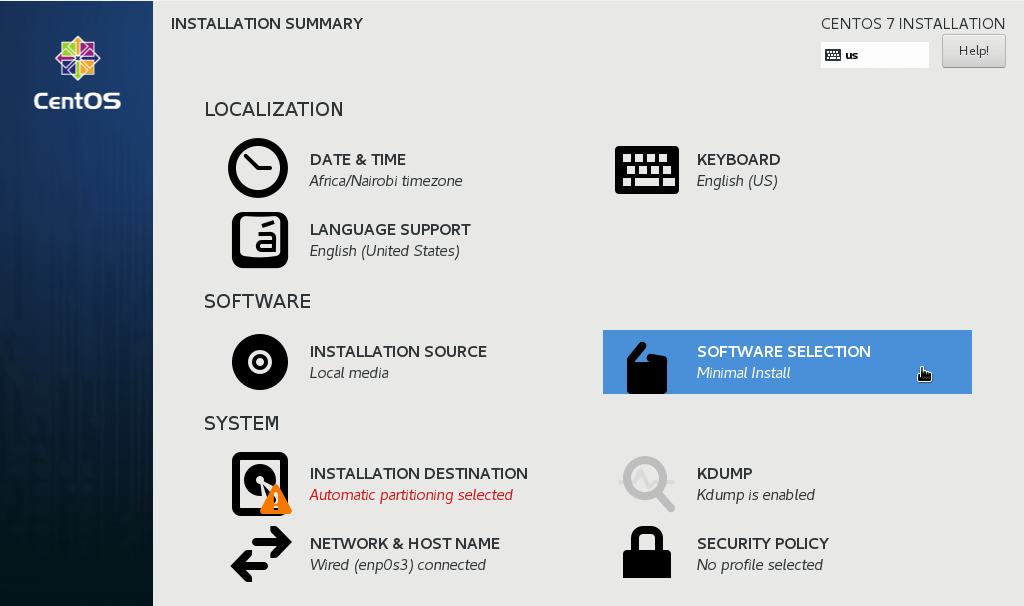
For production environments, the minimal install is preferred since it’s lightweight and lack a graphical user environment which gobbles up significant memory and CPU resources.
You may also choose to include other add-ons on the right pane. Once satisfied with your choices, Hit the ‘Done‘ button to save the changes.
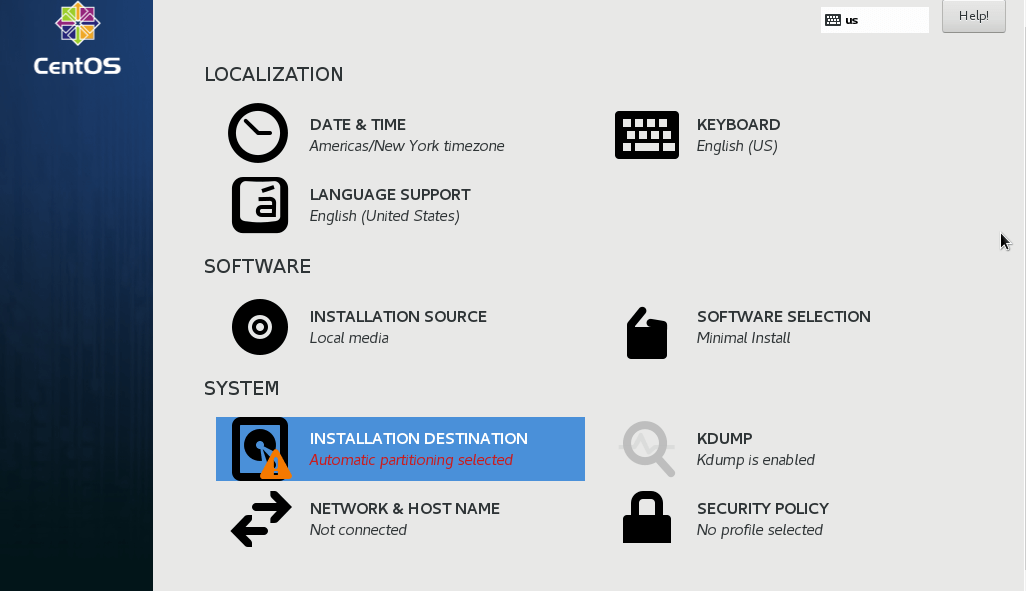
Configure Partitioning
This is the part where you configure your hard disk, Click on ‘INSTALLATION DESTINATION‘ option.
As you can see, we have our free partition which we shrunk to about 40GB. Click on it to select it and click on automatic partitioning.
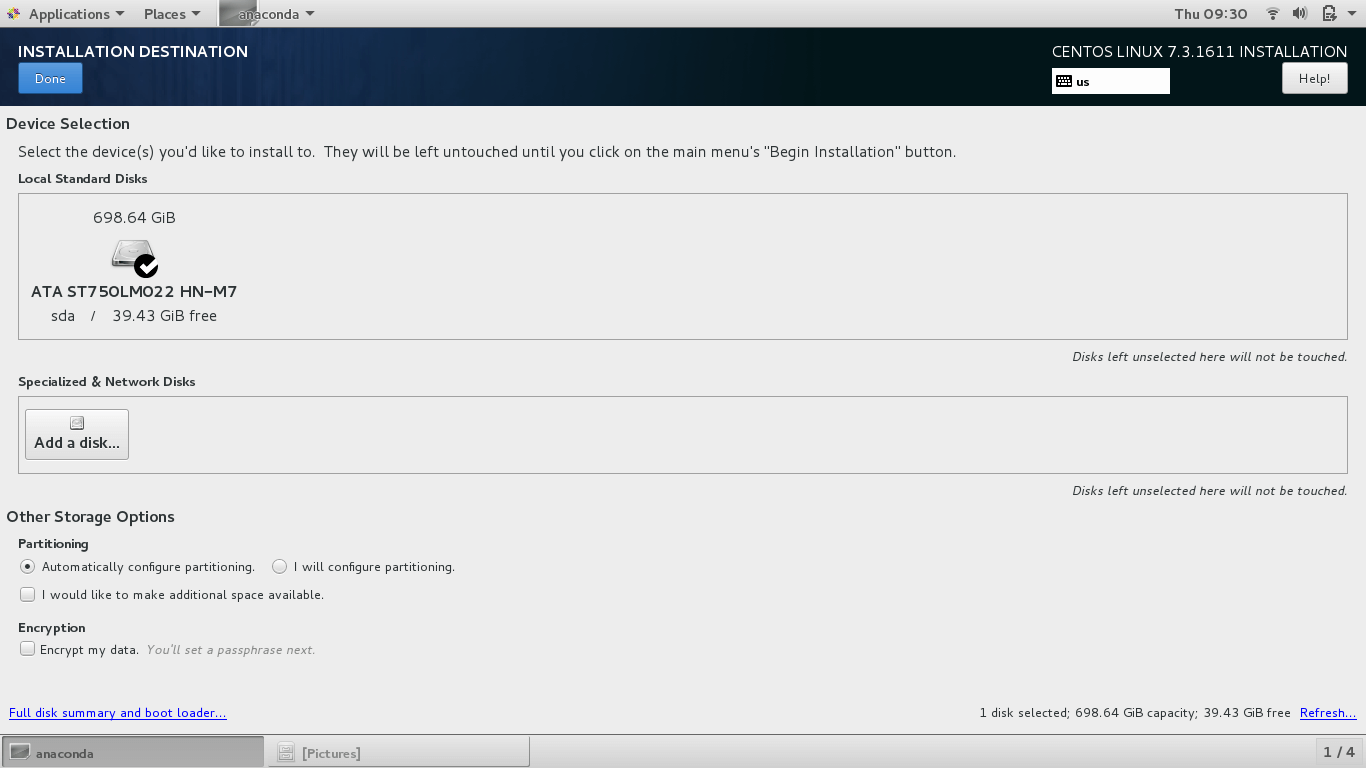
With automatic partitioning, the system automatically partitions the hard drive into the three main partitions as follows:
- The
/(root) - The
/home - The
swap
Next, click Done to save the changes and return to the previous screen.
If you want to create the partitions manually, click on the ‘I will configure partitioning‘.

Next, choose the LVM (Local Volume manager) or any other mount point. Then click on ‘Click here to create them automatically‘ option.

Other partitioning schemes you can choose from include:
- Standard Partition
- LVM Thin provisioning
- Btrfs
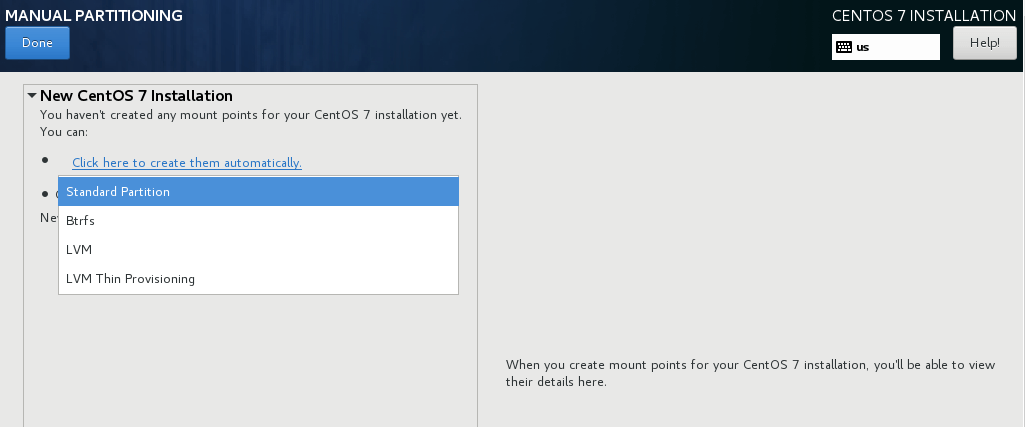
Click on LVM and click on ‘Click here to create them automatically’ option to make your work easier.
If you are still not satisfied with the results, you can use the add, remove or reload the partition scheme to start all over again using the three buttons shown below.
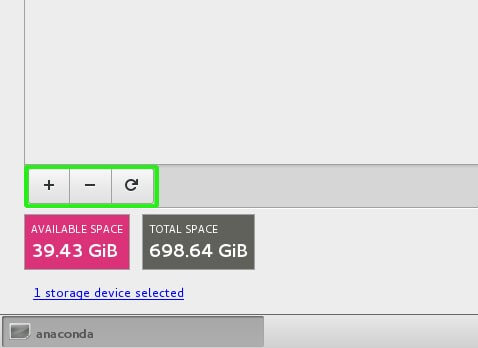
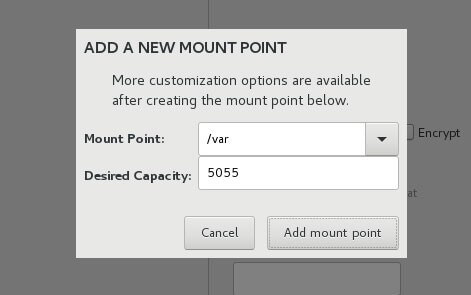
To add a new mount point, click the on plus [+] button. A pop up will appear prompting you to select the mount point type and specify the memory capacity.
To remove a mount point, click on the mount point first and then hit the minus [-] button.
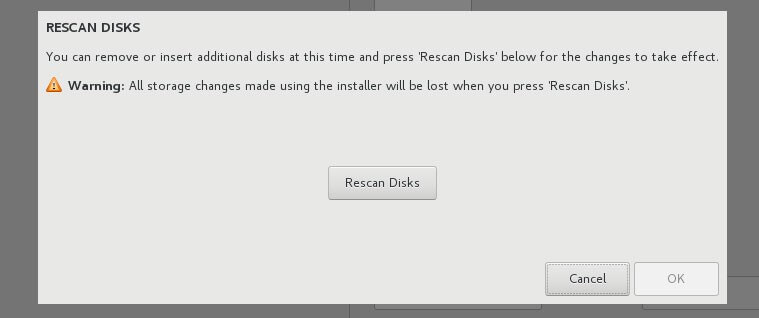
To start over all again click on the Reload button.
The display below will be displayed. Click on ‘Rescan Disks‘ and click OK to start over again with partitioning the disk.
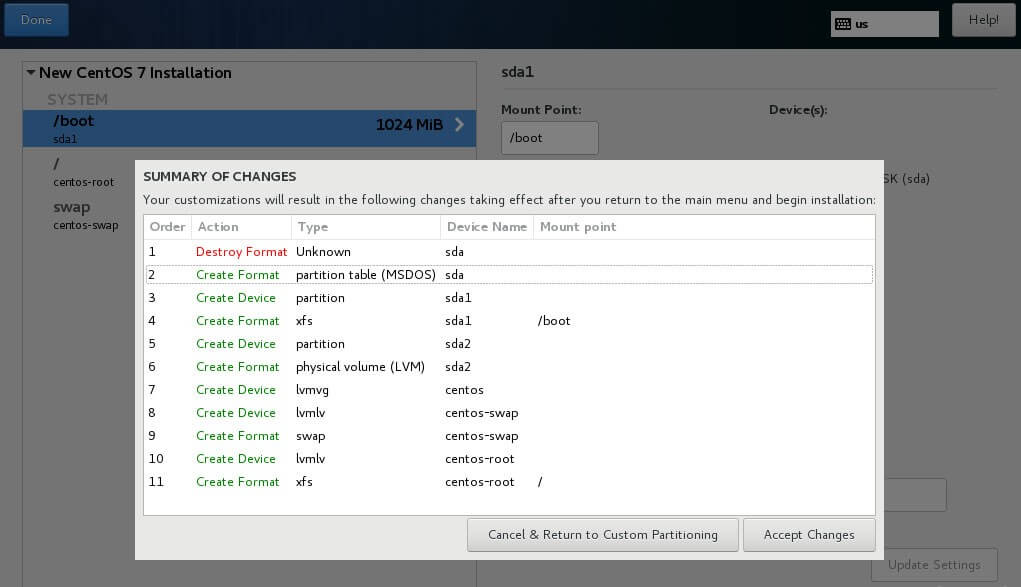
Once done, hit ‘Done‘ to save the changes.
Next, accept the summary of the changes by clicking on the ‘Accept Changes‘ button.
Configure Networking & Hostname
Next, hit the networking tab.
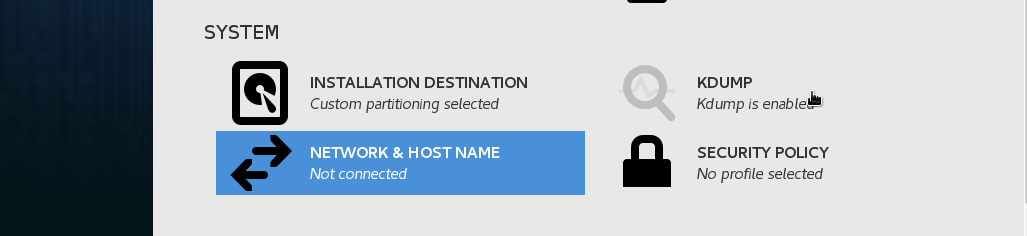
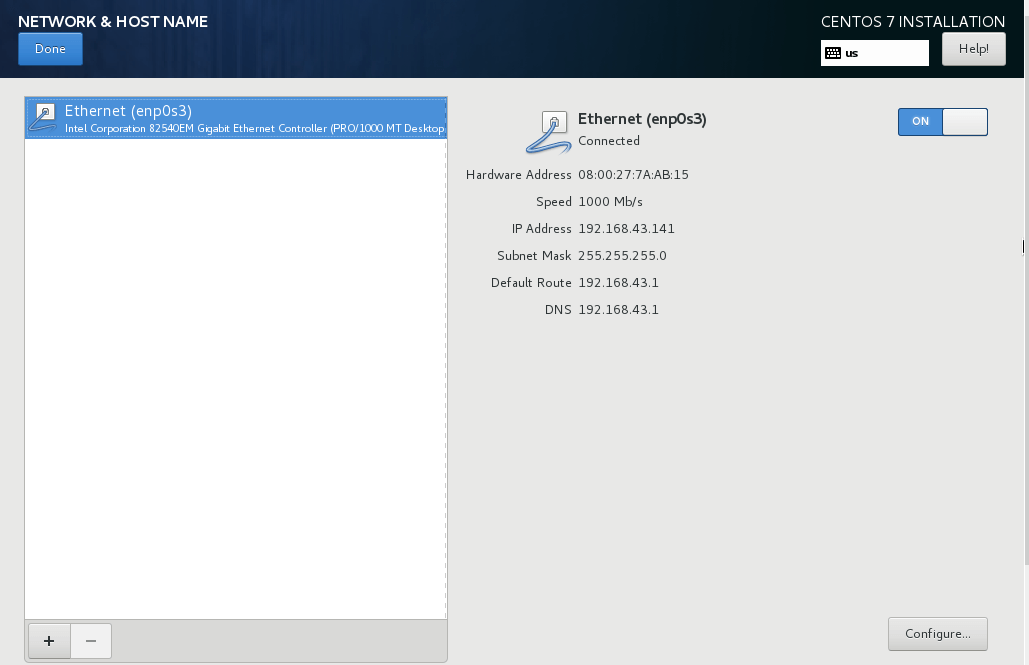
On the far right, flip the networking button 'ON'. If you are in a DHCP environment, your system will automatically pick an IP address as shown below. Next, click on the upper ‘Done‘ button.
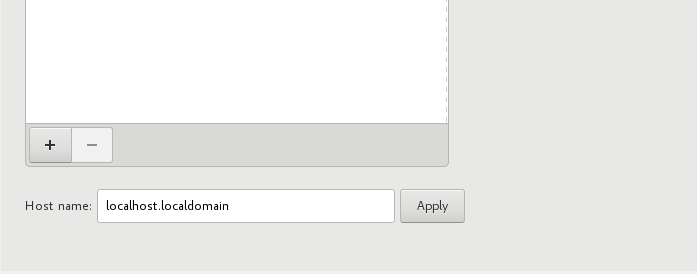
To set the hostname, scroll to the bottom and specify you preferred hostname.
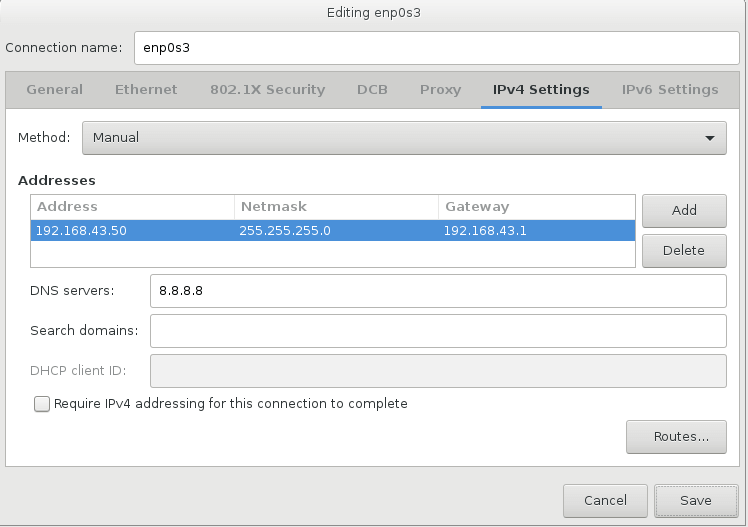
If you want to manually set your own IP address, then hit the ‘Configure button‘ at the bottom-right corner.
Head out to the IPv4 settings and enter the details about your preferred IP address, subnet mask, gateway, and DNS servers and click ‘Save‘ then click on ‘Done‘ to save the configuration.
Configure Kdump
Kdump is an advanced crash dumping mechanism. Its purpose is to create crash dumps in case of a Kernel crash. This is crucial and allows system administrators to debug the errors and determine the cause of the Linux kernel crash.
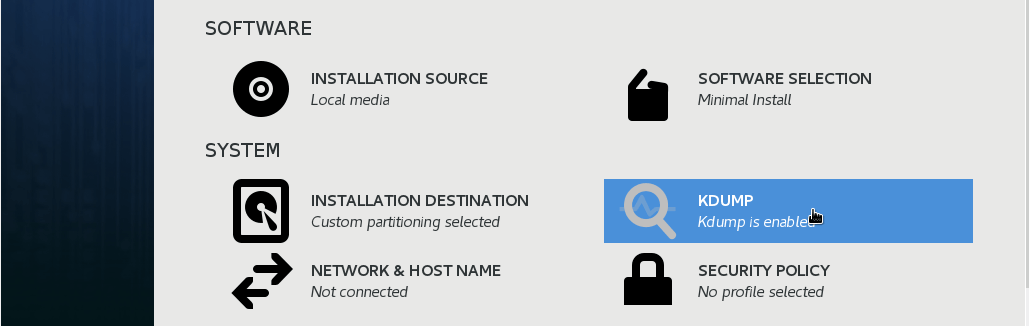
By default, Kdump is enabled, so we shall leave it the way it is.
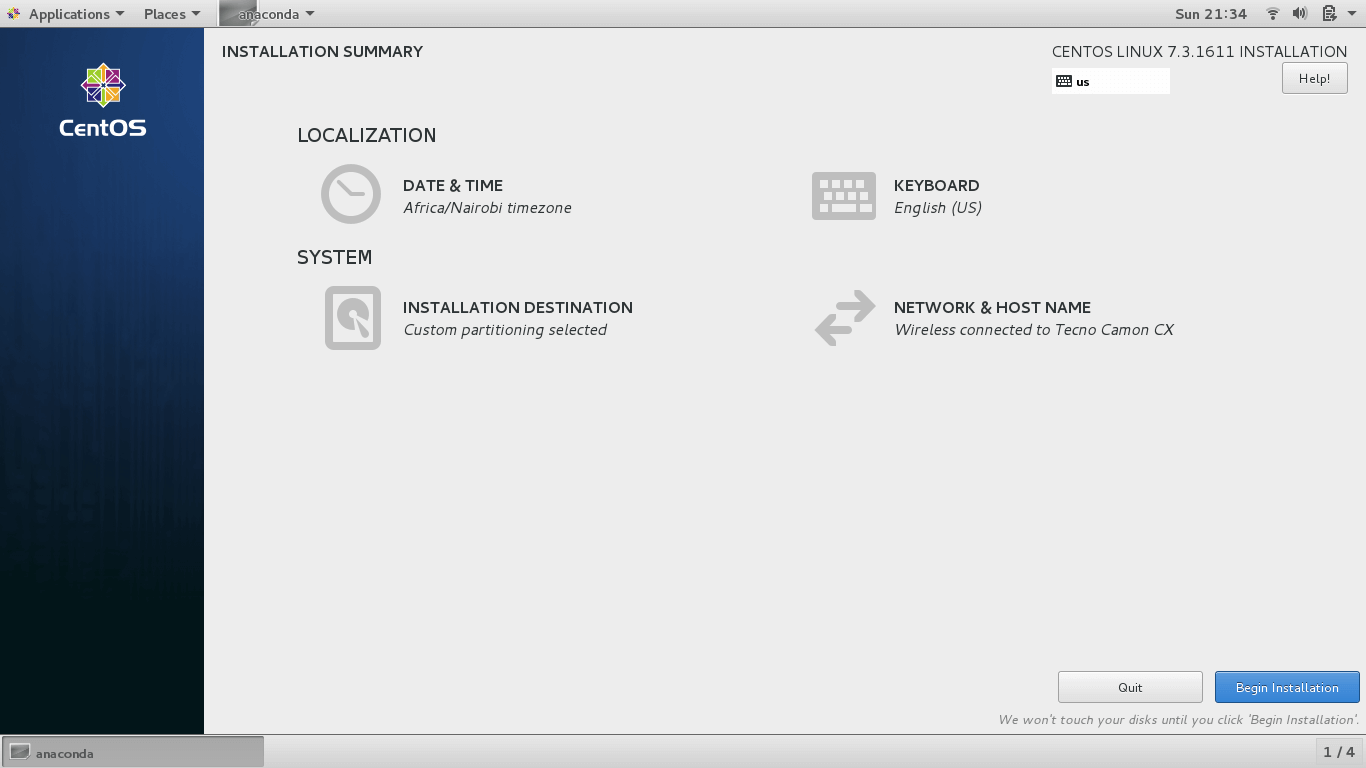
Begin CentOS 7 Installation
Now it’s time to commence the installation of the system. Click on the ‘Begin Installation‘ button.
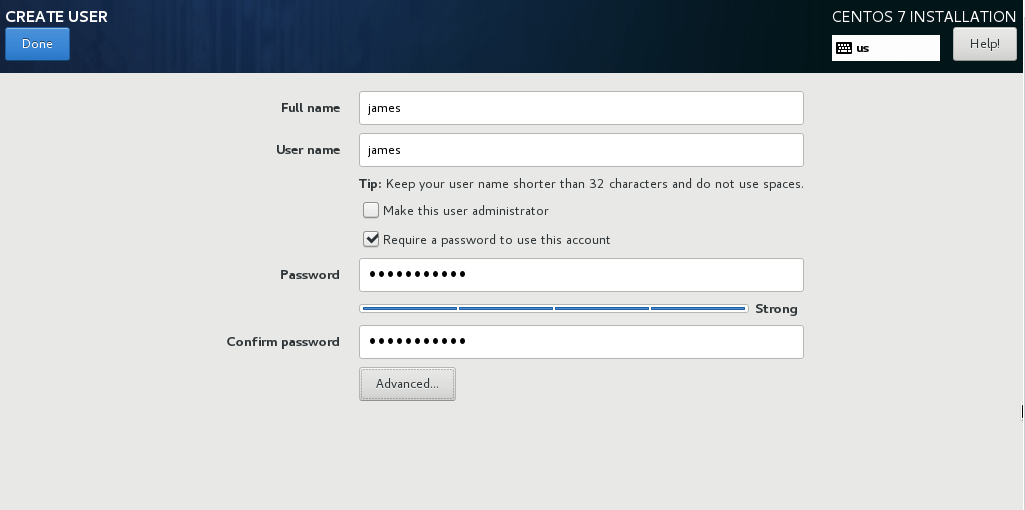
At this point, you will be required to create both the root password and a regular user in the system.
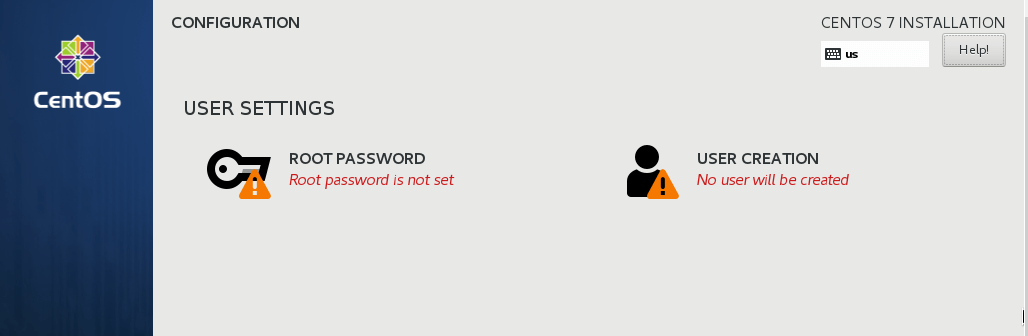
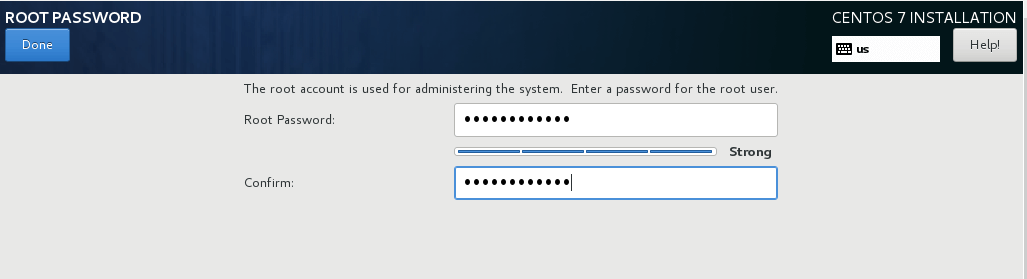
Click on ‘ROOT PASSWORD‘ to create the root password. Type a strong password and click on ‘Done‘.
Next, click on ‘USER CREATION‘ to create a New User. Fill all the required details and click on the ‘Done‘ button.
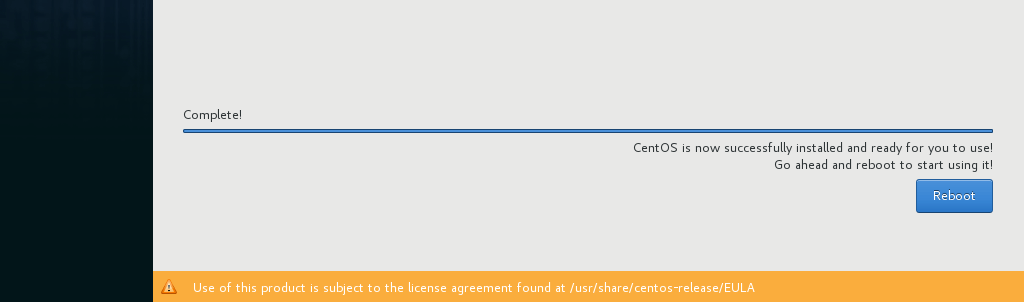
Now, sit back and relax as the installation progresses. At the very end, you will get a notification at the bottom of the progress bar that the installation was successful!
Remove the USB button and hit the ‘Reboot‘ button to restart your system.
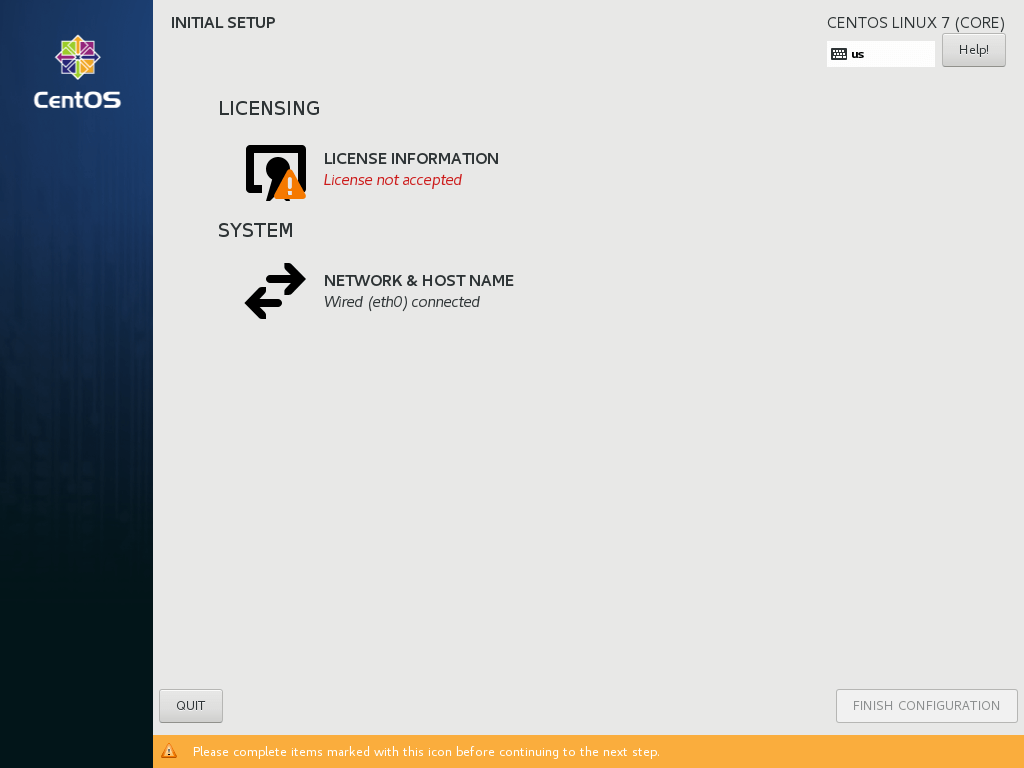
After the systems reboot, you will be required to accept the End User License Agreement.
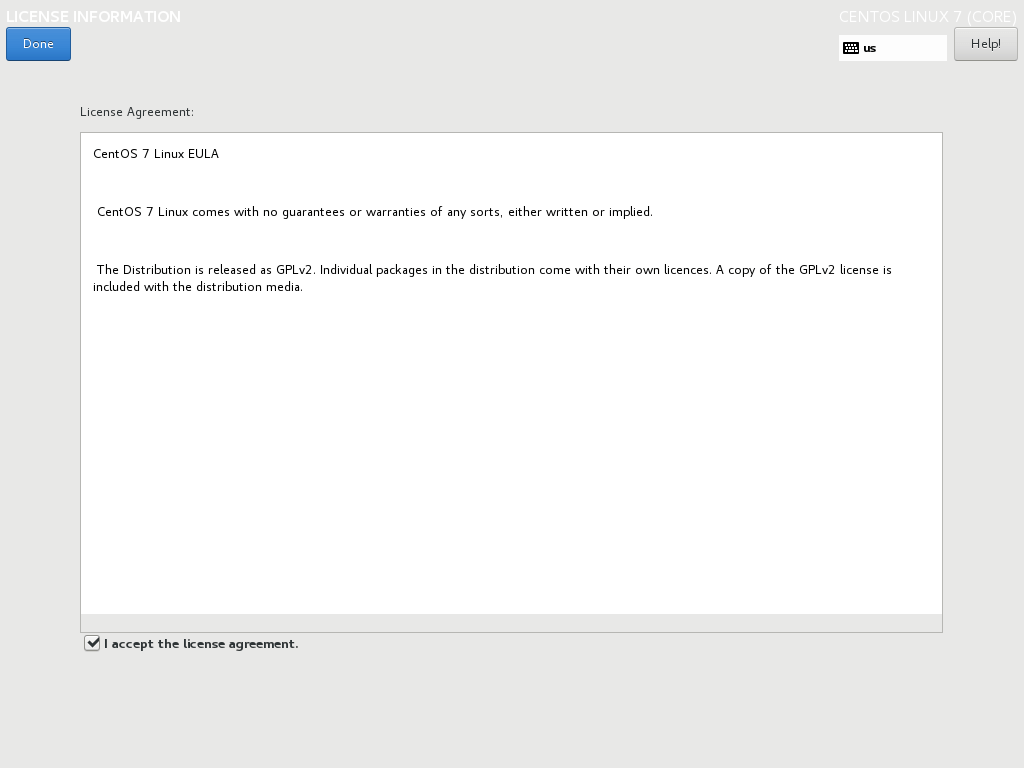
Click on ‘LICENSE INFORMATION‘.
Check the ‘I accept the license agreement‘ checkbox to accept the license agreement.
Finally, click on ‘FINISH CONFIGURATION’ to complete the process.
The system will reboot, and the CentOS bootloader will give you options to boot either from CentOS, Windows or any other installed Operating system.
Conclusion
We have finally come to the end of this tutorial. In this guide, you learned how to install CentOS 7 alongside Windows in a dual boot setup.


I followed these instructions to the letter as well, but after the CentOS install and reboot, Windows 10 was not listed in the boot menu (only CentOS 7). I tried the fix referenced by Glenn above, but selecting Windows 10 after that fix does absolutely nothing.
I used my Windows install disc to boot Windows, and the logical drive letters appear messed up (not sure if that’s an artifact of booting from the install disc). Hoping someone knows how to be able to boot into Windows (after choosing it from the boot list)?
Never mind. I got it working. The instructions for the fix in the web page referenced by Glenn say “note the spaces”, but the instructions should say to note the spaces and carriage returns. When I typed into 40_custom EXACTLY as written with the carriage returns, it works, YAY!
HI, thanks for the article. I seem to have the opposite problem to others – I can only boot into Windows and don’t see an option for CentOS.
Note I have installed Windows and CentOS on separate physical drives. I had played with the boot order in the BIOS but didn’t get anywhere.
Thanks
I completed a dual install of centos 6. Follow the above and now always boots to windows not option to boot to centos.
After rebooting it didn’t give the option to select between windows and centos.
I installed centos 8,
I think I lost my windows
I have the same problem. Were you able to fix it?
Never mind. My Windows installation was fine; I just had to follow the instructions at
https://dareneiri.github.io/Configuring-Grub-2-on-CentOS-7/to make Windows 10 appear as an option at boot.I don’t think so, you don’t lose your Windows, I was able to do the same, but if I use a grub loader, windows is still there.
Hi James, please are you sure of this line: “The system will reboot, and the CentOS bootloader will give you options to boot either from CentOS, Windows or any other installed Operating system.”
Hey. Samuel, sure. I followed all the steps to the latter. The grub bootloader should display all the booting options. If your’s didn’t work out, please ensure that you install CentOS 8 in the same mode as your Windows installation. That is, if you installed Windows using UEFI, then ensure the BIOS is set to UEFI. Likewise to Legacy.