Drupal is a free and open-source CMS written in PHP that ships with the GNU / GPL license. Just like popular CMS platforms such as WordPress and Joomla, with Drupal, you can get started with creating your own blog or website from the ground up with little or zero knowledge of web programming or markup languages.
In this tutorial, you will learn how to install Drupal on CentOS 8 Linux.
Prerequisites
Before we get started, ensure that you have installed the LAMP stack on your CentOS 8. LAMP is a popular stack used for hosting web hosting and consists of Apache web server, MariaDB / MySQL database and PHP.
Also, ensure that you have an SSH connection to your CentOS 8 server and a good and stable internet connection.
Step 1: Install Additional PHP Modules in CentOS 8
Drupal requires additional PHP modules to function without a hitch. So install them by executing the command below.
$ sudo dnf install php-curl php-mbstring php-gd php-xml php-pear php-fpm php-mysql php-pdo php-opcache php-json php-zip
Step 2: Create a Drupal Database
Having installed all the required PHP modules, you need to create a database to accommodate Drupal’s installation files. So log in to your MariaDB database as shown.
$ sudo mysql -u root -p
Once logged in, run the commands as shown to create a database for Drupal and grant all privileges on the Drupal user.
MariaDB [(none)]> CREATE DATABASE drupal_db;
MariaDB [(none)]> GRANT ALL ON drupal_db.* TO ‘drupal_user’@’localhost’ IDENTIFIED BY ‘StrongP@ssword’;
MariaDB [(none)]> FLUSH PRIVILEGES;
MariaDB [(none)]> EXIT;
Exit and restart the database server.
$ sudo systemctl restart mariadb
Step 3: Download Drupal in CentOS 8
With Drupal’s database in place, the next step will be downloading Drupal’s tarball file from Drupal’s official site. This contains all the necessary files required for Drupal to function as expected. At the time of writing this, the latest version is Drupal 8.8.4.
$ sudo wget https://ftp.drupal.org/files/projects/drupal-8.8.4.tar.gz
After the download complete, extract the tarball file as shown.
$ sudo tar -xvf drupal-8.8.4.tar.gz
Next, move the extracted folder to the Apache document root directory as shown.
$ sudo mv drupal-8.8.2 /var/www/html/drupal
With the drupal uncompressed file in the document root directory, modify the file permissions to allow apache to access the directory.
$ sudo chown -R apache:apache /var/www/html/drupal
Step 4: Configure Drupal Settings
Next, we are going to create a settings file from the default settings file (default.settings.php) which already exists in the following location.
$ cd /var/www/html/drupal/sites/default
$ sudo cp -p default.settings.php settings.php
In case SELinux is enabled on your system, run the command below to effect the SELinux rule on the /var/www/html/drupal/ directory.
Step 5: Finalizing Drupal Installation
We’re done with all the configurations. The only remaining bit is to set up Drupal on the browser. To do that, type the following address in your URL bar and hit ENTER.
http://server-IP/drupal
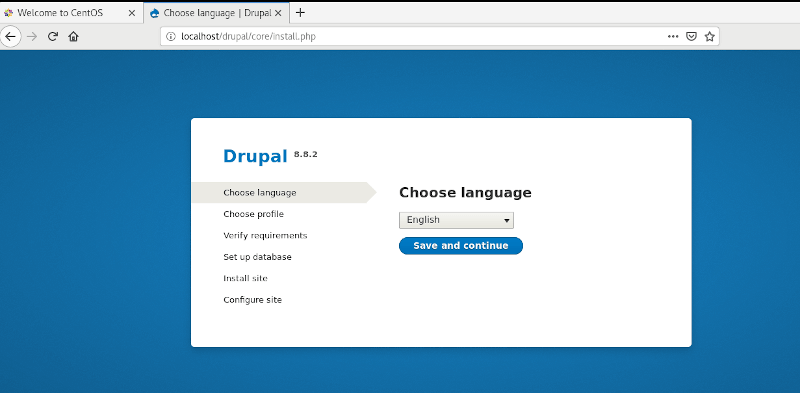
The ‘Welcome’ screen will be as shown. So first, select your preferred language and click the ‘Save and Continue’ button.
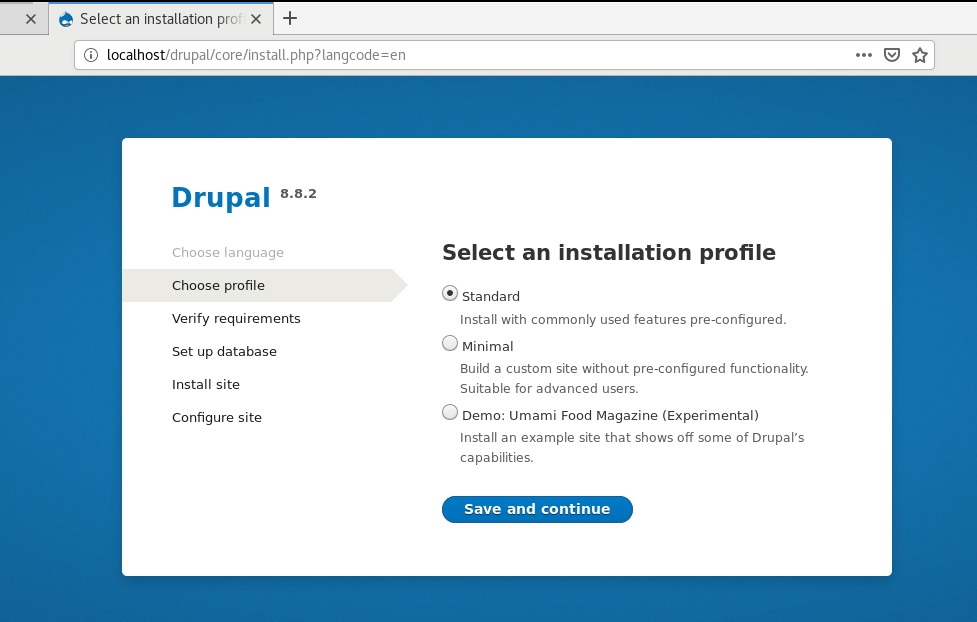
On the next screen, select the ‘Standard Profile’ as the profile to be used and click the ‘Save and Continue’ button to proceed to the next page.
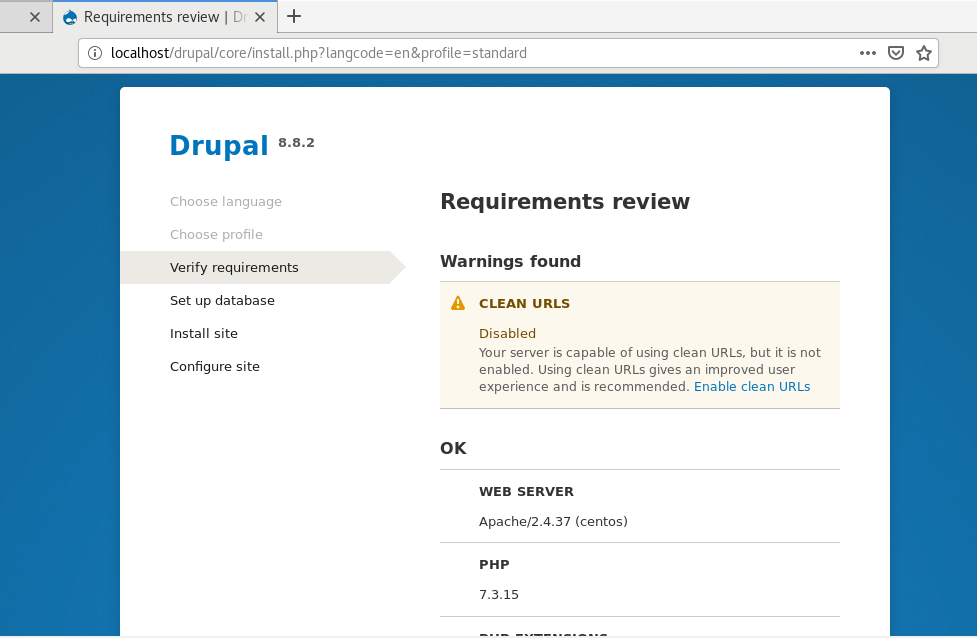
Next, take a look at the overview of the requirements and enable clean URLs. To enable clean URLs, head out to the Apache configuration file located in the /etc/httpd/conf/httpd.conf file.
Set the AllowOverride attribute from None to All.
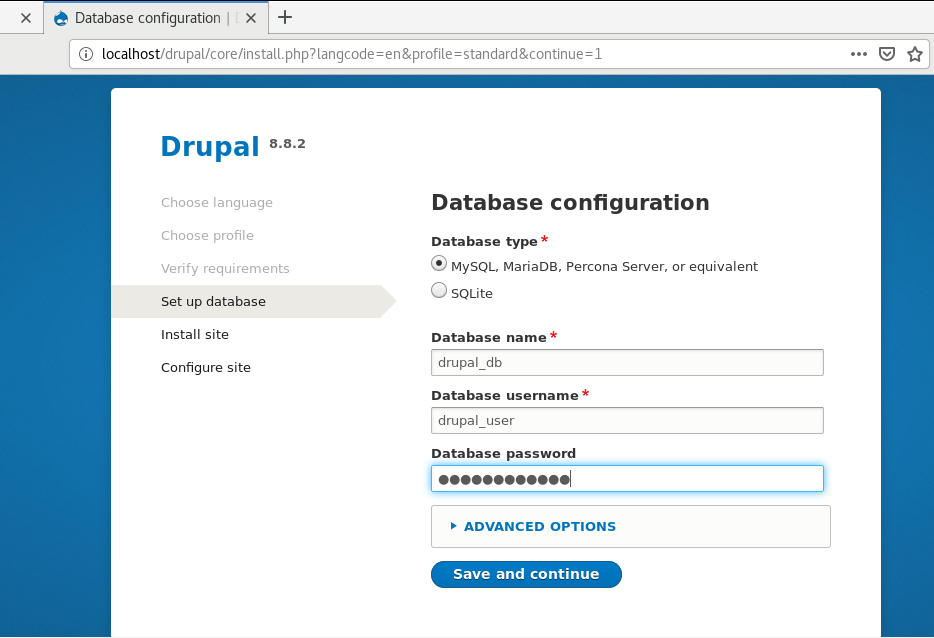
Next, refresh the page to continue to the ‘Database Configuration’ page as shown. Fill out the required fields such as the database type, database name, database password, and username.
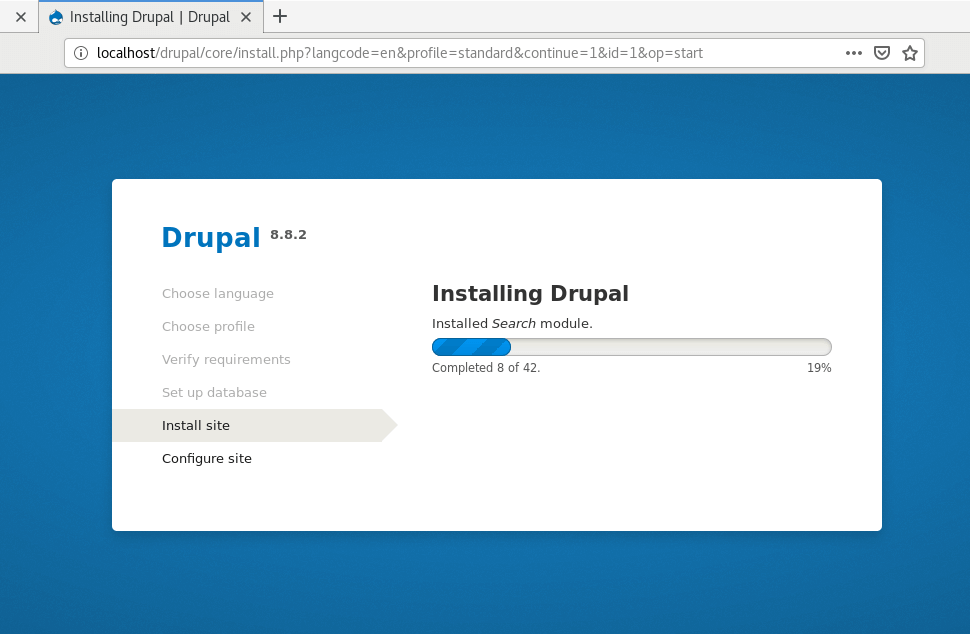
Again, click on the ‘Save and Continue’ button to go to the next step. Drupal will commence installing all the features and will take about 5 minutes.
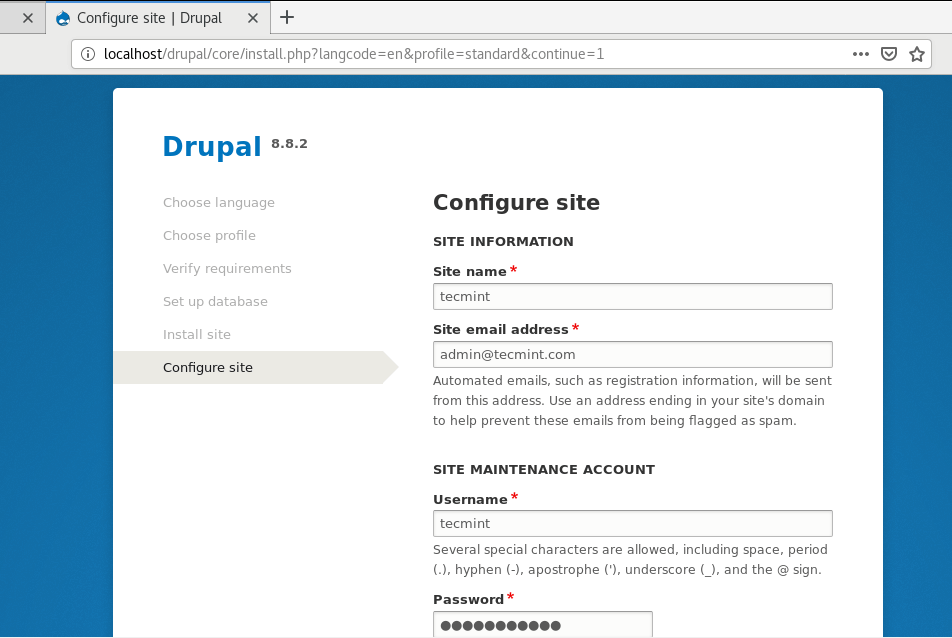
In the next section, Fill out the following details:
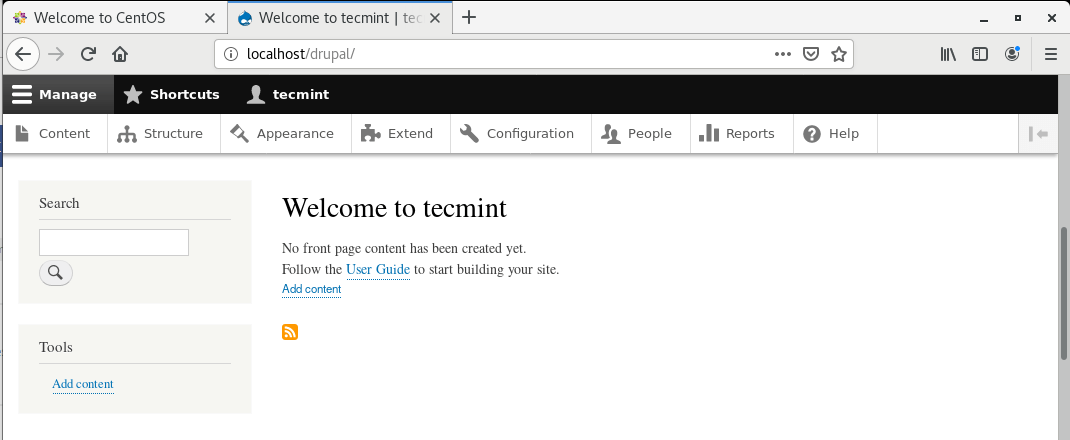
Finally, you will be presented with the home page as shown. You can now proceed to create your site and add content to it. You can use a vast array of Drupal themes and plugins to enhance your site’s appearance.
And this brings us to the end of this article. We have taken you through a step-by-step guide of how you can install Drupal on CentOS 8.


Please don’t use steps 3 and 4 of this tutorial.
Step 3: need to use a composer for drupal installation
Step 4: This file will automatically create during drupal installation.
Hey Dench0, have you tried the steps and encountered a problem anywhere ?
I agree the composer is the recommended way to install Drupal. I would probably add that it’s also better to install drush and then use it to do the site install.