A network bridge is a data-link layer device that interconnects two or more network segments, offering communication between them. It creates a single network interface to set up a single aggregate network from multiple networks or network segments. It forwards traffic based on the MAC addresses of hosts (stored in a MAC address table).
Linux operating systems such as RHEL (Red Hat Enterprise Linux) and CentOS 8 support the implementation of a software-based network bridge to emulate a hardware bridge. The bridge serves a similar function as a network switch; it acts more or less like a virtual network switch.
There are several use cases of network bridging, one practical application is in a virtualization environment to create a virtual network switch used to connect virtual machines (VMs) to the same network as the host.
This guide shows multiple ways to set up a network bridge in RHEL/CentOS 8 and use it to set up virtual networking in a bridged mode under Oracle VirtualBox and KVM, to connect Virtual Machines to the same network as the host.
On this page:
Setting Up a Network Bridge Using nmcli Tool
nmcli is a widely-used, scriptable and powerful command-line tool to control NetworkManager and report network status. It communicates directly to NetworkManager and controls only system-wide connections. Importantly, it allows users to use abbreviations, as long as they are a unique prefix in the set of possible options.
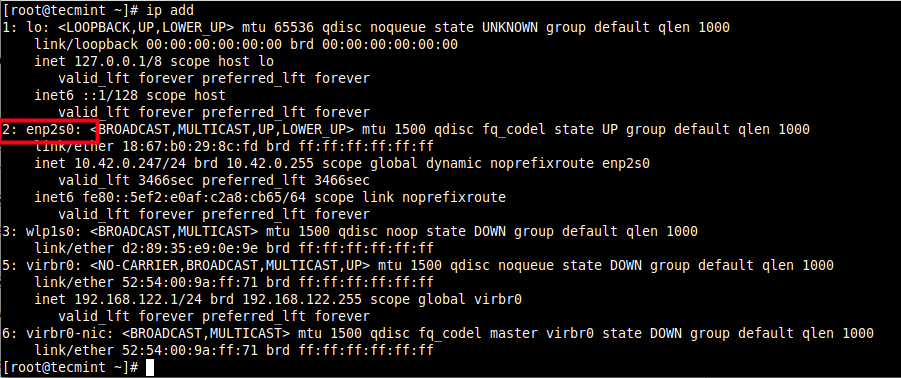
First, use the IP command to identify the network interfaces (both physical and virtual) currently attached to your machine and the networks they are connected to.
# ip add
From the output of the above command, the Ethernet interface is called enp2s0, we will add this interface to the bridge as a slave.
Next, to list the active network connections on the test system, use the following nmcli command.
# nmcli conn show --active

Important: If the libvirtd daemon (libvirtd) is installed and started, the default network interface that represents the network bridge (virtual network switch) is virbr0 as seen in the above screenshots. It is configured to run in NAT mode.
Next, create a network bridge interface using the following nmcli command, where conn or con stands for connection, and the connection name is br0 and the interface name is also br0.
# nmcli conn add type bridge con-name br0 ifname br0

Note: In a bridged mode, the virtual machines are easily accessible to the physical network, they appear within the same subnet as the host machine and they can access services such as DHCP.
To set a static IP address, run the following commands to set IPv4 address, network mask, default gateway, and DNS server of the br0 connection (set the values according to your environment).
# nmcli conn modify br0 ipv4.addresses '192.168.1.1/24'
# nmcli conn modify br0 ipv4.gateway '192.168.1.1'
# nmcli conn modify br0 ipv4.dns '192.168.1.1'
# nmcli conn modify br0 ipv4.method manual
Now add the Ethernet interface (enp2s0) as a portable device to the bridge (br0) connection as shown.
# nmcli conn add type ethernet slave-type bridge con-name bridge-br0 ifname enp2s0 master br0

Next, bring up or activate the bridge connection, you can use the connection name or UUID as shown.
# nmcli conn up br0
OR
# nmcli conn up 2f03943b-6fb5-44b1-b714-a755660bf6eb

Then deactivate or bring down the Ethernet or Wired connection.
# nmcli conn down Wired\ connection\ 1
OR
# nmcli conn down e1ffb0e0-8ebc-49d0-a690-2117ca5e2f42

Now when you try to list the active network connections on the system, the bridge connection should display on the list.
# nmcli conn show --active

Next, use the following bridge command to display the current bridge port configuration and flags.
# bridge link show

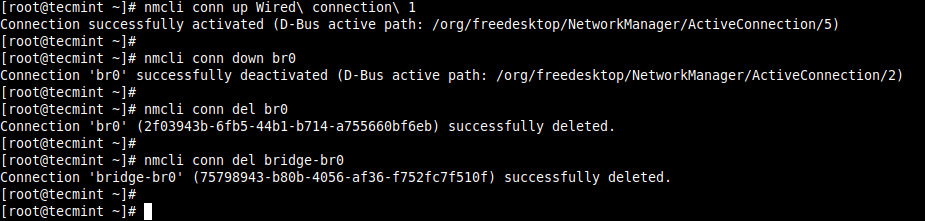
To deactivate the bridge connection and delete it, run the following commands. Note that you first of all have to activate the wired connection.
# nmcli conn up Wired\ connection\ 1
# nmcli conn down br0
# nmcli conn del br0
# nmcli conn del bridge-br0
For more information, see the nmcli manual page.
# man nmcli
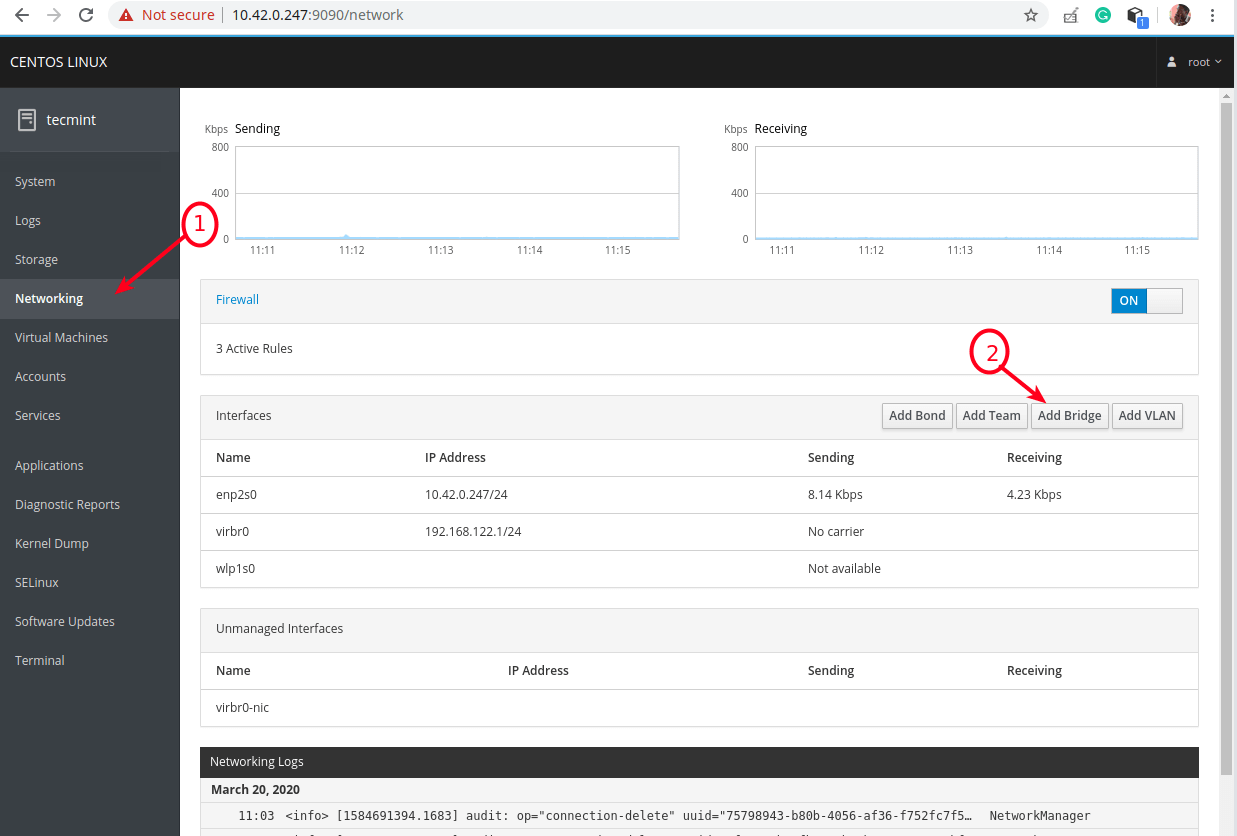
Creating a Network Bridge via Cockpit Web Console
The cockpit is a lightweight, interactive and easy-to-use web-based server administration interface. To interact with the system’s network configuration, the cockpit uses NetworkManager and the DBus APIs it provides.
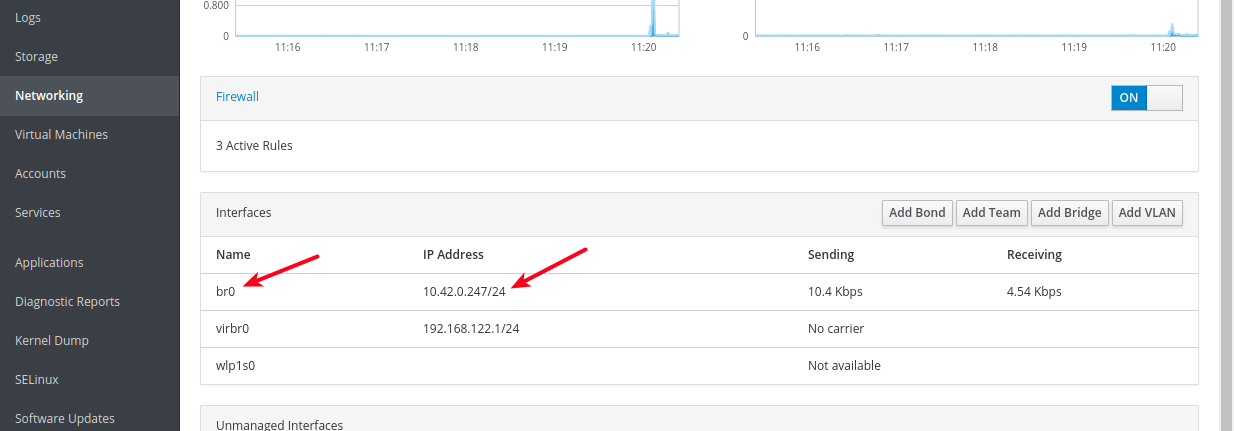
To add a bridge, go to Networking, then click Add Bridge as highlighted in the following image.
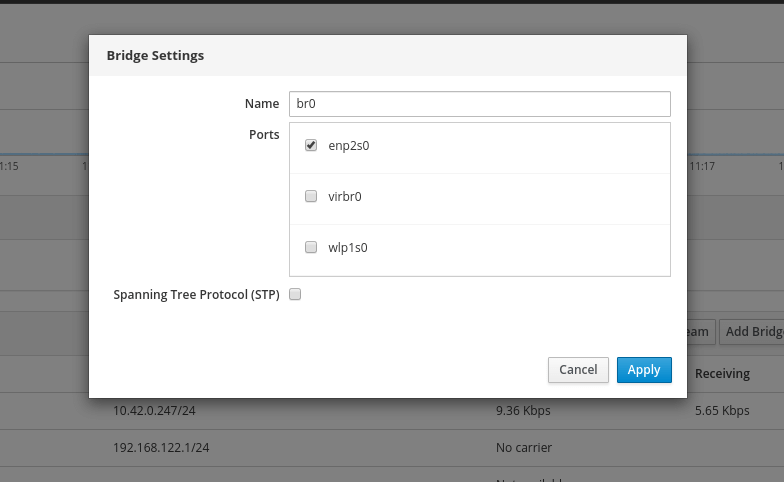
A pop window with options to add a new bridge will appear. Set the bridge name and select the ports as shown in the following screenshot. You can optionally enable STP (Spanning Tree Protocol) and then click Apply.
Under the list of Interfaces, the new bridge should now appear and the Ethernet interface should be de-activated.
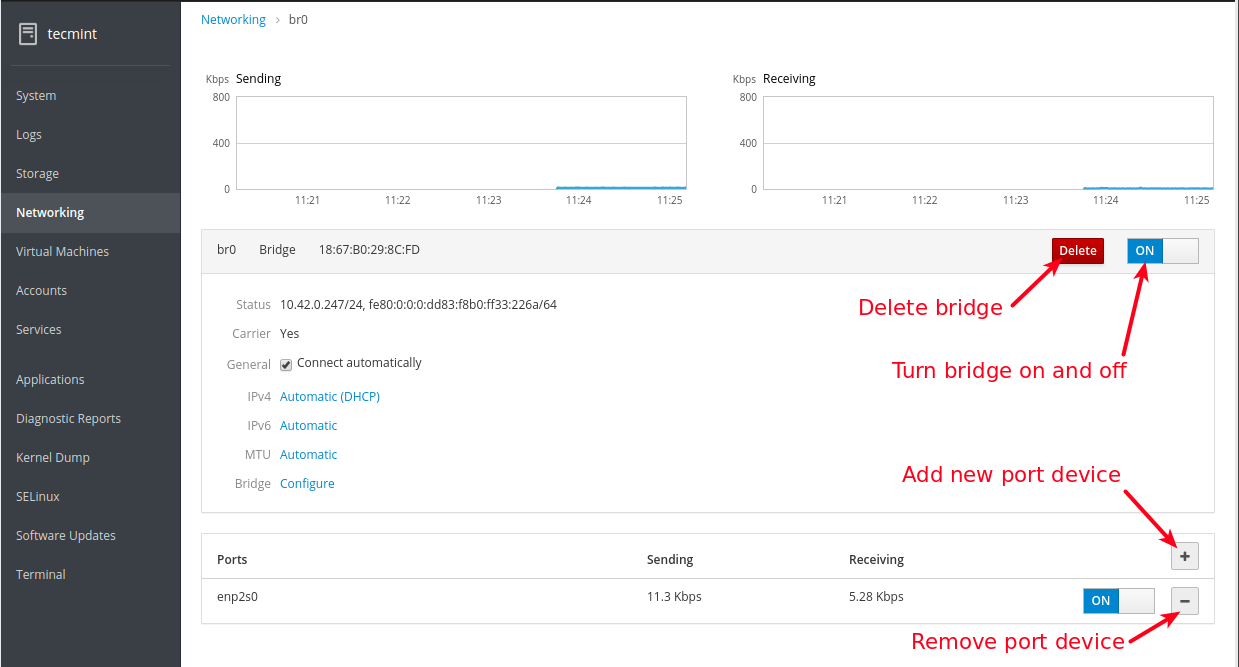
To view the bridge in detail, double click on it. There are options to take it down or delete, add a new port device to it and more.
Creating a Network Bridge Using nm-connection-editor Application
nm-connection-editor is a graphical network connection editor for NetworkManager, used to add, remove, and modify network connections stored by NetworkManager. Any modifications can only work if NetworkManager is running.
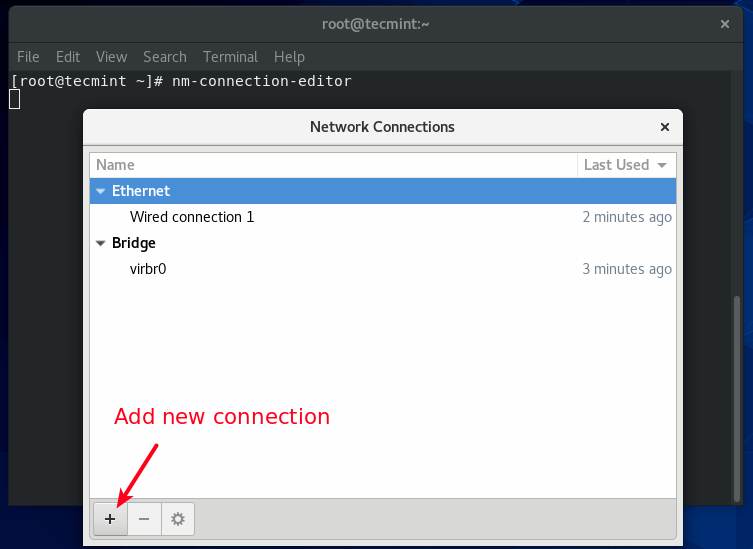
To launch it, run the nm-connection-editor command as root in the command line or open it from the system menu.
# nm-connection-editor
Once it opens up, click the plus sign to add a new connection as highlighted in the following screenshot.
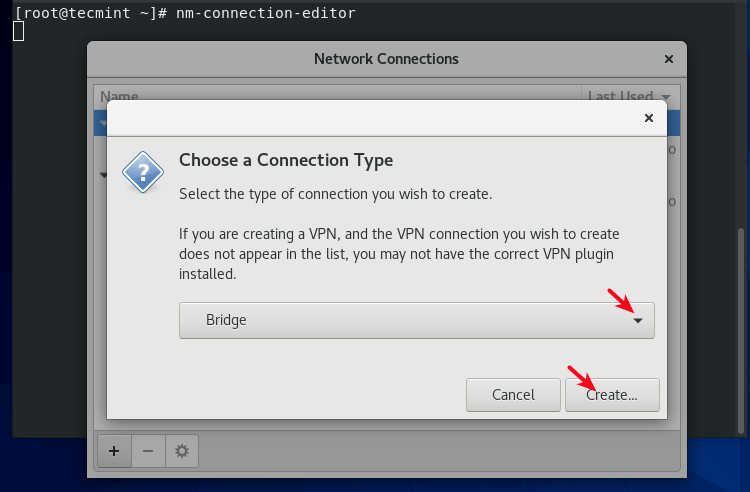
From the pop window, choose the connection type from the drop-down, Bridge in this case and click Create.
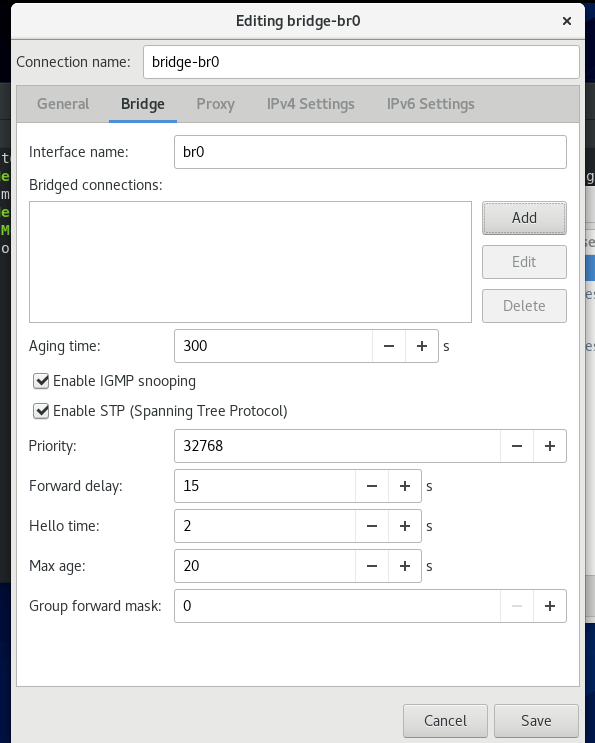
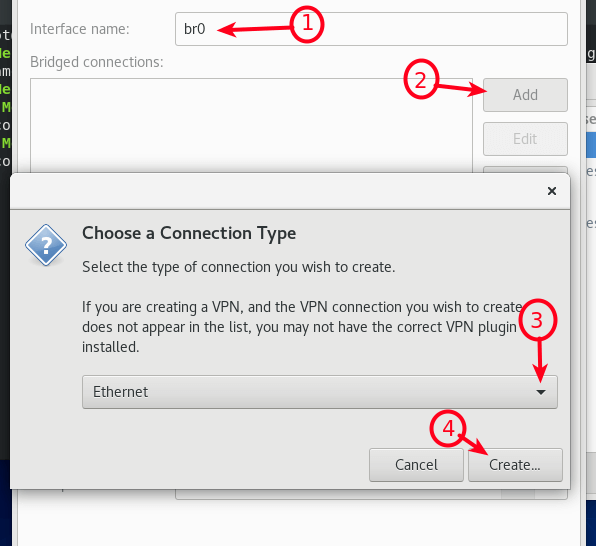
Next, set a bridge connection and interface name, then click Add to add a bridge port. Choose Ethernet as the connection type. Then click Create.
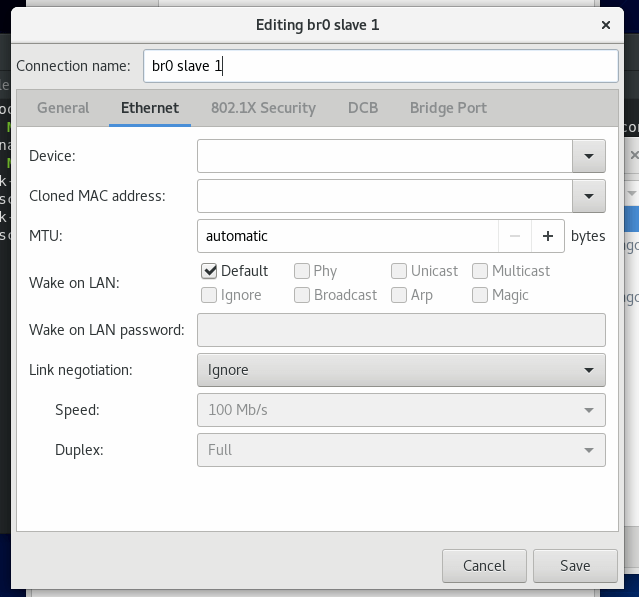
Next, edit the port device connection details and click Save.
Now the bridged port should be added to the list of bridged connections. Then click Save.
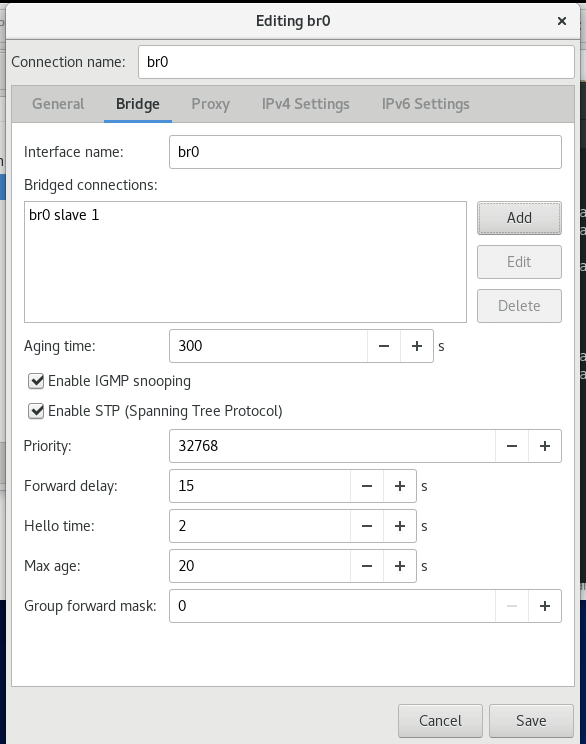
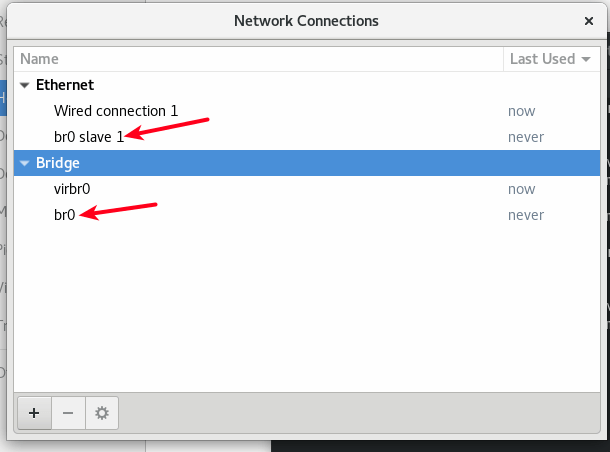
From the connection editor’s main interface, you should be able to see the new bridged connection and bridge interface as shown in the following screenshot.
Now go ahead to activate the bridge connection and deactivate the wired connection from the command line using the nmcli tool as shown before.
# nmcli conn up br0
# nmcli conn down Wired\ connection\ 1
How to Use the Network Bridge in a Virtualization Software
In this section, we will show how to use a bridge to connect virtual machines to the host network, under Oracle VirtualBox and KVM as explained below.
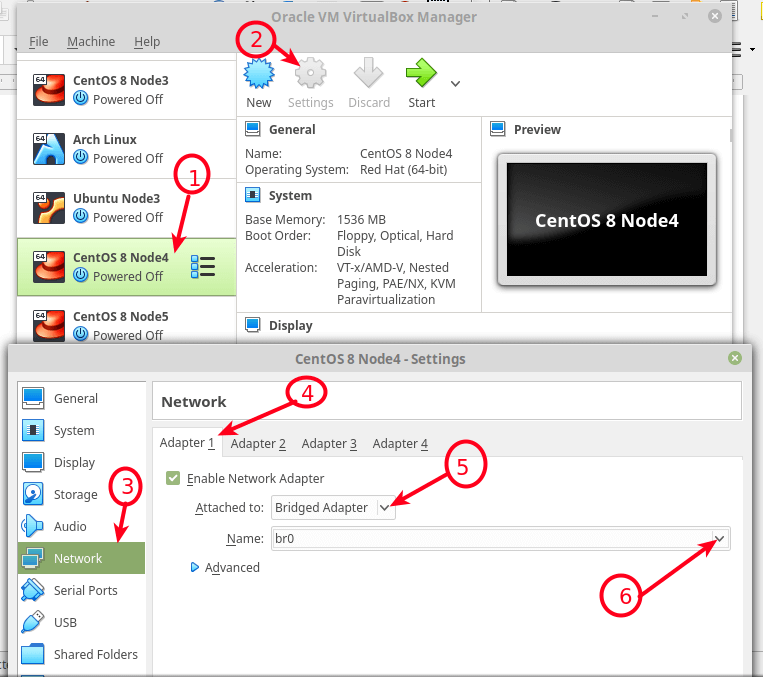
Using a Network Bridge in Oracle VirtualBox
To configure a virtual machine to use a bridged adapter, select it from the list of VMs, then go to its settings, click Network option and select the adapter (e.g Adapter 1), then make sure the Enable Network Adapter option is checked, set the attached to as Bridged Adapter, then select the name of the bridged interface (br0) and click Ok.
Using a Network Bridge in KVM
To use the network bridge created above under KVM, use the --network=bridge=br0 option while virtual machines using the command-line interface, using the virt-install command.
# virt-install --virt-type=kvm --name Ubuntu18.04 --ram 1536 --vcpus=4 --os-variant=ubuntu18.04 --cdrom=/path/to/install.iso --network=bridge=br0,model=virtio --graphics vnc --disk path=/var/lib/libvirt/images/ubuntu18.04.qcow2,size=20,bus=virtio,format=qcow2
You can as well create additional networks and configure them using the virsh command-line tool, and a VM’s XML configuration file can be edited to use one of these new bridged networks.
In this guide, we have shown how to set up a network bridge in RHEL/CentOS 8 and use it within to connect VMs to the same network of the host, under Oracle VirtualBox and KVM.
As usual, reach us via the feedback form below for any questions or comments. You can find more details in understanding virtual networking and configuring a network bridge in RHEL 8 documentation.


Hi,
Very useful article for me.
Thanks a lot
@Jalal
We are glad that you found this article useful. Many thanks as well for the feedback.