GLPI is a French acronym for ‘Gestionnaire Libre de Parc Informatique‘ or simply ‘Free IT Equipment Manager‘ It’s an open-source IT asset Management, service Desk System, and issue tracking system written in PHP.
GLPI is created to help companies manage their IT assets and keep track of incidents and requests, thanks to the HelpDesk functionality.
GLPI provides the following main Key functionalities:
- Management of hardware, software, data centers, and dashboards.
- HelpDesk
- Project management
- Financial management
- Administration
- Configuration
For a comprehensive list of all features offered by GLPI, had over to the GLPI features section. In this guide, we will demonstrate how to install the GLPI IT Asset Management tool on RHEL-based distributions like CentOS, AlmaLinux, and Rocky Linux.
Step 1: Install LAMP Stack in RHEL 8
Since GLPI will be administered from the front end, the first step is to install the LAMP stack. But first, update the local packages lists as shown
$ sudo dnf update
Next, install the Apache webserver and MariaDB database server.
$ sudo dnf install httpd mariadb-server -y
Once installed, enable the services to run on system startup.
$ sudo systemctl enable httpd
$ sudo systemctl enable mariadb
Then start the Apache and MariaDB services.
$ sudo systemctl start httpd
$ sudo systemctl start mariadb
The next step is to install PHP. We will install PHP 8.0 which is provided by the Remi repository. So, the first step is to enable the Remi repository as follows.
$ sudo dnf install -y https://rpms.remirepo.net/enterprise/remi-release-8.rpm
Once installed, you can list all the available PHP modules.
$ sudo dnf module list php -y
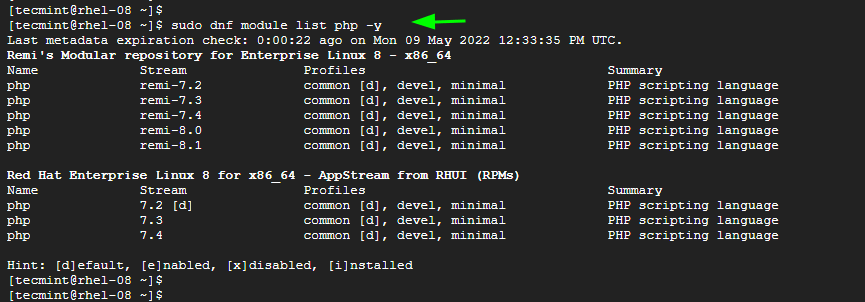
To enable the PHP 8.0 module, run the command:
$ sudo dnf module enable php:remi-8.0 -y
Now, you can install PHP 8.0 and other PHP extensions required for the installation as shown.
$ sudo dnf install php php-{mbstring,mysqli,xml,cli,ldap,openssl,xmlrpc,pecl-apcu,zip,curl,gd,json,session,imap} -y
Step 2: Create a Database for GLPI
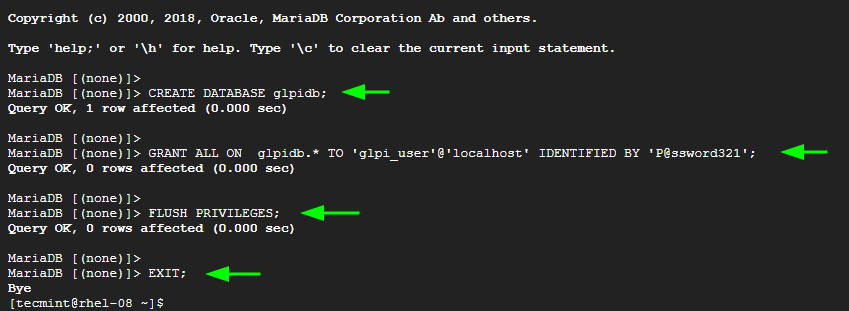
The next step is to create a database for GLPI. So, log into the MariaDB database server:
$ sudo mysql -u root -p
Create a database and database user and grant all privileges on the database to the user
> CREATE DATABASE glpidb;
> GRANT ALL ON  glpidb.* TO 'glpi_user'@'localhost' IDENTIFIED BY 'P@ssword321';
> FLUSH PRIVILEGES;
> EXIT;
Step 3: Download the GLPI Installer
With the database in place, the next step is to download the GLPI installer which contains all the installation files for GLPI. Head over to the official GLPI downloads page and grab the binary file using the wget command as shown.
$ wget https://github.com/glpi-project/glpi/releases/download/10.0.0/glpi-10.0.0.tgz
Next, uncompress the tarball file to the webroot directory as follows.
$ sudo tar -xvf glpi-10.0.0.tgz -C /var/www/html/
And set the following ownership and permissions.
$ sudo chown -R apache:apache /var/www/html/glpi
$ sudo chmod -R 755 /var/www/html/glpi
Step 4: Create an Apache Configuration for GLPI
Next, you need to create an Apache configuration file for GLPI in the /etc/httpd/conf.d/ directory.
$ sudo vim /etc/httpd/conf.d/glpi.conf
Paste the following configuration. For the ServerName attribute, be sure to provide the server’s IP address or a registered domain name.
<VirtualHost *:80>
   ServerName server-IP or FQDN
   DocumentRoot /var/www/html/glpi

   ErrorLog "/var/log/httpd/glpi_error.log"
   CustomLog "/var/log/httpd/glpi_access.log" combined

   <Directory> /var/www/html/glpi/config>
           AllowOverride None
           Require all denied
   </Directory>

   <Directory> /var/www/html/glpi/files>
           AllowOverride None
           Require all denied
   </Directory>
</VirtualHost>
Save and exit.
Next, set the following SELinux policies.
$ sudo dnf -y install policycoreutils-python-utils
$ sudo semanage fcontext -a -t httpd_sys_rw_content_t "/var/www/html/glpi(/.*)?"
$ sudo restorecon -Rv /var/www/html/glpi
To apply all the changes, restart Apache.
$ sudo systemctl restart httpd
Step 5: Complete the GLPI Installation from Browser
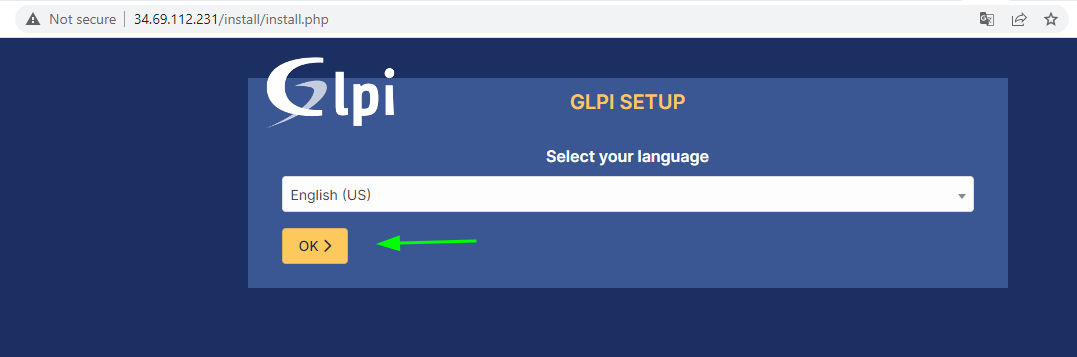
Finally, to complete the installation, open your browser and visit your server’s IP or registered domain name.
http://server-ip
In the first step, select your preferred language, and then hit ‘Ok’.
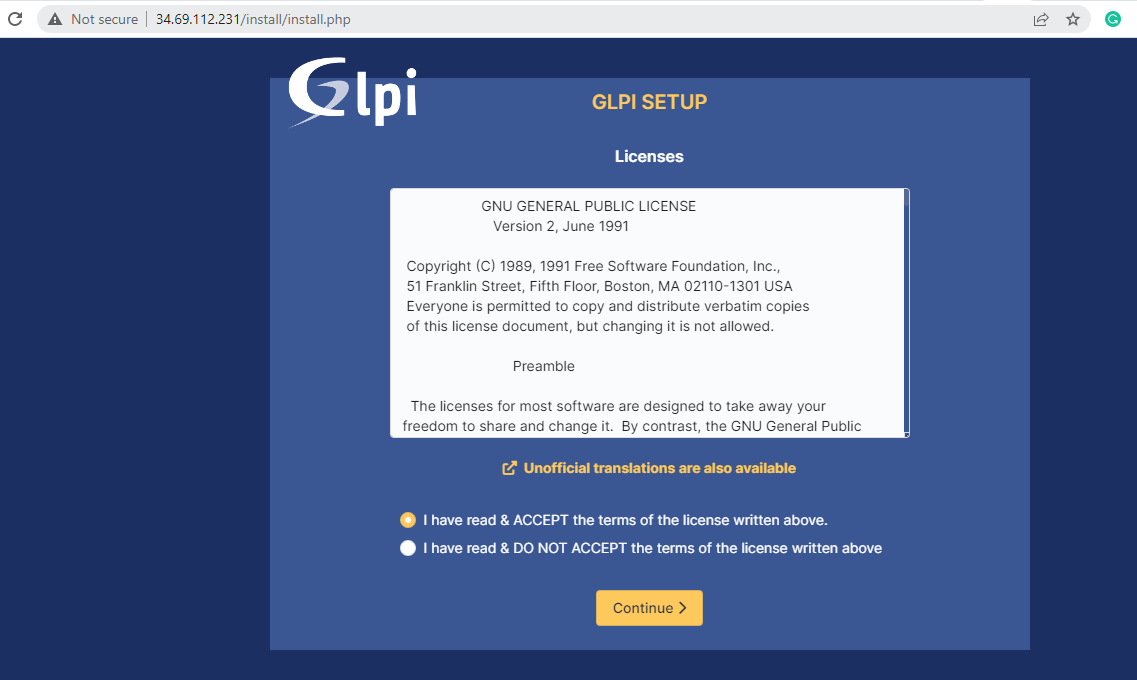
Next, accept the terms of the license and click ‘Continue’.
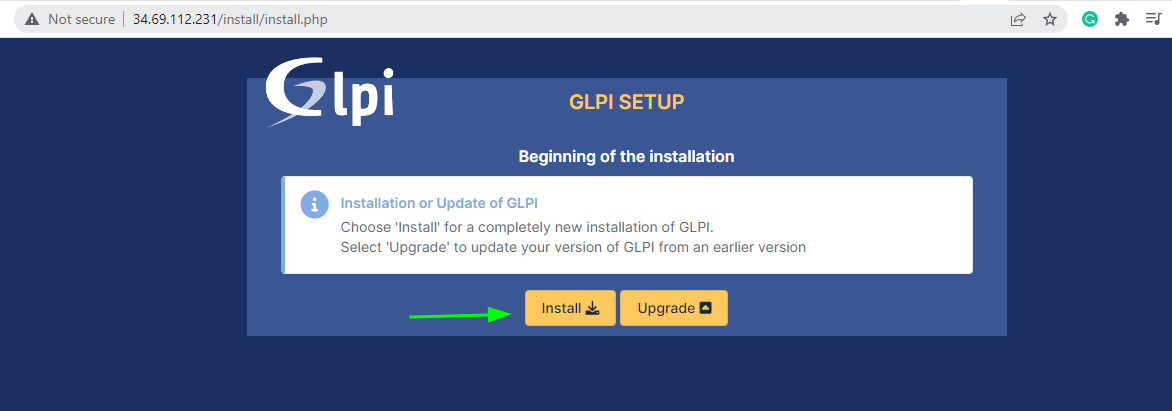
Next, choose ‘Install’ to begin the installation of GLPI.
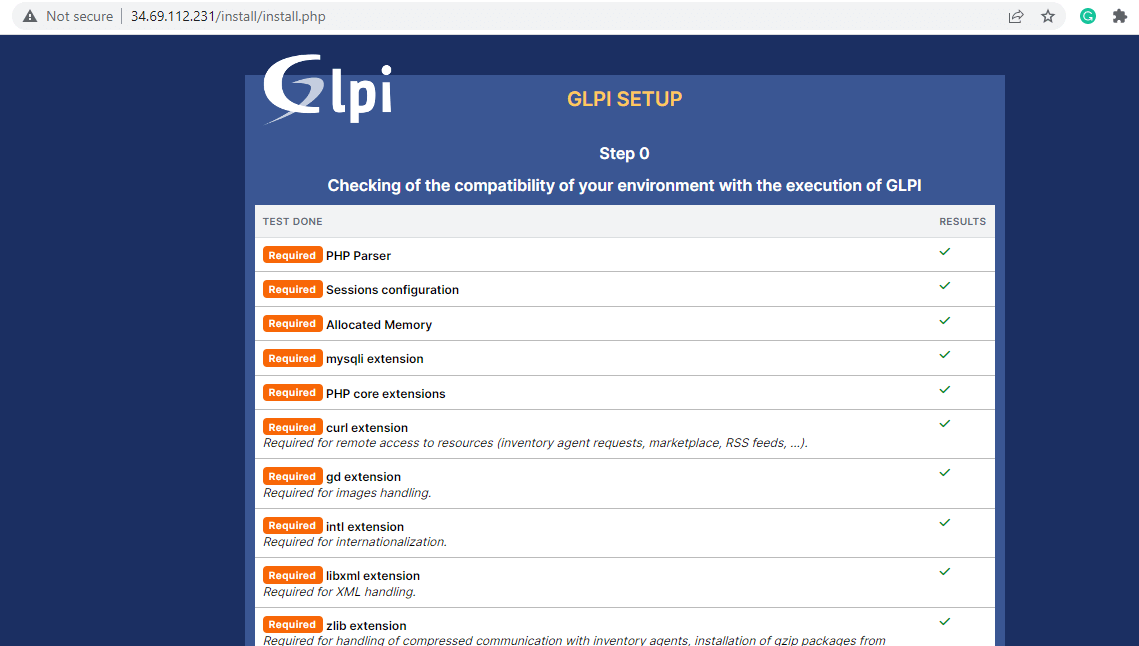
This takes you to the list of requirements that are needed for the installation to continue. Ensure that all the PHP extensions and libraries are installed. Then scroll all the way down and click ‘Continue’.
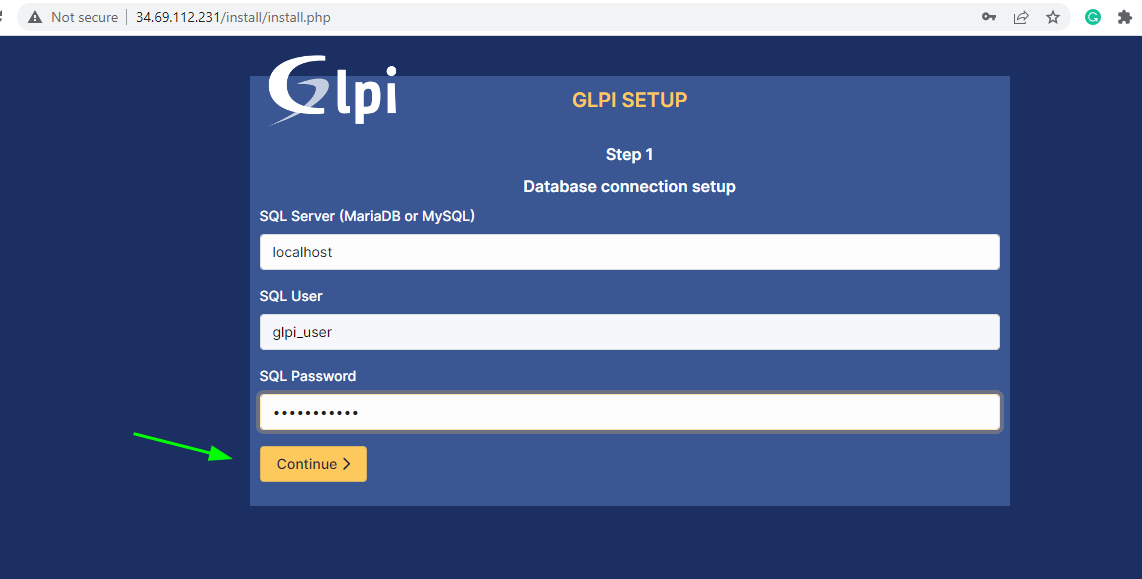
In the next step, fill in the database details and click ‘Continue’.
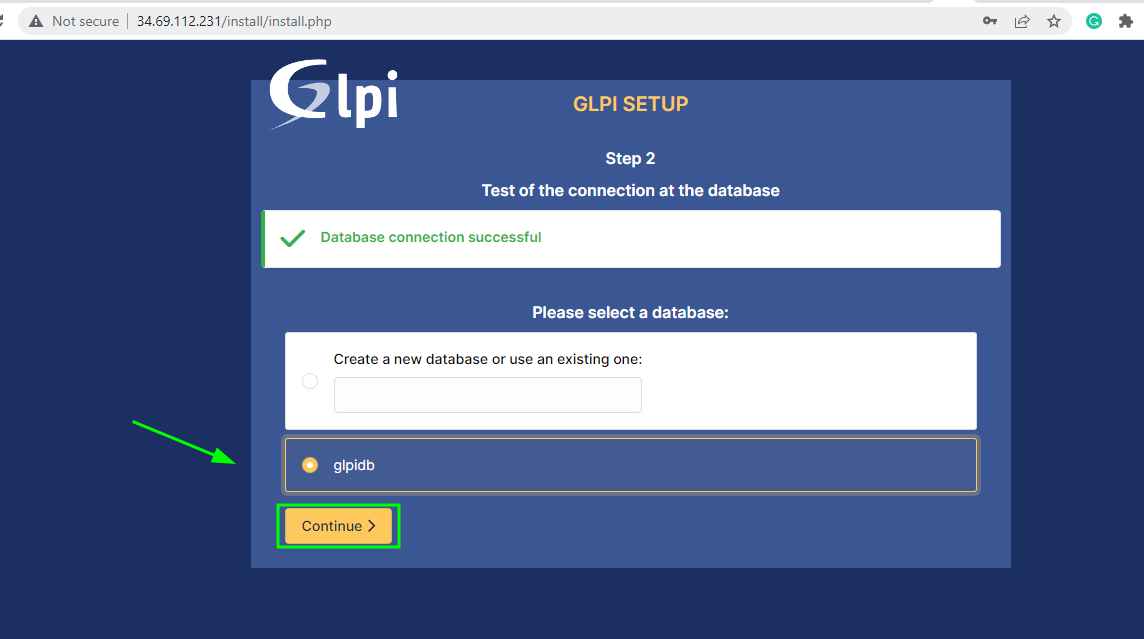
The installer will attempt to establish a connection to the database. Once the connection is successful, select the database you configured earlier and click ‘Continue’.
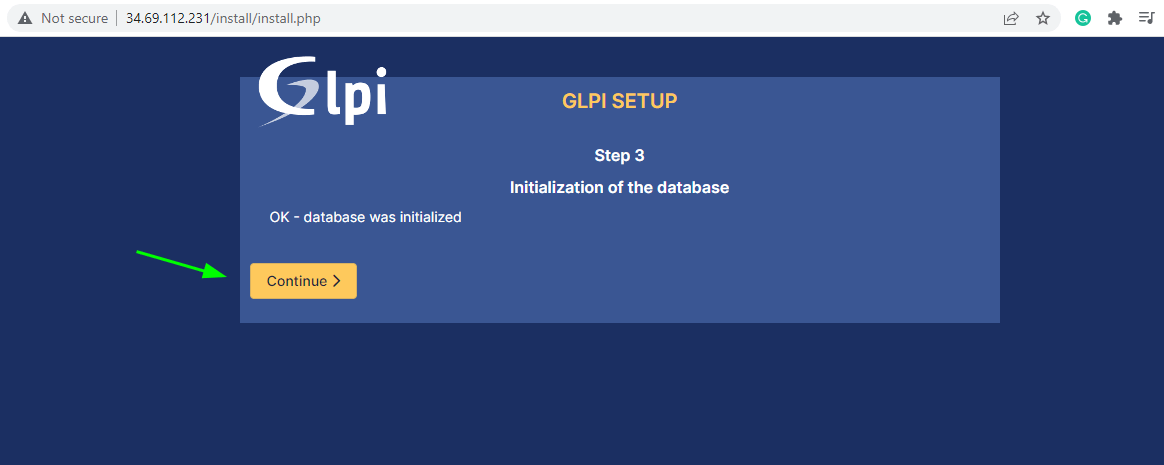
The installer will then initialize the database and once the initialization is complete, yet again, click ‘Continue’.
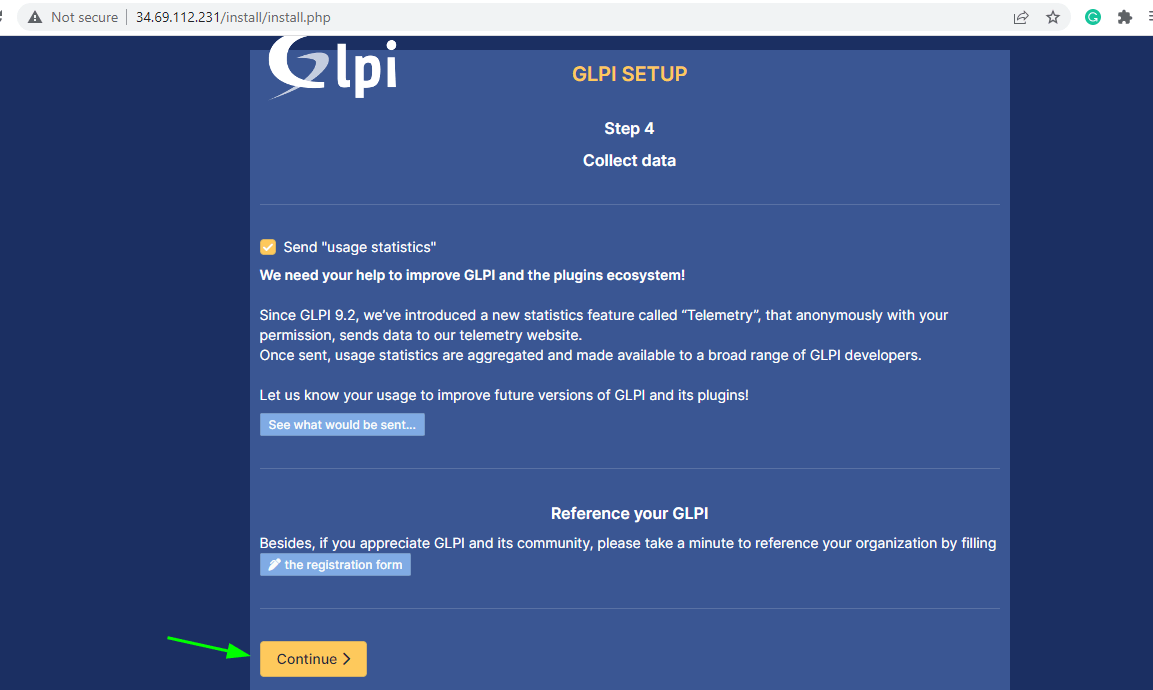
In the next step, choose whether to send usage statistics or not and click click ‘Continue’.
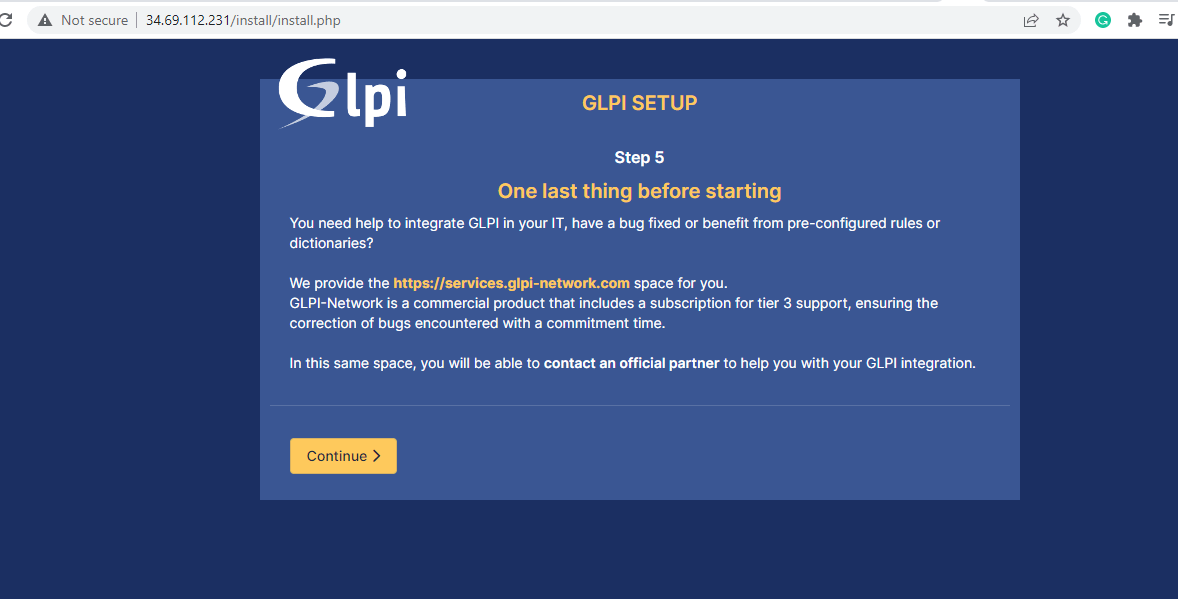
In the next step, a link to report bugs or get assistance with GLPI will be provided. Click ‘Continue’ to proceed to the next step.
Once the installation is complete, click on ‘Use GLPI’ to log in.
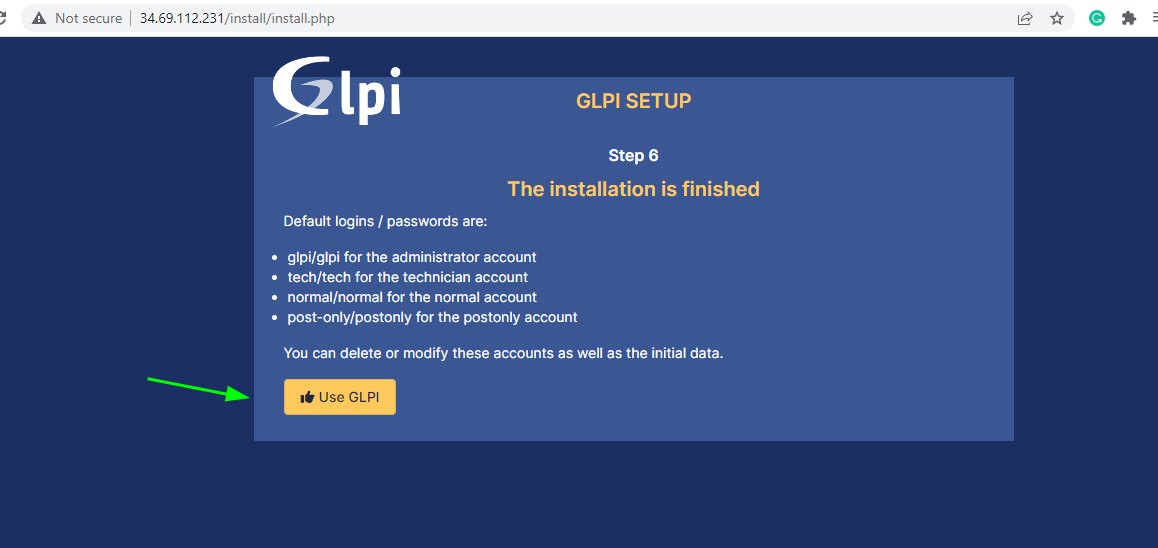
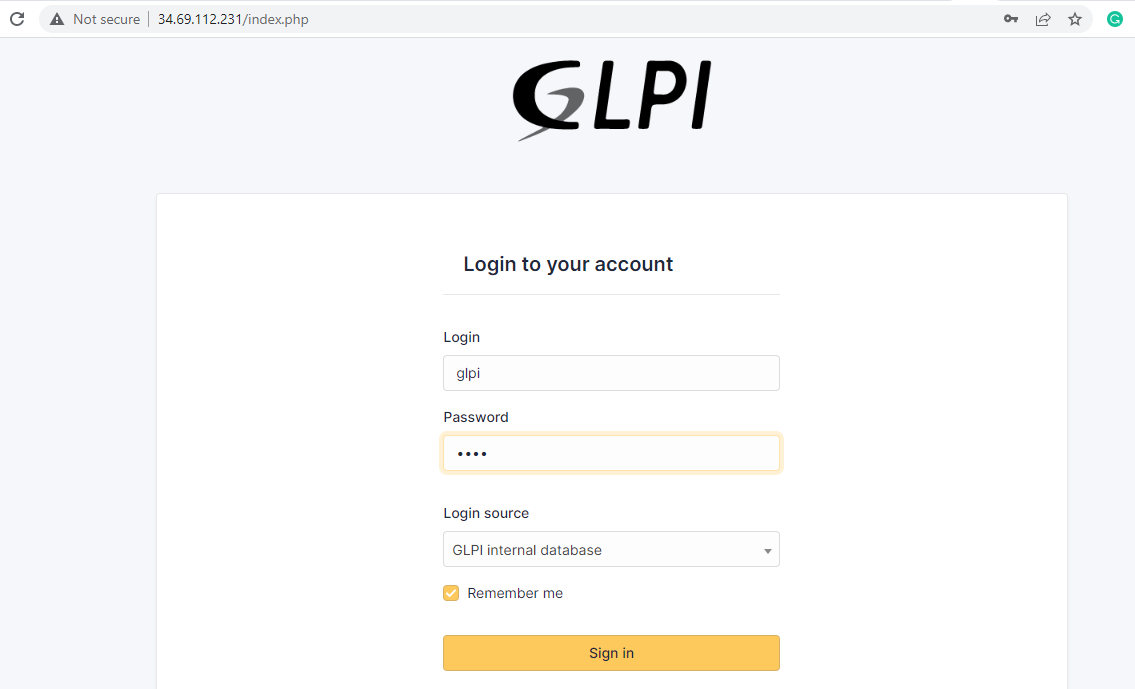
This directs you to the login page as you can see. The default login credentials are provided below:
For Administrator account 	glpi / glpi
For technician account		tech / tech
For normal account		normal / normal
For postonly			postonly / postonly
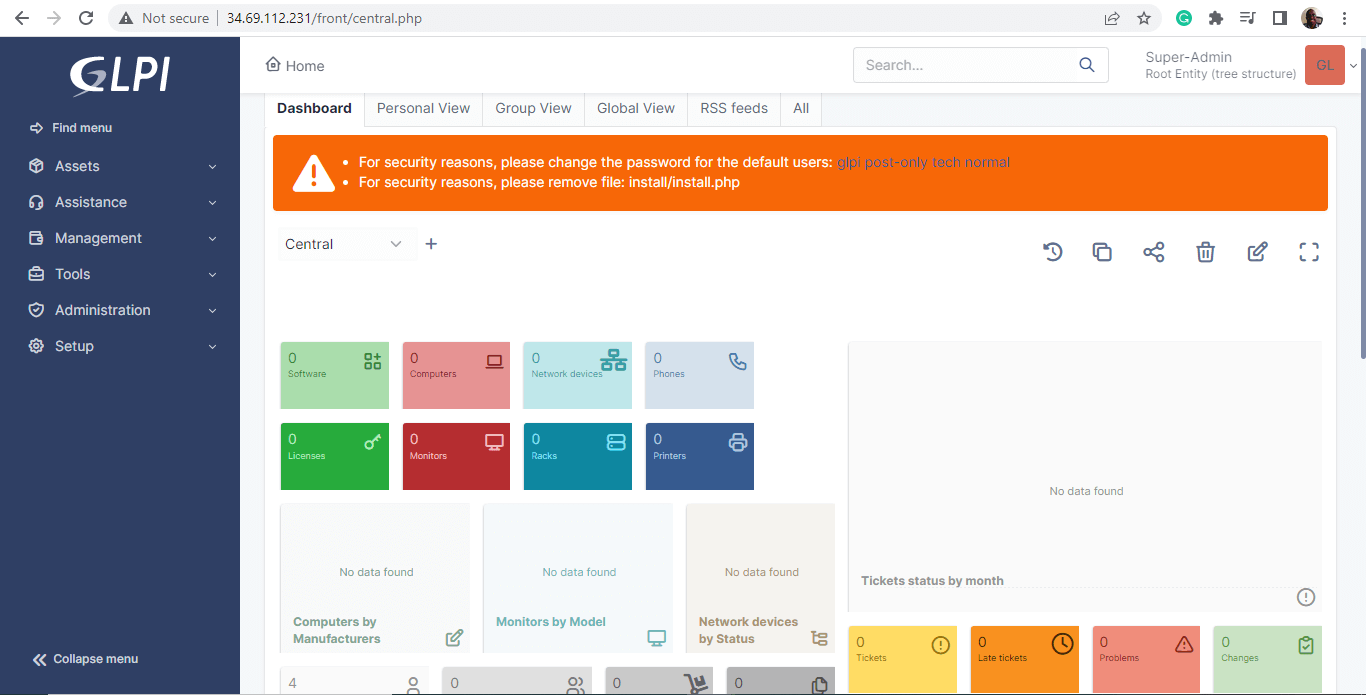
And behold the GLPI dashboard! From there you can start managing incidents/requests, creating reports, defining SLAs, and all that pertains to the service desk and asset management.
This brings us to the end of this guide. We hope you can now comfortably install the GLPI service desk and IT asset management tool on RHEL-based distributions.


Good day, could you please guide us on how to install the GLPI agent on domain computers and also how to set it up? I have an environment within a domain, consisting of around 300 computers, and I aim to have all these computers visible on the dashboard of the GLPI server.
How can I achieve this?
Hi,
I followed the steps exactly like it’s described, but in step 5 when I enter
http://172.30.10.22it redirects towww.172.30.10.22.my config file /etc/httpd/conf.d/glpi.conf looks like this
ServerName 172.30.10.22 ServerName default-catch-all.example.org DocumentRoot /var/www/html/glpi ErrorLog "/var/log/httpd/glpi_error.log" CustomLog "/var/log/httpd/glpi_access.log" combined /var/www/html/glpi/config> AllowOverride None Require all denied /var/www/html/glpi/files> AllowOverride None Require all deniedPlease disregard. I just needed to permit TCP port 80 on my CentOS firewall. Below is the command to enable TCP 80 and 443 ports on CentOS 8
# firewall-cmd --add-port={80,443}/tcp --permanent # firewall-cmd --reloadNice tutorial
In php installation the php-intl missed.
So, it can be:
# dnf install php php-{intl,mbstring,mysqli,xml,cli,ldap,openssl,xmlrpc,pecl-apcu,zip,curl,gd,json,session,imap} -yThanks.