Magento is a free, open-source e-commerce platform that is designed specifically for building online stores, with features like product listings, shopping carts, secure payments, and customer management.
Magento was launched in 2008 and acquired by Adobe in 2018 but it is a popular choice for creating e-commerce websites.
While the exact percentage of websites using Magento may vary depending on the source, it remains an important player in the e-commerce market.
If you’re planning to launch your own e-commerce business and use Ubuntu 24.04 as your operating system, this guide will walk you through the installation and configuration of Magento 2.
Before We Begin
Before you start, ensure you have the following:
- A server running Ubuntu 24.04.
- SSH access to your server.
- A non-root user with sudo privileges.
- Basic knowledge of command-line operations.
Step 1: Install LAMP Stack on Ubuntu
First, make sure your system is up-to-date with the latest security patches and software versions.
sudo apt update -y
sudo apt upgrade -y
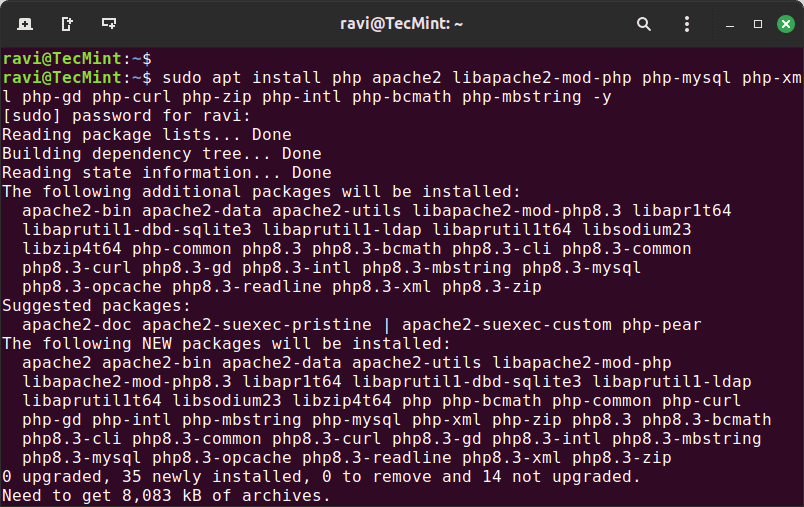
Next, you need to install a LAMP stack, as Magento is a PHP script that uses a MySQL database. Therefore, you’ll need a running web server and a MySQL database server with PHP support.
To install these components on Ubuntu, you will have to run the following commands in the terminal.
sudo apt install php apache2 mysql-server libapache2-mod-php php-mysql php-xml php-gd php-curl php-zip php-intl php-bcmath php-mbstring php-soap -y
Once the LAMP stack is installed, you need to configure the following PHP settings in the configuration file.
sudo nano /etc/php/8.3/apache2/php.ini
Find and set the following values (you can use Ctrl + W to search).
memory_limit = 2G
upload_max_filesize = 64M
max_execution_time = 1800
Save and close the file (Ctrl + X, then Y, then Enter).
Once all the required packages have been installed on the system/server successfully, now move forward to create a new MySQL database for Magento installation.
Step 2: Create a Database for Magento
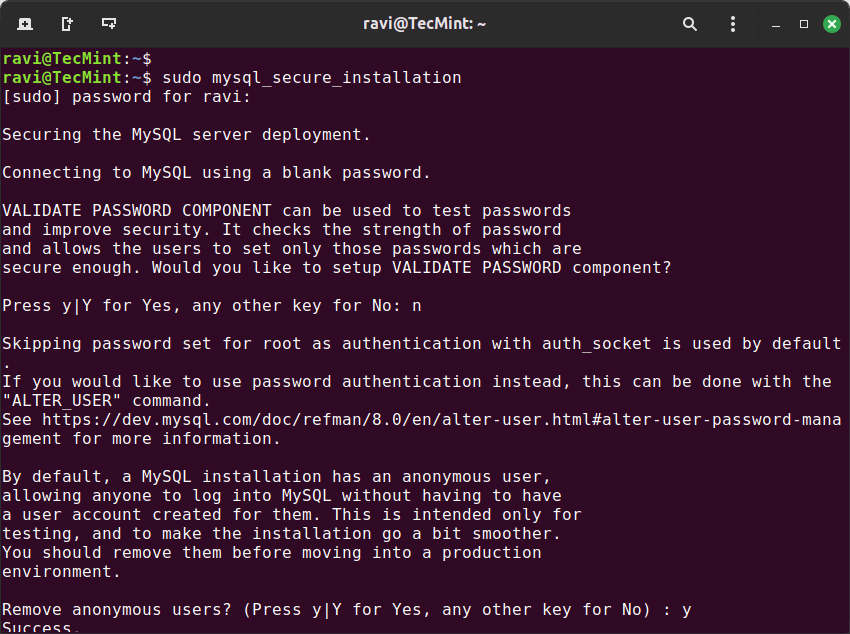
Before creating a database, you need to secure your default MySQL installation by running the following security script.
sudo mysql_secure_installation
Follow the prompts to set up your root password and secure the installation.
To create a new database and a user, log in to your database server using the root account and password you created during the mysql-server installation above.
sudo mysql -u root -p
Create a database and user for Magento:
CREATE DATABASE magento;
CREATE USER 'ravi'@'localhost' IDENTIFIED BY 'your_password';
GRANT ALL PRIVILEGES ON magento.* TO 'ravi'@'localhost';
FLUSH PRIVILEGES;
EXIT;
Step 3: Install Composer on Ubuntu
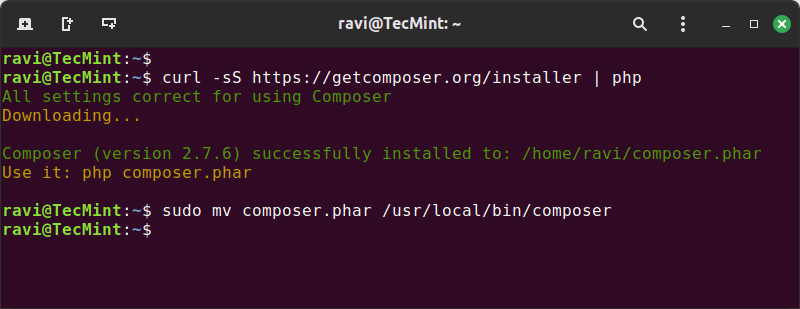
Magento uses Composer to manage dependencies, as it allows you to declare the libraries for the project depends on and manages the installation and updates of these dependencies.
sudo apt install curl -y
curl -sS https://getcomposer.org/installer | php
sudo mv composer.phar /usr/local/bin/composer
Step 4: Download Magento 2 in Ubuntu
To download Magento 2, you need to create a Magento Marketplace account. Log in using your credentials, then navigate to “My Account” and click on “Account Settings.
From there, click on “Downloads Access Token” and generate a new key pair. This process will create a public key (username) and a private key (password), which you will use to download the necessary files for your project from the Magento repositories.
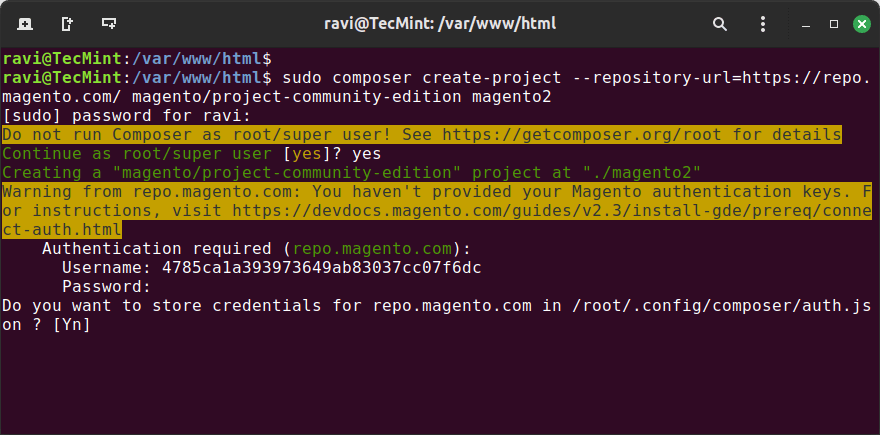
Now switch to the web root directory and use the Composer to download Magento 2 as shown.
cd /var/www/html
sudo composer create-project --repository-url=https://repo.magento.com/ magento/project-community-edition magento2
Next, set the correct permissions for the Magento directory.
sudo chown -R www-data:www-data /var/www/html/magento2
sudo chmod -R 755 /var/www/html/magento2
sudo chmod -R 777 /var/www/html/magento2/var /var/www/html/magento2/pub /var/www/html/magento2/generated
Step 5: Configure Apache for Magento 2
Now we will create a new virtual host file magento2.conf for our Magento site under /etc/apache2/sites-available/ directory.
sudo nano /etc/apache2/sites-available/magento2.conf
Now add the following lines to it.
<VirtualHost *:80>
    ServerAdmin [email protected]
    DocumentRoot /var/www/html/magento2
    ServerName example.com
    ServerAlias www.example.com

    <Directory /var/www/html/magento2>
        AllowOverride All
        Require all granted
    </Directory>

    ErrorLog ${APACHE_LOG_DIR}/magento2_error.log
    CustomLog ${APACHE_LOG_DIR}/magento2_access.log combined
</VirtualHost>
Save and close the file.
Now, enable the new site and the rewrite module.
sudo a2ensite magento2.conf
sudo a2enmod rewrite
sudo systemctl restart apache2
Finally, install the Magento 2 application as shown.
bin/magento setup:install --base-url=http://localhost/magento2 --db-host=localhost --db-name=magento --db-user=ravi --db-password='rig!43B#' --admin-firstname=Magento --admin-lastname=Admin [email protected] --admin-user=admin --admin-password=m0d1fyth15 --language=en_US --currency=USD --timezone=America/Chicago --use-rewrites=1 --search-engine=opensearch
Replace ‘your_domain.com‘, ‘your_password‘, and other values with your specific details.
Step 6: Finalize the Installation via Web Browser
Open your web browser and navigate to your server’s IP address or domain name and follow the Magento 2 installation wizard to complete the setup.


Thank you very much.
I spent a week to install on the VPS without success. But, when reading your guide, I finished in just 10 minutes.
Nice post although command line installation is much more faster and customisable.
And there is a request can you make a post on magento migration from one domain to another.
With all its components and data.
Hello, If you go to weightlossn0w.com you’ll see Welcome to Magento’s Installation Wizard! You can tick “I agree to the above terms and conditions.” But when you click the Continue button nothing happens, it’s as if the window freezes. The host is a Linux server with PHP Version 5.4.36, Apache Version 2.2.29, MySQL Version 5.5.40-cll Any thoughts? I’ve contacted the people controlling the server but they have not responded as yet.
@Charley,
I just tried the installation wizard and it moves to the next step, now I am at Database Configuratin wizard..I think you should try on different browser…
I followed that post but I faced many many problems while working o ubuntu 14.4
there is many issues appeared to me
@Mohamed,
Sorry for the trouble, actually the article is little outdated and haven’t updated since last one year. We are in process to update all our updated articles to latest version..give us some..be patience and stay tuned…
The only issues I had with this guide were:
1.the location of the apache config
“$ sudo nano /etc/apache2/sites-available/default”
was not found. I found the file at
“$sudo nano /etc/apache2/sites-available/000-default.conf”.
The Directory section did not exist at all for me, I inserted it below the “documentroot” line (not 100% sure this is the correct location).
2.The other issue is in the Magento configuration. It comes directly after fixing the write permissions. I am getting an error “php extension mcrypt must be loaded”. I fixed this by:
“sudo php5enmod mcrypt”
“sudo service apache2 reload”
“sudo service apache2 restart”
HHHmm Not sure about those 777 permissions? Is there a way to not have to do that?
Will you may set them to 775 if you want.
Hi, magento is rewritable for this reason your files should have permissions 777 and owned by the user the web public domain, not the user ROOT as this would generate update problems, editing and viewing the frontend
This will cause many security problems of course, not all the files should be under 777 permissions but only those that Magento requested in this picture:
https://www.tecmint.com/wp-content/uploads/2014/09/Magento-Configuration-620×428.png
If it was like you said, there would be more error messages but Magento only requires those files to be under 777, not the whole installation.
Thanks.
is there any supporting details from magento or is that from your experience?