Written PHP, Drupal is a free and opensource content management system (CMS) that enables you to create powerful and elegant blogs or websites. It ships with preinstalled themes, widgets, and other out-of-the-box features that help you get started with little knowledge in web programming languages. It’s ideal for users who want to publish their content with but have little background in web development.
In this article, you will learn how to install Drupal on Debian 10/9.
Drupal Prerequisites
Like any other CMS, Drupal runs on the front end and is powered by a database server on the backend. Therefore, you need to have a LAMP stack installed before anything else. LAMP comprises of the Apache web server, MariaDB / MySQL database, and PHP which is a server-side scripting language.
In this guide, we have used the following versions:
- Apache webserver.
- MariaDB database server.
- PHP (For Drupal 9, PHP 7.3 and later versions is recommended).
With the requirements met, let’s get started!
Step 1: Install LAMP Stack on Debian 10
1. To install Drupal, you must have a running web-server and a database server, in this article we will work with Apache, PHP, and MariaDB, you can install them using apt command as shown.
$ sudo apt install apache2 mariadb-server mariadb-client php libapache2-mod-php php-cli php-fpm php-json php-common php-mysql php-zip php-gd php-intl php-mbstring php-curl php-xml php-pear php-tidy php-soap php-bcmath php-xmlrpc
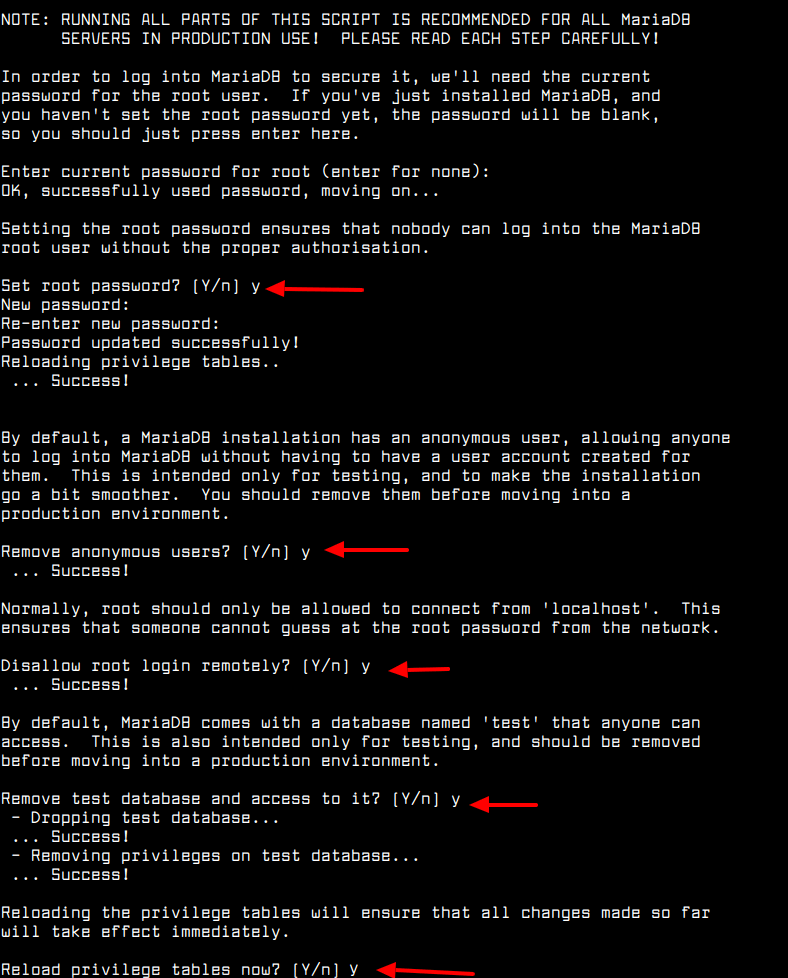
2. Next, you need to apply some basic security measures on the database installation by running the following security script which ships with the MariaDB package.
$ sudo mysql_secure_installation
After executing the script, it will prompt you a series of questions where you can answer yes(y) to enable some basic security options as shown.
- Enter current password for root (enter for none): Enter
- Set a root password? [Y/n]
y - Remove anonymous users? [Y/n]
y - Disallow root login remotely? [Y/n]
y - Remove test database and access to it? [Y/n]
y - Reload privilege tables now? [Y/n]
y
Step 2: Create a Drupal Database
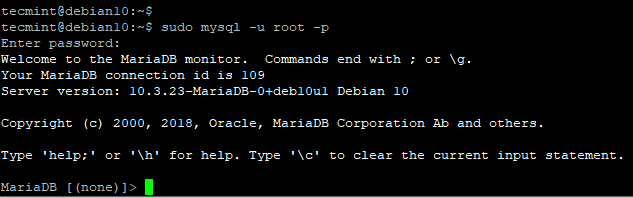
3. Next, we will start by creating a database that will be used by Drupal for storing data during and after the installation. First, log into the MariaDB database server.
$ sudo mysql -u root -p
You will get the following welcome message.
4. Once you login to the MariaDB shell, we are going to create a database called drupal_db.
MariaDB [(none)]> create DATABASE drupal_db;
5. Next, we will create a database user with a strong password and grant the user full access to the Drupal database as shown.
MariaDB [(none)]> create USER ‘drupal_user’@’localhost’ IDENTIFIED BY “StrongPassword”;
MariaDB [(none)]> GRANT ALL ON drupal_db.* TO ‘drupal_user’@’localhost’ IDENTIFIED BY “password”;
MariaDB [(none)]> FLUSH PRIVILEGES;
MariaDB [(none)]> EXIT;
Now that we have the Apache web server, Drupal database, and all the PHP extensions in place, we will move along and download the Drupal installation file.
Step 3: Download and Install Drupal in Debian
6. We are going to download Drupal’s compressed file from Drupal’s Official site as shown using the wget command.
$ sudo wget https://www.drupal.org/download-latest/tar.gz -O drupal.tar.gz
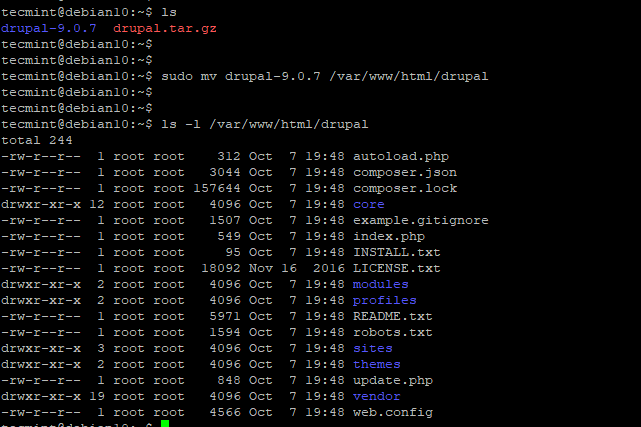
7. Once the download is complete, extract it in your current directory and move the uncompressed drupal folder to the /var/www/html path and list the directory’s contents as shown:
$ sudo tar -xvf drupal.tar.gz
$ sudo mv drupal-9.0.7 /var/www/html/drupal
$ ls -l /var/www/html/drupal
8. Next, modify the directory permissions to make Drupal accessible to the public.
$ sudo chown -R www-data:www-data /var/www/html/drupal/
$ sudo chmod -R 755 /var/www/html/drupal/
Step 4: Create an Apache Drupal Virtual Host
9. To serve Drupal on the front end, we need to create an Apache virtual host file to serve Drupal’s site. Using your favorite text editor, create the file as shown. Here, we are using the vim editor.
$ sudo vim /etc/apache2/sites-available/drupal.conf
Paste the content shown on the virtual host file.
<VirtualHost *:80>
     ServerAdmin [email protected]
     DocumentRoot /var/www/html/drupal/
     ServerName  example.com
     ServerAlias www.example.com

     ErrorLog ${APACHE_LOG_DIR}/error.log
     CustomLog ${APACHE_LOG_DIR}/access.log combined

     <Directory /var/www/html/drupal/>;
            Options FollowSymlinks
            AllowOverride All
            Require all granted
     </Directory>

     <Directory /var/www/html/>
            RewriteEngine on
            RewriteBase /
            RewriteCond %{REQUEST_FILENAME} !-f
            RewriteCond %{REQUEST_FILENAME} !-d
            RewriteRule ^(.*)$ index.php?q=$1 [L,QSA]
    </Directory>
</VirtualHost>
When you are done, save the changes and exit the file.
10. Up until this point, only the Apache Welcome page is accessible from a browser. We need to change this and have Apache serve the Drupal site. To achieve this, we need to enable Drupal’s virtual host. So, execute the following commands:
$ sudo a2ensite drupal.conf
$ sudo a2enmod rewrite
Finally, to effect the changes, restart the Apache webserver.
$ sudo systemctl restart apache2
11. If you have a UFW firewall running, open the HTTP port as shown.
$ sudo ufw allow 80/tcp
$ sudo ufw reload
Step 6: Setup Drupal from a Browser
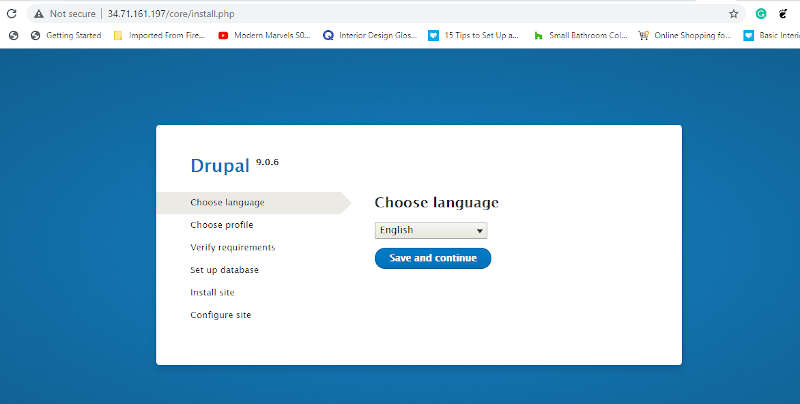
12. This is the final step in the installation of Drupal and it requires setting it up on a browser. So, fire up your favorite browser and browse your server’s IP address as shown:
http://www.server-ip/
The installer will take you through the steps before completing the setup. On the first page, you will be required to choose your preferred language as shown. Select your desired language and click ‘Save and Continue’.
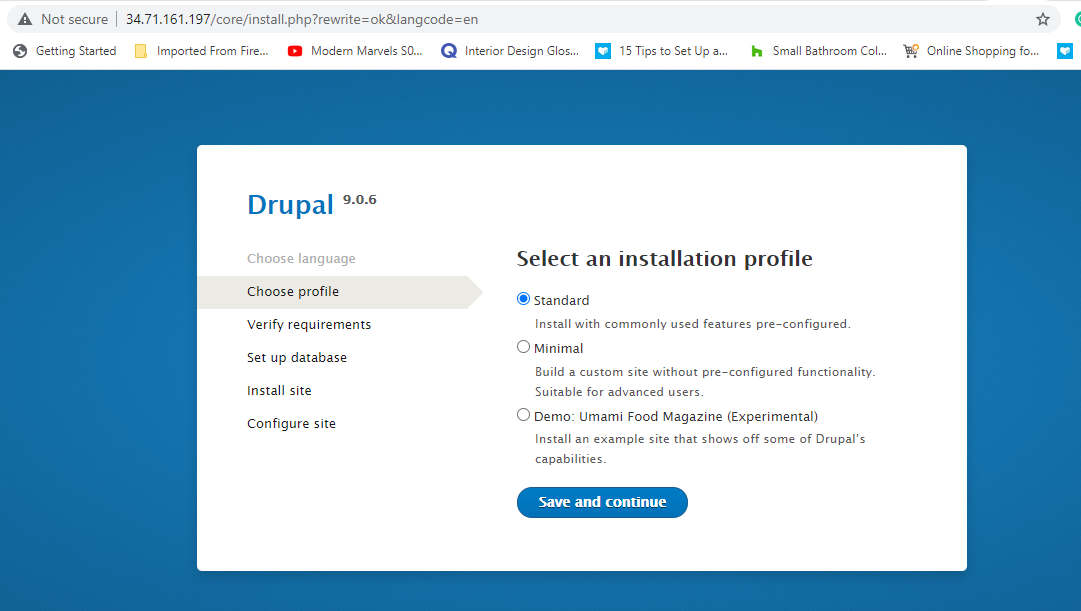
13. There are 3 installation profiles that you can use to install Drupal, But for simplicity’s sake, we will go with the ‘Standard’ profile.
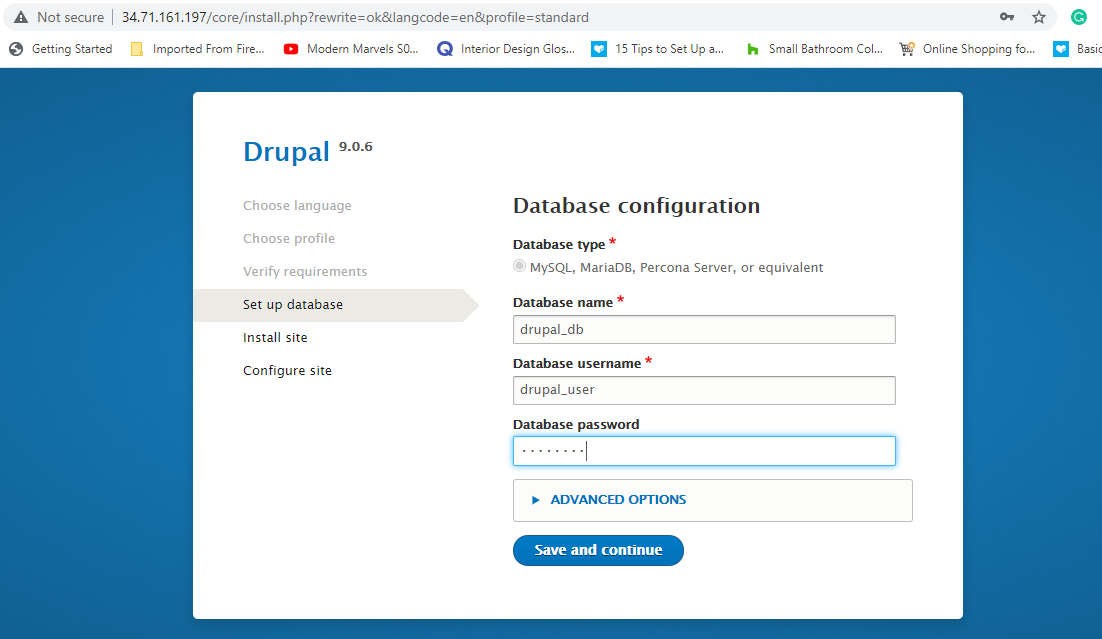
14. In the next step, fill out the database details for Drupal as specified above and click ‘Save and Continue’.
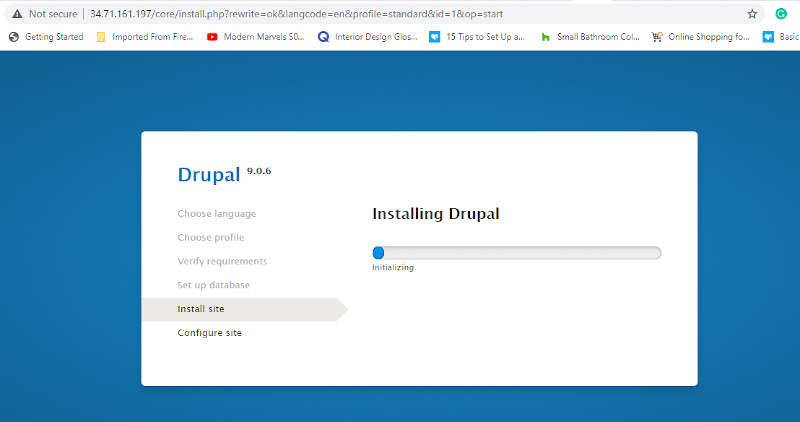
15. Drupal’s installer will begin to install all the files and database modules.
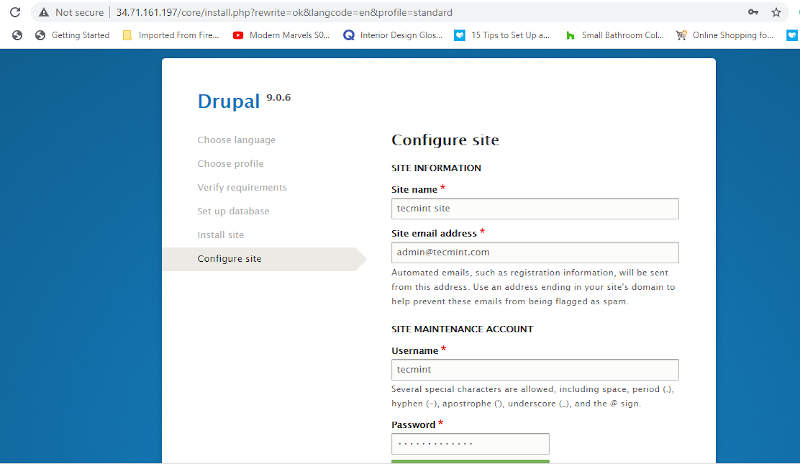
16. Once the installation is complete, you will be required to provide your site’s details such as Site name, site address, timezone, and location to mention a few. Be sure to fill in all the details.
17. Finally, you will get the default dashboard for Drupal as shown:
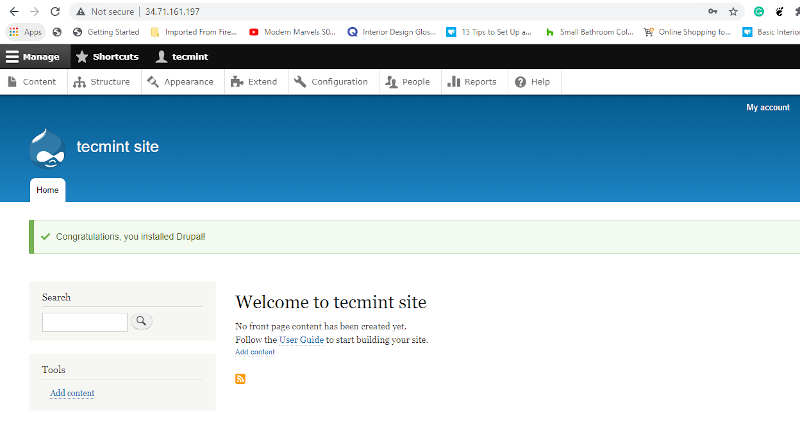
From here, you can go on and create your blog or website using various templates and customize the look and feel to your preference. That’s it for today. We hope that you can comfortably install Drupal on your Debian instance.


Hello, great tutorial, can you please help me how to redirect my main index to drupal?
I followed the instructions and searched the internet for how to do it, but I don’t know what to do anymore now.