Moodle is the world’s most popular learning management system for building robust online learning sites. It features a range of activities and educational tools that you can choose from, it supports assessment management and ships with custom certificates. It also enables communication with your students in real-time with a powerful video conference tool. Besides, it is mobile-ready, so your students can learn from their mobile devices.
Moodle Server Requirements
- Operating System: a minimal installation of CentOS 8 or RHEL 8 server with LEMP stack installed.
- Disk Space: 200MB for the Moodle, and 5GB is probably a realistic minimum of storing content.
- Processor: 1GHz (min), 2GHz dual-core or more recommended.
- Memory: 512MB (min), 1GB or more is recommended. 8GB plus is likely on a large production server.
On this page
Creating a Domain DNS Record for Moodle Website
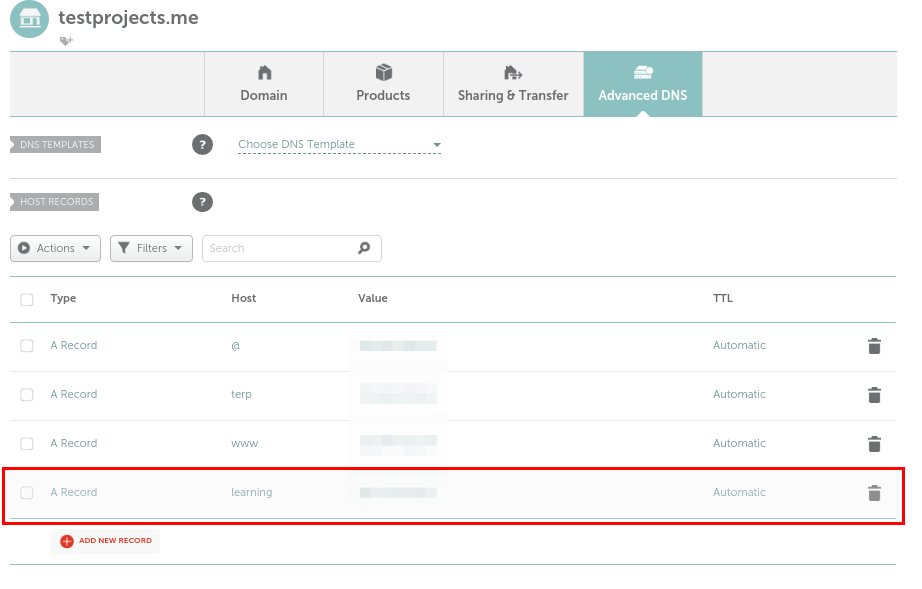
1. Start by creating a subdomain that users will use to access the Moodle online learning site. For example, if your domain name is testprojects.me, you can create a subdomain called learning.testprojects.me.
Open your domain name’s advanced DNS settings and add an A record as shown in the following image.
Installing Moodle in CentOS 8 Server
2. Before installing Moodle, ensure that you have the required PHP extensions on your server, you can run the following command to install them:
# dnf install php-common php-iconv php-curl php-mbstring php-xmlrpc php-soap php-zip php-gd php-xml php-intl php-json libpcre3 libpcre3-dev graphviz aspell ghostscript clamav
3. Next, create a database for the Moodle application as follows.
# mysql -u root -p
Then create the database, database user and create a secure password for the use.
MariaDB [(none)]> CREATE DATABASE moodledb;
MariaDB [(none)]> GRANT SELECT,INSERT,UPDATE,DELETE,CREATE,CREATE TEMPORARY TABLES,DROP,INDEX,ALTER ON moodledb.* TO 'moodleadmin'@'localhost' IDENTIFIED BY 'p@zzwd0L2';
MariaDB [(none)]> FLUSH PRIVILEGES;
MariaDB [(none)]> exit
4. Now download the latest version of Moodle (3.9 at the time of writing) from the official moodle project website, extract the archive file and move it into your webroot (/var/www/html/) directory, then set appropriate permissions and ownership to allow the webserver access to the Moodle directory, as follows.
# wget -c https://download.moodle.org/download.php/direct/stable39/moodle-latest-39.tgz
# tar -xzvf  moodle-latest-39.tgz
# mv moodle /var/www/html/
# chmod 775 -R /var/www/html/moodle
# chown nginx:nginx -R /var/www/html/moodle
5. Next, create the moodledata directory which is the location of files that are uploaded or created by the Moodle interface, then assign appropriate permissions and ownership to allow the webserver read and write access to it:
# mkdir -p /var/www/html/moodledata
# chmod 770 -R /var/www/html/moodledata
# chown :nginx -R /var/www/html/moodledata
6. Next, move into the Moodle installation directory and create a config.php file from the sample config.dist.php file provided, then open it for editing to configure some key settings for your Moodle platform, such as database connection parameters and the site location and where it can find the moodledata directory:
# cd /var/www/html/moodle/
# cp config-dist.php config.php
# vim config.php
Set the correct datbase type, correct database host, database name, and database user and the user’s password.
$CFG->dbtype    = 'mariadb';      // 'pgsql', 'mariadb', 'mysqli', 'sqlsrv' or 'oci'
$CFG->dblibrary = 'native';     // 'native' only at the moment
$CFG->dbhost    = 'localhost';  // eg 'localhost' or 'db.isp.com' or IP
$CFG->dbname    = 'moodledb';     // database name, eg moodle
$CFG->dbuser    = 'moodleadmin';   // your database username
$CFG->dbpass    = 'p@zzwd0L2';   // your database password
$CFG->prefix    = 'mdl_';       // prefix to use for all table names
7. Also set the URL used to access your Moodle sit, this specifies the location of the wwwroot where your Moodle web files are located, and also the dataroot (the moodledata directory):
$CFG->wwwroot   = 'http://learning.testprojects.me';
$CFG->dataroot  = '/var/www/html/moodledata';
Configuring NGINX to Serve Moodle Website
8. In this section, you need to configure NGINX to serve your Moodle application. You need to create a server block for it in the NGINX configuration as shown.
# vim /etc/nginx/conf.d/moodle.conf
Copy and paste the following configuration in the server block configuration file. Replace the server name with your subdomain name created above, and the fastcgi_pass should point to php-fpm (note that on CentOS 8, PHP-FPM accepts FastCGI requests using the address defined in the /etc/nginx/conf.d/php-fpm.conf configuration).
server{
   listen 80;
    server_name learning.testprojects.me;
    root        /var/www/html/moodle;
    index       index.php;

    location / {
        try_files $uri $uri/ /index.php?$query_string;
    }

    location ~ ^(.+\.php)(.*)$ {
        fastcgi_split_path_info ^(.+\.php)(.*)$;
        fastcgi_index           index.php;
        fastcgi_pass            php-fpm;
        include                 /etc/nginx/mime.types;
        include                 fastcgi_params;
        fastcgi_param           PATH_INFO       $fastcgi_path_info;
        fastcgi_param           SCRIPT_FILENAME $document_root$fastcgi_script_name;
}
}
Save the file and close it.
9. Then check the NGINX configuration for correctness, if it is Ok, restart the nginx and php-fpm services to apply the recent changes:
# nginx -t
# systemctl restart nginx
# systemctl restart php-fpm
10. If you have SELinux enabled on your system, then run the following commands to set the correct context for accessing the Moodle web files on the server:
# setsebool -P httpd_can_network_connect on
# chcon -R --type httpd_sys_rw_content_t /var/www/html
11. Besides, ensure that the HTTP and HTTPS services are open in the firewall to allow traffic to the NGINX web server:
# firewall-cmd --permanent --zone=public --add-service=http
# firewall-cmd --permanent --zone=public --add-service=https
# firewall-cmd --reload
Complete Moodle Installation via Web Installer
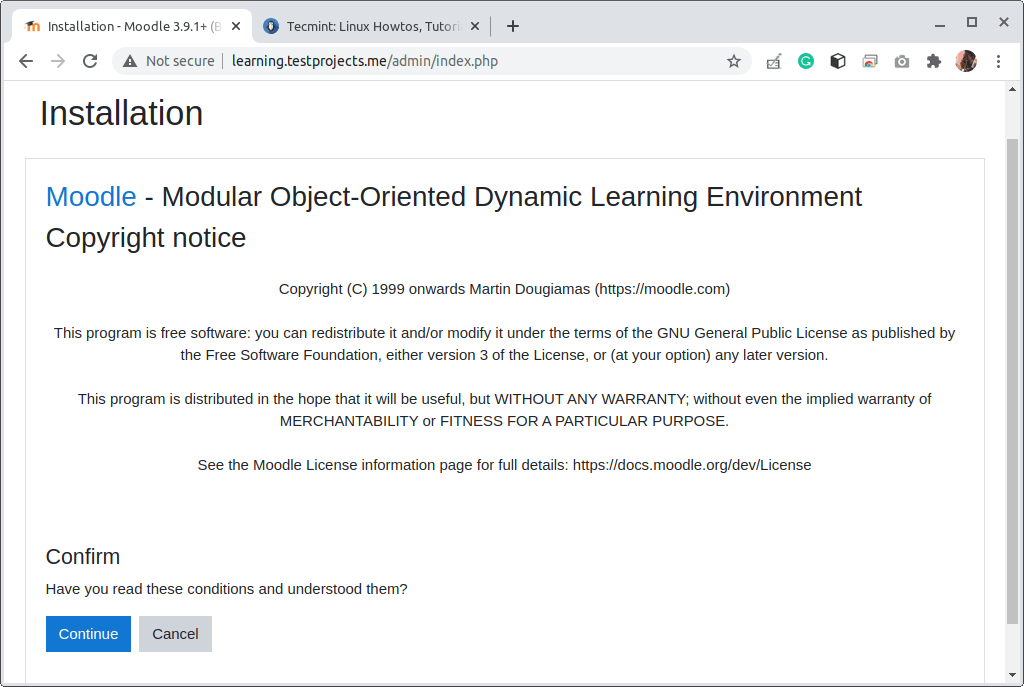
12. To access the Moodle web installer, open your web browser, and navigate using the subdomain you created above:
http://learning.testprojects.me
Once the welcome page loads read through the terms, and conditions and click Continue.
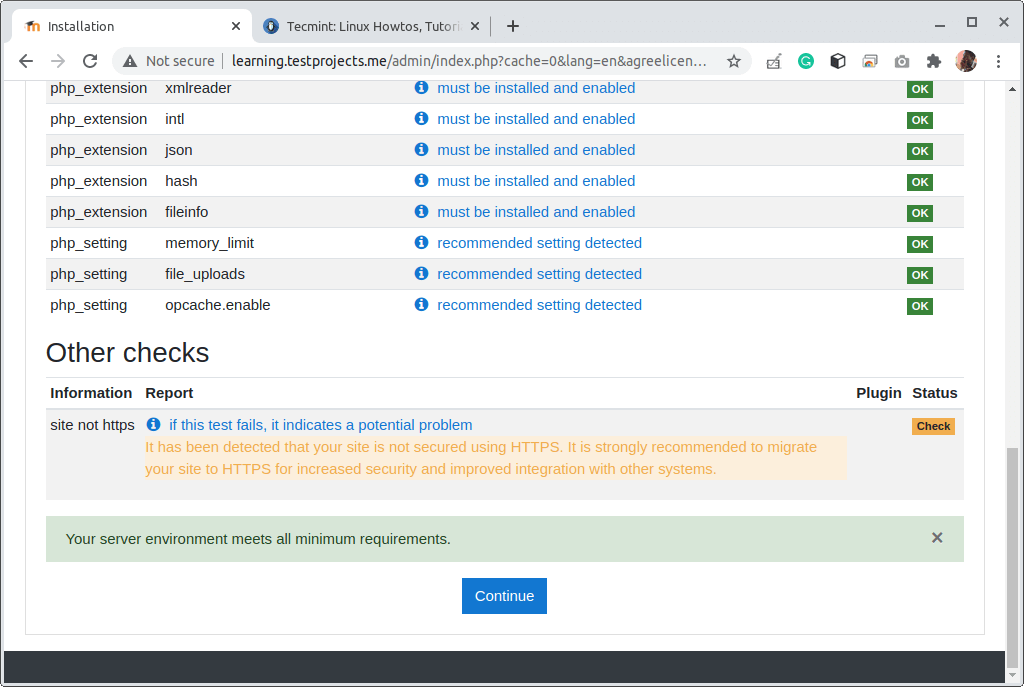
13. Next, the web installer will check whether your system meets the requirements for running a Moodle site of the specified version. You can scroll down to view more information.

14. The installer will complain about HTTPS not being enabled, ignore that error for now (in the next section, we will show how to enable HTTPS on Moodle), and click Continue, to start the actual installation of the web files.
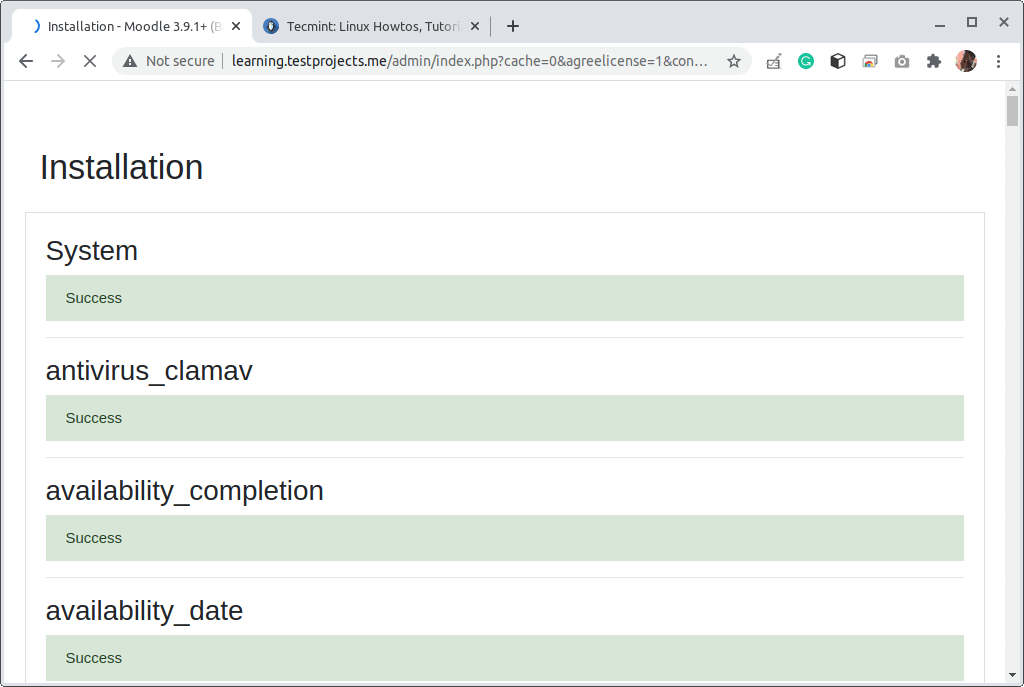
15. Now the installer will start the actual installation of the Moodle files as shown in the following screenshot. Once it is complete, click Continue.
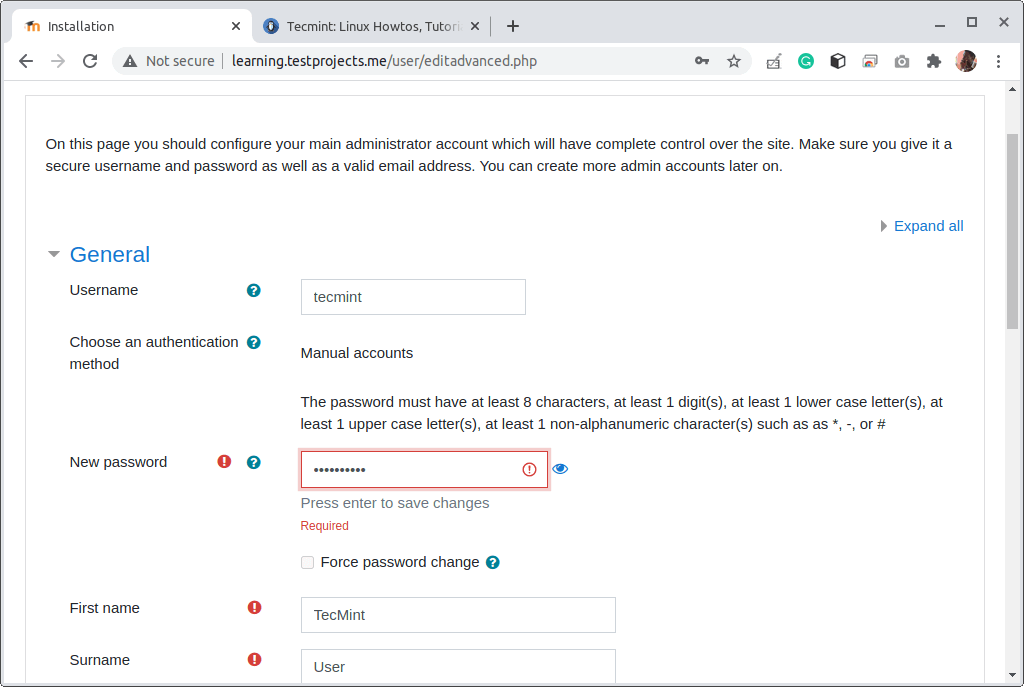
16. In the next step, you need to update your Moodle site’s administrator account by updating the username, password, first name, and surname, and email address. Then scroll down the page and click Update Profile.
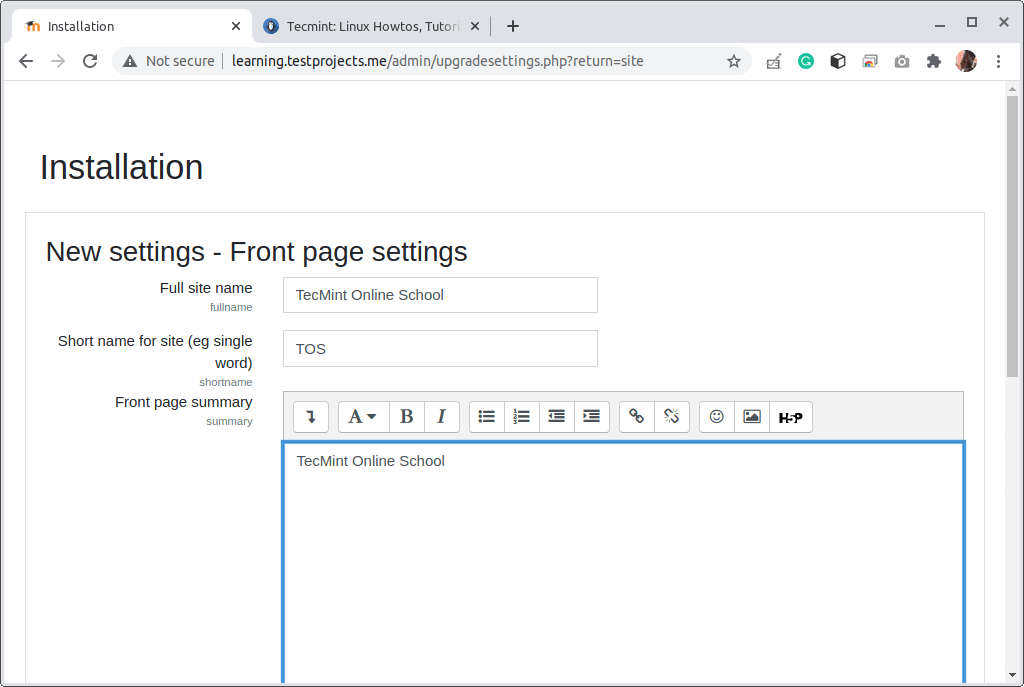
17. Then update the Moodle site front-page settings. Then scroll down and click Update to start using your Moodle site.
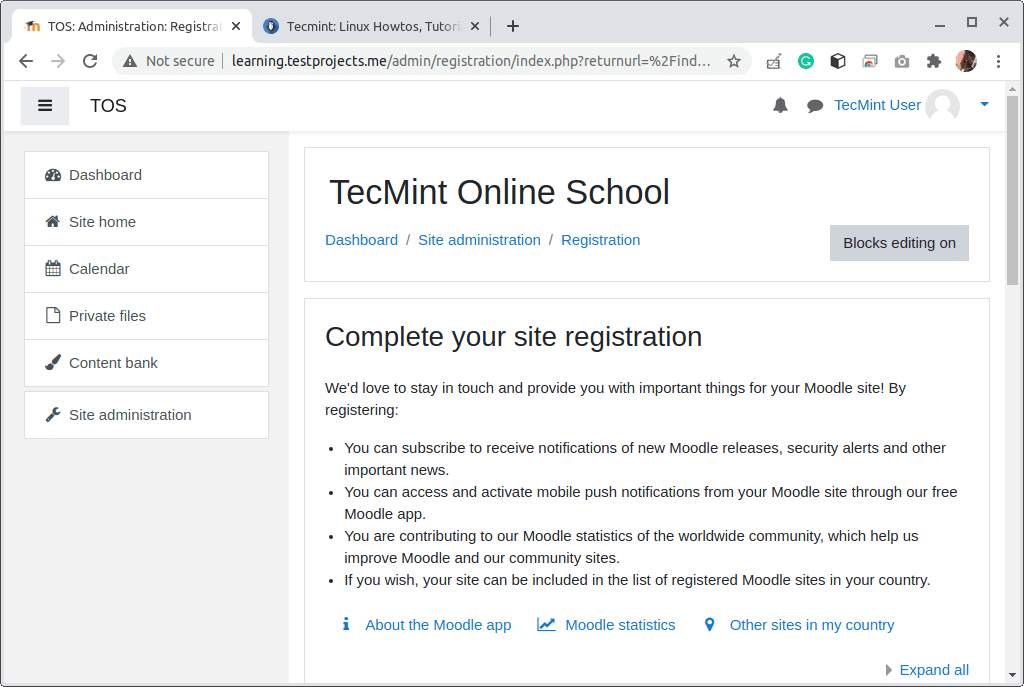
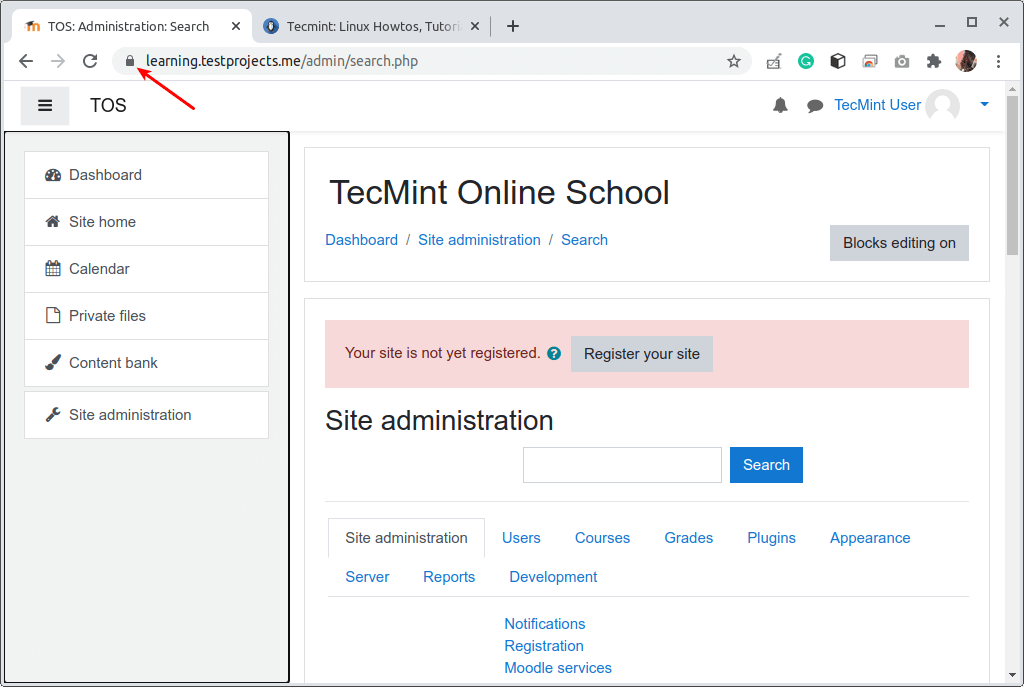
18. Next, you need to register your site by following the instructions on the screen. You can go to the dashboard by clicking on the Dashboard.
Setting Up HTTPS on Moodle Site Using Let’s Encrypt
HTTPS adds the first layer of security to your site to enable secure communications between your users and the Moodle application (especially the NGINX web server which receives requests and delivers responses).
You can either purchase an SSL/TLS certificate from a commercial CA or use Let’s Encrypt which is free and recognized by all modern web browsers. For this guide, we will use Let’s Encrypt.
19. The Let’s Encrypt Certificate deployment is automatically managed using the certbot tool. You can install certbot and other required packages with the following command:
# dnf install certbot python3-certbot-nginx
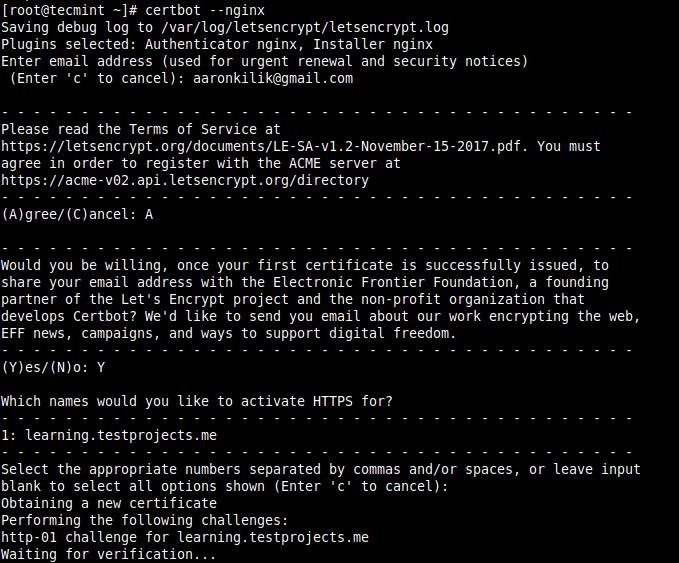
20. Then run the following command to get a Let’s Encrypt certificate and have Certbot edit your NGINX configuration automatically to serve it (it will also configure HTTP to be redirected automatically to HTTPS).
# certbot --nginx
21. Then run the following command to enable automatic renewal of the Let’s Encrypt SSL/TLS certificate:
# echo "0 0,12 * * * root python3 -c 'import random; import time; time.sleep(random.random() * 3600)' && certbot renew -q" | sudo tee -a /etc/crontab > /dev/null
22. Next, update your Moodle configuration to start using HTTPS.
# vim /var/www/html/moodle/config.php
change the wwwroot URL from HTTP to HTTPS:
$CFG->wwwroot = 'https://learning.testprojects.me';
23. Last but not least, confirm that your Moodle site is now running on HTTPS.
That’s it for now! For more information and configuration options to run your new learning platform, go to the Moodle website, and read through the official documentation.


Hi,
Thank you for this great tutorial. However, when i tried to access it externally, I’m getting 403 Forbidden and log says:
*4 directory index of “/var/www/html/” is forbidden
*1 directory index of “/var/www/html/” is forbidden
*6 directory index of “/var/www/html/” is forbidden
*7 directory index of “/var/www/html/” is forbidden
*2 directory index of “/var/www/html/” is forbidden
Try to install moodle on Debian buster, ubuntu 2004, and other distributions without success. I am installing from a computer in VirtualBox and I can’t get past step 15. where it gets stuck working and after a long time I get an error that when searching it does not return anything in google. I don’t know how to move forward.