In our previous article, we’ve described how to setup OpenLiteSpeed(HTTP) server, PHP 7 and MariaDB on CentOS 7. In this article, we will explain how to install and setup OpenLiteSpeed – High Performance HTTP Web Server with PHP 7 and MariaDB support on Debian and Ubuntu systems.
OpenLiteSpeed is an open source, high-performance HTTP server with an event-driven architecture; built for Unix-like operating systems including Linux and Windows OS.
It is a powerful, modular HTTP server that comes with several modules for common HTTP server functionalities, it can handle hundreds of thousands of concurrent connections without critical server load issues, and it supports third-party modules via API (LSIAPI) as well.
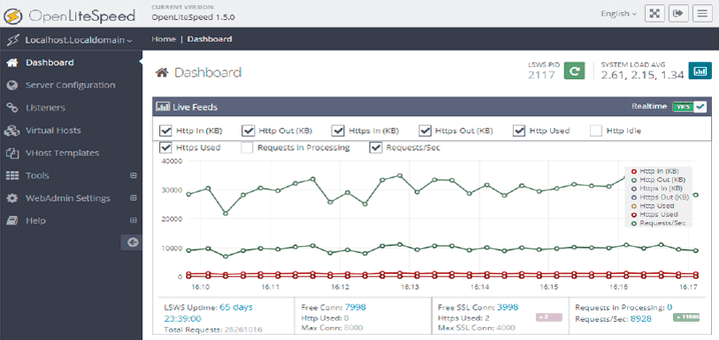
Importantly, it supports Apache-compatible rewrite rules, ships in with a an easy-to-use, user friendly Web administration console which shows real-time server stats. OpenLiteSpeed utilizes minimal CPU and memory resources, supports creation of virtual hosts, high-performance page caching as well as installation of a different PHP versions.
Step 1: Enable OpenLitespeed Repository
1. OpenLiteSpeed is not present in the Debian/Ubuntu software repositories, so you have to add OpenLiteSpeed repository with this command. This will create the file /etc/apt/sources.list.d/lst_debian_repo.list:
$ wget -c http://rpms.litespeedtech.com/debian/enable_lst_debain_repo.sh
$ sudo bash enable_lst_debain_repo.sh
Step 2: Install OpenLiteSpeed on Debian/Ubuntu
2. Then install OpenLiteSpeed 1.4 (the latest version at the time of this writing) with the apt command below, which will install it under the /usr/local/lsws directory. The service will also be started after installation is complete.
$ sudo apt install openlitespeed
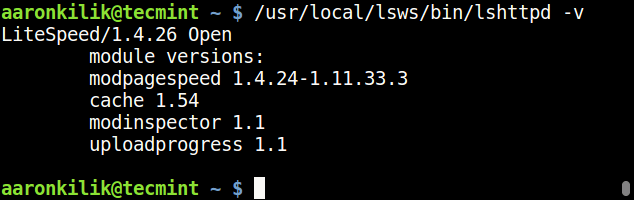
3. After installing it, you can start and confirm the OpenLiteSpeed version by running like this
$ /usr/local/lsws/bin/lshttpd -v
4. OpenLiteSpeed runs on port “8088” by default. If you have UFW firewall enabled on the system, update firewall rules to permit port 8088 to access your default site on the server.
$ sudo ufw allow 8088/tcp
$ sudo ufw reload
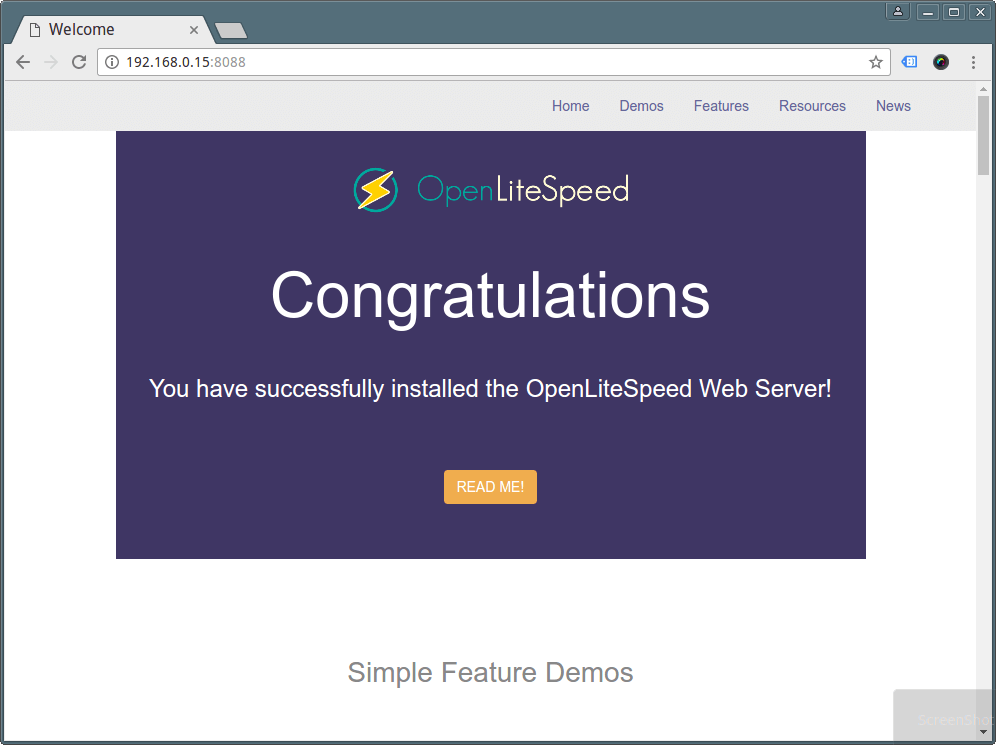
5. Now open a web browser and type the following URL to verify the default page of OpenLiteSpeed.
http://SERVER_IP:8088/
or
http://localhost:8088
Step 3: Install PHP 7 for OpenLiteSpeed
6. Next, install PHP 7 with most needed modules for OpenLiteSpeed with the command below, it will install PHP as /usr/local/lsws/lsphp70/bin/lsphp.
$ sudo apt install lsphp70 lsphp70-common lsphp70-mysql lsphp70-dev lsphp70-curl lsphp70-dbg
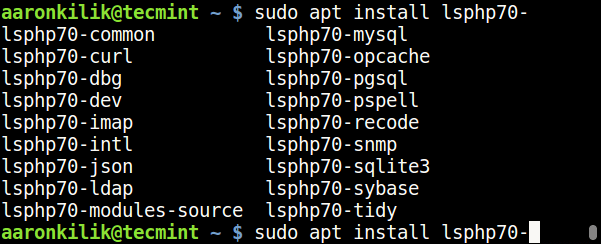
7. If you want to install extra PHP modules, run the command below to list all the available modules.
$ sudo apt install lsphp70-
Step 4: Configure OpenLiteSpeed and PHP 7
8. In this section, we will configure OpenLiteSpeed and PHP 7 with the standard HTTP port 80 as explained below.
As we mentioned earlier on, OpenLiteSpeed comes with a WebAdmin console which listens on port 7080. So, first start by setting the admin username and password for the OpenLiteSpeed WebAdmin console using the command below.
$ sudo /usr/local/lsws/admin/misc/admpass.sh
Please specify the user name of administrator.
This is the user name required to login the administration Web interface.

User name [admin]: tecmint

Please specify the administrator's password.
This is the password required to login the administration Web interface.

Password:
Retype password:
Administrator's username/password is updated successfully!
9. Now add firewall rules to permit port 7080 via the firewall to access the WebAdmin console.
$ sudo ufw allow 7080/tcp
$ sudo ufw reload
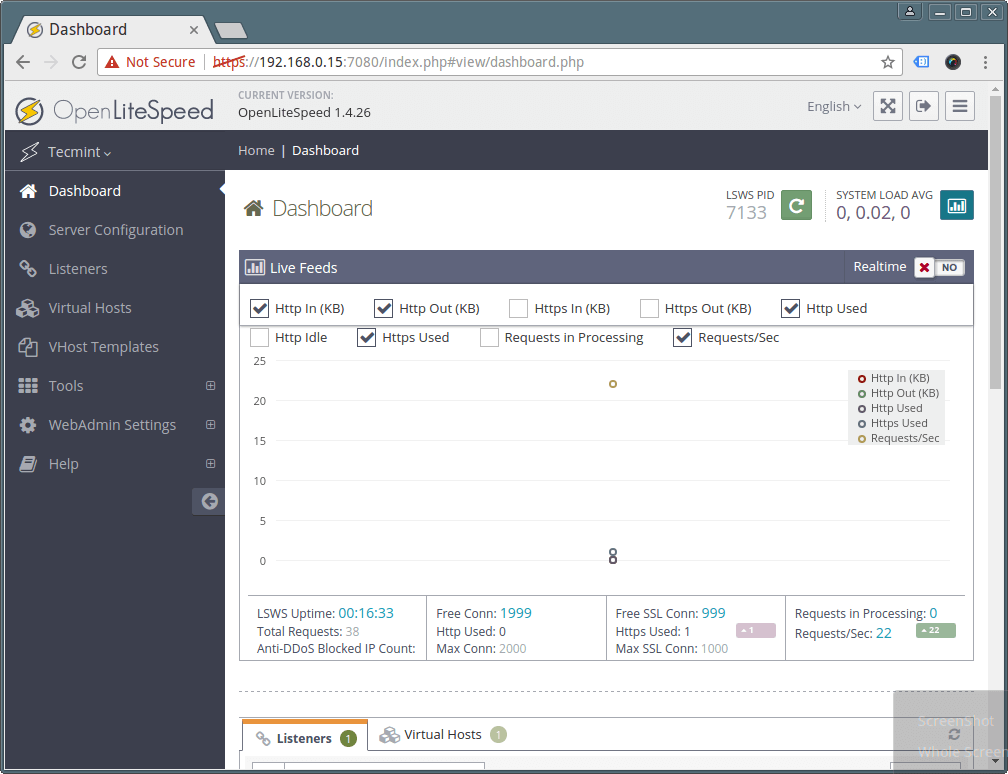
10. Now open a web browser and type the following URL to access OpenLiteSpeed WebAdmin console.
http://SERVER_IP:7080
OR
http://localhost:7080
Enter the username and password you set above, and click on “Login“.

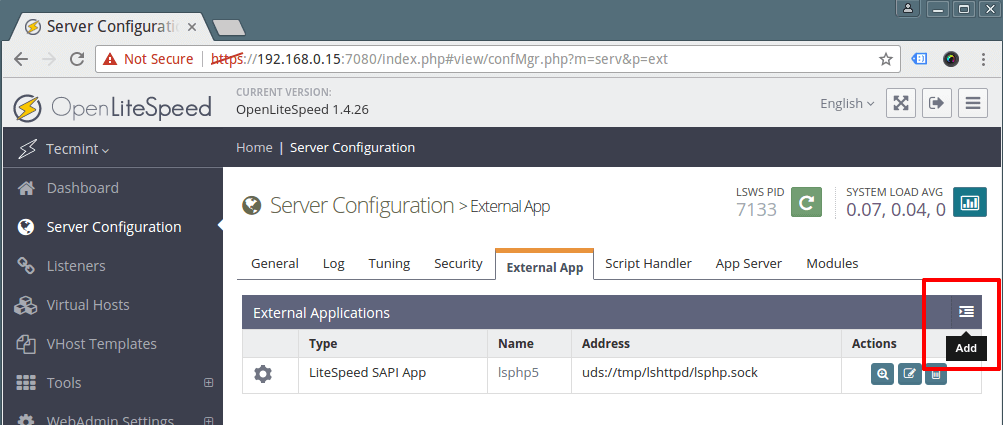
11. By default, OpenLiteSpeed 1.4 uses LSPHP 5, you need to make a few changes to setup LSPHP 70 as explained below.
Go to Server Configuration → External App → Add button on the right side to add new “lsphp70” as shown in the screen shot below.
12. Then define the new External App, set type to “LiteSpeed SAPI App” and click next to add the new external application’s name, address, maximum number of connections, initial response timeout, and retry timeout.
Name: 					lsphp70
Address:    				uds://tmp/lshttpd/lsphp.sock
Notes: 					LSPHP70 Configuration
Max Connections: 			35
Initial Request Timeout (secs): 	60
Retry Timeout : 			0

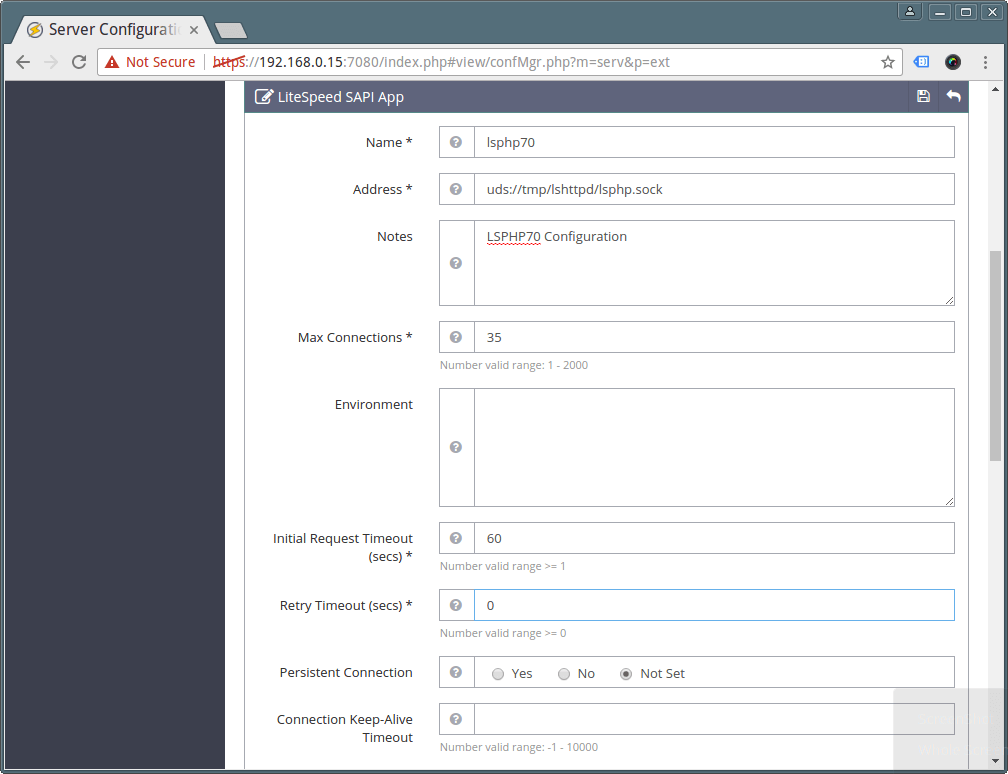
Note that the most critical configuration here is the Command setting, it tells the external app where to find PHP executable it will use – provide the absolute path of LSPHP70:
Command: /usr/local/lsws/lsphp70/bin/lsphp
And click on the Save button to save the above configurations.
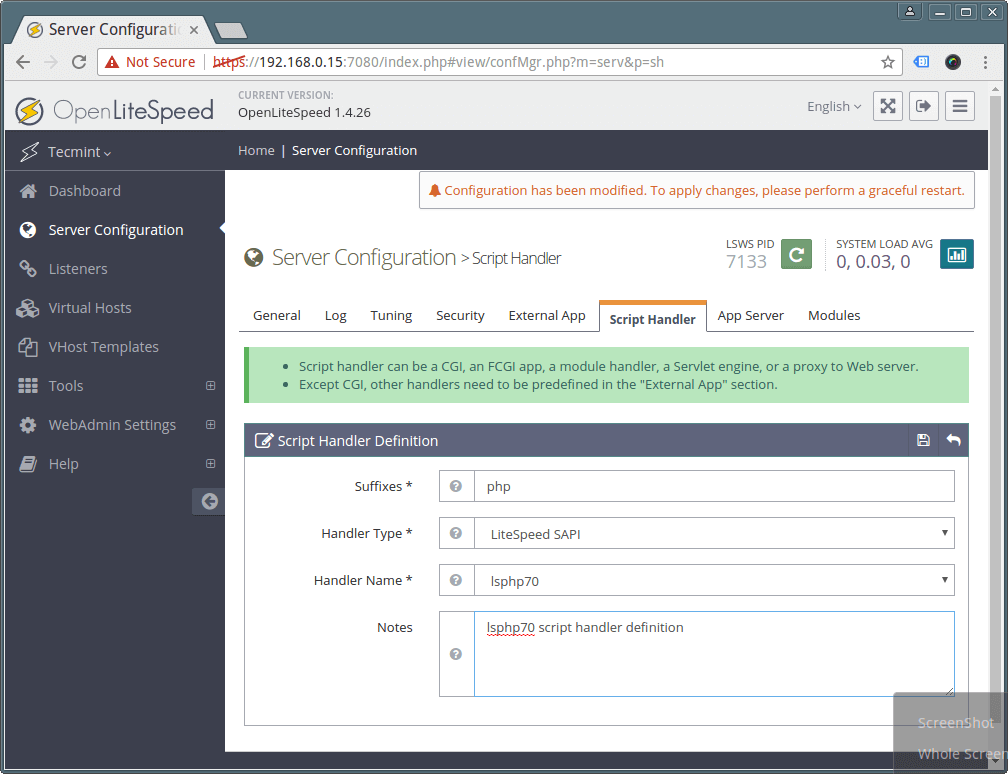
13. Next, click on Server Configuration → Script Handler and edit the default lsphp5 script handler, enter the following values.
Suffixes: 		php
Handler Type: 		LiteSpeed SAPI
Handler Name:		lsphp70
Notes:			lsphp70 script handler definition
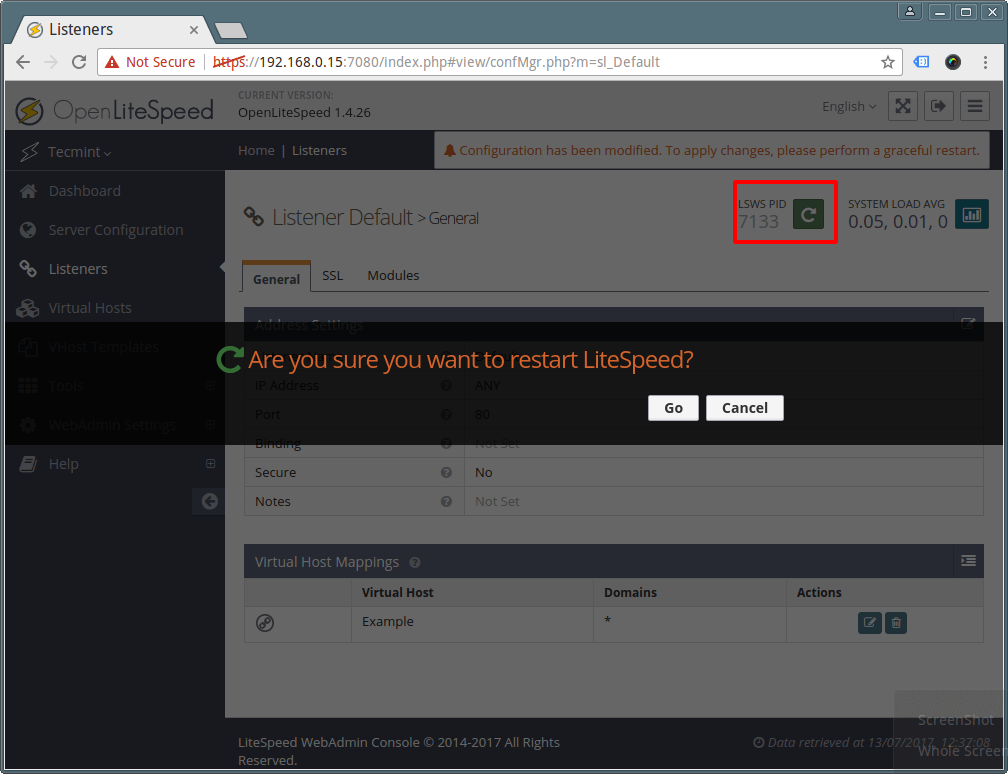
14. By default, most HTTP servers are associated with or listen on port 80, but OpenLiteSpeed listens on 8080 by default: change it to 80.
Click on Listeners to see a list of all listeners configurations. Then click View to see all settings of the default listener and to edit, click Edit.
Set the port to 80 and save the configuration and save the settings.

15. To reflect the above changes, gracefully restart OpenLiteSpeed by clicking on the restart button and click yes to confirm.
16. Add firewall rules to permit port 80 via the firewall.
$ sudo ufw allow 80/tcp
$ sudo ufw reload
Step 5: Test PHP 7 and OpenLiteSpeed Installation
17. Finally verify that OpenLiteSpeed is running on port 80 and PHP 7 using following URL’s.
http://SERVER_IP
http://SERVER_IP/phpinfo.php
18. To manage and control OpenLiteSpeed service, use these commands.
# /usr/local/lsws/bin/lswsctrl start            #start OpenLiteSpeed
# /usr/local/lsws/bin/lswsctrl stop             #Stop OpenLiteSpeed
# /usr/local/lsws/bin/lswsctrl restart          #gracefully restart OpenLiteSpeed (zero downtime)
# /usr/local/lsws/bin/lswsctrl help             #show OpenLiteSpeed commands
Step 6: Install MariaDB for OpenLiteSpeed
20. Install MariaDB database management system using following command.
$ sudo apt install mariadb-server
21. Next, start the MariaDB database system and secure its installation.
$ sudo systemctl start mysql
$ sudo mysql_secure_installation
After running the security script above, you will be prompted to enter the root password, simply press [Enter] without providing it:
Enter current password for root (enter for none):
You will also be asked to answer the questions below, simply type y to all the questions to set a root password, remove anonymous users, turn off remote root login, remove the test database and reload privilege tables:
Set root password? [Y/n]yRemove anonymous users? [Y/n]yDisallow root login remotely? [Y/n]yRemove test database and access to it? [Y/n]yReload privilege tables now? [Y/n]y
You can find additional information from OpenLitespeed Homepage: http://open.litespeedtech.com/mediawiki/
You may also like to read following related articles.
- Installing LAMP (Linux, Apache, MariaDB, PHP/PhpMyAdmin) in RHEL/CentOS 7.0
- Install Latest Nginx 1.10.1, MariaDB 10 and PHP 5.5/5.6 on RHEL/CentOS 7/6
- How To Install Nginx, MariaDB 10, PHP 7 (LEMP Stack) in 16.10/16.04
- How to Install LAMP with PHP 7 and MariaDB 10 on Ubuntu 16.10
That’s all! In this tutorial, we have explained how to setup OpenLiteSpeed, PHP 7 and MariaDB on Debian/Ubuntu systems. If you have any queries or additional thoughts do share using the comment section.
rewrite the article to reflect php 7.4
@guru,
Just replace lsphp70 with lsphp74, for example.
If someone looking for OLS for any project like WP or PHP based, I would recommend checking OPENLitePanel script which handles all installation and setup pain.
https://openlitepanel.comTry if you are looking for no GUI based server setup.
@Sunil
Thanks a ton for sharing.
Also to install WordPress on OLS
Namaste Aaron, Thank you for the article.
Could you update it supporting for Ubuntu 18.04 LTS with Open Lite Speed along with the email server configuration?
1. OLS on Ubuntu 18.04 LTS without GUI.
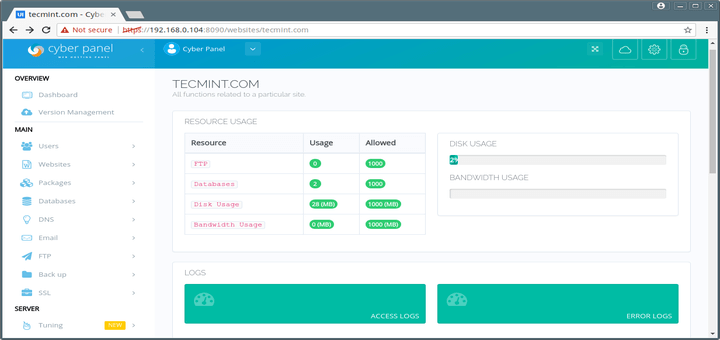
2. Email Server on OLS without CyberPanel/cPanel
3. Email Server should support DMARC (without third-party)
4. DKIM should support the latest encryption algorithms ED25519 instead of RSA /SHA-256 algorithms
5. SPF – CLI
All these things in Command Line Interface and not in the GUI. GUI reduces security as I am security conscious.
@Krishna,
These installation instructions also support Ubuntu 18.04 LTS, give a try and see..
Note that the most critical configuration here is the Command setting, it tells the external app where to find PHP executable it will use – provide the absolute path of LSPHP70:
how to use? please help..
@savas
Command:
/usr/local/lsws/lsphp70/bin/lsphpHere, Command is the configuration parameter in the configuration interface and
/usr/local/lsws/lsphp70/bin/lsphpis the value. Unfortunately, we didn’t capture it in the screenshot. But once you see it, know that you have to use it as explained.