This guide will walk you through the instructions to install PostgreSQL 12 relational and object-oriented database management systems and pgAdmin4, a commonly-used web-based PostgreSQL database server administration tool. We will show how to install the latest version of pgAdmin4 that is v4.23.
Prerequisites:
Let’s get started…
Installing PostgreSQL in Ubuntu 20.04
Log into your Ubuntu system and update the system software packages using the following apt command.
$ sudo apt update
Now install the latest version of PostgreSQL from the default Ubuntu repositories.
$ sudo apt install postgresql
During the installation, the installer will create a new PostgreSQL cluster (a collection of databases that will be managed by a single server instance), thus initialize the database. The default data directory is /var/lib/postgresql/12/main and the configurations files are stored in the /etc/postgresql/12/main directory.
After PostgreSQL installed, you can confirm that the PostgreSQL service is active, running and is enabled under systemd using the following systemctl commands:
$ sudo systemctl is-active postgresql
$ sudo systemctl is-enabled postgresql
$ sudo systemctl status postgresql
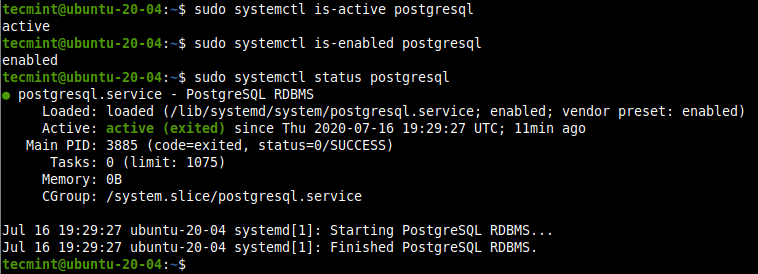
Also, confirm that the Postgresql server is ready to accept connections from clients as follows:
$ sudo pg_isready

Creating Database in PostgreSQL
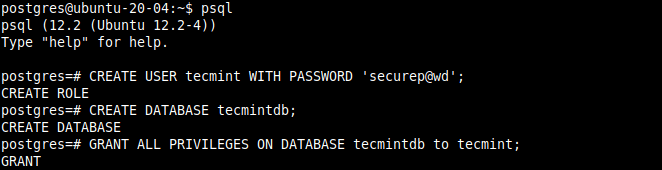
To create a new database in PostgreSQL, you need to access the PostgreSQL database shell (psql) program. First, switch to the postgres system user account and run the psql command as follows:
$ sudo su - postgres
$ psql
postgres=#
Now create a new database and a user using the following commands.
postgres=# CREATE USER tecmint WITH PASSWORD 'securep@wd';
postgres=# CREATE DATABASE tecmintdb;
postgres=# GRANT ALL PRIVILEGES ON DATABASE tecmintdb to tecmint;
postgres=# \q
Configuring PostgreSQL Client Authentication
PostgreSQL uses client authentication to decide which user accounts can connect to which databases from which hosts and this is controlled by settings in the client authentication configuration file, which on Ubuntu is located at /etc/postgresql/12/main/pg_hba.conf.
Open this file using your favorite text editor as shown.
$ sudo vim /etc/postgresql/12/main/pg_hba.conf
PostgreSQL uses many types of client authentication methods including peer, ident, password, and md5 (read the PostgreSQL 12 documentation for a detailed explanation of each method).
md5 is the most secure and recommended because it requires the client to supply a double-MD5-hashed password for authentication. So, ensure that the entries below have md5 as the under method:
host    all             all             127.0.0.1/32            md5
# IPv6 local connections:
host    all             all             ::1/128                	md5
After making changes in the Client Authentication configuration file, you will need to restart the PostgreSQL service.
$ sudo systemctl restart postgresql
Installing pgAdmin4 in Ubuntu
pgAdmin4 is not available in the Ubuntu repositories. We need to install it from the pgAdmin4 APT repository. Start by setting up the repository. Add the public key for the repository and create the repository configuration file.
$ curl https://www.pgadmin.org/static/packages_pgadmin_org.pub | sudo apt-key add
$ sudo sh -c 'echo "deb https://ftp.postgresql.org/pub/pgadmin/pgadmin4/apt/$(lsb_release -cs) pgadmin4 main" > /etc/apt/sources.list.d/pgadmin4.list && apt update'
Then install pgAdmin4,
$sudo apt install pgadmin4
The above command will install numerous required packages including Apache2 webserver to serve the pgadmin4-web application in web mode.
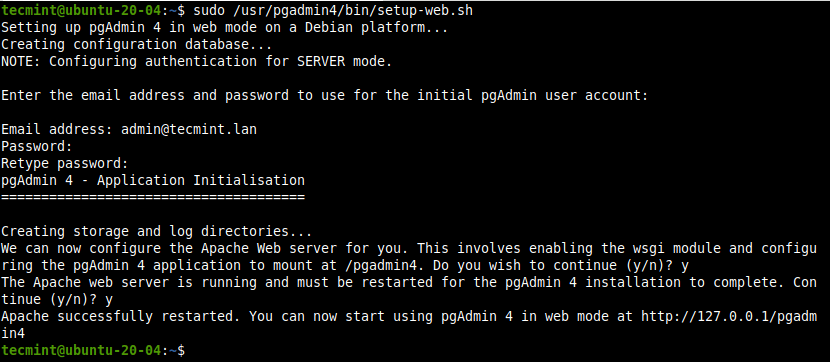
Once the installation is complete, run the web setup script which ships with the pgdmin4 binary package, to configure the system to run in web mode. You will be prompted to create a pgAdmin4 login email and password as shown in the screenshot below.
This script will configure Apache2 to serve the pgAdmin4 web application which involves enabling the WSGI module and configuring the pgAdmin application to mount at pgadmin4 on the webserver so you can access it at:
http://SERVER_IP/pgadmin4
It also restarts the Apache2 service to apply the recent changes.
Remember to replace [email protected] with your email address and set a strong secure password as well:
$ sudo /usr/pgadmin4/bin/setup-web.sh
Accessing pgAdmin4 Web Interface
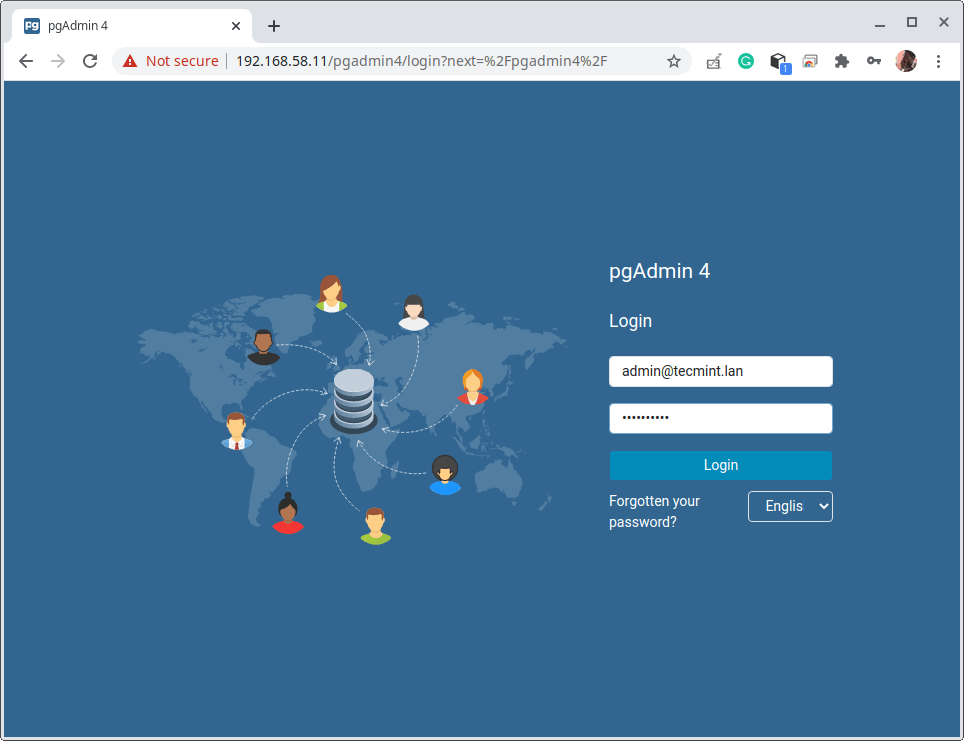
To access the pgAdmin4 web application interface, open a web browser, and use the following address to navigate:
http://SERVER_IP/pgadmin4
Once the login page loads, enter the email address and password you created in the previous section while configuring the pgAdmin4 to run in web mode.
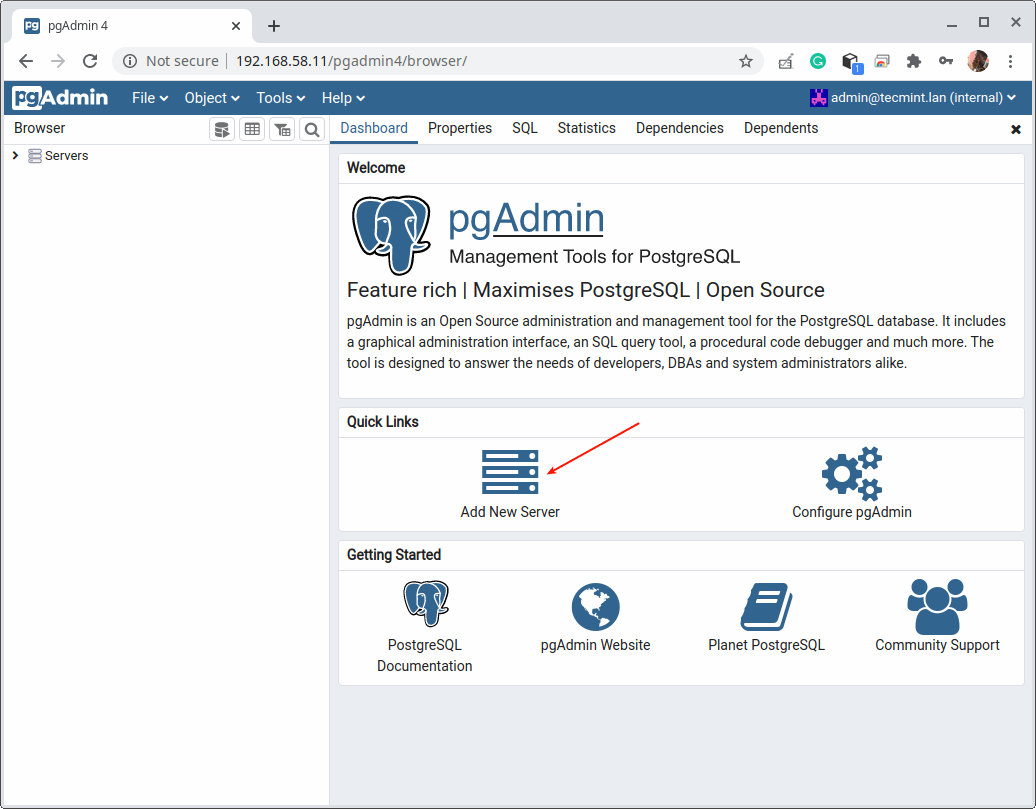
After a successful login, you will be land in the pgAdmin4 web application dashboard. To connect to a server, click on Add New Server as highlighted in the following screenshot.
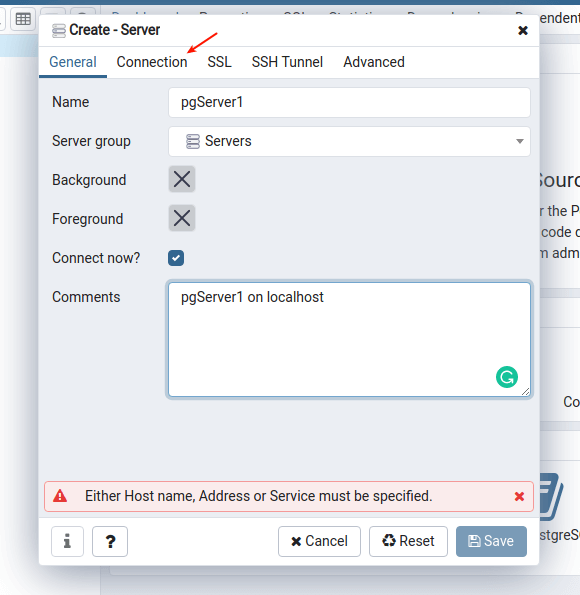
Next, enter the connection in General settings (Name, Server group, and a comment). Then click Connections as highlighted in the following screenshot.
Next, enter the PostgreSQL database server hostname/address, Port number (leave 5432 to use default), select the Maintenance database (which should be postgres), enter the database username and password.
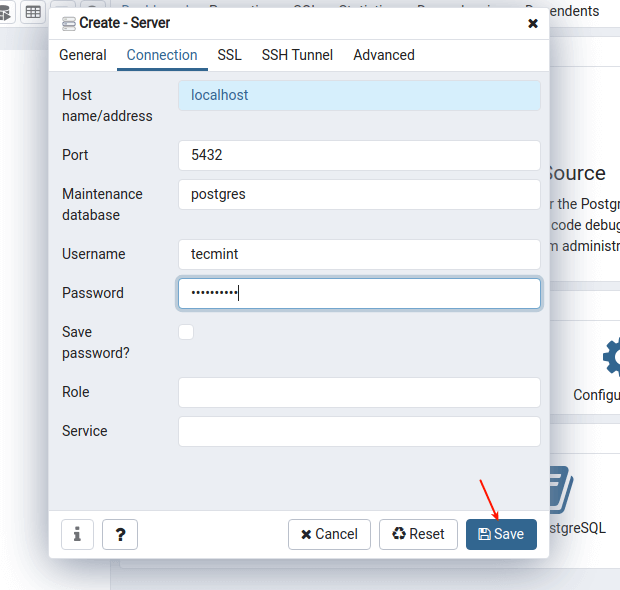
If the database access credentials are OK and the server-client authentication configuration is too, pgAdmin4 should successfully connect to the database server.

That’s all! For more information, see the PostgreSQL 12 documentation and pgAdmin 4 documentation. Remember to share your thoughts with us via the comment section below.


Thanks, it’s a really useful walk-through for someone just starting to learn databases (data science course) and new to Ubuntu. The only point I got stuck on was the “run the web setup script which ships with the pgdmin4 binary package, to configure the system to run in web mode”.
I had to search elsewhere to find what this script was and how to run it, the following worked:
Found at: https://www.pgadmin.org/download/pgadmin-4-rpm/
Finally it works in remote mode, it was just a matter of settings. A big thank-you.
@Paul,
You’re welcome! I’m glad to hear that the issue has been resolved and that pgAdmin4 is now working in remote mode. It’s often the case that minor settings adjustments can make a significant difference in resolving connectivity problems.
I followed the tutorial, everything works, however, when I try to connect from another machine, it crashes. I have a vmware on which a debian is installed, from the physical machine I tried to connect to the address
http://debian_ip_address_server/pgadmin4, unfortunately without result.@Paul,
If you are experiencing issues connecting to pgAdmin4 on a Debian virtual machine (VM) from another machine, make sure that the network configuration of the VM is correctly set to bridged mode, allowing it to obtain an IP address on the same network as your physical machine.
Check the firewall settings on the VM to make sure that port 80 or the port specified for pgAdmin4 is open in your firewall rules.
Also, check the web server logs for any errors or misconfigurations that might be causing the crash.
Thank you!! This worked on my Ubuntu VM. :)
Hi, I need help installing pgadmin4 it says that the curl command is not found.
@Toure,
Install curl command in Ubuntu.
Hi, I am using Ubuntu on wsl2, and im facing an error after I run the command:
Error:
Does it seem to be something to do with apache2, any ideas?
Thanks for that great step-by-step guidance. Would you be able to add the postgresql extension install to that tutorial?
whether it will take long after this code.
failed, couldn’t find module “flask” even after I installed it system-wide for both user and root.
Seems this script is stuck on python3.8 and no longer works on python3.9-based distros
Followed the directions and got to this step where I had to stop:
This simply doesn’t work at all. There is no pgadmin4 application installed and nothing running at
http://localhost/pgadmin4.The configuration screens that you show during installation weren’t there.
@Dean,
What error are you get while installing pgAdmin4?
The problem was you showed accessing pgadmin4 via the web browser before running the setup-web.sh. It would be clearer if you didn’t show h
ttp://SERVER_IP/pgadmin4before running the setup script.You can delete my comment.
Thank you very much.
Really well documented, great work!
Hi Guys, I am getting this when trying to start the shell script for pgadmin4.
cabolba@LAPTOP-HQU5QQSN:~$ sudo /usr/pgadmin4/bin/setup-web.sh
Setting up pgAdmin 4 in web mode on a Debian based platform…
Creating configuration database…
pgAdmin 4 – Application Initialisation
======================================
Creating storage and log directories…
We can now configure the Apache Web server for you. This involves enabling the wsgi module and configuring the pgAdmin 4 application to mount at /pgadmin4. Do you wish to continue (y/n)? y
The Apache web server is running and must be restarted for the pgAdmin 4 installation to complete. Continue (y/n)? y
The system has not been booted with systemd as init system (PID 1). Can’t operate.
Failed to connect to bus: Host is down
Error restarting apache2. Please check the systemd logs
Nice article, how we can secure the admin panel by DNS and ssl?
This was thorough clear instructions. I managed to install Postgres and pgadmin4. Thank you
However, you asked me to set a strong password, which I did and I have forgotten it. How do I reset the pgadmin password because I have failed? I tried password recovery through the pgadmin4 GUI but I get an error to do with SMTP.
Is there a way to reset the pgadmin4 password through the console?
@Emanuel,
Set the password again by following the “Creating Database in PostgreSQL” section as shown in the article…
As a noob Ubuntu and Linux user in general, the instructions are so simple and straightforward!
Thank you so much!
You saved me in my desperate times!
Excellent article.
Very clear and all is Ok.
All the installation processes are Ok.
Many thanks
For installing PostgreSQL on Linux Mint 20 the first part of this tutorial was very helpful. Many thanks!
But for installing pgAdmin4 on Linux Mint 20 this tutorial worked for me:
https://medium.com/@ogunyemijeremiah/installing-pgadmin-4-on-linux-mint-20-ulyana-741b941479c9
If you like you can keep it in mind for next releases supporting Linux Mint, too ;-)
What about updates?
Should the PostgreSQL package be blocked from updating automatically?
@Regulator,
No, it won’t, you can update it using the apt package manager.
Thanks for the great step-by-step instructions! Except for the first step “sudo apt install postgresql” which didn’t work on my installation! I had to fetch it from the postgresql.org site. Everything else worked!!
@Srini
Thanks for the useful feedback.
PostgreSQL is my first choice of use with Node.js.
Thanks for sharing this tutorial.