This series will be titled Preparation for the setting up and managing Zentyal as PDC (Primary Domain Controller) through Parts 1-14 and covers the following topics.
This tutorial will demonstrate how to use a Linux distribution, Zentyal, as a PDC ( Primary Domain Controller ) and integrate a Windows-based system in this Domain Controller.
Requirements:
- Download Zentyal Server Development Edition 7.0.
- A different computer that runs a Windows-based system to be integrated into the domain.
- The domain used is a fictional one and runs on a local network only: “tecmint.com”.
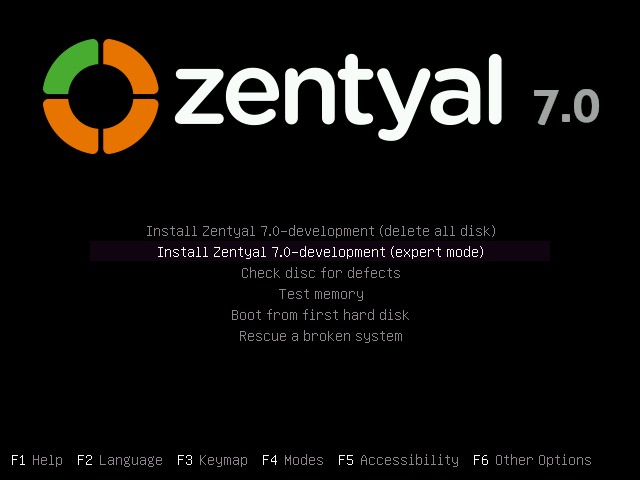
Step 1: Installing Zentyal Server
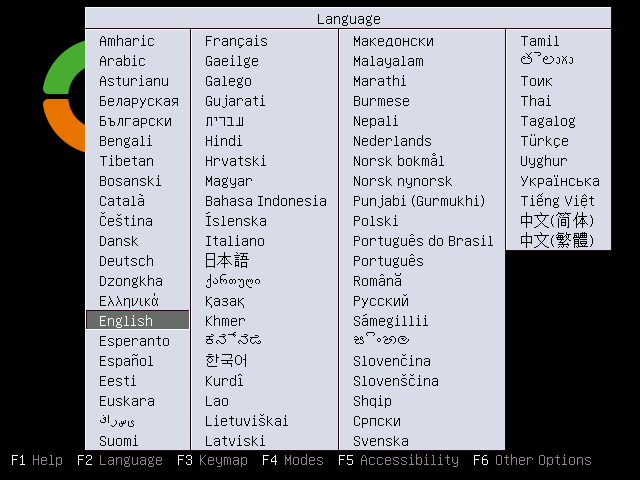
1. Choose language.
2. Choose an expert mode.
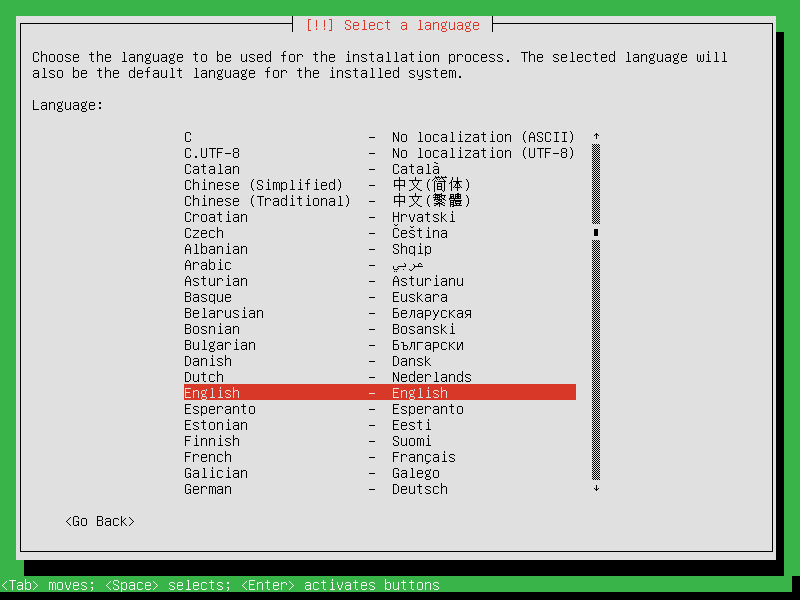
3. Again choose your language for the installation process.
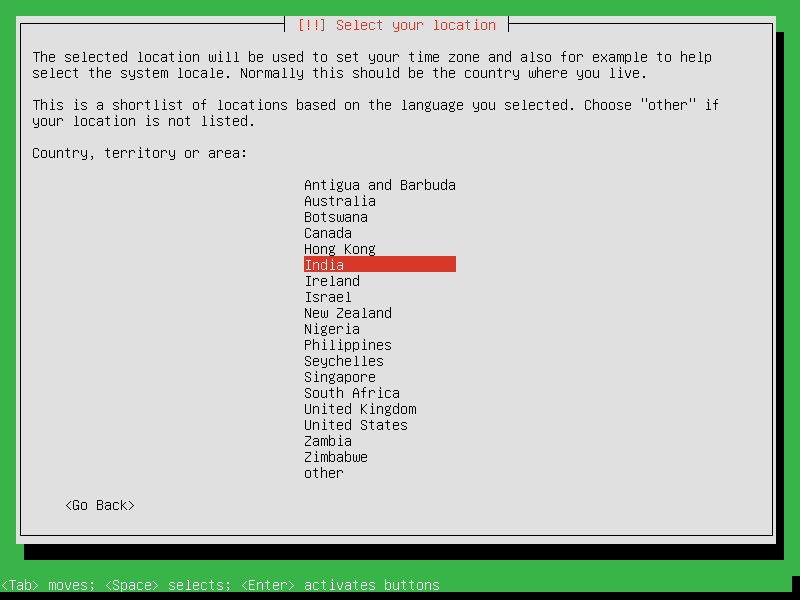
4. Choose your location. If your country is not listed in the default options choose Other, then select your continent and country: I’m in India so I choose India.
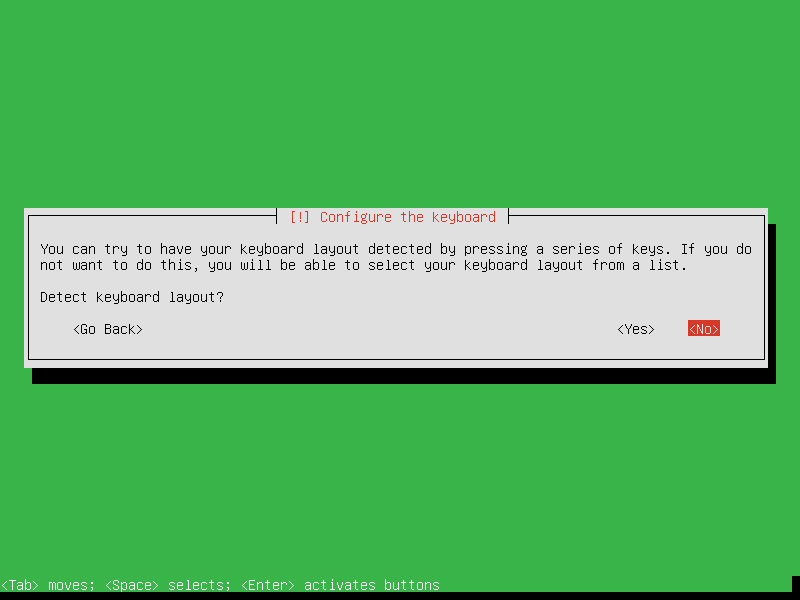
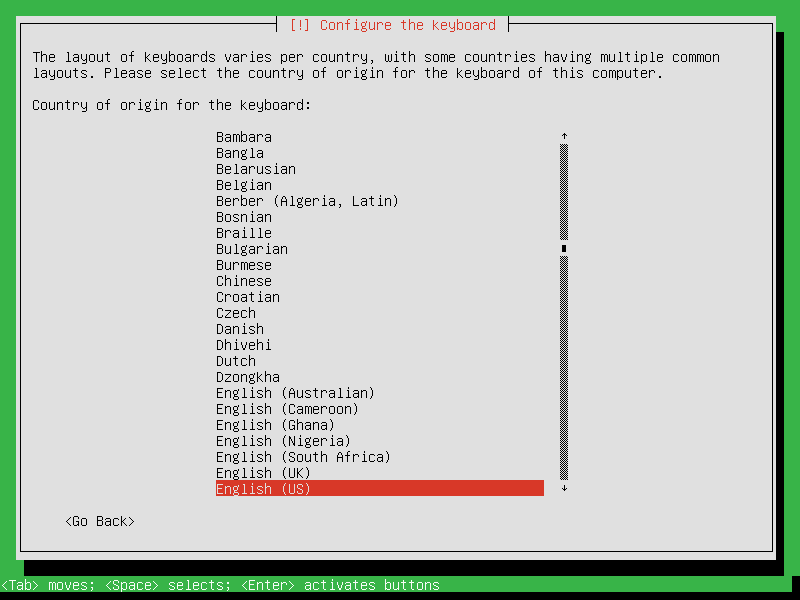
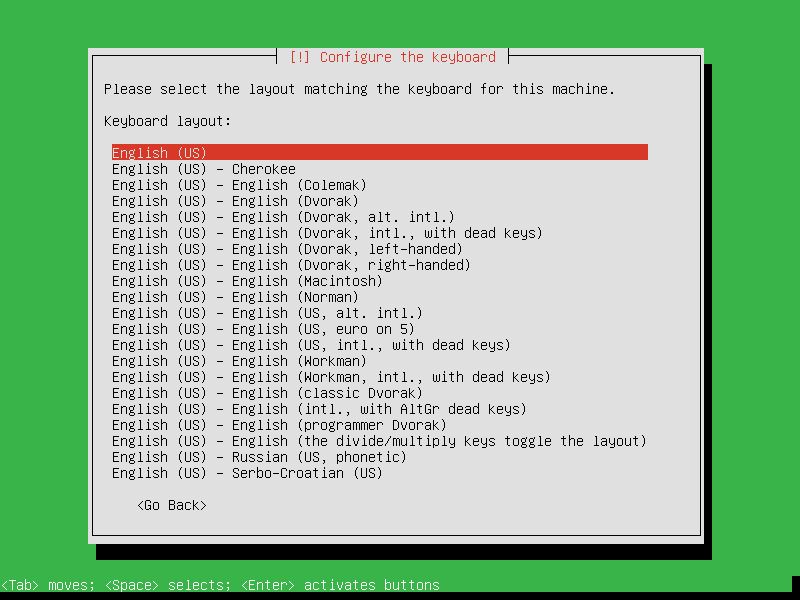
5. Next configure your keyboard: I choose the English US keyboard.
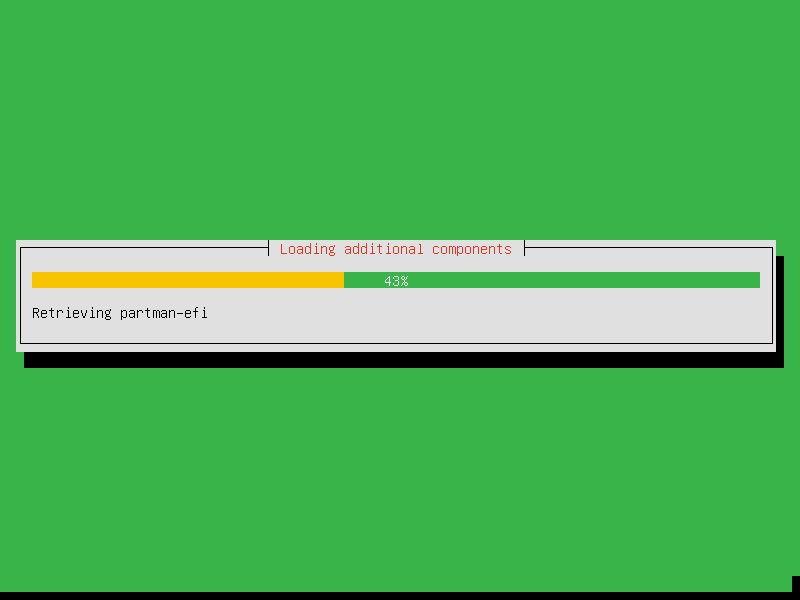
6. Next the installer will load components needed for configuring the system.
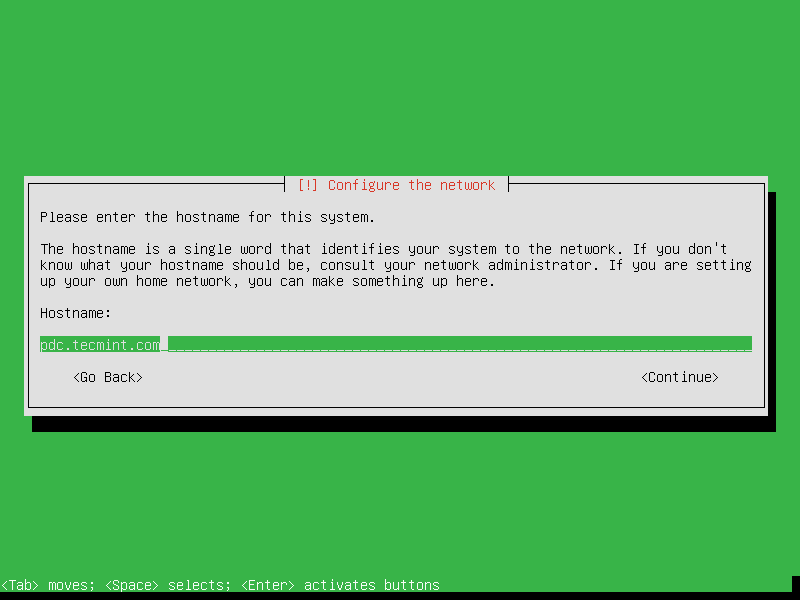
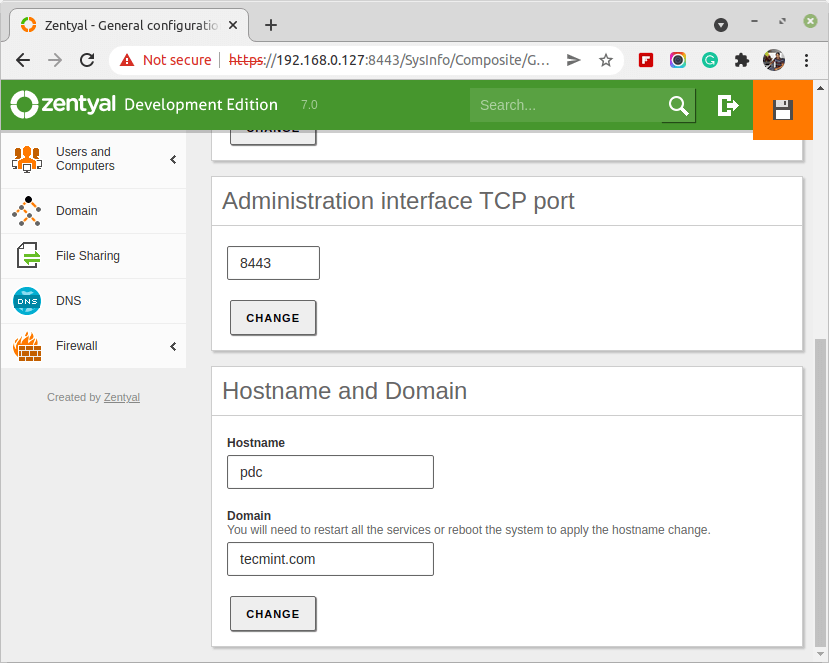
7. The next installer stage is to set the hostname for your system. You should enter here your FQDN. This is a test server so I choose “pdc.tecmint.com” ( Be aware that “pdc” will be this server and “tecmint.com” would be your domain for Active Directory ).
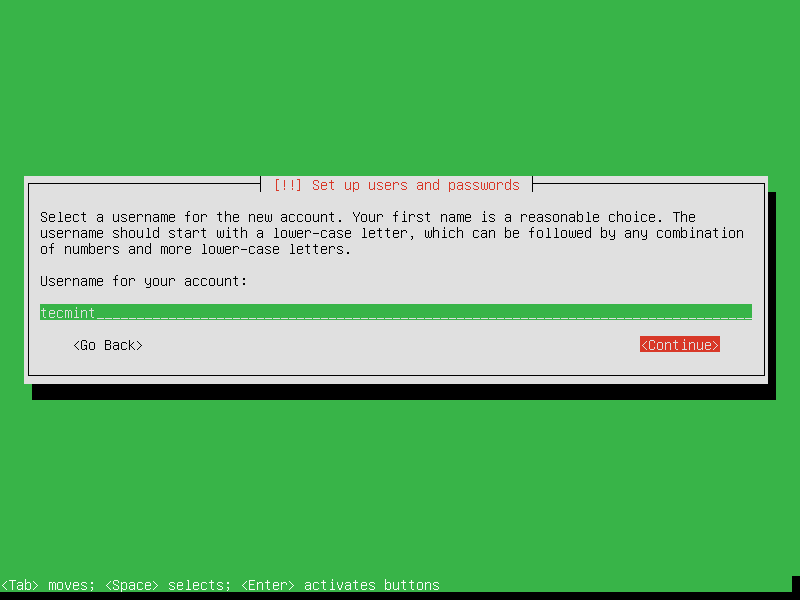
8. Next choose a user for system administration ( This will be the privileged user with root powers – sudo ) not the user domain controller.
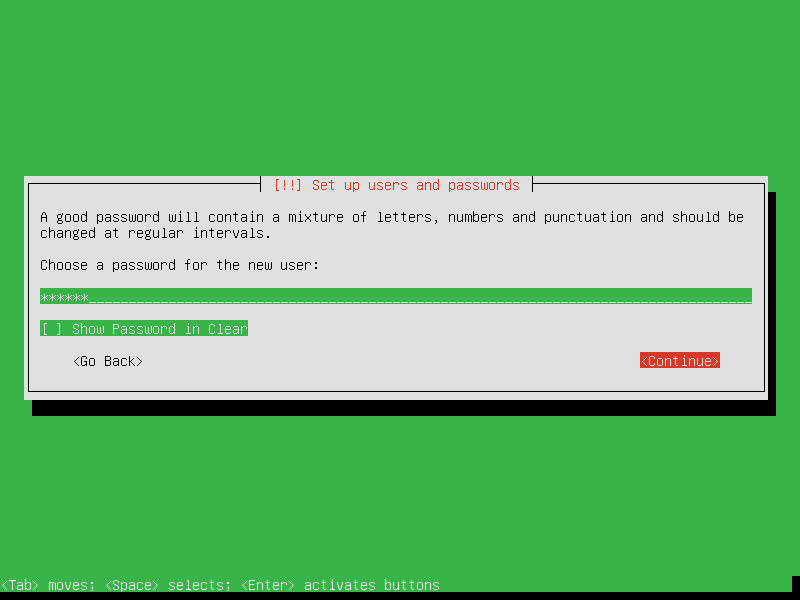
9. Next type a password for the sudo user. Choose a strong one ( 9 characters at least upper&lower&numerical&special ). Here I choose a simple one because is a test server.
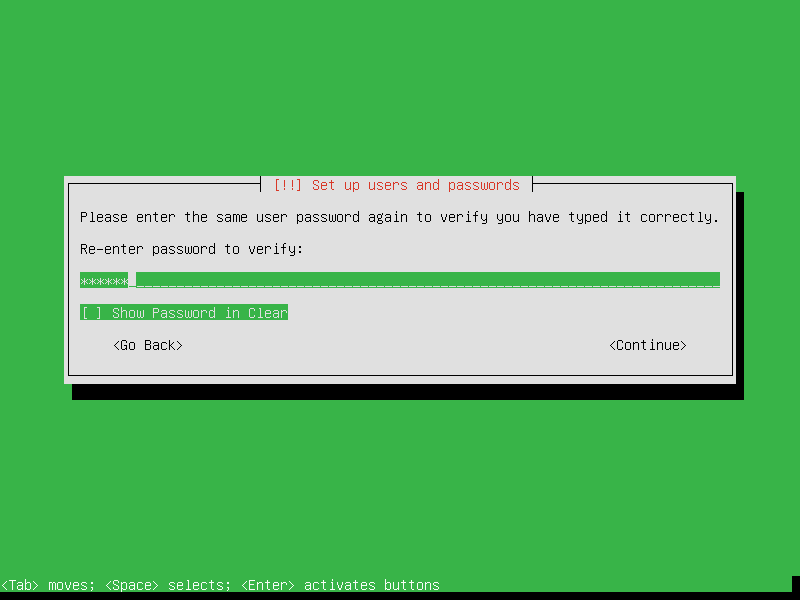
10. Next it will ask you to re-enter your password and if you choose a weak one the installer will warn you about this fact. So select Yes and hit enter.
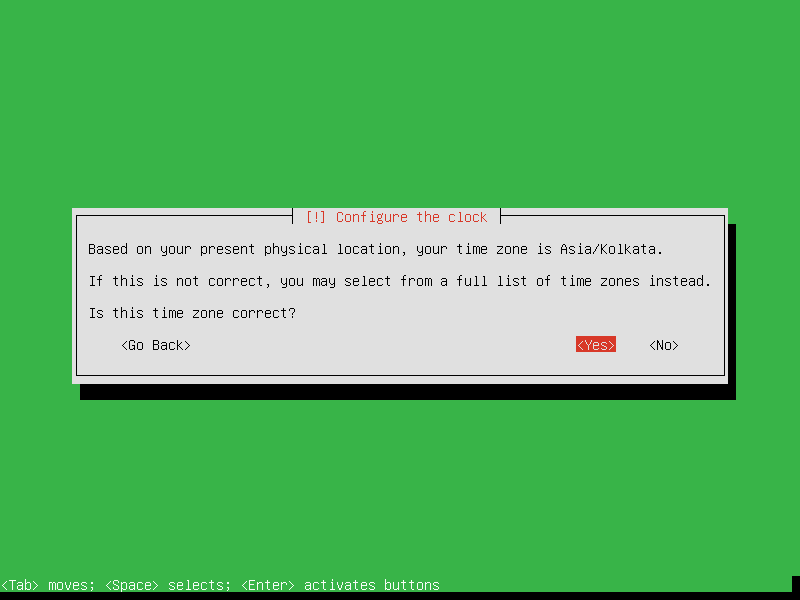
11. Next step is configuring your time. If your system is connected to the Internet the installer will automatically detect your time zone. So press Yes if your time setting is the correct one.
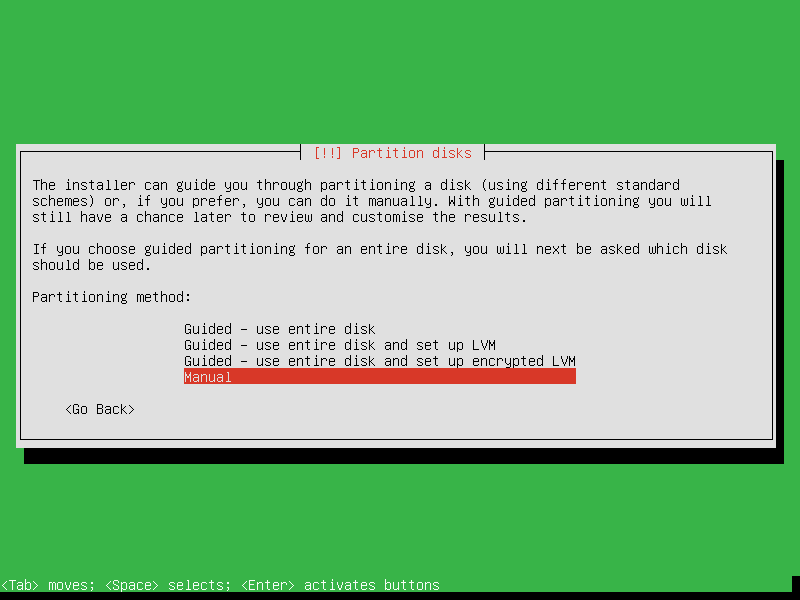
12. Next screen is Partition Disks where you have four alternatives like in the images below. For better control over your system partition choose Manual and hit Enter.
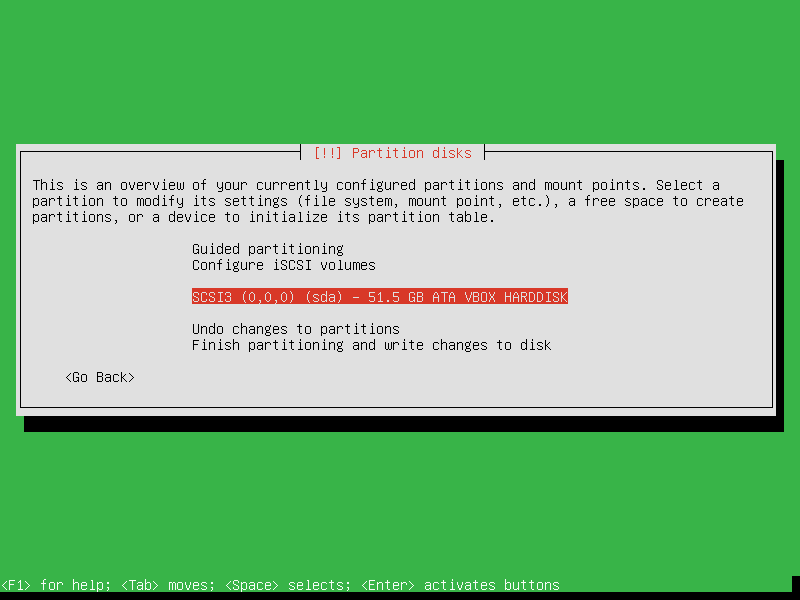
13. Choose your HDD. In this setup, I’m on a Virtualbox virtual disk.
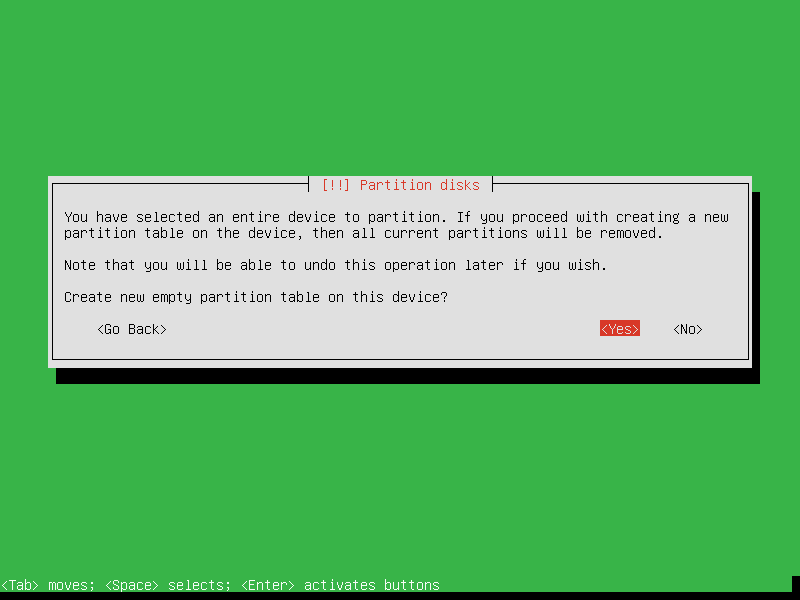
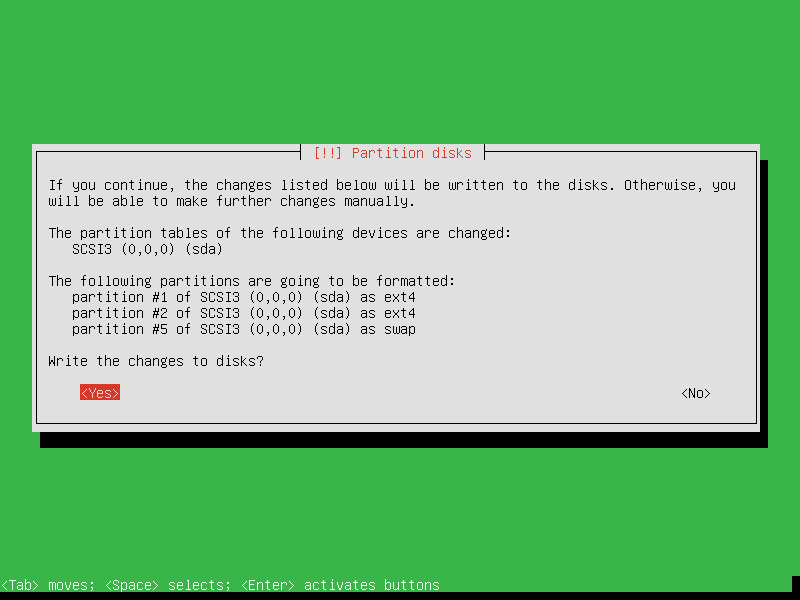
14. Next choose Yes and hit Enter.
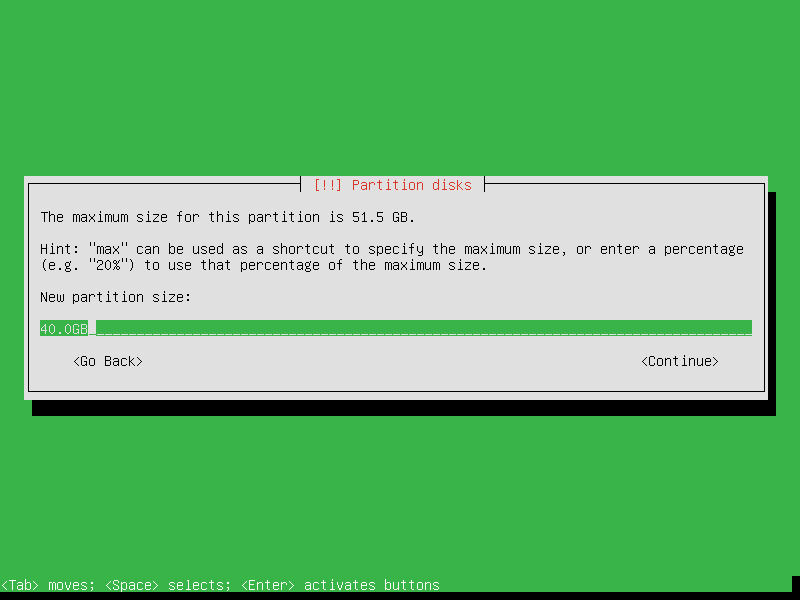
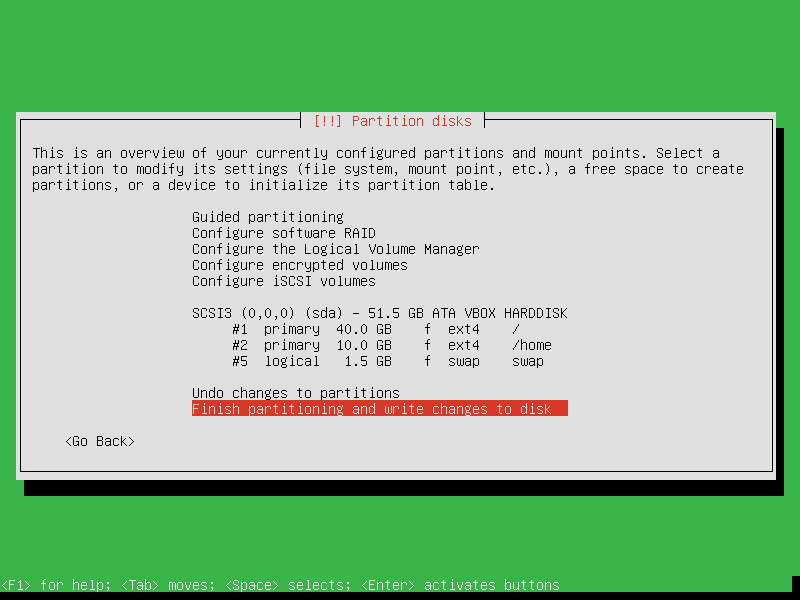
15. Configuring the Hard Disk Partitions. My HDD system config is the following.
- 40 GB for
/Partition ext4 - 1 GB for swap area
- 10 GB for
/homeext4
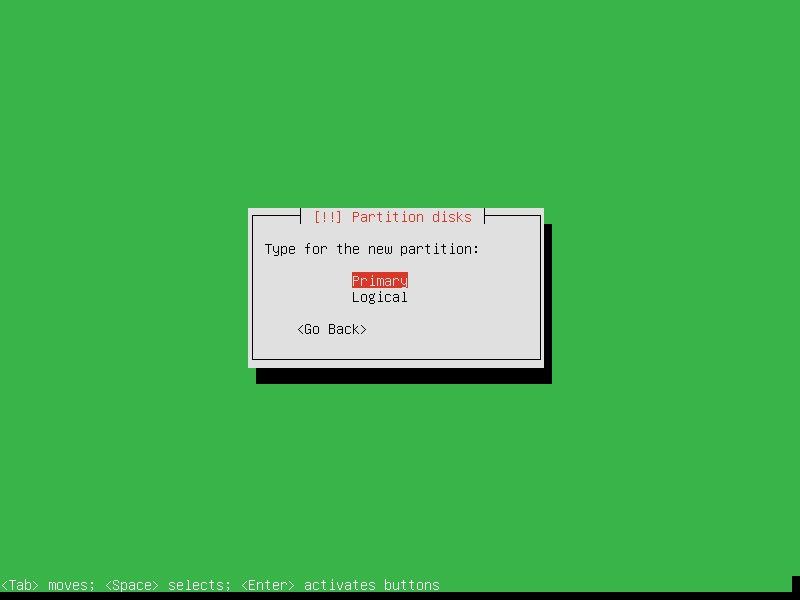
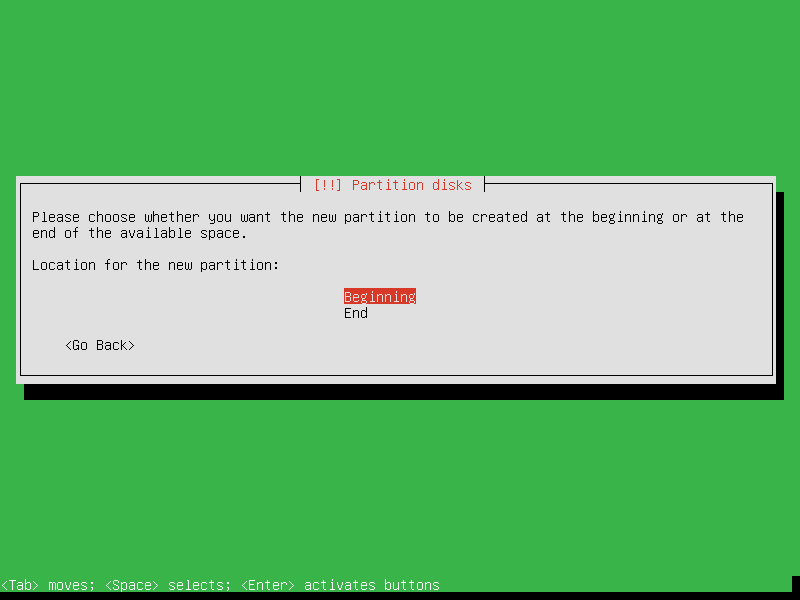
On a real server, you should allocate more space for all of the partitions, even create a new one for /var partition. Now is the time to create a partition. Follow the steps. Choose Free space.
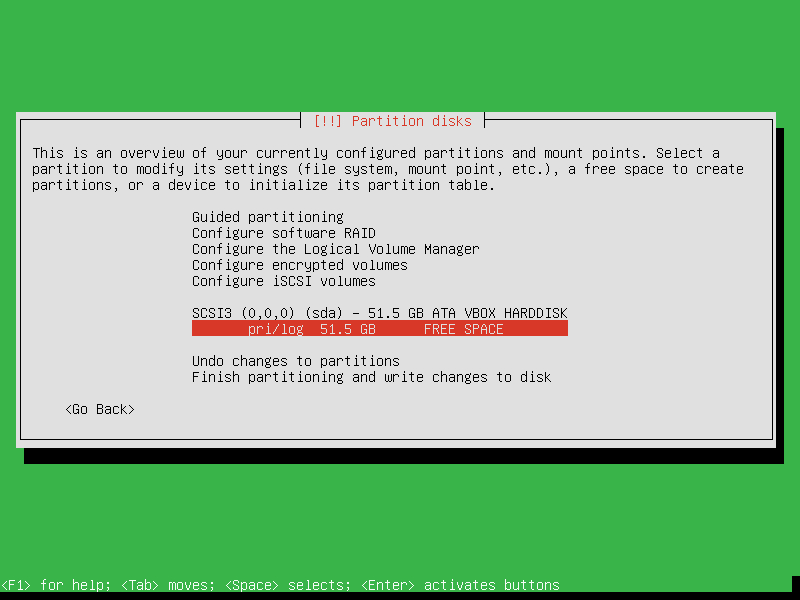
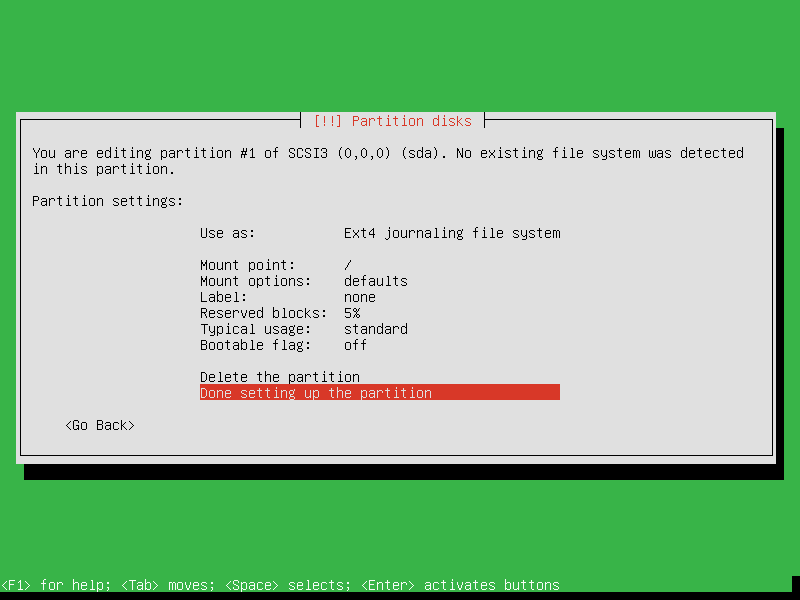
Repeat these steps for /home and swap partitions too. The final disk layout should look like this. On the next to warn dialog choose yes and hit Enter again.
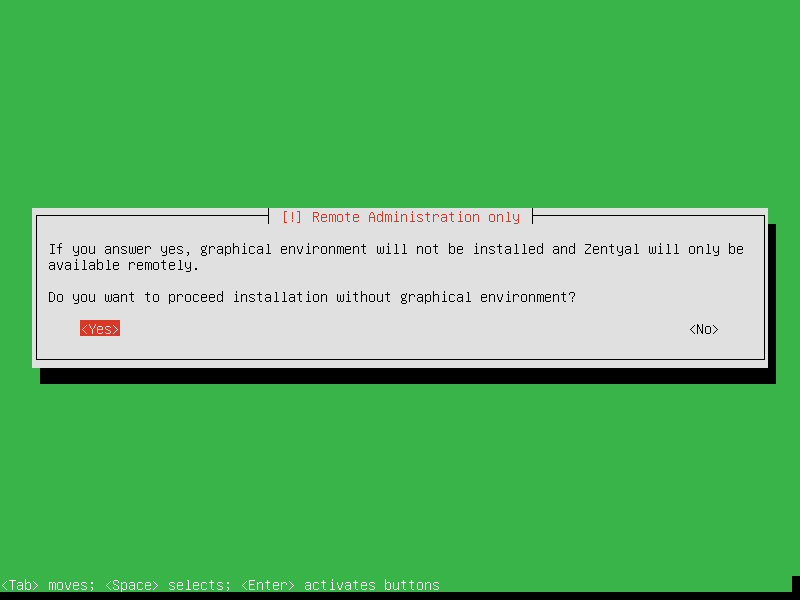
16. The next stage on the installer is asking if you want to set up a Graphical Environment for Zentyal. If your server has a monitor and a keyboard attached to it then you should probably choose No ( This will install an LXDE GUI ) else choose yes ( you will control your system remotely using a web admin interface and ssh ).
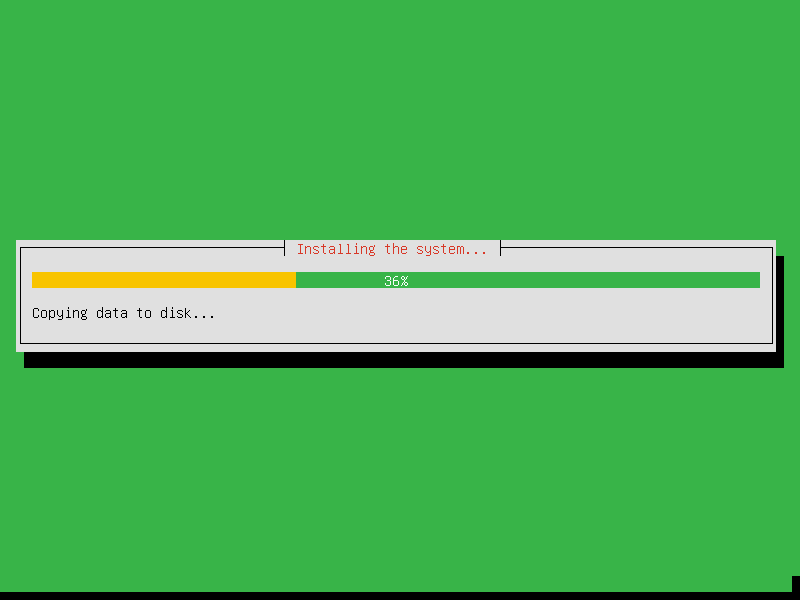
17. Next your system starts installing.
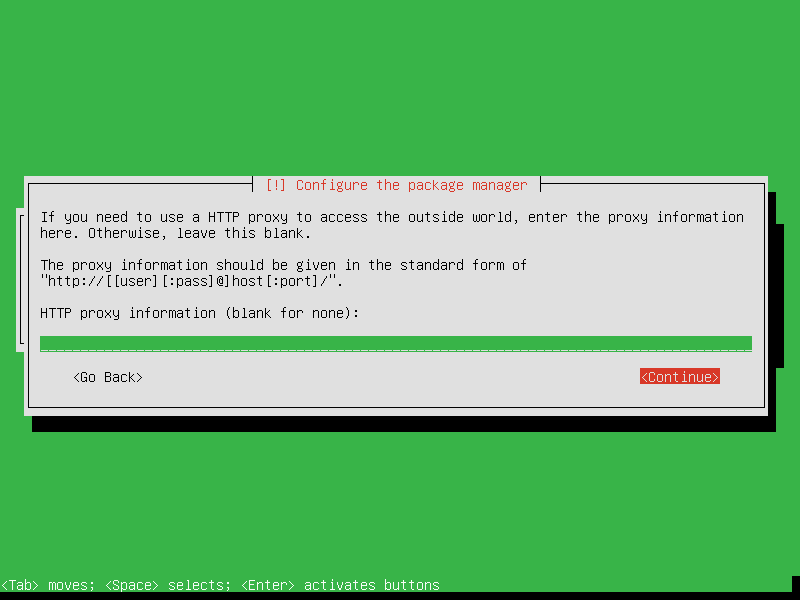
18. On the next dialog just hit enter ( if you are accessing the internet through a proxy you should enter it now).
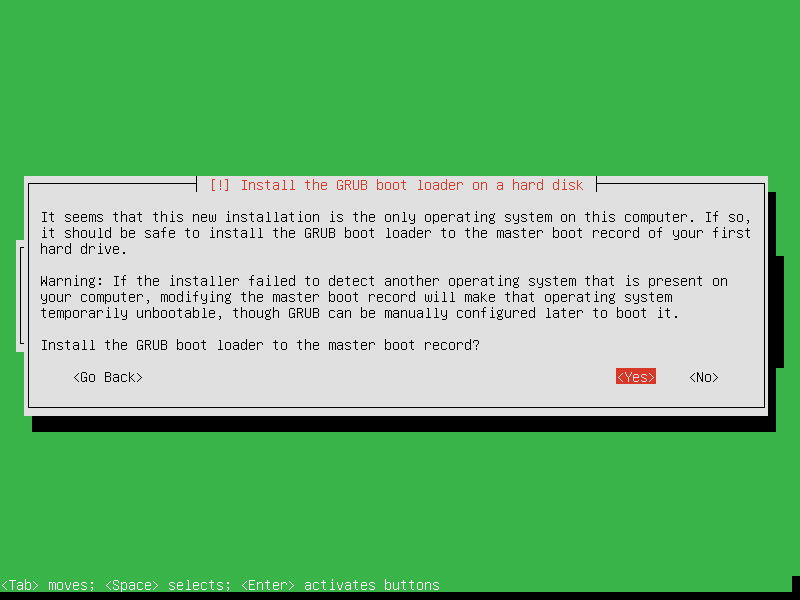
19. Choose Yes for installing Grub into MBR.
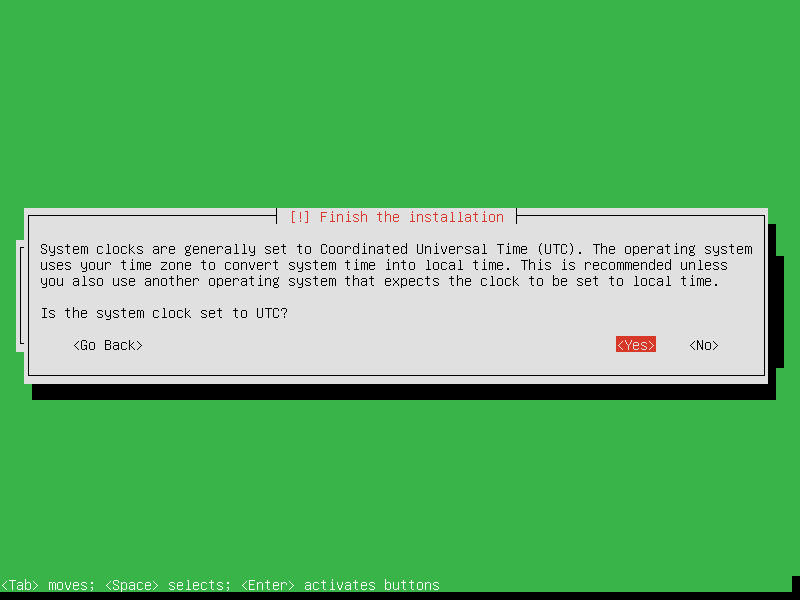
20. Next choose Yes for the next warning about UTC time.
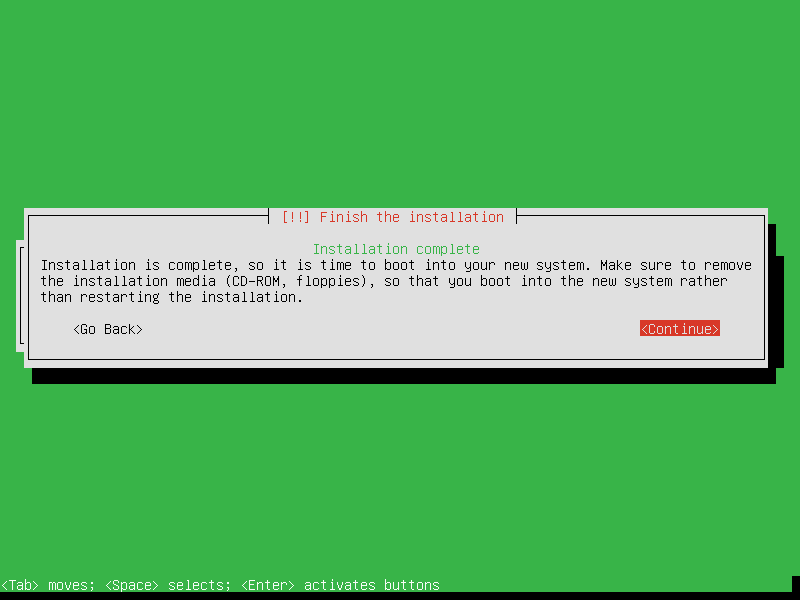
21. And we reached the finish line. Press enter to continue and the system will reboot.
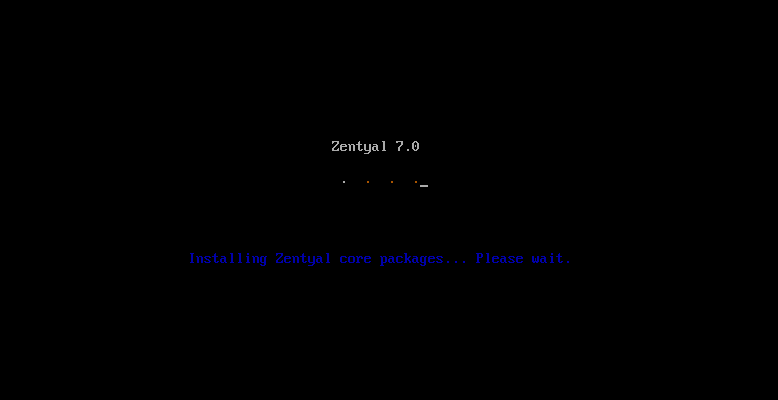
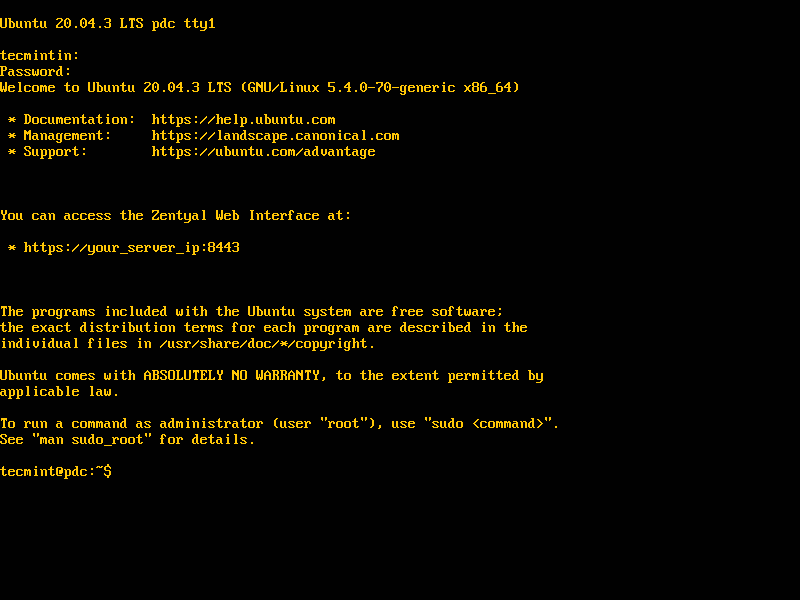
After rebooting the system will install some basic software and then it will prompt us for web IP administration.
Step 2: Installing Basic Softwares for PDC
22. Now it’s time to go to heavy stuff – meaning accessing web remote administrating tool and installing the basic software for the server to become a complete Primary Domain Controller (PDC) with samba4.
- Next, open a web browser and type the address prompted in Zentyal ( for this example the web admin address is :
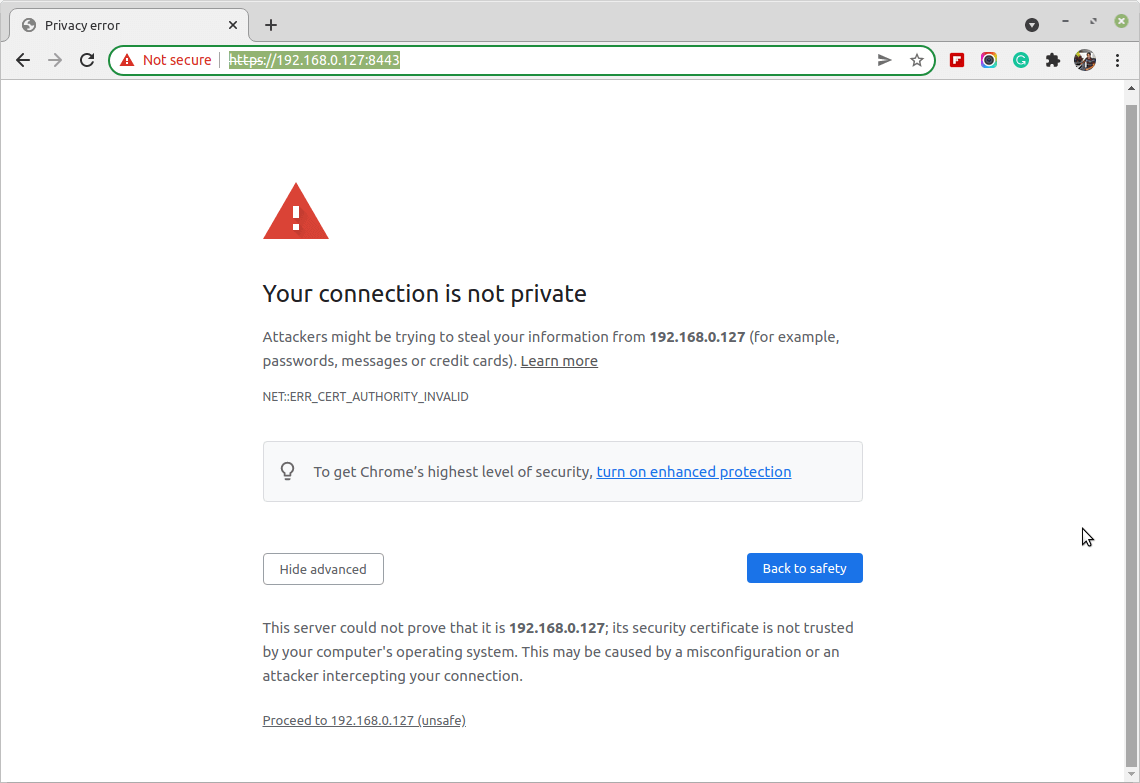
https://192.168.0.127:8443). - Next, the web browser will warn you about a security issue relating to the certificate.
23. Choose “Advanced” and then “Proceed” like in the screenshots below.
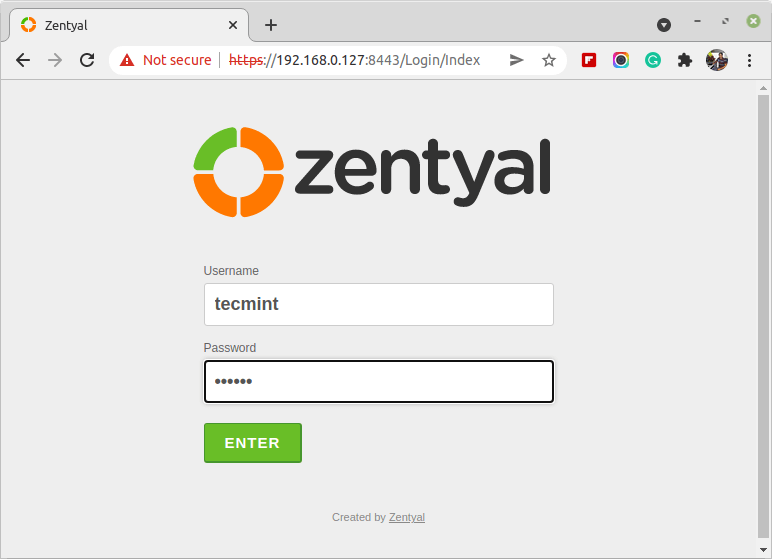
24. Then enter your user and password for the admin user ( the user-created on installation).
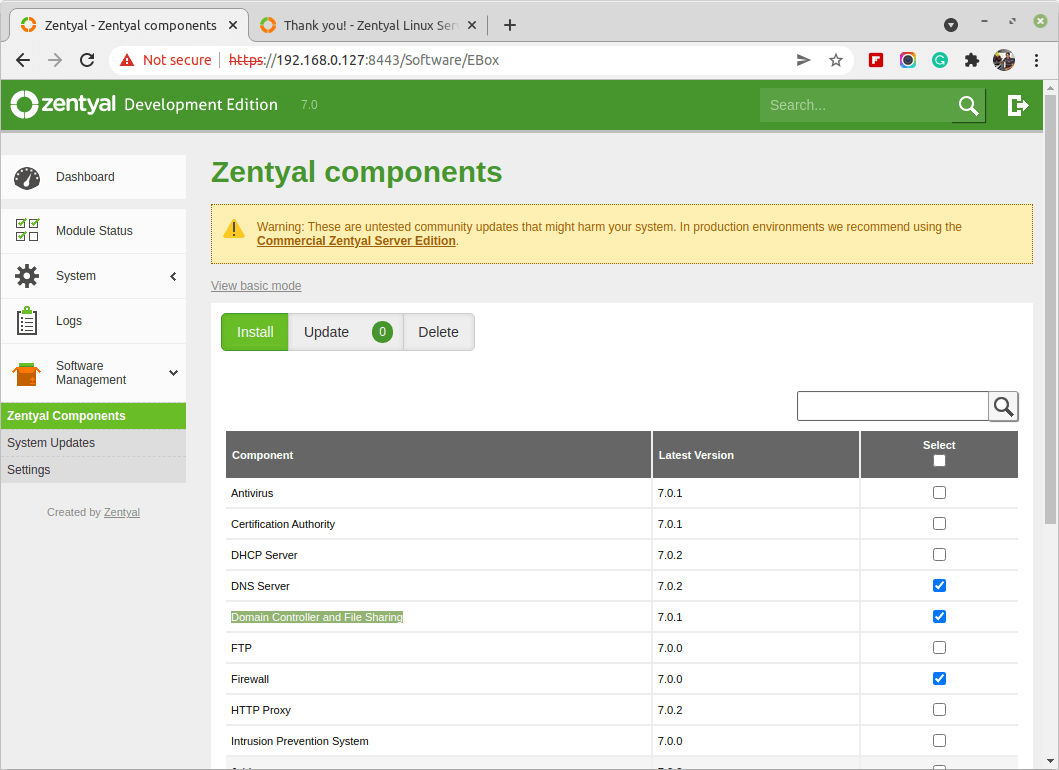
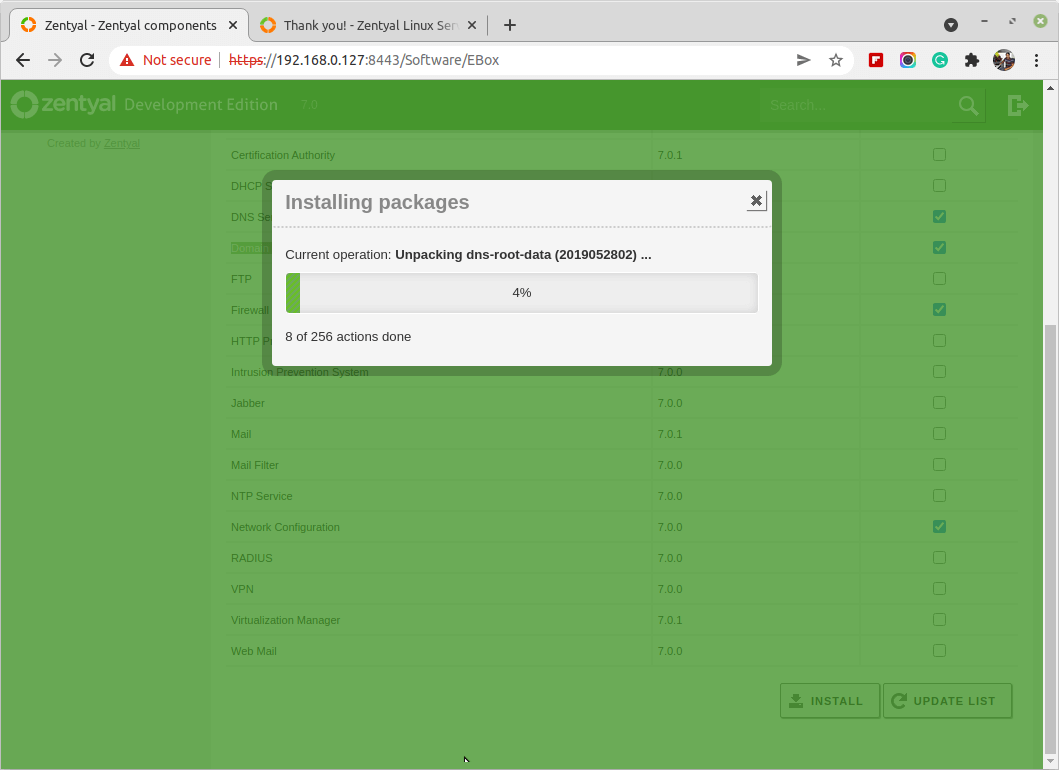
25. We are now presented with the Zentyal Web Administration and it’s time to choose and install software for our PDC from Software Management – Zentyal Components and choose the following packages (modules) for the server to become a Primary Domain Controller.
- DNS Service
- Domain Controller and File Sharing
- Firewall
- Network Configuration
26. Next, go to the System – General and set the Hostname and Domain.
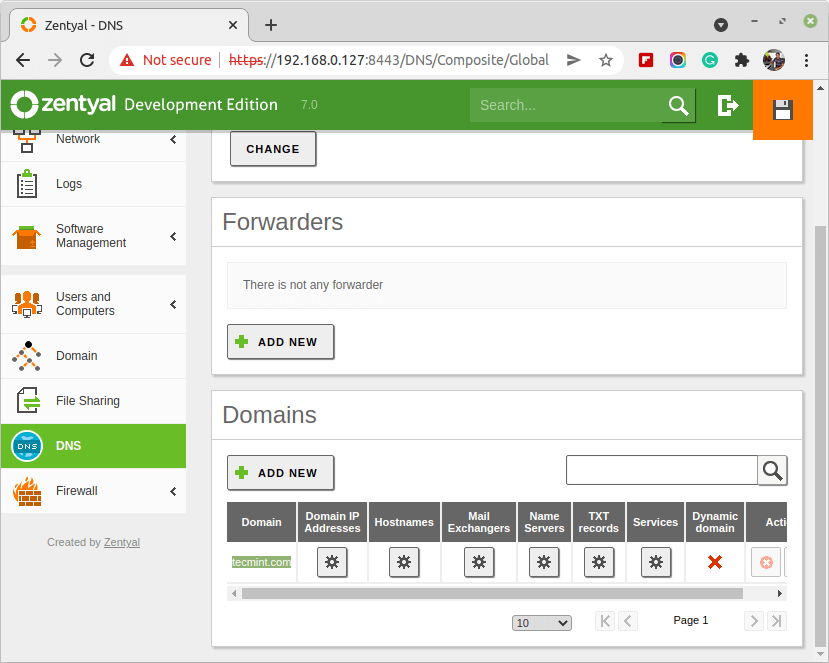
27. Now you should go to DNS Module and make sure that your domain is listed in the Domains tab.
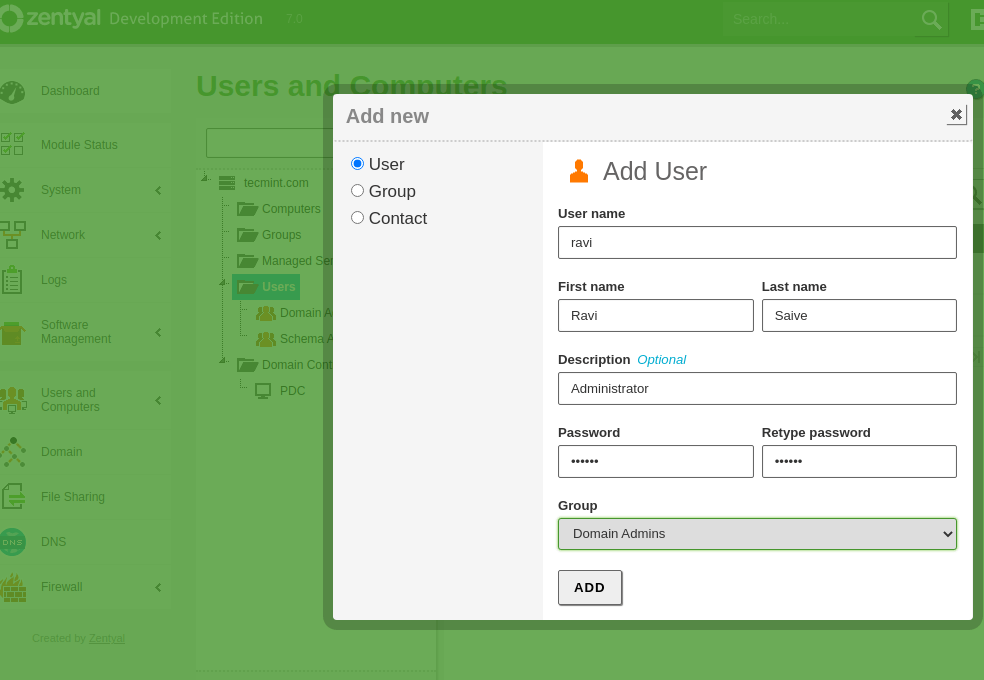
28. Then go to Users and Computers Module, select Manage and add a user with Administrator Privileges for Active Directory. Select Users, Click on the “+” button below, and enter your credentials.
29. Now go to Domain Module, select Settings, choose a description for your server, select “Enable roaming profiles” and hit the Change button.

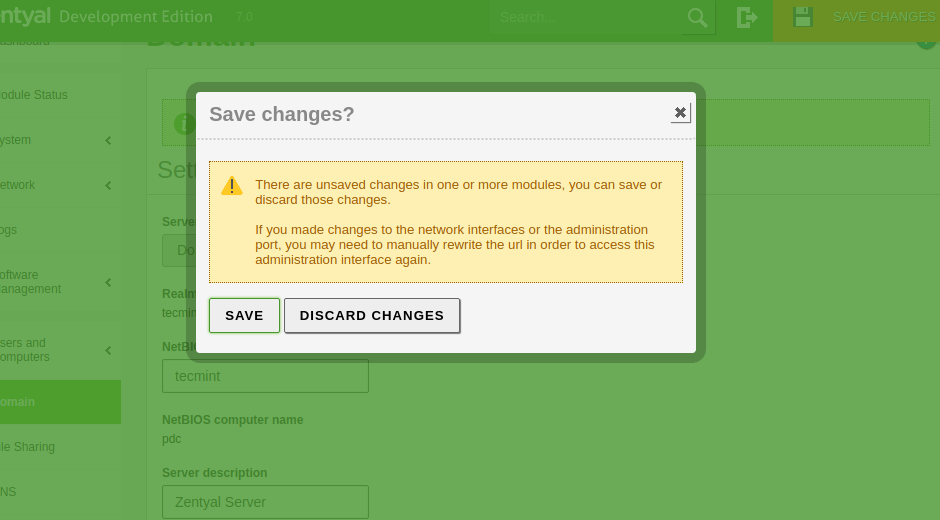
30. Now go top right and click on Save Changes for the system to apply your new settings and click Save.
That’s it for now on the PDC server minimal configuration to become a Primary Domain Controller.
Step 3: Integrating a Windows System in PDC
It’s time to integrate a Windows-based system ( In this example a Windows 10 system) in the “tecmint.com” domain.
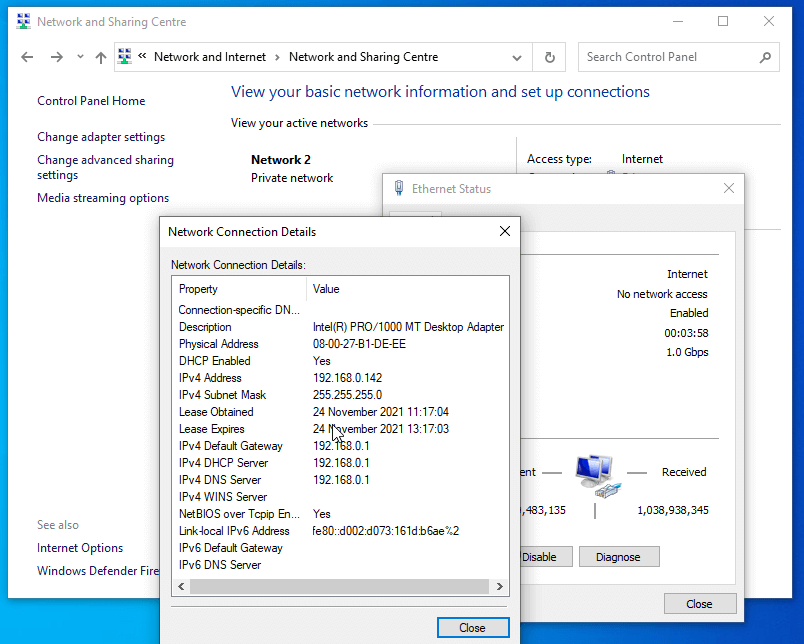
31. First let’s set up the network configuration for the system to be able to access the new domain. Go to Start -> Control Panel -> Network and Internet -> Network and Sharing Center -> View Network Status and Tasks -> Local Area Connection.
On Local Area Connection select Properties -> IPv4 -> and enter your static IP, netmask, gateway, and DNS like in the screenshots below.
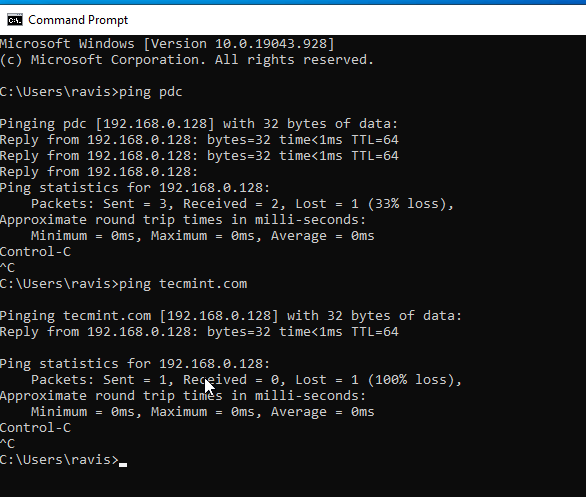
32. To be sure that everything is OK try first pinging your pdc server address and then ping the domain name.
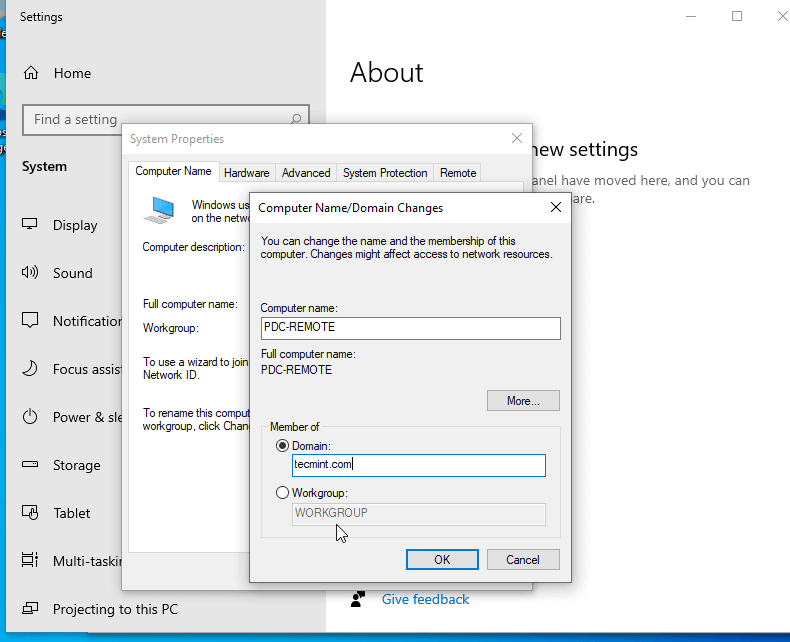
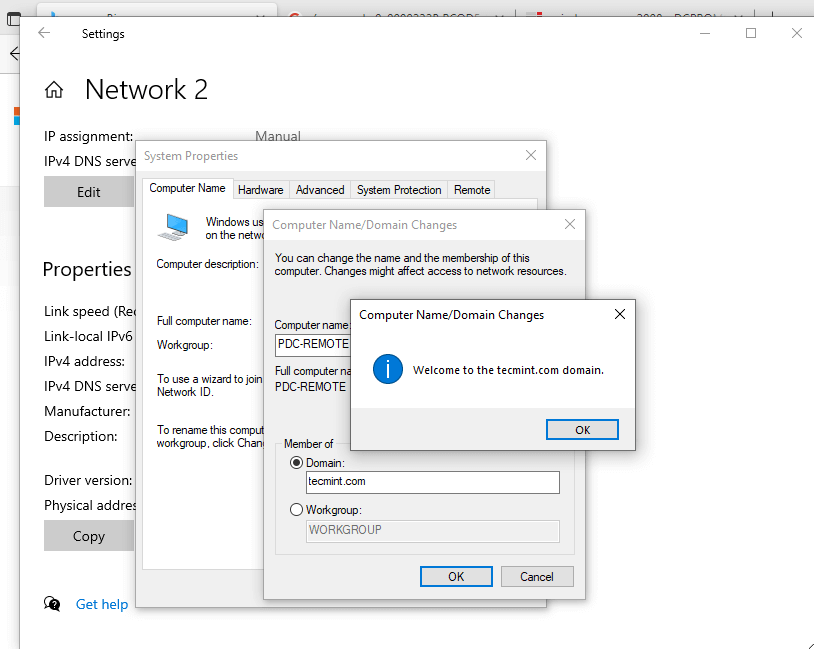
33. We now reach the end of this tutorial. Let’s finish the configuration by adding Windows 10 to the tecmint.com domain name. Click “Computer” -> System Properties -> Advanced System Settings -> Computer Name.
Enter your computer name in the Computer Name field domain in Member of Domain.
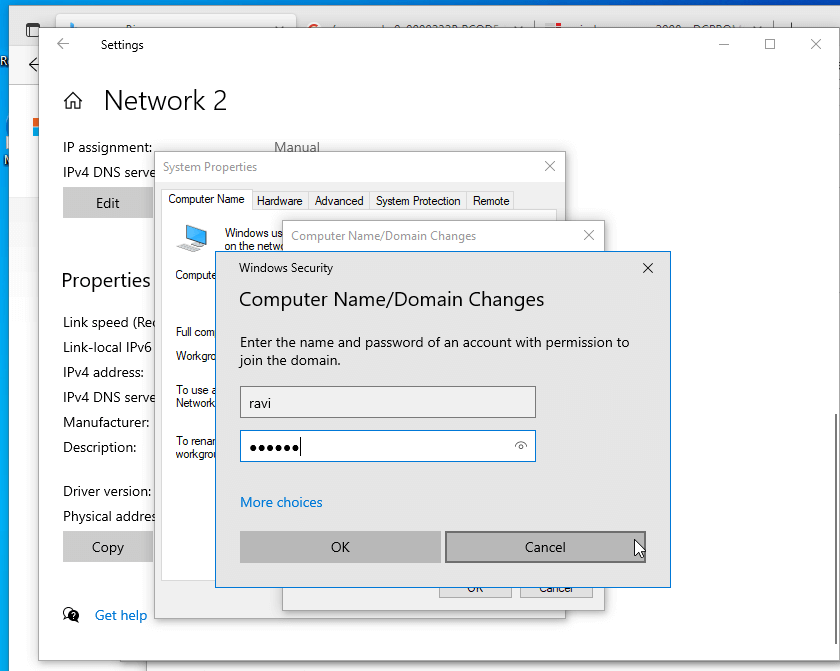
34. On the next prompt enter username and password for the Administrator User of your domain ( the user created in Users and Computer through Zentyal Web Interface).
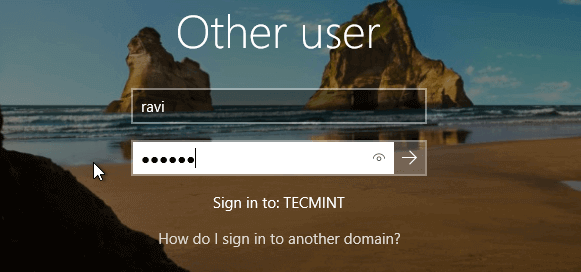
35. Next, restart your computer to apply changes and log on to your new domain.
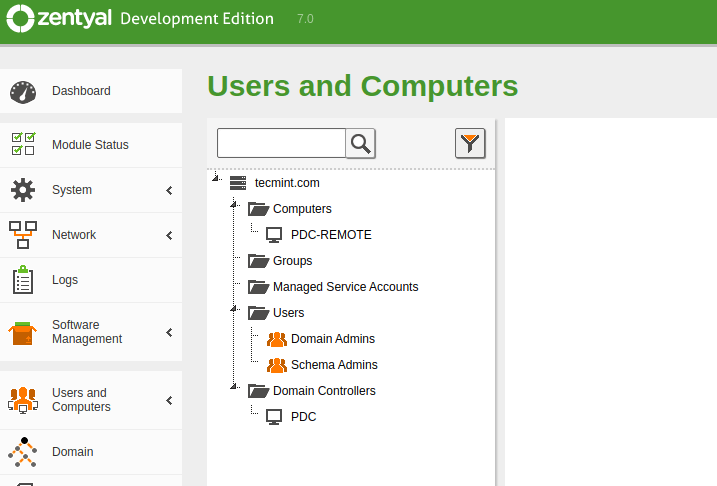
36. Navigate again to Zentyal Web Dashboard and check if the Computer has been added to Users and Computers.
Congratulations! You now have a full domain service and you can easily add other windows based systems into your new domain.
The next tutorial will be on how to access your PDC server remotely from Windows-based systems, Create new Users and Groups, Create a Share, and set up Group Policy for this domain users and computers.

Please do not refer to any Samba AD DC as a PDC, it isn’t. A PDC is the Primary Domain Controller in an NT4-style domain. Whilst one AD DC will hold the PDC_Emulator FSMO role, this can be any AD DC, using terms such as ‘first’ DC can be used, but are a bit meaningless if that DC is later demoted.
is there any script to add bulk user in the zentyal 6.0.1 ?
This works great but the only issue I’m running into is when a user tries to change his or her password from the windows computer, it says incorrect user/password. If that can be figured out, this will be really useful for me.
Maybe the passwords they enter don’t meet the security requirements for your domain. Provide more details? Can you change a user password from RSAT? What about from Zentyal panel?
Hi,
Thanks for these awesome documentation. Can we have integration of MAC machines with Zentyal documentation too.
Thanks in advance.
-Prashant
wants to know that is zyntel supports different os platform (Windows, linux and Mac)beacuse i have configured zyntel and configure some policys and it works in windows but it not works in mac and linux. if zyntel not supports the same then please suggest some open source tool so i can configure same
thanks in advance
You can join differnet OSes to Zentyal pdc, but windows GPO applies only to Windows based workstations. I dont’t think there’s a windows GPO echivalent on Linux or mac.
I followed every single step in it TO THE LETTER and Windows clients still refuse to join the domain. You will get it all set up (which takes hours to load and configure), only to attempt to join your client to the domain and get the error message: “The following error occurred attempting to join the domain ‘YOURDOMAIN’ The specified domain either does not exist or could not be contacted.” Zentyal is a complete failure and is totally unable to act as a Primary Domain Controller for Windows clients.
Hey Matei Cezar, I am currently using Zentyal 4.2 as a PDC and able to connect Windows client. However, I am facing issues whilst pushing GPO’s to the multiple users/groups. I could see few settings are getting updated at the client end but most of the important ones are missing out; I have tried logging in with multiple ID’s on multiple system’s but no joy; I believe there’s a communication issue with Widows/Zentyal. Any help would be greatly appreciated.
@Rully: First of all the second computer must be joined to Zentyal PDC from an administrative account. What do you mean an existing account bla bla bla…it has importance all the displayed error message it shows you! It could mean that you have another computer with the same name on your network!
How much NICs your server has? You must fill the external interface with all the required internet settings provided by your ISP, not jot the IP Address. (put IP, Netmask, Router (gateway) and DNS! You must also check the outgoing rules from firewall.
Dear Matei Cezar,
I need help please…I have install Zentyal 4.0 in my office server. And I try connecting the client to the server. I use my computer and it’s connected to the zentyal server. but when I use other computer it always said “The join operation was not successful, this could be because an existing computer account…bla..bla…could you please tell me what is wrong with that?
And one more thing I have public IP from my Internet provider and I want to set the zentyal to be access remotely but when I fill in the ip number to the network setting on zentyal server why I still can’t go online and open a website on the browser.
Please show me what is wrong…I need help. otherwise my boss will get angry with me. Thank you very much Matei Cezar.
Regards,
Rully
Hi Matei,
Is it possible to redirect Roaming Profile to other folder share,for example to Folder Users,and folder Users is Group folders for all users.
Hi,
I am following this guide as is and all work fine but at the end I have problem.
I have a computer with Windows 8, I have entered in the domain and windows gave me confirmation message asking me to restart. After rebooting, trying to enter the domain\username and password gives me the error like this (I try to translate it in English) “no access server available to access”. As if he could not reach the domain. Yet the computer table.
Can you help me?
@SHAIK CHANDBASHA: If you want to use CentOS && Fedora as Domain Controllers for Zentyal PDC you have to install Samba4 on both and join them as Active Directory Domain Controllers, wait for replication to finish, then you have to move on on a Windows machine with RSAT installed and promote both Samba AD DCs as PDCs, but that’s a lot of work in CentOS and Fedora! In my opinion the simpler way is to install another machine with the same version of Zentyal and setup as a BDC, then just move to Windows RSAT and promote Zentyal BDC as PDC!
Can you please tell me by using this Zentyal server how to connect centos and fedora as a domain controller …..Please
Thanku sooo much buddy this is help you soo much…………….Thanku soo much again….:)
Sir,
This is an awesome tutorial, thanks for sharing this article. Great job. :-)
Ok then….maybe there is an big gap between time on client and server. Domain controllers are very sensible to time issues so I suggest that you synchronize time on clients to match PDC time.
Hi Matei Cezar, nice post you have.
I have same issue like Arsalan Memon and as your suggest (set dns and enter correct credential) i have checked but still not working if I logon domain zentyal via windows xp / 7. Have you get same experience ? thank you
@Arsalan Memon: make sure that XP DNS points to Zentyal PDC IP Address and you enter the correct credentials for Zentyal PDC Administrator account.
I want to add a computer with windows xp sp3 but there is error “unknown user name or bad password”. but it is being accessed in run \\server-ip and allowing read and right in a public share. please reply
CONGRATULATIONS many excellent contribution, very good job, helped me a lot, I was lost but this what helped me lot.
You sir are a saint and a scholar! Great guide!
i want know how to install remote OS to the other system from zentyal server 3.5
Can I install Zentyal in VirtualBox (Windows host) as a PDC?
This is the one I am looking for. Thank you Guy for your contribution. But I haven’t tried yet.
I’m pretty sure it can handle more than 230 clients….depending on your hardware!
How Many Clients will handle this Zentyal PDC.
I have 230 Machine in my Network Mix Enviornment (Windows & Linux). Does this Community edition supports 230 Clients.
Make sure Zentyal DNS is correctly setup and you’re system DNS IP points to Zentyal DNS.
Sorry i missed also that i cant ping the mydomain.lan as i named it just the ip?
And when iam trying to join the domain i get to write in username and password then i get the error. I googled all over but cant find any solution.
I cant get it to join mydomain on a win7 getting an error but it is in swedish saying den angivna domänen finns inte eller kunde inte kontaktas.
Can you share the steps to configure mail server with openchange in zentyal..
Can you provide “how to” join zentyal as secondary dc for existing Windows PDC, also using Zentyal as Proxy,Firewall,VPN for Windows Domain Environmental.
Thank you so much for all your “howtos”. They are all very usesfull.
http://imgur.com/L7fZeuY
m stuck now
i ddnt see any ”
Installing Core Packages” step
just this screen after in installed and rebooted
i am on triboot window 8, netrunner and now zentyal
@manoj gupta : you access zentyal from any Linux distro just by opening a web browser and type https protocol followed by zentyal ip address ( https://zentyal_IP) , as long as you have connectivity to zentyal network segment .
Dear Sir,
I am beginner in linux. I had configured it and able to access from windows client machines. I have also some centos client machines. how would i access from there ?
Kindly help me.
Very Good Job. Thanks for sharing.
Zentyal is based on Ubuntu so i’m pretty sure that is Open Source! yes you can join Open Suse in Zentyal PDC .
Hi ,
Can u confirm this zentyal is open source and also confirm how can i join linux open suse
join domain user and LDAP for address book.
This is one smart solution. I already use Zarafa mail server since 5 months now and love it. Will give this a spin too.
Thank so much. very hot :)