Multipass is a cross-platform, lightweight Ubuntu virtual machine (VIM) manager that runs on Linux, Windows, and macOS. It builds cloud-style Ubuntu VMs, allowing developers to quickly set up a new Ubuntu environment with a single command.
Intended as a development tool, here are some of the key benefits of using Multipass:
- Setting up a local development environment and testing can be time-consuming, but Multipass simplifies the process by automating all setup and teardown.
- Developers can use Multipass to generate fresh, customized Linux development environments on any machine and to prototype cloud installations.
- Multipass is the quickest way for Mac and Windows users to acquire an Ubuntu command line on their PC.
- New Ubuntu users can employ Multipass as a sandbox to experiment with new features without messing up their host computer or having to dual boot.
It is crucial to highlight that Multipass runs a VM with low overhead by using KVM on Linux, Hyper-V on Windows, and HyperKit on macOS. VirtualBox can also be used on Windows and macOS. And Multipass will automatically retrieve and update images for you.
Furthermore, Multipass has a growing library of images that allow you to launch purpose-built VMs or bespoke VMs you’ve customized yourself via its robust cloud-init interface.
This guide shows how to install and use Multipass on a Linux operating system.
Install Multipass on Linux
Multipass is available as a snap package, thus making it easy to install on the most popular Linux distribution that supports snaps.
To install Multipass on your computer, you must have Snap installed on the system, if not, use the right set of commands for your Linux distribution.
Install Multipass on Ubuntu
$ sudo apt update
$ sudo apt install snapd
$ sudo snap install multipass
Install Multipass on Linux Mint
$ sudo rm /etc/apt/preferences.d/nosnap.pref
$ sudo apt update
$ sudo apt install snapd
$ sudo snap install multipass
Install Multipass on Debian
$ sudo apt update
$ sudo apt install snapd
$ sudo snap install core
$ sudo snap install multipass
Install Multipass on Fedora
$ sudo dnf install snapd
$ sudo ln -s /var/lib/snapd/snap /snap
$ sudo snap install multipass
Install Multipass on RHEL
$ sudo dnf install https://dl.fedoraproject.org/pub/epel/epel-release-latest-9.noarch.rpm  [RHEL 9]
$ sudo dnf install https://dl.fedoraproject.org/pub/epel/epel-release-latest-8.noarch.rpm  [RHEL 8]
$ sudo dnf install https://dl.fedoraproject.org/pub/epel/epel-release-latest-7.noarch.rpm  [RHEL 7]
$ sudo dnf upgrade
$ sudo subscription-manager repos --enable "rhel-*-optional-rpms" --enable "rhel-*-extras-rpms"
$ sudo yum update
$ sudo yum install snapd
$ sudo systemctl enable --now snapd.socket
$ sudo ln -s /var/lib/snapd/snap /snap
$ sudo snap install multipass
Install Multipass on openSUSE
$ sudo zypper addrepo --refresh https://download.opensuse.org/repositories/system:/snappy/openSUSE_Leap_15.2 snappy
$ sudo zypper --gpg-auto-import-keys refresh
$ sudo zypper dup --from snappy
$ sudo zypper install snapd
$ sudo systemctl enable --now snapd
$ sudo snap install multipass
Install Multipass on Arch Linux
$ git clone https://aur.archlinux.org/snapd.git
$ cd snapd
$ makepkg -si
$ sudo systemctl enable --now snapd.socket
$ sudo ln -s /var/lib/snapd/snap /snap
$ sudo snap install multipass
After installing multipass on your machine, you can use it to run Ubuntu instances locally from your command line, as explained in the sections that follow.
Find Available Ubuntu Images
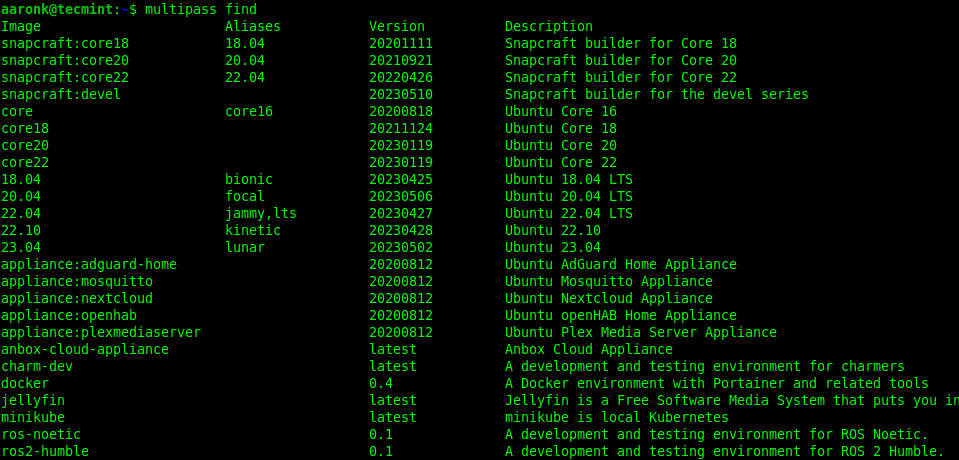
Run the following multipass command to see a list of available multipass images from which you can download and create an instance:
$ multipass find
Download Ubuntu Image
Once you’ve identified which Multipass image to use, use the launch command to download, create, and launch a local Ubuntu instance from it.
This example demonstrates how to use the Ubuntu 22.04 image:
$ multipass launch 22.04
launch failed: Another virtual machine manager is currently running. Please shut it down before starting a Multipass instance.

To proceed, shut down the other virtual machine. Then try running multipass again.
If your launch command was successful, the Ubuntu image was downloaded, and the local Ubuntu instance was created and started, the instance should have a name randomly generated by Multipass. As indicated in the screenshot, the instance name, in this case, is validating-goat.
The new instance is launched by default with 1 CPU, 1GB of RAM, and 5GB of storage space.

List all Available Instances
The multipass list command lists all the created local instances and some of their properties:
$ multipass list

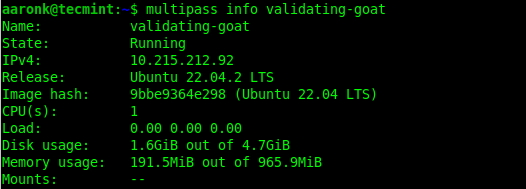
You can use the info command to display information about an instance, such as its state, IP address, release, image hash, number of CPU(s), load, disk usage, memory usage, and mounts, as seen in the following screenshot:
$ multipass info validating-goat
Open Shell in Ubuntu Instance
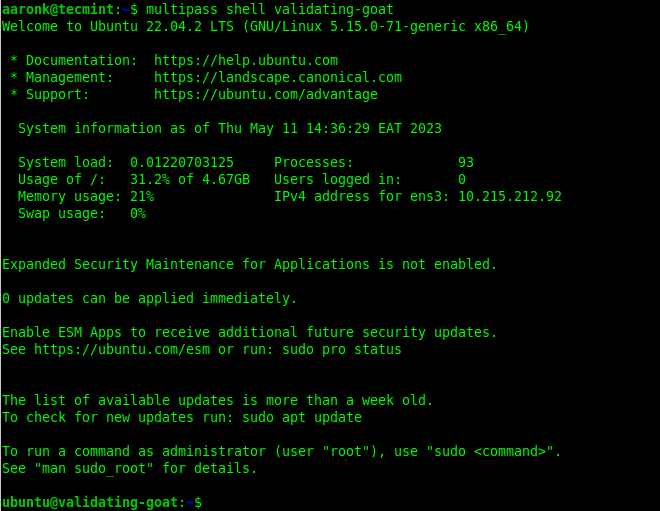
To launch a shell in a running instance (for example, validating-goat), use the shell command:
$ multipass shell validating-goat
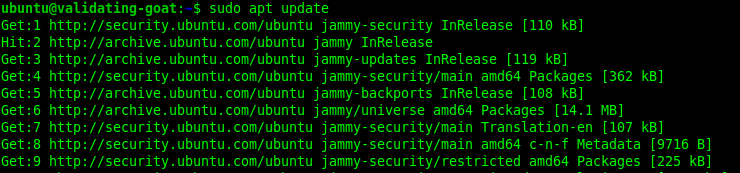
After launching a shell into a running instance, you can run commands on it normally. For example, you can update the apt package index on it as shown.
$ sudo apt update
Start or Stop Instances
To stop or start an instance, use these commands, respectively:
$ multipass stop validating-goat
$ multipass start validating-goat
Delete a Local Instance
To delete a local instance, whether it is in running or stopped, use the delete command as shown.
$ multipass list
$ multipass delete exalted-meerkat

Start an Instance with Custom Settings
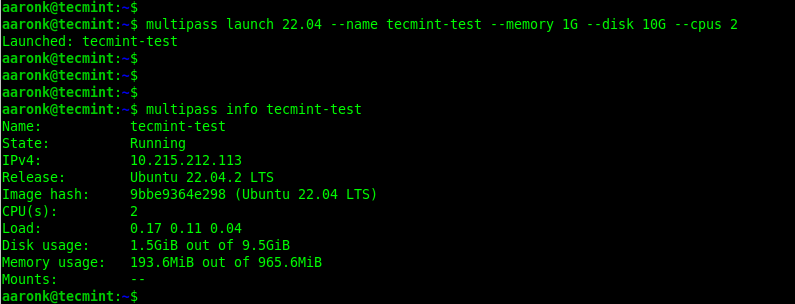
You can also launch an instance with customized specifications (such as name, number of CPU(s), RAM size, and disk size as shown.
$ multipass launch 22.04 --name tecmint-test --memory 1G --disk 10G --cpus 2
$ multipass info tecmint-test
Run a Web Server in Your Ubuntu Instance
Let’s look at how to use your local Ubuntu instance. This example shows how to install and run a basic NGINX web server as shown:
$ multipass shell tecmint-test
$ sudo apt update
$ sudo apt install nginx
After installing NGINX, the service should be started automatically (this is a known behavior on on Ubuntu and its derivatives). Use the following systemctl command to ensure that it is up and running:
$ systemctl status nginx

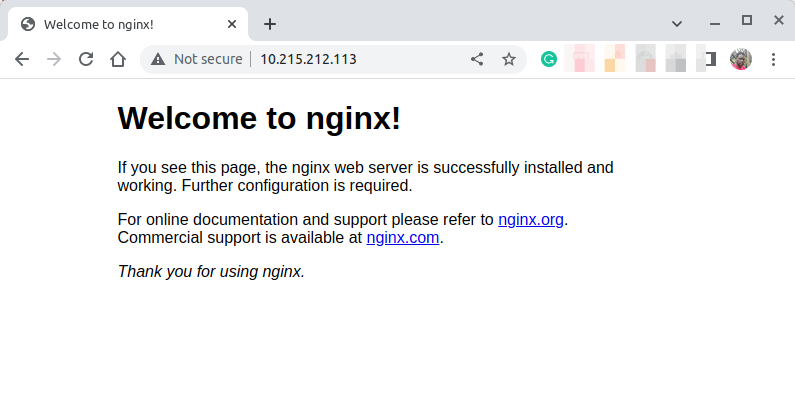
Now use your running instance’s IP address (which you can get from the list of local instances) to make a request to NGINX and view the default welcome web page, as shown in the following screenshot.
Uninstall Multipass on Linux
To remove Multipass from your computer, run the following command:
$ sudo snap remove multipass
For more information about Multipass command-line options, run the following command:
$ multipass -h
You’ve successfully installed Multipass and learned how to use it to launch and manage Ubuntu instances on your computer quickly, efficiently, and reliably.
For any comments, please contact us using the feedback form below.


