rdiff-backup is a powerful and easy-to-use Python script for local/remote incremental backup, which works on any POSIX operating system such as Linux, Mac OS X or Cygwin. It brings together the remarkable features of a mirror and an incremental backup.
Significantly, it preserves subdirectories, dev files, hard links, and critical file attributes such as permissions, uid/gid ownership, modification times, extended attributes, acls, and resource forks. It can work in a bandwidth-efficient mode over a pipe, in a similar way as the popular rsync backup tool.
rdiff-backup backs up a single directory to another over a network using SSH, implying that the data transfer is encrypted thus secure. The target directory (on the remote system) ends up an exact copy of the source directory, however extra reverse diffs are stored in a special subdirectory in the target directory, making it possible to recover files lost some time ago.
Dependencies
To use rdiff-backup in Linux, you’ll need the following packages installed on your system:
- Python v2.2 or later
- librsync v0.9.7 or later
- pylibacl and pyxattr Python modules are optional but necessary for POSIX access control list(ACL) and extended attribute support respectively.
- rdiff-backup-statistics requires Python v2.4 or later.
How to Install rdiff-backup in Linux
Important: If you are operating over a network, you’ll have to install rdiff-backup both systems, preferably both installations of rdiff-backup will have to be the exact same version.
The script is already present in the official repositories of the mainstream Linux distributions, simply run the command below to install rdiff-backup as well as its dependencies:
Intall rdiff-backup On Ubuntu
To install Rdiff-Backup on Ubuntu Focal or Debian Bullseye or newer (has 2.0).
$ sudo apt-get update
$ sudo apt-get install librsync-dev rdiff-backup
To install Rdiff-Backup on Ubuntu backports for older versions (needs a backported 2.0).
$ sudo add-apt-repository ppa:rdiff-backup/rdiff-backup-backports
$ sudo apt update
$ sudo apt install rdiff-backu
On CentOS/RHEL 8
To install Rdiff-Backup on CentOS and RHEL 8 (from COPR).
$ sudo yum install yum-plugin-copr epel-release
$ sudo yum copr enable frankcrawford/rdiff-backup
$ sudo yum install rdiff-backup
On CentOS/RHEL 7
To install Rdiff-Backup on CentOS and RHEL 7 (from COPR).
$ sudo yum install yum-plugin-copr epel-release
$ sudo yum copr enable frankcrawford/rdiff-backup
$ sudo yum install rdiff-backup
On CentOS/RHEL 6
$ sudo yum install centos-release-scl
$ sudo yum install rh-python36 gcc libacl-devel
$ scl enable rh-python36 bash
$ sudo pip install rdiff-backup pyxattr pylibacl
$ echo 'exec scl enable rh-python36 -- rdiff-backup "$@"' | sudo tee /usr/bin/rdiff-backup
$ sudo chmod +x /usr/bin/rdiff-backup
On Fedora
To install Rdiff-Backup on Fedora 32+.
$ sudo dnf install rdiff-backup
How to Use rdiff-backup in Linux
As I mentioned before, rdiff-backup uses SSH to connect to remote machines on your network, and the default authentication in SSH is the username/password method, which normally requires human interaction.
However, to automate tasks such as automatic backups with scripts and beyond, you will need to configure SSH Passwordless Login Using SSH keys, because SSH keys increases the trust between two Linux servers for easy file synchronization or transfer.
Once you have setup SSH Passwordless Login, you can start using the script with the following examples.
Backup Files to Different Partition
The example below will backup the /etc directory in a Backup directory on another partition:
$ sudo rdiff-backup /etc /media/aaronkilik/Data/Backup/mint_etc.backup

To exclude a particular directory as well as it’s subdirectories, you can use the --exclude option as follows:
$ sudo rdiff-backup --exclude /etc/cockpit --exclude /etc/bluetooth /media/aaronkilik/Data/Backup/mint_etc.backup
We can include all device files, fifo files, socket files, and symbolic links with the --include-special-files option as below:
$ sudo rdiff-backup --include-special-files --exclude /etc/cockpit /media/aaronkilik/Data/Backup/mint_etc.backup
There are two other important flags we can set for file selection; --max-file-size size which excludes files that are larger than the given size in bytes and --min-file-size size which excludes files that are smaller than the given size in bytes:
$ sudo rdiff-backup --max-file-size 5M --include-special-files --exclude /etc/cockpit /media/aaronkilik/Data/Backup/mint_etc.backup
Backup Remote Files on Local Linux Server
For the purpose of this section, we’ll use:
Remote Server (tecmint)	        : 192.168.56.102
Local Backup Server (backup) 	: 192.168.56.10
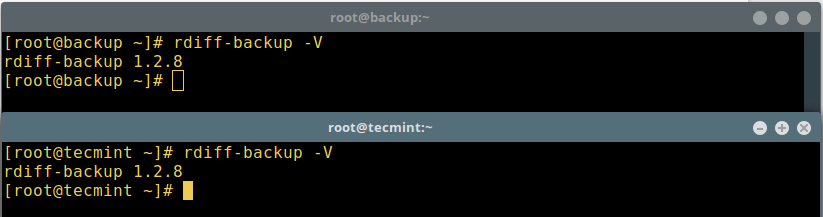
As we stated before, you must install the same version of rdiff-backup on both machines, now try to check the version on both machines as follows:
$ rdiff-backup -V
On the backup server, create a directory which will store the backup files like so:
# mkdir -p /backups
Now from the backup server, run the following commands to make a backup of directories /var/log/ and /root from remote Linux server 192.168.56.102 in /backups:
# rdiff-backup [email protected]::/var/log/ /backups/192.168.56.102_logs.backup
# rdiff-backup [email protected]::/root/ /backups/192.168.56.102_rootfiles.backup
The screenshot below shows the root file on remote server 192.168.56.102 and the backed up files on the back server 192.168.56.10:
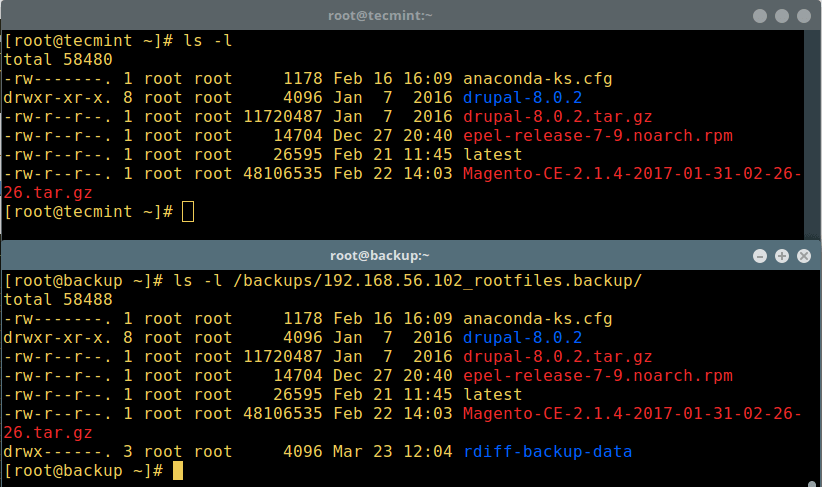
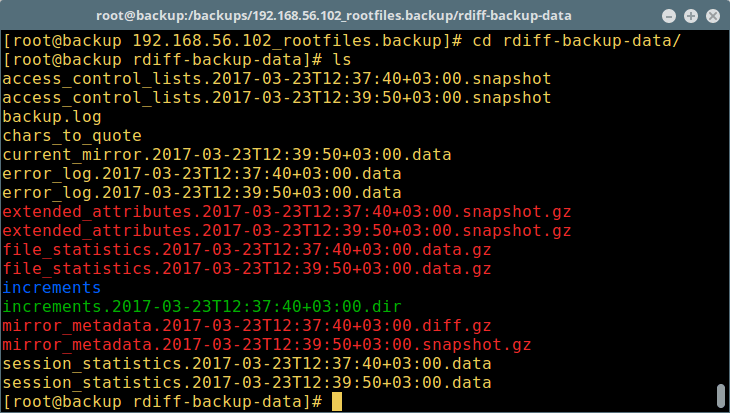
Take note of the rdiff-backup-data directory created in the backup directory as seen in the screenshot, it contains vital data concerning the backup process and incremental files.
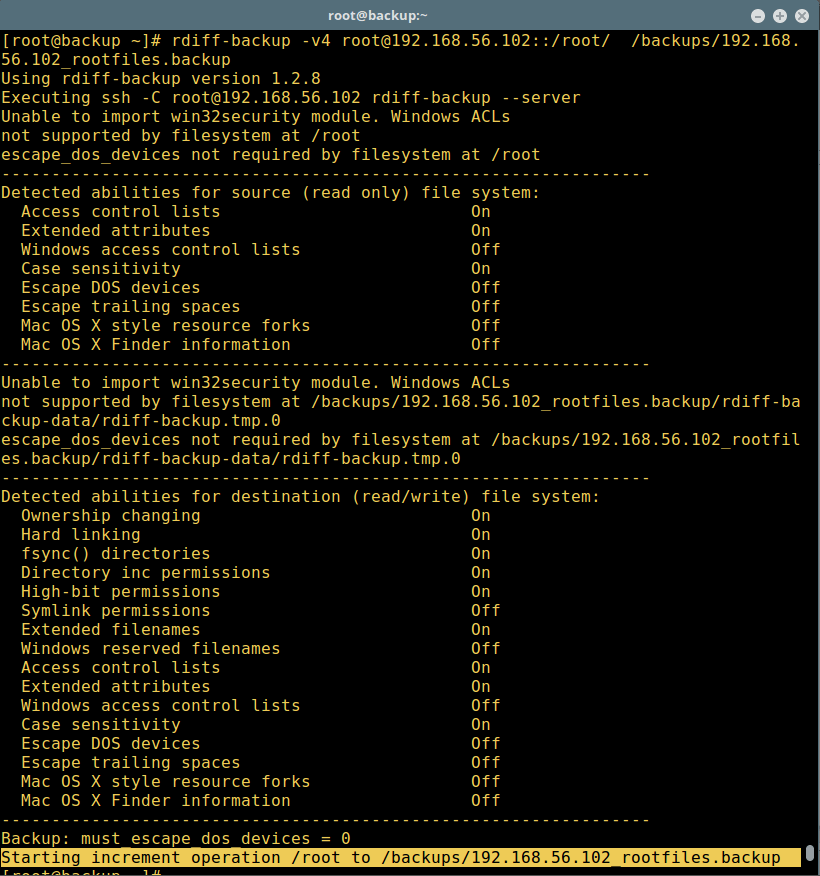
Now, on the server 192.168.56.102, additional files have been added to the root directory as shown below:

Let’s run the backup command once more time to get the changed data, we can use the -v[0-9] (where the number specifies the verbosity level, default is 3 which is silent) option to set the verbosity feature:
# rdiff-backup -v4 [email protected]::/root/ /backups/192.168.56.102_rootfiles.backup
And to list the number and date of partial incremental backups contained in the /backups/192.168.56.102_rootfiles.backup directory, we can run:
# rdiff-backup -l /backups/192.168.56.102_rootfiles.backup/
Automating rdiff-back Backup Using Cron
We can print summary statistics after a successful backup with the --print-statistics. However, if we don’t set this option, the info will still be available from the session statistics file. Read more concerning this option in the STATISTICS section of the man page.
And the –remote-schema flag enables us to specify an alternative method of connecting to a remote computer.
Now, let’s start by creating a backup.sh script on the backup server 192.168.56.10 as follows:
# cd ~/bin
# vi backup.sh
Add the following lines to the script file.
#!/bin/bash

#This is a rdiff-backup utility backup script

#Backup command
rdiff-backup --print-statistics --remote-schema 'ssh -C %s "sudo /usr/bin/rdiff-backup --server --restrict-read-only  /"'  [email protected]::/var/logs  /backups/192.168.56.102_logs.back

#Checking rdiff-backup command success/error
status=$?
if [ $status != 0 ]; then
        #append error message in ~/backup.log file
        echo "rdiff-backup exit Code: $status - Command Unsuccessful" >>~/backup.log;
        exit 1;
fi

#Remove incremental backup files older than one month
rdiff-backup --force --remove-older-than 1M /backups/192.168.56.102_logs.back
Save the file and exit, then run the following command to add the script to the crontab on the backup server 192.168.56.10:
# crontab -e
Add this line to run your backup script daily at midnight:
0 0 * * * /root/bin/backup.sh > /dev/null 2>&1
Save the crontab and close it, now we’ve successful automated the backup process. Ensure that it is working as expected.
Read through the rdiff-backup man page for additional info, exhaustive usage options and examples:
# man rdiff-backup
rdiff-backup Homepage: http://www.nongnu.org/rdiff-backup/
That’s it for now! In this tutorial, we showed you how to install and basically use rdiff-backup, an easy-to-use Python script for local/remote incremental backup in Linux. Do share your thoughts with us via the feedback section below.


Great piece on rdiff, not used it for few years and it made life nice and easy for me.
@Colin
Many thanks for the feedback.