In this part we are going to discuss some important points related to our RHEV series. In Part-2 of this series, we’ve discussed RHEV Hypervisor deployments and installations. In this part we will discuss another ways to install RHEV Hypervisor.

The First way was done by using dedicated RHEVH which customized by RedHat itself without any modification or change from admin side. The other way, we will use a normal RHEL server [Minimal installation] that will act as a RHEV Hypervisor.
Step 1: Add RHEL Hypervisor to the Environment
1. Install subscribed RHEL6 server [Minimal installation]. You may increase your virtual environment by adding additional subscribed RHEL6 server [Minimal installation] acts as hypervisor.
Virtual Machine Specification
OS: RHEL6.6 x86_64
Number of processors: 2
Number of cores : 1
Memory : 3G
Network : vmnet3
I/O Controller : LSI Logic SAS
Virtual Disk : SCSI
Disk Size : 20G
IP: 11.0.0.7
Hostname: rhel.mydomain.org
and make sure you checked the virtualization option in vm processor settings.
Hint : Make sure your system is subscribed to redhat channels and up-to-date, if you don’t know how to subscribe to redhat subscription channel, you may read the article Enable Red Hat Subscription Channel.
Tip : To save your resources you can shutdown one of the both currently up and running hypervisors.
2. To turn your server into hypervisor {use it as a hypervisor} you may need install the RHEVM agent on it.
# yum install vdsm
After packages installation complete, Go to RHEVM web interface to add it.
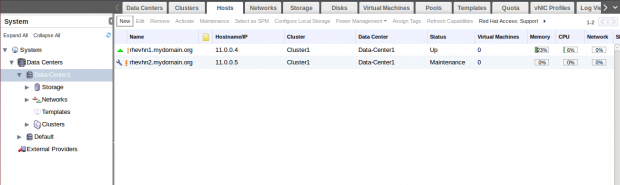
3. In against of RHEVH hypervisor, you can add RHEL hypervisor from one way from RHEM using the root credential of the RHEL hypervisor. So, from rhevm WUI switch to Hosts tab and click new.
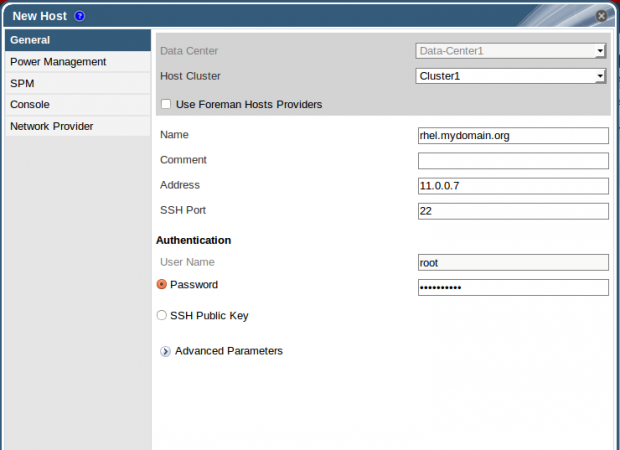
Then Provide your host information as shown.
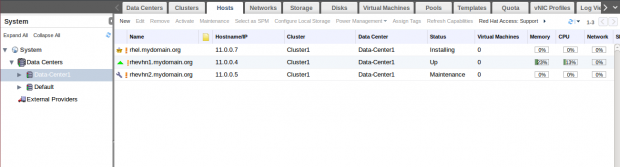
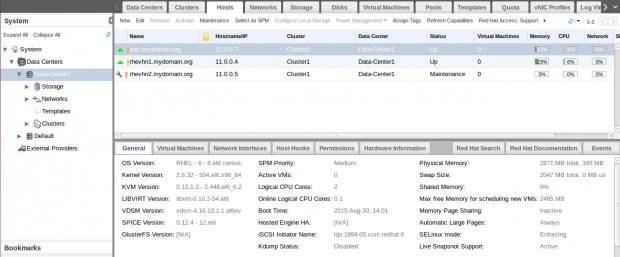
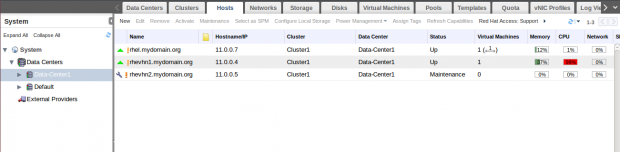
Next, ignore Power mgmt warning and finish then wait for a few minutes and check the status of the newly added host.
For more details about adding RHEL based Host, check out RedHat official RHEV documentation.
Step 2: Managing RHEV Clustering
Clustering in RHEV describes a group of the same CPU type hosts are sharing the same storage [e.g. over network] and are using to do specific task [e.g. High Availability ]
Clustering in general has a lot of additional tasks you can check out the article that explains What is Clustering and Advantages/Disadvantages of it.
The main advantage of clustering in RHEV is to enable and manage virtual machines migration between hosts that belong to the same cluster.
So, How virtual machines migrate between hosts ?
RHEV has two strategies:
1. Live Migration
2. High Availability
1. Live Migration
Live Migration used in non-critical situation which mean everything is working fine in general but you have to do some load balancing tasks (e.g. you found there is host is loaded by virtual machine over another. So, you may Live migrate virtual machine from host to another to achieve load balancing).
Note : There is no interruption to services, application or users running inside VM during Live Migration. Live migration also called as resources re-allocation.
Live migration can be processed manually or automatic according to pre-defined policy:
- Manually: Force selecting the the destination host then migrate VM to it manually using WUI.
- Automatic : Using one of Cluster policies to manage Live migration according to RAM usage, CPU utilization, etc.
Switch to Clusters tab and select Cluster1 the click on edit.
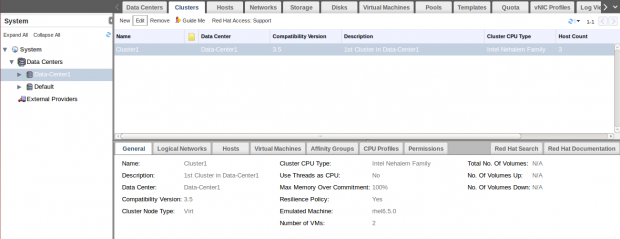
From window tabs, switch to Cluster Policy tab.
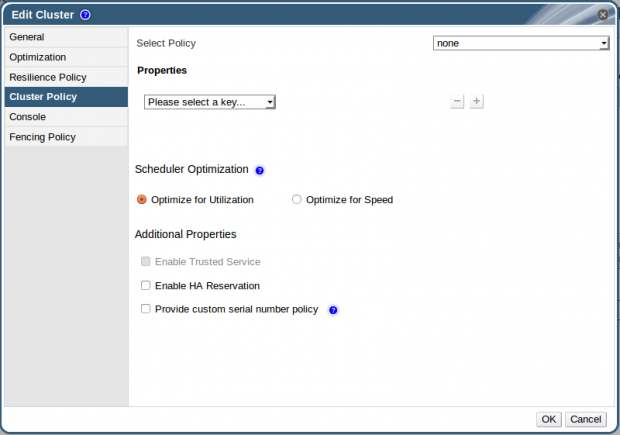
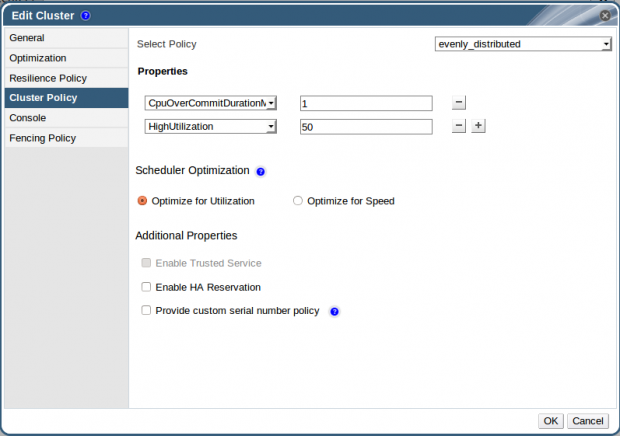
Select evenly_distributed policy. This policy allows you to configure Max threshold for CPU utilization on the host and the allowed time for the load before starting Live migration.
Hint
As shown I configured the max threshold to be 50% and duration to be 1 min.
Then OK and switch to VM’s tab.
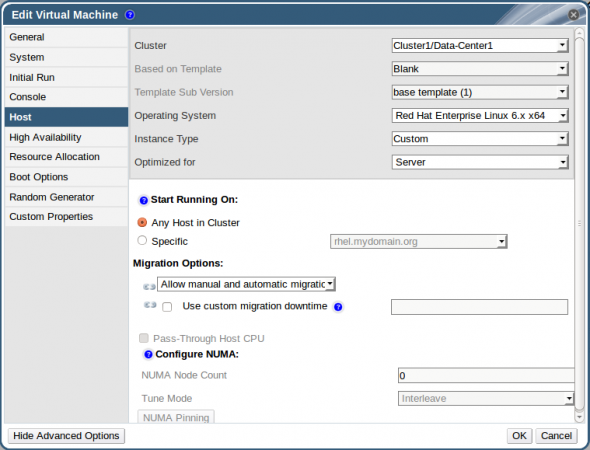
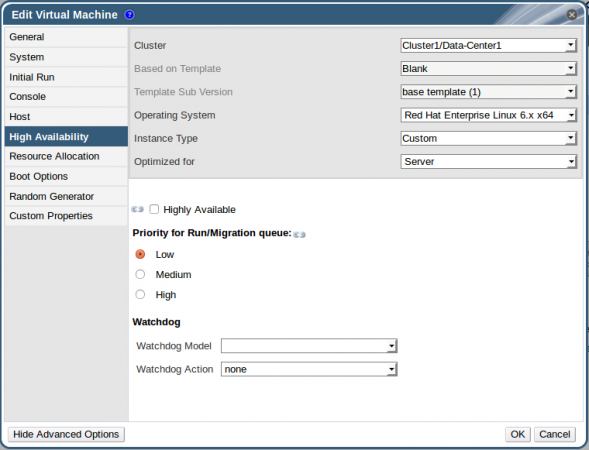
Select Linux vm [Previously created] then click edit and check this points.
1. From Host tab : Check Manual and Automatic Live Migration is allowed for this VM.
2. From HA tab : Check the Priority degree of your virtual-machine. In our case, its not very important as we are playing with only one vm. But it will be important to set priorities for your vms in large environment.
Then start Linux VM.
First, we will use the Manually Live Migration. Linux VM in now running on rhel.mydomain.org.

Lets run the following command over vm console, before starting migration.
# ls -lRZ /
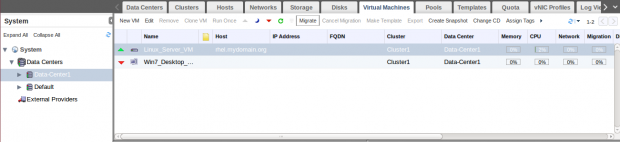
Then select Linux VM and click Migrate.
If you select automatically, system will check the most responsible host to be destination under the cluster policy. We will test this without any interference from administrator.
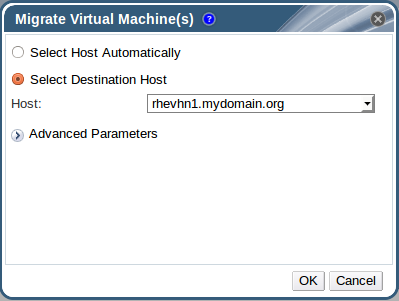
So, after selecting manually and choose the destination, Click OK and go to console and monitor the running command. You can also check the vm status.

You may need to monitor Task events.

After a few seconds, you will find a change in he vm Hostname.

Your VM is manually Live migrated successfully !!
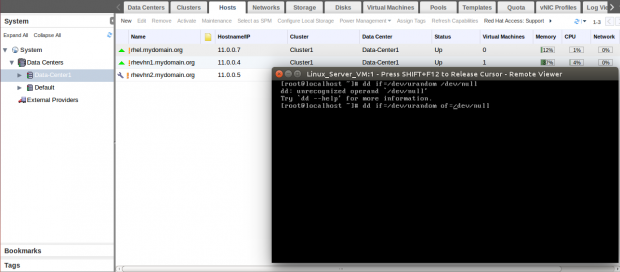
Lets try automatic Live Migration, our target is to make CPU Load on the rhevhn1 Host is exceeded 50%. We will do that by increasing the load on the vm itself, so from console write this command:
# dd if=/dev/urandom of=/dev/null
and monitor the load on Host.
After few minutes, the load on Host will exceeds 50%.

Just wait another few more minutes then live migration will start automatically as shown.
You can also check the tasks tab, and after little waiting, your virtual machine is automatically Live Migrated to rhel Host.


Important: Make sure that one of your hosts have resources more than the other one. If the two hosts are identical in resources. VM won’t be migrated because there will be no difference !!
Hint: Putting Host into Maintenance Mode will automatically Live Migration Up and running VM’s to other hosts in the same cluster.
For further information about VM Migrations, read Migrating Virtual Machines Between Hosts.
Hint: Live Migration between different clusters isn’t officially supported expect one case you can check it here.
2. High Availability
In the against of Live Migration, HA is used to Cover Critical Situation not just load balancing tasks. The common section that your VM will also migrated to another host but with rebooting down time.
If you have Failure, Non-Operational or Non-responsive Host in your cluster, Live Migration Cannot help you. HA will power-off the virtual-machine and restart it on another up and running host in the same cluster.
To Enable HA in your environment, you must have at least one power management device [e.g. power switch] in your environment.
Unfortunately, we aren’t able to do that in our virtual environment. So for more about HA in RHEV please check out Improving Uptime with VM High Availability.
Remember: Live Migration and High Availability are working with hosts in the same cluster with same type of CPU and connected to shared Storage.
Conclusion:
We reached peak point in our series as we discussed one of the important features in RHEV Clustering as we described it and its importance. Also we discussed the second type [method] to deploy RHEV hypervisors which based on RHEL [at least 6.6 x86_64].
In next article, we will be able to make some operations on virtual-machines such as snapshots, sealing, cloning, exporting and pools.


Hi,
Great Work, I have followed through your blog.
Migration Side not working:
Jul 19, 2017 1:33:32 PM
Migration failed due to Error: Migration not in progress (VM: Windows7, Source: rhev-h2.lab.com).
Jul 19, 2017 1:33:32 PM
No available host was found to migrate VM Windows7 to.
Jul 19, 2017 1:33:32 PM
Failed to migrate VM Windows7 to Host rhev-h1.lab.com due to Error: Migration not in progress. Trying to migrate to another Host.
Jul 19, 2017 1:33:31 PM
VDSM rhev-h2.lab.com command failed: Migration canceled
Jul 19, 2017 1:32:42 PM
Host rhev-h1.lab.com has network interface which exceeded the defined threshold [95%] (p8p1: transmit rate[2%], receive rate [98%])
Jul 19, 2017 1:32:17 PM
Migration started (VM: Windows7, Source: rhev-h2.lab.com, Destination: rhev-h1.lab.com, User: admin@internal).
Great job Mohammad. Any idea on when next articles will arrive?