To ensure maximum web application availability, scalability, and high performance, it is now common to implement technologies that introduce redundancy, such as server clustering and load balancing. For example, setting up a cluster of servers that all run the same application(s) and then deploying load balancer(s) in front of them to distribute the traffic.
HAProxy is an open-source, powerful, high performance, reliable, secure and widely-used high availability TCP/HTTP load balancer, proxy server and SSL/TLS terminator built for very high traffic web sites. It runs reliably well on Linux, Solaris, FreeBSD, OpenBSD as well as AIX operating systems.
This guide shows how to set up a dedicated high availability load balancer with HAProxy on CentOS 8 to control traffic in a cluster of NGINX web servers. It also demonstrates how to configure SSL/TLS termination in HAProxy.
Prerequisites:
A total of 4 servers with minimal CentOS 8 installation.
Test Environment Setup
----------- HAProxy Server Setup -----------
HA Proxy Server - hostname: haproxy-server.tecmint.lan; IP: 10.42.0.247
Test Site Domain: www.tecmint.lan


----------- Client Web Servers Setup -----------
Web Server #1 - hostname: websrv1.tecmint.lan; IP: 10.42.0.200
Web Server #2 - hostname: websrv2.tecmint.lan; IP: 10.42.0.21
Web Server #3 - hostname: websrv3.tecmint.lan; IP: 10.42.0.34
Step 1: Setting Up Nginx HTTP Server on the Client Machines
1. Login into all your CentOS 8 client machines and install the Nginx web server using the dnf package manager as shown.
# dnf install Nginx
2. Next, start the Nginx service, for now, enable it to automatically start at system boot and confirm that it is up and running by checking its status, using the systemctl commands (do this on all the client machines).
# systemctl start nginx
# systemctl enable nginx
# systemctl status nginx
3. Also, if the firewalld service is running on all the client machines (which you can check by running systemctl start firewalld), you must add the HTTP and HTTPS services in the firewall configuration to allow requests from the load balancer pass through the firewall to the Nginx web servers. Then reload the firewalld service to effect the new changes (do this on all client machines).
# firewall-cmd --zone=public --permanent --add-service=http
# firewall-cmd --zone=public --permanent --add-service=https
# firewall-cmd --reload
4. Next, open a web browser on your local machines and test if the Nginx installation is working fine. Use the client IP’s to navigate, once you see the Nginx test page, it means that the web server installed on the client machine is working properly.
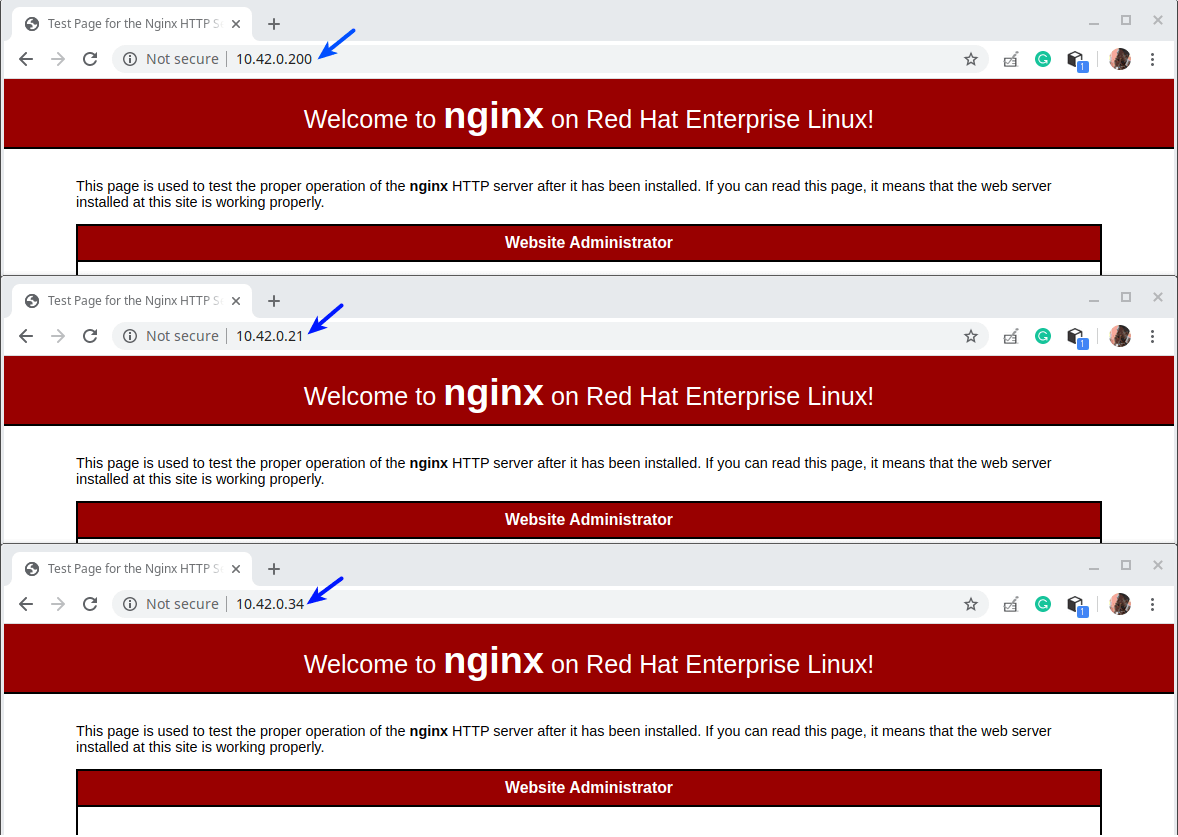
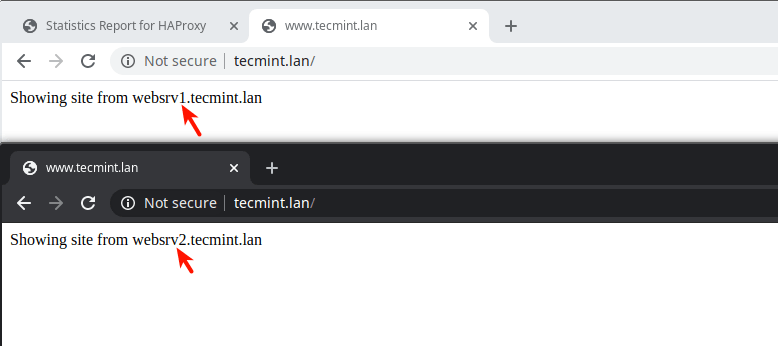
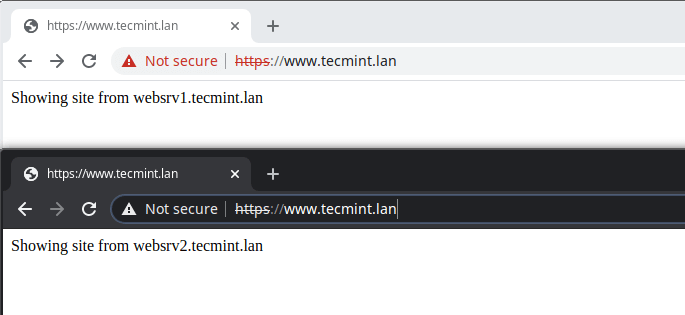
5. Next, we need to create test pages on the client machines that we will use later on to test out the HAProxy setup.
----------- Web Server #1 -----------
# cp /usr/share/nginx/html/index.html /usr/share/nginx/html/index.html.orig
# echo "Showing site from websrv1.tecmint.lan"> /usr/share/nginx/html/index.html

----------- Web Server #2 -----------
# cp /usr/share/nginx/html/index.html /usr/share/nginx/html/index.html.orig
# echo "Showing site from websrv2.tecmint.lan"> /usr/share/nginx/html/index.html

----------- Web Server #3 -----------
# cp /usr/share/nginx/html/index.html /usr/share/nginx/html/index.html.orig
# echo "Showing site from websrv3.tecmint.lan"> /usr/share/nginx/html/index.html
Step 2: Installing and Configuring HAProxy Server on CentOS 8
6. Now install the HAProxy package on the HAProxy server by running the following command.
# dnf install haproxy
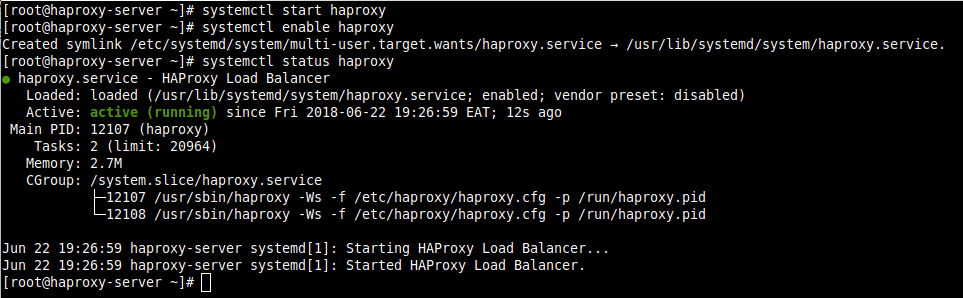
7. Next, start the HAProxy service, enable it to auto-start at system boot and verify its status.
# systemctl start haproxy
# systemctl enable haproxy
# systemctl status haproxy
8. Now we will configure the HAProxy using the following configuration file.
# vi /etc/haproxy/haproxy.cfg
The configuration file is divided into four major sections.
- global settings – sets process-wide parameters.
- defaults – this section sets default parameters for all other sections following its declaration.
- frontend – this section describes a set of listening sockets accepting client connections.
- Backend – this section describes a set of servers to which the proxy will connect to forward incoming connections.
To understand the options under global settings and defaults, read the HAProxy documentation (link provided at the end of the article). For this guide, we will use the defaults.
Setting Up HAProxy Logging
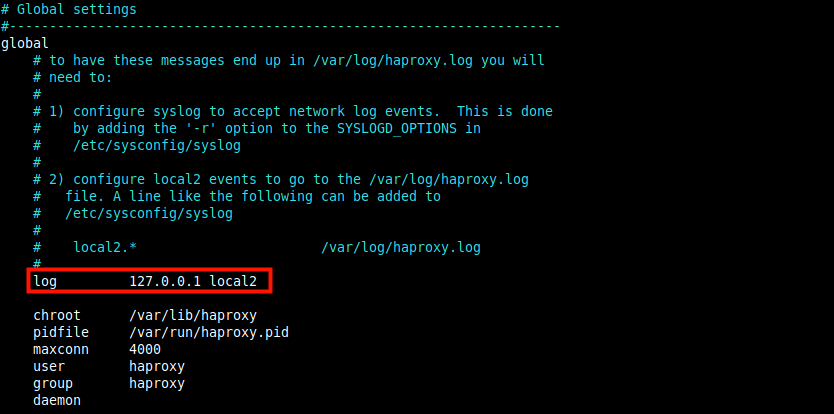
9. HAProxy when once deployed will play a significant role in your IT infrastructure, thus configuring logging for it is a basic requirement; this allows you to get insights about each connection to your backend web servers.
The log parameter (highlighted in the following screenshot) declares a global Syslog server (such as rsyslog the default in CentOS) that will receive log messages. More than one server can be declared here.
The default configuration points to the localhost (127.0.0.1) and local2 is the default facility code used to identify HAProxy log messages under rsyslog.
10. Next, you need to tell the rsyslog server how to receive and process HAProxy log messages. Open the rsyslog configuration file to /etc/rsyslog.conf or create a new file within the /etc/rsyslog.d directory, for example /etc/rsyslog.d/haproxy.conf.
# vi /etc/rsyslog.d/haproxy.conf
Copy and paste the following configuration to collect log with UDP on the default port 514.
$ModLoad imudp
$UDPServerAddress 127.0.0.1
$UDPServerRun 514
Also add these lines to instruct rsyslog to write to two separate log files based on the severity, where local2 is the facility code defined in the HAProxy configuration above.
local2.* 	/var/log/haproxy-traffic.log
local2.notice 	/var/log/haproxy-admin.log
11. Save the file and close it. Then restart the rsyslog service to apply the recent changes.
# systemctl restart rsyslog
Configuring HAProxy Front-end and Back-ends
12. In this section, we will demonstrate how to configure the front-end and back-end proxies. Go back to the HAProxy configuration file and modify the default front-end and backend sections as follows. We will not go into a detailed explanation of each parameter, you can always refer to the official documentation.
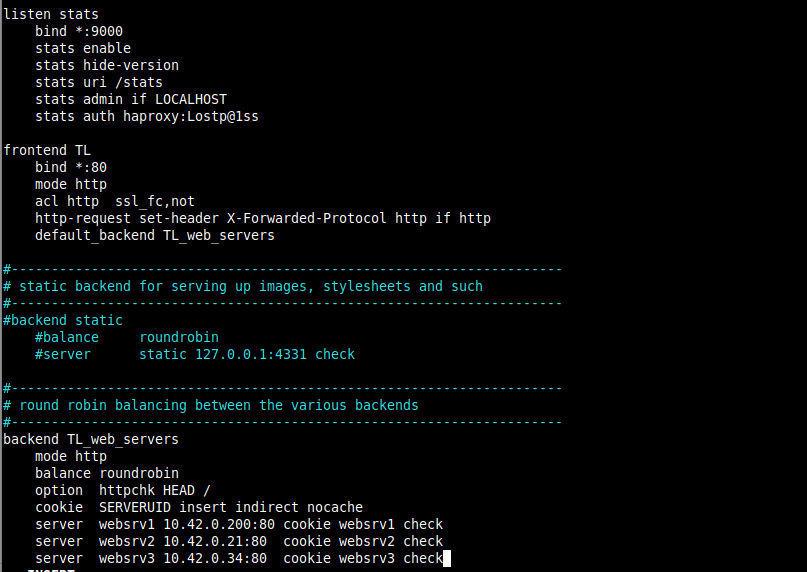
The following configuration defines a listen section used to serve up the HAProxy Stats page. The bind parameter assigns a listener to a given IP address (* for all in this case) and port (9000).
The stats enable setting enables the statistics page which will be accessed using the URI /stats (i.e http://server_ip:9000/stats).
The stats auth setting is used to add a basic authentication when accessing the page (replace haproxy and Lostp@1ss with a username and password of your choice).
listen stats
    bind *:9000
    stats enable
    stats hide-version
    stats uri /stats
    stats admin if LOCALHOST
    stats auth haproxy:Lostp@1ss
13. The next configuration defines a frontend section called TL (you can give a name of your liking). The mode parameter defines the mode HAProxy operates in.
The acl (Access Control List) parameter is used to make a decision based on content extracted from the request. In this example, the request is considered plain HTTP if it’s not made over SSL.
Then the http-request set-header setting is used to add an HTTP header to the request. This helps inform Nginx that the initial request was made over HTTP (or via port 80).
The default_backend or use_backend directive defines the backend servers, in this case, referenced by TL_web_servers.
Note that HAProxy will return a “503 Service Unavailable error” if a request is not routed by a use_backend or default_backend directive.
frontend TL
    bind *:80
    mode http
    acl http  ssl_fc,not
    http-request set-header X-Forwarded-Protocol http if http
    default_backend TL_web_servers
14. Then we need to define a backend section where the balance setting defines how HAProxy selects the back-end servers to process a request if no persistence method overrides that selection.
The cookie directive enables cookie-based persistence, it instructs HAProxy to send a cookie named SERVERID to the client and to associate it with the ID of the server that gave the initial response.
The server directive is used to define the upstream servers in the format sever_name (e.g websrv1), server_IP:port and options.
One key option is check which tells HAProxy to keep checking on the availability of a server and report on the stats page.
backend TL_web_servers
    mode http
    balance roundrobin
    option  httpchk HEAD /
    cookie SERVERUID insert indirect nocache
    server  websrv1 10.42.0.200:80 cookie websrv1 check
    server  websrv2 10.42.0.21:80  cookie websrv2 check
    server  websrv3 10.42.0.34:80  cookie websrv3 check
Comment out any other frontend and backend sections as shown in the screenshot that follows. Save the file and close it.
15. Now restart the HAProxy service to apply the new changes.
# systemctl restart haproxy
16. Next, ensure that the HTTP (port 80) and HTTPS (port 433) services are opened in the firewall to accept client requests as follows. Also, open port 9000 in the firewall for accessing the stats page and reload the firewall settings.
# firewall-cmd --zone=public --permanent --add-service=http
# firewall-cmd --zone=public --permanent –add-service=https
# firewall-cmd --zone=public --permanent --add-port=9000/tcp
# firewall-cmd --reload
Step 3: Testing HAProxy Setup and Viewing Statistics
17. Now its time to test the HAPrxoy setup. On the local desktop machine where you are accessing the all servers from, add the following line in the /etc/hosts file to enable us to use the dummy site domain.
10.42.0.247 www.tecmint.lan
18. Then open a browser and navigate using either the server address or site domain.
http://10.42.0.247/
OR
http://www.tecmint.lan/
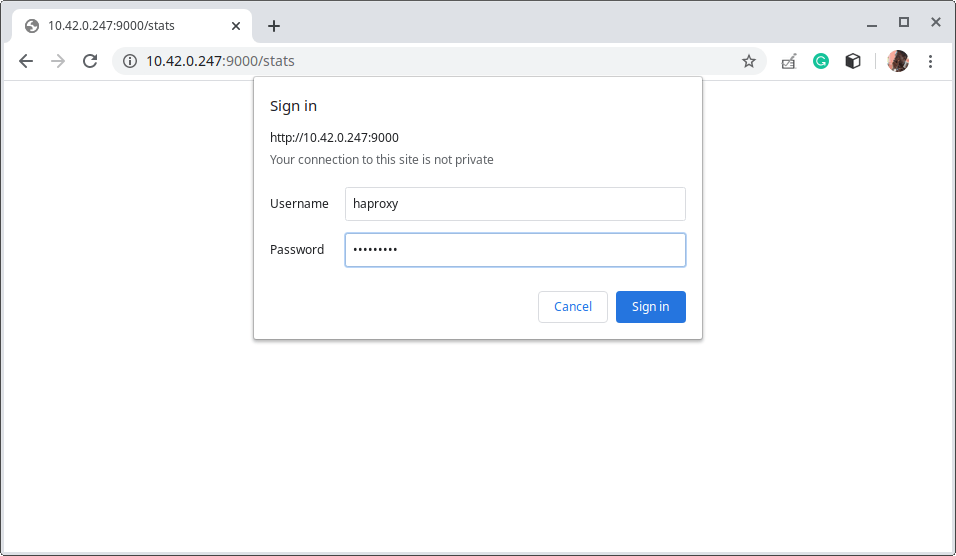
19. To access the HAProxy statistics page, use the following address.
http://10.42.0.247:9000/stats
Then use the username and password you defined in HAProxy configuration file (refer to the stats auth parameter).
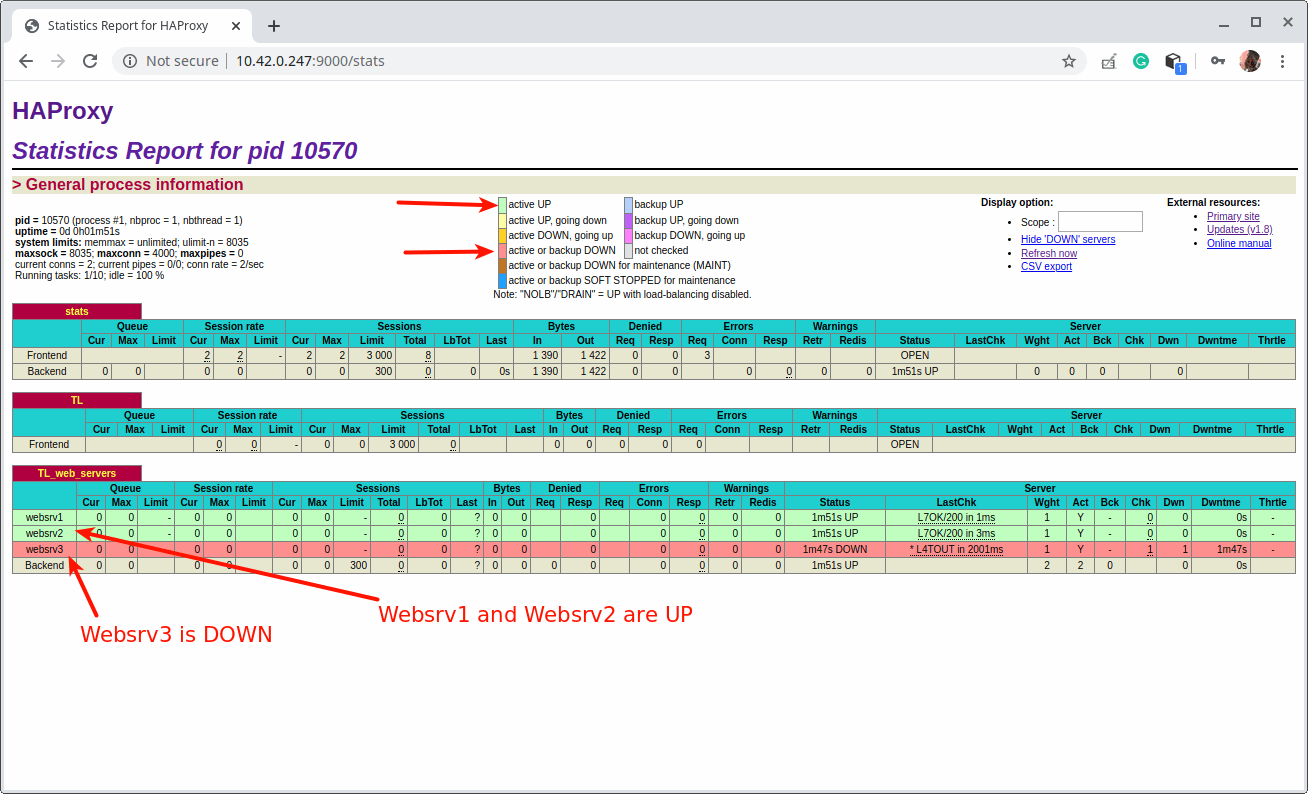
After a successful login, you will land at the HAProxy statistics page that shows you metrics that cover the health of your servers, current request rates, response times, and so much more.
To demonstrate how the status report works regarding the color codes work, we have put one of the back-end servers.
Step 4: Configuring HTTPS in HAProxy Using a Self-signed SSL Certificate
20. In this final section, we will demonstrate how to configure SSL/TLS to secure all communications between the HAProxy server and client. HAProxy supports four major HTTPS configuration modes, but for this guide, we will use SSL/TLS offloading.
In SSL/TLS offloading mode, HAProxy deciphers the traffic on the client-side and gets connected in clear traffic to the backend servers.
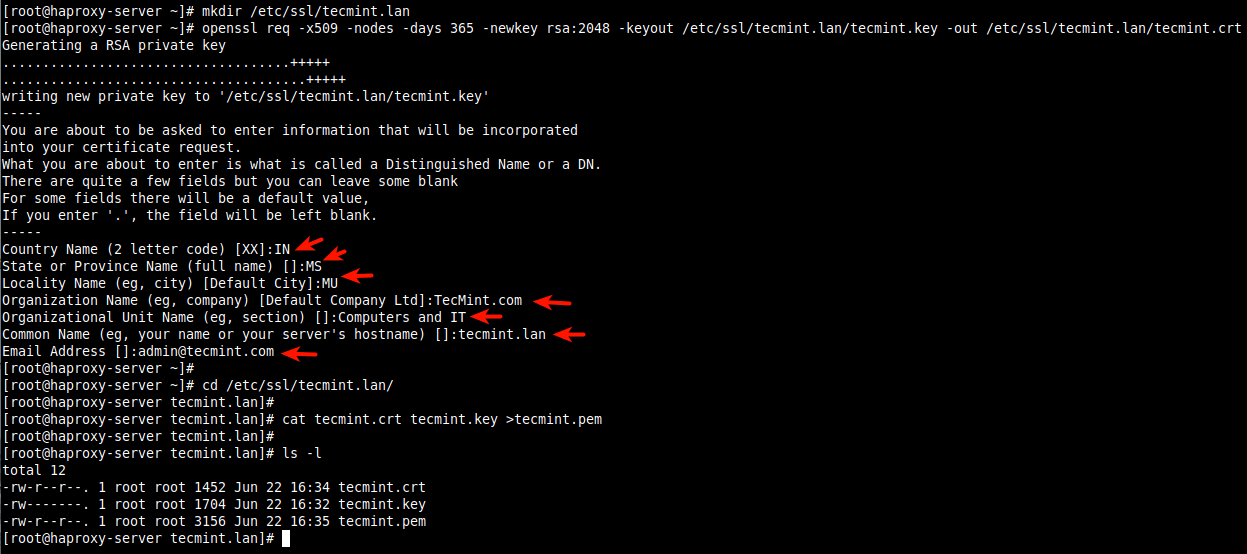
We will start by creating the certificate and key as shown (answer the questions accordingly based on your company details during the certificate creation, as highlighted on the screenshot).
# mkdir /etc/ssl/tecmint.lan
# cd /etc/ssl/tecmint.lan/
# openssl req -x509 -nodes -days 365 -newkey rsa:2048 -keyout /etc/ssl/tecmint.lan.key -out /etc/ssl/tecmint.lan.crt
# cd /etc/ssl/tecmint.lan/
# cat tecmint.crt tecmint.key >tecmint.pem
# ls -l
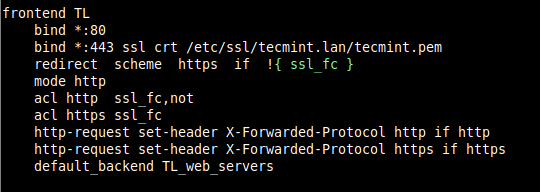
21. Next, open the HAProxy configuration file (/etc/haproxy/haproxy.cfg) and edit the front-end section.
frontend TL
    bind *:80
    bind *:443 ssl crt /etc/ssl/tecmint.lan/tecmint.pem
    redirect  scheme  https  if  !{ ssl_fc }
    mode http
    acl http  ssl_fc,not
    acl https ssl_fc
    http-request set-header X-Forwarded-Protocol http if http
    http-request set-header X-Forwarded-Protocol https if https
    default_backend TL_web_servers
Save the file and close it.
22. Then restart the HAProxy service to apply the new changes.
# systemctl restart haproxy.service
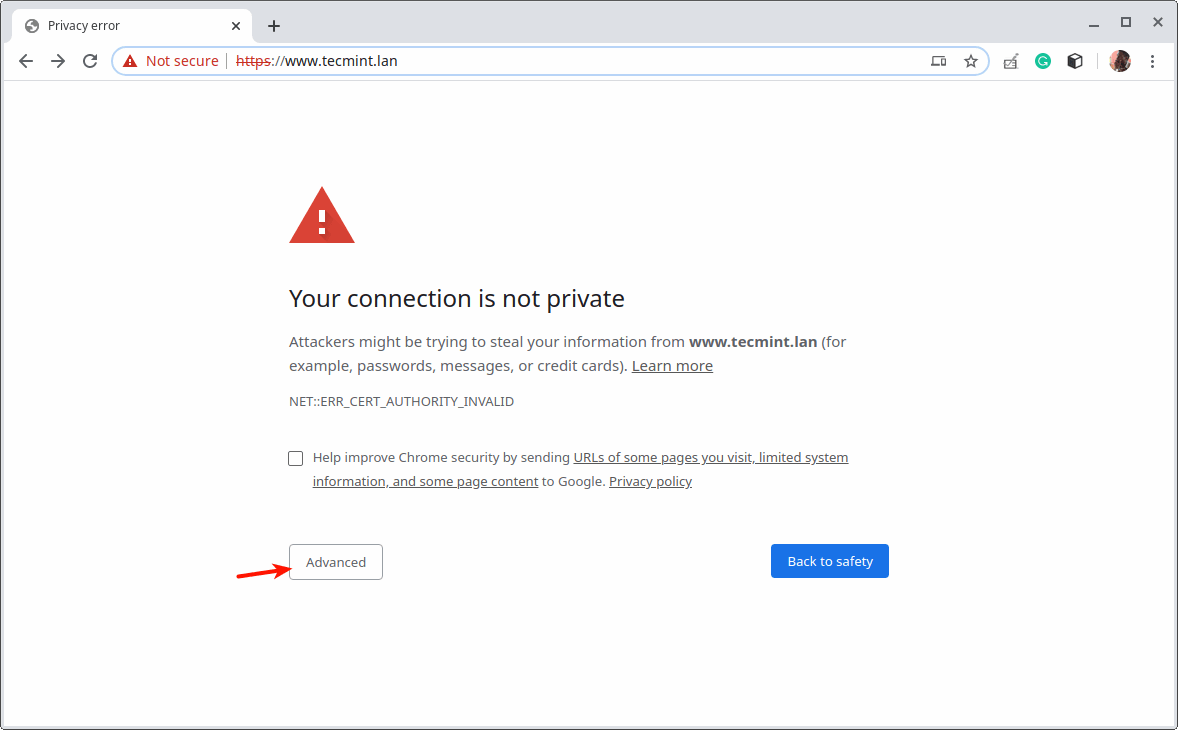
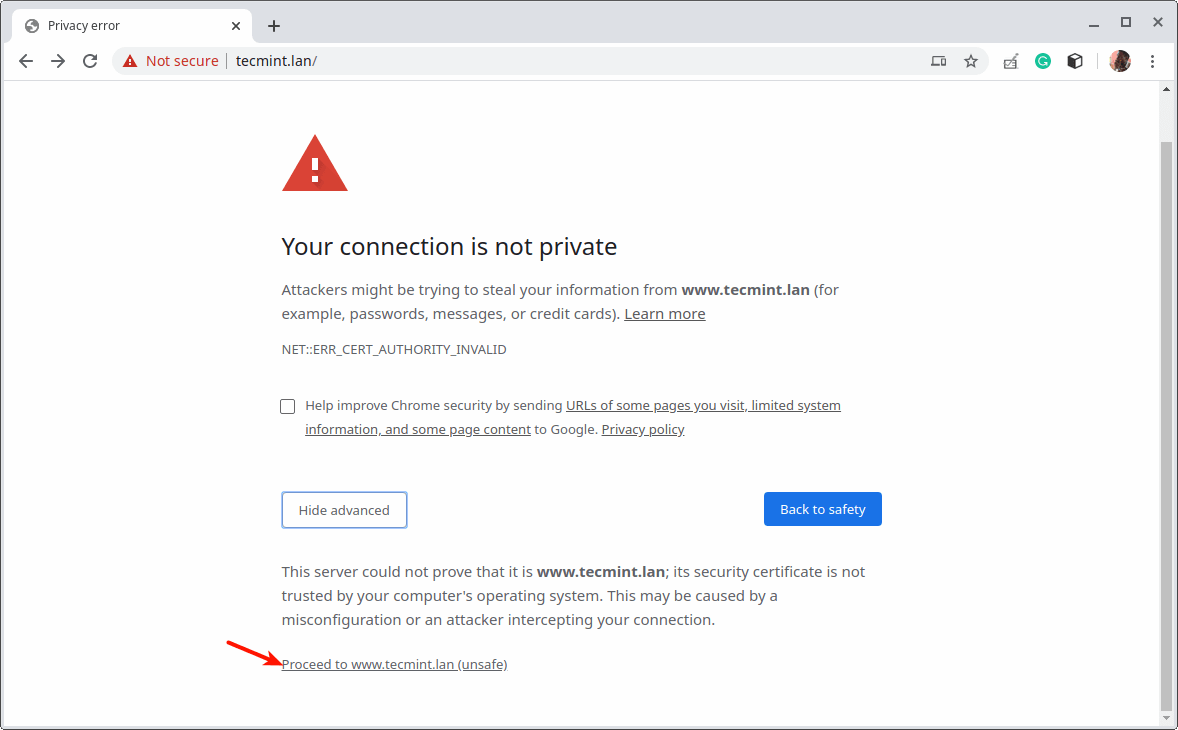
23. Next, open a web browser and try accessing the site once more. The browser will show an error because of the self-signed certificate, click Advanced to proceed.
That’s all for now! Every web application has its own set of requirements, you need to design and configure load balancing to suit your IT infrastructure and application’s requirements.
To get more insights on some of the configuration options used in this guide, and generally how to use HAProxy, see the official HAProxy community edition documentation or HAProxy enterprise version documentation. You can post any questions or thoughts via the feedback form below.


Could you please make an article on L3 Load Balance as keepalived and L7 Layer as Nginx working as reverse proxy?
Why not use Nginx as a load balancer? Why introduce additional technology in your stack when Nginx functions as a fantastic load balancer.
@Somthingnotused
We already have a guide about using Nginx as a load balancer:https://www.tecmint.com/use-nginx-as-http-load-balancer-in-linux/ We create guides for popularly used options so that readers can choose what to use or what meets their needs. Thanks.
Isn’t it easier to set up TLS/SSL termination in HAProxy and plain traffic between HAProxy and the NGINX instances rather than configuring TLS/SSL in multiple instances of NGINX? Just asking…
@Fred
Yes, it is better. And that is what we have exactly done in this article. Thanks.