Brief: In this guide, we demonstrate how to use SSH ProxyJump and SSH ProxyCommand commands when connecting to a jump server.
In our previous guide on how to set up an SSH Jump Server, we covered the concept of a Bastion Host. A Bastion host or a Jump Server is an intermediary device that an SSH client connects to first before accessing the target remote Linux system. An SSH Jump server acts as a gateway to your IT resources, thus reducing the attack surface.
The SSH ProxyJump and ProxyCommand commands determine how a client connects to the remote server via the jump server, jump host, or bastion server.
This guide shines the spotlight on the SSH ProxyJump and SSH Proxy Command in Linux.
[ez-toc]
Connect Remote Linux Using SSH ProxyJump Command
The ProxyJump command is denoted with the -J flag. It was introduced in OpenSSH server version 7.3 and helps you make a connection to a remote target by skipping through a bastion or a jump server.
The syntax below shows how this option is used:
$ ssh -J <jump-server> <remote-target>
In the case of multiple bastion or jump servers, the syntax takes the following format.
$ ssh -J <jump-server-1> <jump-server-2> <remote-target>
In both cases, you will be logged in as the root user every step of the way. This is not ideal due to security reasons, so you might want to create different users in every instance.
You can explicitly specify different users and SSH ports as shown.
$ ssh -J <user@jump-host:port> <user@remote-target:port>
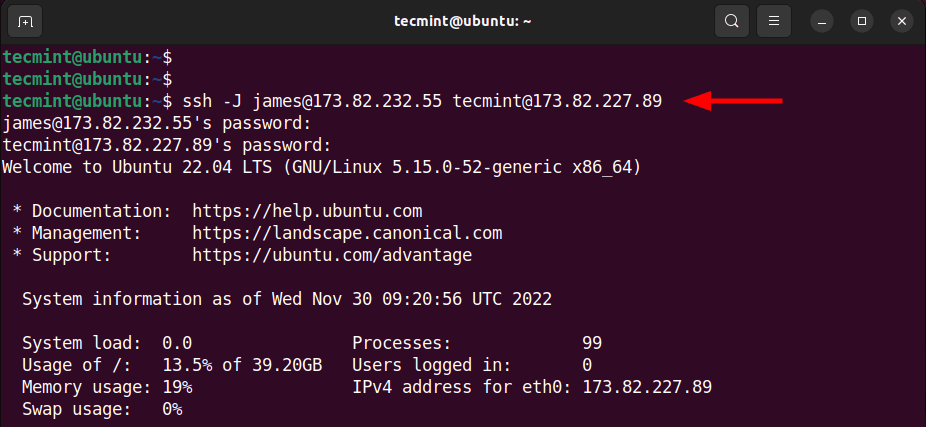
To demonstrate the ProxyJump flag in action, we have a simple setup as shown.
Jump Server IP:		173.82.232.55		User: james
Remote Target IP:	173.82.227.89		User: tecmint
To connect to the remote target using the Jump server, the command will look as follows.
$ ssh -J [email protected] [email protected]
The command will prompt you for the jump server’s user password, then followed thereafter by the target system’s password upon which you will be granted access to the target system.
Configuring Proxy Hosts in the ~/.ssh/config File
If you regularly use a specific bastion to connect to a specific remote target, you can append the following ProxyJump configuration in the ~/.ssh/config file to make the connection seamless. When this happens, you will only be authenticated once and this happens only on the remote target.
Host host-jump
User james
Hostname 173.82.232.55

Host host_destination
User tecmint
Hostname 173.82.227.89
Port 22
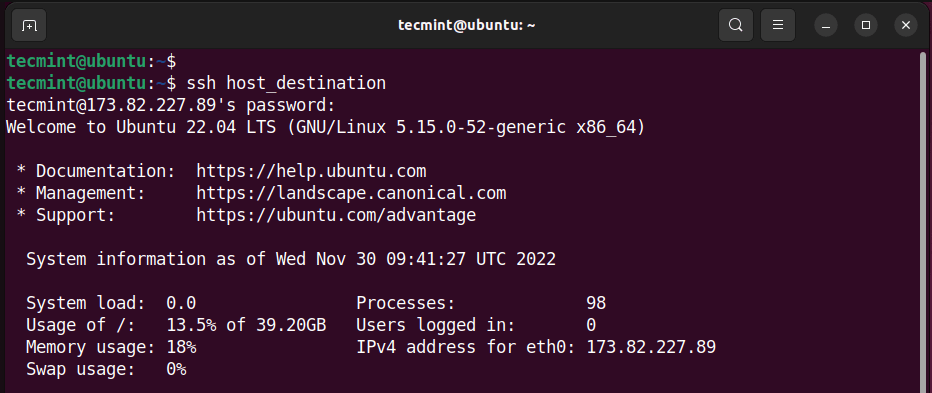
Using the above configuration, you can make the connection to the target as shown.
$ ssh -J host_destination
Connect Remote Linux Using SSH ProxyCommand Command
Before SSH Proxy Jump, ProxyCommand was the only way of jumping hosts to reach the remote target. It works by forwarding the stdin (standard in) and stdout (standard out) from the remote target through the jump server or bastion.
The ProxyCommand takes the following syntax.
$ ssh -o ProxyCommand="ssh -W %h:%p <jump server>" <remote target>
Here, the -W to the %h:%p arguments forward the stdin and out to the remote host (%h) and the remote host’s port (%p).
To put the command into action, this is how our command would look like
$ ssh -o ProxyCommand="ssh -W %h:%p 173.82.232.55" 173.82.227.89

Configuring ProxyCommand in the ~/.ssh/config File
Of course, typing the whole command is tedious and time-consuming. To avoid typing such a lengthy command, add the following lines of code to your ~/.ssh/config file.
Host host-destination
Hostname 173.82.227.89
ProxyCommand ssh -q -W %h:%p host-jump
Save and exit.
Now all you have to do is run the following command to connect to the remote server.
$ ssh host-destination
Conclusion
In this guide, we demonstrated how ProxyJump and ProxyCommand commands work. Generally, ProxyJump comes off as a better alternative to ProxyCommand and provides an easier and seamless way to connect to a remote target through a jump host.


The .ssh/config example for proxy hosts doesn’t look complete. How do they tie together? don’t you need a ProxyJump statement in the file?
@Mike,
You’re right, the example provided in the .ssh/config file for proxy hosts might not be complete for all scenarios. To tie everything together and set up the proxy correctly, you can indeed use the ProxyJump statement.
Here’s how you can modify the example for better clarity:
In this modified example, we’ve created two separate host configurations: one for the proxy host (proxy-host) and one for the target host (target-host). The ProxyJump statement in the target-host configuration specifies that you should use the proxy-host as a jump host to reach the target-host.
This configuration ensures that your SSH connection first goes through the proxy host to reach the target host. Make sure to replace proxy.example.com, target.example.com, your-username, and your-identity-file with the actual values you need for your setup.
Thank you for pointing out the need for clarification, and I hope this helps you set up your SSH connections effectively.