A jump host (also known as a jump server) is an intermediary host or an SSH gateway to a remote network, through which a connection can be made to another host in a different security zone, for example, a demilitarized zone (DMZ). It bridges two dissimilar security zones and offers controlled access between them.
A jump host should be highly secured and monitored especially when it spans a private network and a DMZ with servers providing services to users on the internet.
A classic scenario is connecting from your desktop or laptop from inside your company’s internal network, which is highly secured with firewalls to a DMZ. In order to easily manage a server in a DMZ, you may access it via a jump host.
In a nutshell, an SSH Jump server is a Linux server that is used as a gateway to other Linux servers on a private network over the SSH Protocol.
In this article, we will demonstrate how to access a remote Linux server via a jump host, and also we will configure the necessary settings in your per-user SSH client configurations.
[ez-toc]
SSH Jump Server Setup
Consider the following scenario.

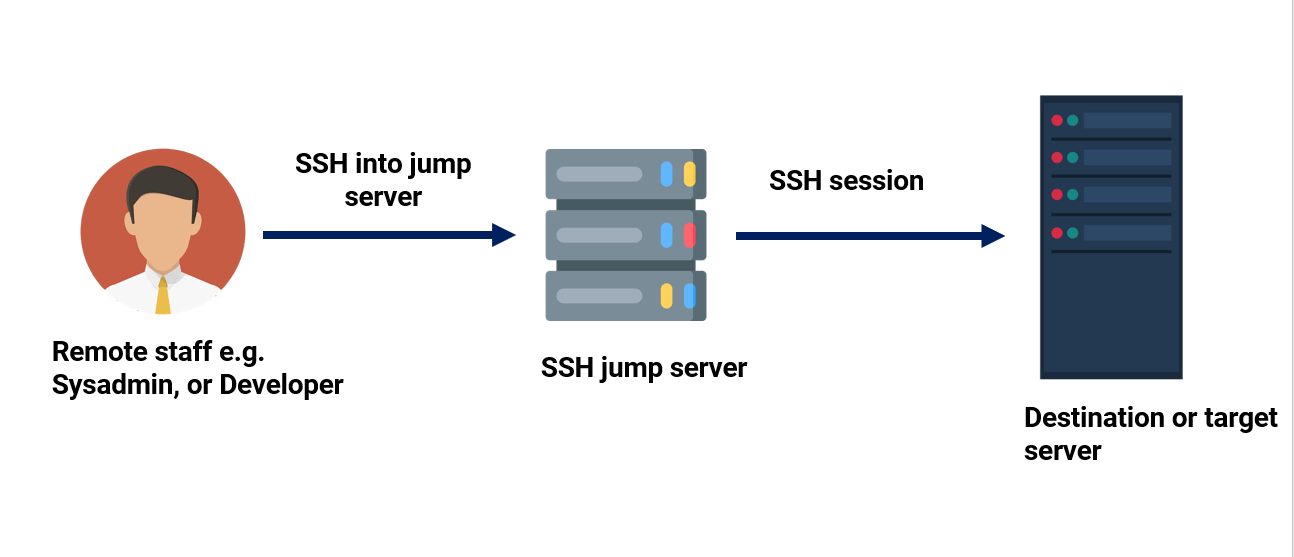
For more clarity, below is a simple setup demonstrating the role of an SSH Jump server.
Reasons for Configuring an SSH Jump Server
A Jump server provides a gateway to your infrastructure and reduces the potential attack surface to your resources. It also provides transparent management of devices as well as a single point of entry to your resources.
Keep in mind that as you incorporate a jump server into your infrastructure, ensure that the server is hardened, otherwise it would be as good as not using one. We will come back to this later in this tutorial.
How To Create a Simple SSH Jump Server
Let us now focus on how you can create a simple SSH Jump server. Here is our simple setup.
- Originating IP: 105.68.76.85.
- Jump Server IP (we’ll call this host-jump): 173.82.232.55.
- Destination IP (we’ll call this host_destination): 173.82.227.89.
In the above scenario, you want to connect to HOST 2 (173.82.227.89), but you have to go through HOST 1 (173.82.232.55), because of firewalling, routing, and access privileges. There is a number of valid reasons why jump hosts are needed.
Dynamic Jumphost List
The simplest way to connect to a target server via a jump host is using the -A and -J flags from the command line. This tells ssh to make a connection to the jump host and then establish a TCP forwarding to the target server, from there (make sure you’ve Passwordless SSH Login between machines).
$ ssh -A -J user@jump-server user@destination server
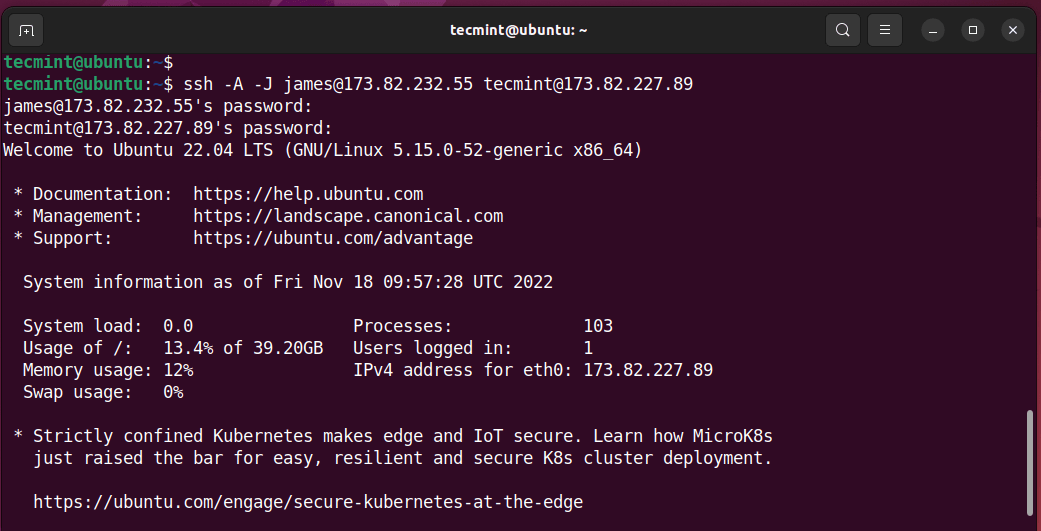
For example, in our setup, we have the user called james configured on the Jump Server and tecmint configured on the destination or target system.
The command will look as follows from the originating IP.
$ ssh -A -J [email protected] [email protected]
The command will prompt you for the jump server’s user password, followed by the target system’s password upon which you will be granted access to the target system.
If usernames or ports on machines differ, specify them on the terminal as shown.
$ ssh -J username@host1:port username@host2:port
Multiple Jumphosts List
The same syntax can be used to make jumps over multiple servers.
$ ssh -J username@host1:port,username@host2:port username@host3:port
Static Jumphost List
Static jumphost list means, that you know the jumphost or jumphosts that you need to connect a machine. Therefore you need to add the following static jumphost ‘routing’ in ~/.ssh/config file and specify the host aliases as shown.
### First jumphost. Directly reachable
Host vps1
  HostName vps1.example.org

### Host to jump to via jumphost1.example.org
Host contabo
  HostName contabo.example.org
  ProxyJump vps1
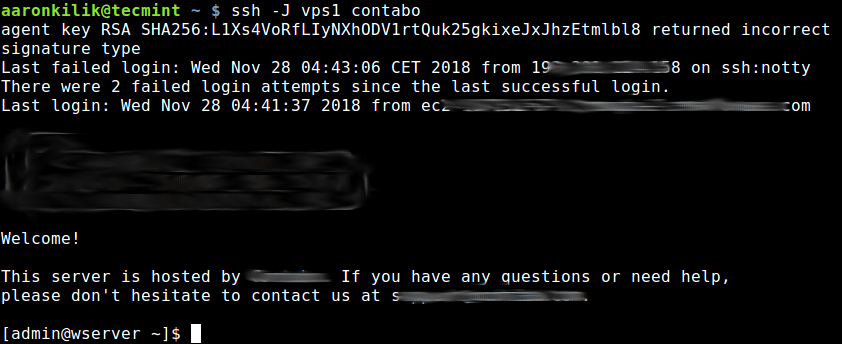
Now try to connect to a target server via a jump host as shown.
$ ssh -J vps1 contabo
The second method is to use the ProxyCommand option to add the jumphost configuration in your ~.ssh/config or $HOME/.ssh/config file as shown.
In this example, the target host is contabo, and the jumphost is vps1.
Host vps1
	HostName vps1.example.org
	IdentityFile ~/.ssh/vps1.pem
	User ec2-user

Host contabo
	HostName contabo.example.org
	IdentityFile ~/.ssh/contabovps
	Port 22
	User admin
	Proxy Command ssh -q -W %h:%p vps1
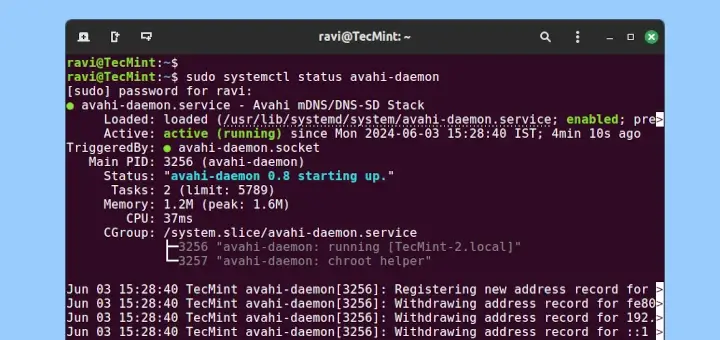
Save the changes and exit the file. To apply the changes, restart the SSH daemon.
$ sudo systemctl restart ssh
Let’s explore the options used in the configuration file:
-q– This stands for quiet mode. It suppresses warnings and diagnostic messages.-W– Requests that standard input and output on the client be forwarded to HOST on PORT over the secure channel.%h– Specifies the host to connect to.%p– Specified the port to connect to on the remote host.
To ‘jump‘ to the destination system from your Originating IP through the Jump Server, just run the following command:
$ ssh contabo
The above command will first open an ssh connection to vps1 in the background affected by the ProxyCommand, and thereafter, start the ssh session to the target server contabo.
Making SSH Jump Server More Secure
One of the ways of making this setup more secure is by copying the Public SSH key from the Originating system to the Jump Server, and then finally to the target system, and then disabling password authentication. Check out our guide on how to enable SSH passwordless authentication.
In addition, check out SSH server hardening tips.
Also, ensure that no sensitive data is housed within the Jump server as this could lead to leakage of access credentials such as usernames and passwords leading to a system-wide breach.
For more information, see the ssh man page or refer to: OpenSSH/Cookbxook/Proxies and Jump Hosts.
That’s all for now! In this article, we have demonstrated how to access a remote server via a jump host. Use the feedback form below to ask any questions or share your thoughts with us.


Why would you be restarting the sshd daemon when all the changes you made are CLIENT side configuration changes which have nothing to do with sshd on the other end?
But you have them restart sshd on the client side, which makes no sense. You clearly don’t understand how ssh CLIENT works. ssh client configs do NOT require a sshd daemon restart!
Also, you have ~.ssh/config in your document. I seriously doubt you have a user on your host named “.ssh”. I know you meant ~/.ssh/config, but it’s funny to see such a huge mistake in a document so riddled with other mistakes.
You had a mistake:
The below three seem to be referring to the same host.
And the below three seem to be referring to the same host.
This article is all over the place – perhaps you should decide on a naming convention a stick with that…
Could you please clarify, that the pem file of the target server (contabo) should be stored in the middle server (vps1)? or should both the pem files be in my local server itself, (through with I am trying to access the target)?
Your configuration is not correct.
“ProxyJump contabo” would be “ProxyJump vps1”
@akm,
Thanks, corrected the command in the article…
4 machines, A(local), B, C, D remote servers
A .ssh/config,only B,not C,D
“`
.ss/config
Host B
HostName B_IP
“`
B .ssh/config, have C and D
“`
.ss/config
Host C
HostName C_IP
Host D
HostName D_IP
“`
???
how to jump C or D from B, notice, A .ssh/config does not have C and D
“`
ssh -J B C
ssh -J B D
“`
I set up a simple version of this using bash scripts and ssh keys. I setup a hostA that can connect to hosts b – z using the ssh key (password less connection).
The script must be run by root or sudo. you ssh to hostA then run the script. “sudo myman Hostname” this allows you to access the servers in the secure zone.
@Patrick
Thanks for sharing your ideas with us. We are grateful!
“ProxyJump contabo” doesn’t make sense, I think there a couple of errors on first static config file.
Here are the changes I would make:
Source: https://unix.stackexchange.com/a/437909/209677
On the second replacement I meant
"s/ProxyJump contabo/ProxyJump jumphost1/".In the above example lets say Host B has a webserver and we need to connect to it via browser from the localhost via the HostB, How to connect to a webserver via local port forwarding?
@viru
Check out this guide about port forwarding: https://www.tecmint.com/create-ssh-tunneling-port-forwarding-in-linux/
Hello,
What is Identifyfile? It should be identityfile
NO one even noticed?
@Ravi,
You are correct, it is
IdentityFile, corrected in the article..There is a typo error “Proxy Command ssh -q -W %h:%p vps1” => “ProxyCommand ssh -q -W %h:%p vps1”
@Atheror,
Thanks for pointing, corrected the command in the article.
You also need to apply the correction to the code snippets.
martin@martin:~$ ssh -V
OpenSSH_7.2p2 Ubuntu-4ubuntu2.5, OpenSSL 1.0.2g 1 Mar 2016
martin@martin:~$
martin@martin:~$ ssh -J
unknown option -- J:-(
@tuxmartin
The
-Joption is available in OpenSSH 7.3p1 or later.I still get prompted for password on the destination machine – even though I’ve got my key stored on the jumphost.
This doesn’t work for me:
This does work :
@Daniel
Okay, thanks for sharing.
Why not use a hardened Windows Server in the DMZ? Then, after you RDP to it (using a PAM account), you’ll have access to a Windows GUI, a web browser, puTTy for CLI, etc. Security is essential in a DMZ, but having access to a good tool set can help application admins with the services they need.
@Jeff
Thanks a ton for sharing this useful information, we are grateful.
Great article.
But you have used host1 and host2 along the whole article while the image that explain this show Host A and Host B.
@Rorigo,
The image is provide here, just to understand the how SSH Jump host works..
I prefer ProxyJump vps1 => Simpler Syntax
@Mirzet
Thanks for the useful feedback.