Recently, I updated my VirtualBox installation to version 7.0.0, I noticed some nice updates on the graphical user interface (GUI). The first was the improved theme support, then the new notification center unifying most of the running processes and error reporting around the GUI. Additionally, in VirtualBox 7 you can navigate and search through the user manual easily via a new help viewer widget.
But importantly, the new VM wizard has been reworked to integrate the unattended guest OS installation and to have a more streamlined workflow. This was the most intriguing feature for me, I had never used it before, so I decided to give it a try.
Below, I have described the necessary steps to install Ubuntu 22.04 desktop as a guest OS in Virtual Box. This guide can work for any other guest OS and it assumes that you already obtained the ISO of the OS you would like to install.
Let’s get started.
Create a New VM in VirtualBox
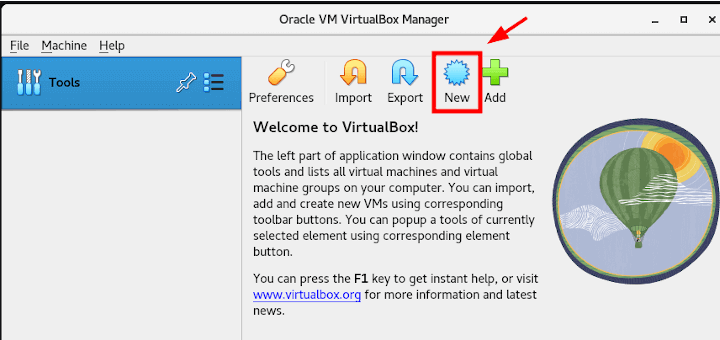
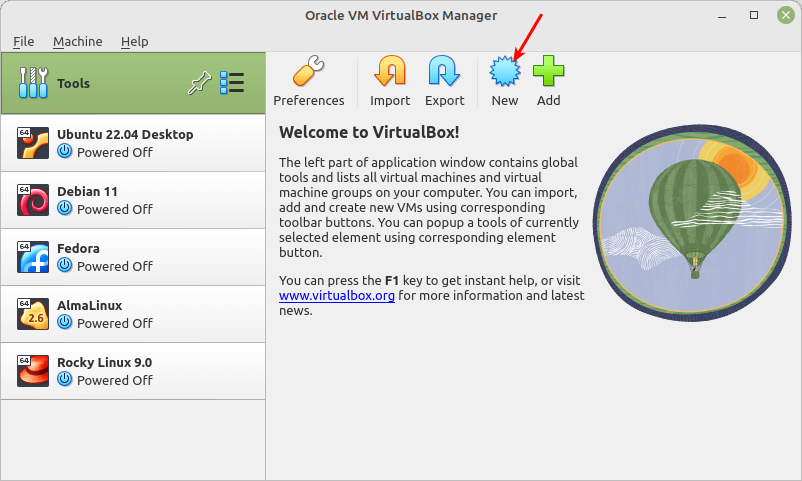
First, open the VirtualBox application from the system menu, then click on New to create a new VM.
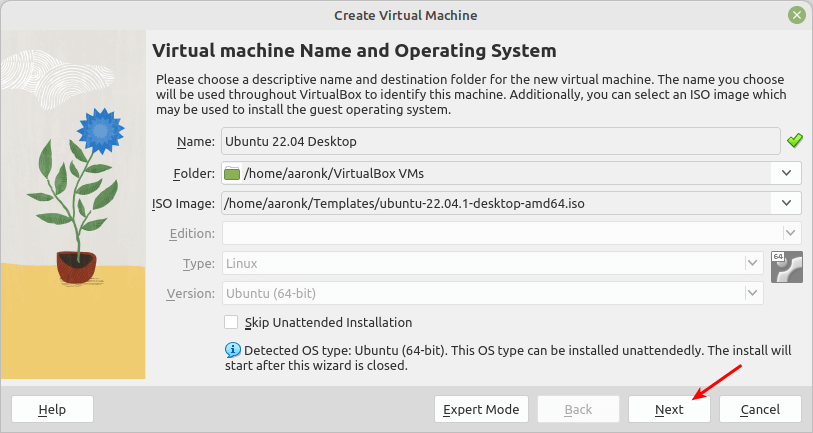
In the next window, enter the following configuration parameters:
- Name – the name of your new VM, for example, Ubuntu 22.04 Desktop.
- ISO Image – path to the guest OS ISO.
The other parameters will automatically be detected/picked by VirtualBox, which can be changed later when required. Then leave the Skip Unattended Installation unchecked and click Next as highlighted in the following screenshot.
Note: VirtualBox will first detect if your OS type can be installed unattended, as shown in the following screenshot before you can proceed with the process.
Next, configure the unattended guest OS installation parameters such as the Username to be created in the guest OS, the user’s password, the hostname of the guest OS, and the local domain name.
Also, check the option to install Guest Additions (device drivers and system applications) which are installed in the guest OS that optimize the guest operating system for better performance and usability.
By default, the installation happens in the foreground, you can set it to a background installation by checking the option Install in Background. Under Additional Options, enter a valid product key if it is required by the guest OS, for example, Windows. Click Next to continue.

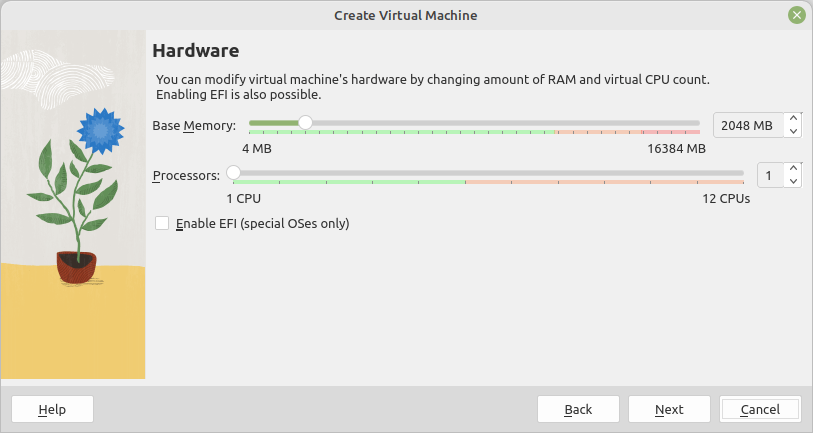
Next, configure the new VM’s hardware by setting the amount of RAM and virtual CPU count. You can also configure the EFI setting for special OSes. Then click Next to proceed.
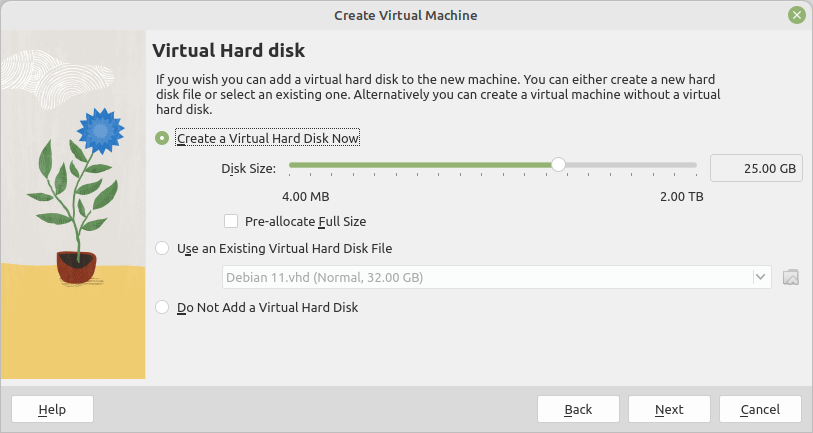
In the next window, create a virtual hard drive for the new machine by leaving the default option Create a Virtual Hard Disk Now and setting the disk size. Then click Next.
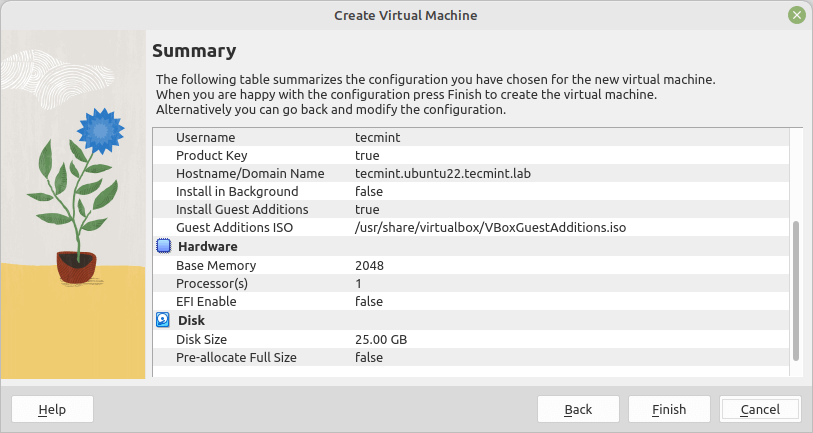
Now you should see a summary of the configuration you have defined for the unattended guest OS installation. If all is ok, click Finish, otherwise, click Back and make the necessary configuration changes.
Perform Unattended Guest VM Installation in VirtualBox
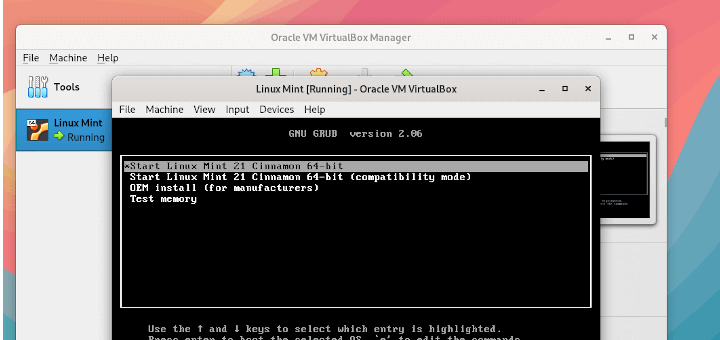
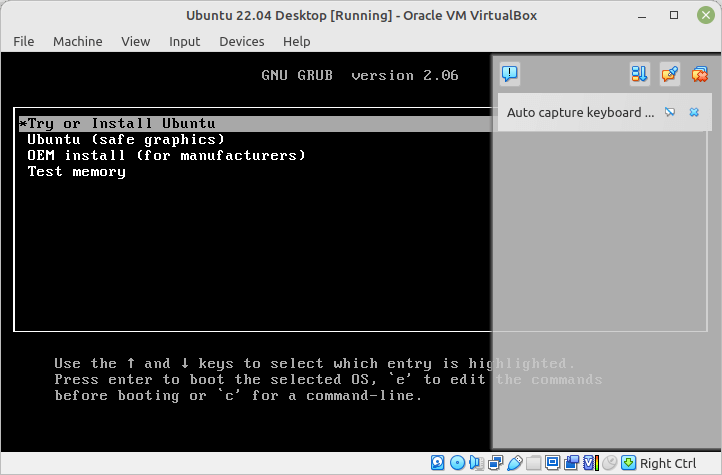
Wait for the guest OS to boot, from the grub screen, select the option “Try or Install Ubuntu” and click enter. You can close the side notification messages to have a clear view during the installation process.
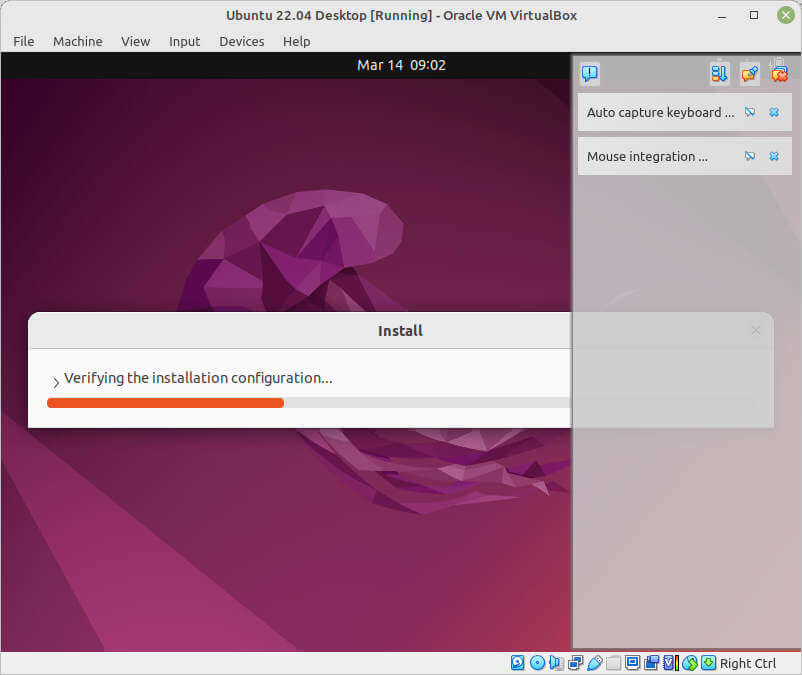
Next, the unattended installation should start as seen in the following screenshot. Sit back, relax, and wait for it to get done.
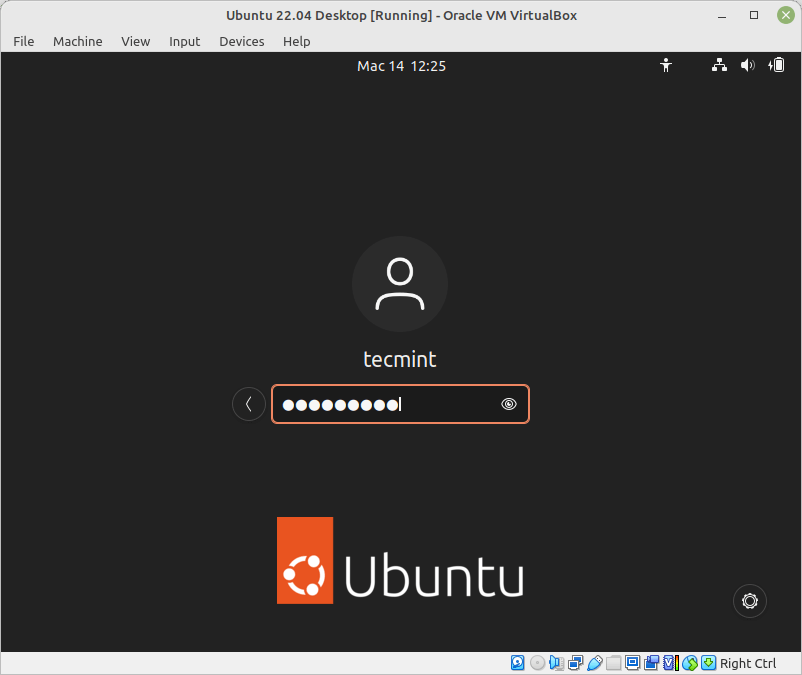
Once the installation is done, the VM will reboot automatically and load the login screen. Select/click the user account (the same as defined in the configuration above, and enter your password to log in.
That’s it! Do not forget to share your experience or any comments about this topic with us via the feedback section.