GoTTY is a simple GoLang based command line tool that enables you to share your terminal(TTY) as a web application. It turns command line tools into web applications.
It employs Chrome OS’ terminal emulator (hterm) to execute a JavaScript based terminal on a web browsers. And importantly, GoTTY runs a web socket server that basically transfers output from the TTY to clients and receives input from clients (that is if input from clients is permitted) and forwards it to the TTY.
Read Also: Teleconsole – Share Your Linux Terminal with Your Friends
Its architecture (hterm + web socket idea) was inspired by Wetty program which enables terminal over HTTP and HTTPS.
Prerequisites:
You should have GoLang (Go Programming Language) environment installed in Linux to run GoTTY.
How To Install GoTTY in Linux Systems
If you already have a working GoLang environment, run the go get command below to install it:
# go get github.com/yudai/gotty
The command above will install the GoTTY binary in your GOBIN environment variable, try to check if that is the case:
# ls $GOPATH/bin/

How To Use GoTTY in Linux
To run it, you can use the GOBIN env variable and command auto-completion feature as follows:
# $GOBIN/gotty
Else, run GoTTY or any other Go program without typing the full path to the binary, add your GOBIN variable to PATH in the ~/.profile file using the export command below:
export PATH="$PATH:$GOBIN"
Save the file and close it. Then source the file to effect the changes above:
# source ~/.profile
The general syntax for running GoTTY commands is:
Usage: gotty [options] <Linux command here> [<arguments...>]
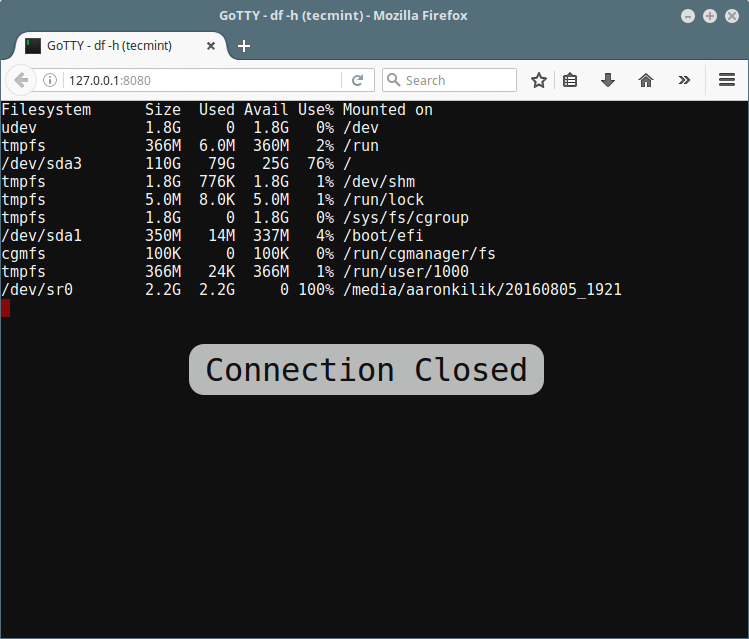
Now run GoTTY with any command such as the df command to view system disk partitions space and usage from the web browser:
# gotty df -h
GoTTY will start a web server at port 8080 by default. Then open the URL: http://127.0.0.1:8080/ on your web browser and you will see the running command as if it were running on your terminal:
How To Customize GoTTY in Linux
You can alter default options and your terminal (hterm) in the profile file ~/.gotty, it will load this file by default in case it exists.
This is the main customization file read by gotty commands, so, create it as follows:
# touch ~/.gotty
And set your own valid values for the config options (find all config options here) to customize GoTTY for example:
// Listen at port 9000 by default
port = "9000"

// Enable TSL/SSL by default
enable_tls = true

// hterm preferences
// Smaller font and a little bit bluer background color
preferences {
    font_size = 5,
    background_color = "rgb(16, 16, 32)"
}
You can set your own index.html file using the --index option from the command line:
# gotty --index /path/to/index.html uptime
How to Use Security Features in GoTTY
Because GoTTY doesn’t offer reliable security by default, you need to manually use certain security features explained below.
Permit Clients to Run Commands/Type Input in Terminal
Note that, by default, GoTTY doesn’t permit clients to type input into the TTY, it only enables window resizing.
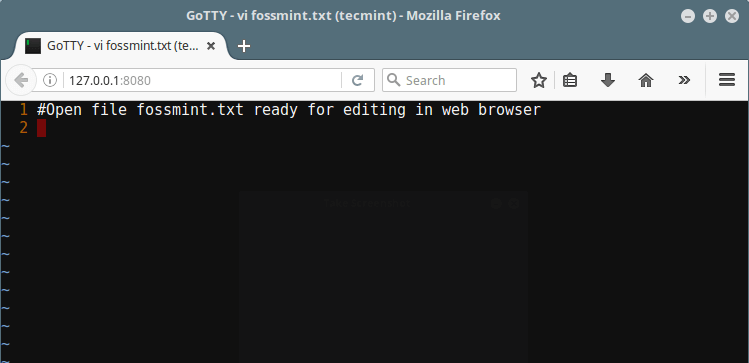
However, you can use the -w or --permit-write option to allow clients to write to the TTY, which is not recommended due to security threats to the server.
The following command will use vi command line editor to open the file fossmint.txt for editing in the web browser:
# gotty -w vi fossmint.txt
Below is the vi interface as seen from the web browser (use vi commands here as usual):
Use GoTTY with Basic (Username and Password) Authentication
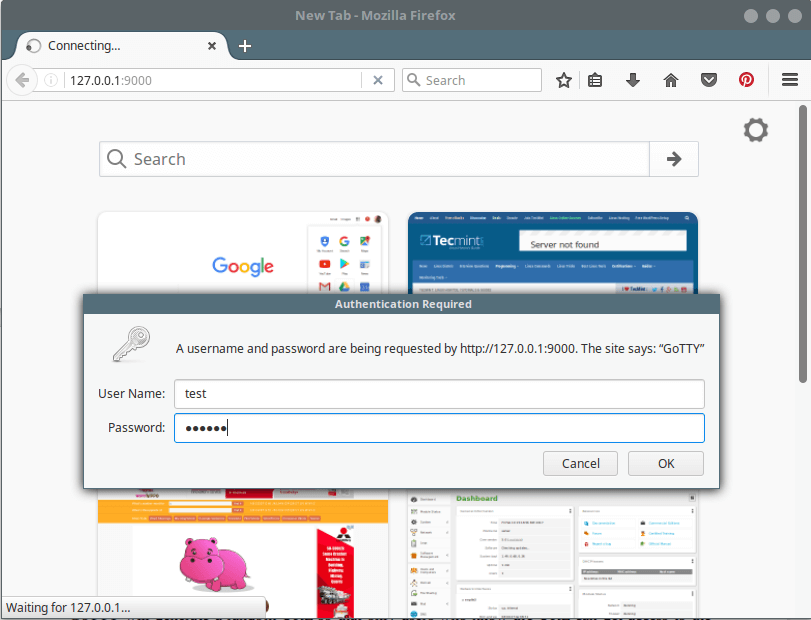
Try to activate a basic authentication mechanism, where clients will be required to input the specified username and password to connect to the GoTTY server.
The command below will restrict client access using the -c option to ask users for specified credentials (username: test and password: @67890):
# gotty -w -p "9000" -c "test:@67890" glances
Gotty Generate Random URL
Another way of restricting access to the server is by using the -r option. Here, GoTTY will generate a random URL so that only users who know the URL can get access to the server.
Also use the –title-format “GoTTY – {{ .Command }} ({{ .Hostname }})” option to define the web browsers interface title and glances command is used to show system monitoring stats:
# gotty -r --title-format "GoTTY - {{ .Command }} ({{ .Hostname }})" glances
The following is result of the command above as seen from the web browser interface:

Use GoTTY with SSL/TLS
Because by default, all connections between the server and clients are not encrypted, when you send secret information through GoTTY such as user credentials or any other info, you have to use the -t or --tls option which enables TLS/SSL on the session:
GoTTY will by default read the certificate file ~/.gotty.crt and key file ~/.gotty.key, therefore, start by creating a self-signed certification as well as the key file using the openssl command below (answer the question asked in order to generate the cert and key files):
# openssl req -x509 -nodes -days 365 -newkey rsa:2048 -keyout ~/.gotty.key -out ~/.gotty.crt
Then use GoTTY in a secure way with SSL/TLS enabled as follows:
# gotty -tr --title-format "GoTTY - {{ .Command }} ({{ .Hostname }})" glances
Share Your Terminal With Multiple Clients
You can make use of terminal multiplexers for sharing a single process with multiple clients, the following command will start a new tmux session named gotty with glances command (make sure you have tmux installed):
# gotty tmux new -A -s gotty glances
To read a different config file, use the –config “/path/to/file” option like so:
# gotty -tr --config "~/gotty_new_config" --title-format "GoTTY - {{ .Command }} ({{ .Hostname }})" glances
To display the GoTTY version, run the command:
# gotty -v
Visit the GoTTY GitHub repository to find more usage examples: https://github.com/yudai/gotty
That’s all! Have you tried it out? How do you find GoTTY? Share your thoughts with us via the feedback form below.


Getting error in ubunut 16.04.
./gotty top
./gotty: line 7: syntax error near unexpected token `newline’
./gotty: line 7: `’
Hello,
Thanks for this article !
In the “.gotty” configuration file, you must not put a comma between the different options (the one after “font_size = 5” causes an error.
Regards
@yogi
Thanks for the tip, we hope this will be helpful to new GoTTY users out there.
This article has 3 problems :
1 : In below section :
How To Install GoTTY in Linux Systems
you must write : ls $GOPATH/bin/ instead of “$GOPATH/bin/”
2 : In below section :
Use GoTTY with Basic (Username and Password) Authentication
You must write this command : “# gotty -w -p “9000” -c “test:@67890” glances” instead of “# gotty -w -p “9000” -c “test@67890” glances”
you forgot to put
":"between username and password in your command.3 : In section :
How To Customize GoTTY in Linux
You mentioned that for html index we must use
"--html"option but in command you used"--index"option--indexis true.Best Regards
@Mohammad,
Thanks for pointing of all errors, corrected in the write up as suggested..