In a previous tutorial, we have showed you how to install MariaDB 10 in CentOS 7. In this guide, we will show you how to install and secure MariaDB 10.1 stable version in RHEL/CentOS 6 distributions.
Note that in this tutorial, we’ll assume your working on the server as root, otherwise, use the sudo command to run all the commands.
Step 1: Add MariaDB Yum Repository
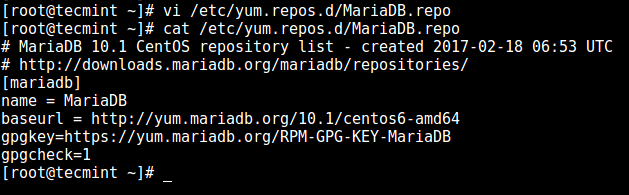
1. First, add the MariaDB YUM repository entry for RHEL/CentOS 6 systems. Create the file /etc/yum.repos.d/MariaDB.repo.
# vi /etc/yum.repos.d/MariaDB.repo
Afterwards copy and paste the lines below into the file and save it.
On CentOS 6
[mariadb]
name = MariaDB
baseurl = http://yum.mariadb.org/10.1/centos6-amd64
gpgkey=https://yum.mariadb.org/RPM-GPG-KEY-MariaDB
gpgcheck=1
On RHEL 6
[mariadb]
name = MariaDB
baseurl = http://yum.mariadb.org/10.1/rhel6-amd64
gpgkey=https://yum.mariadb.org/RPM-GPG-KEY-MariaDB
gpgcheck=1
Step 2: Install MariaDB in CentOS 6
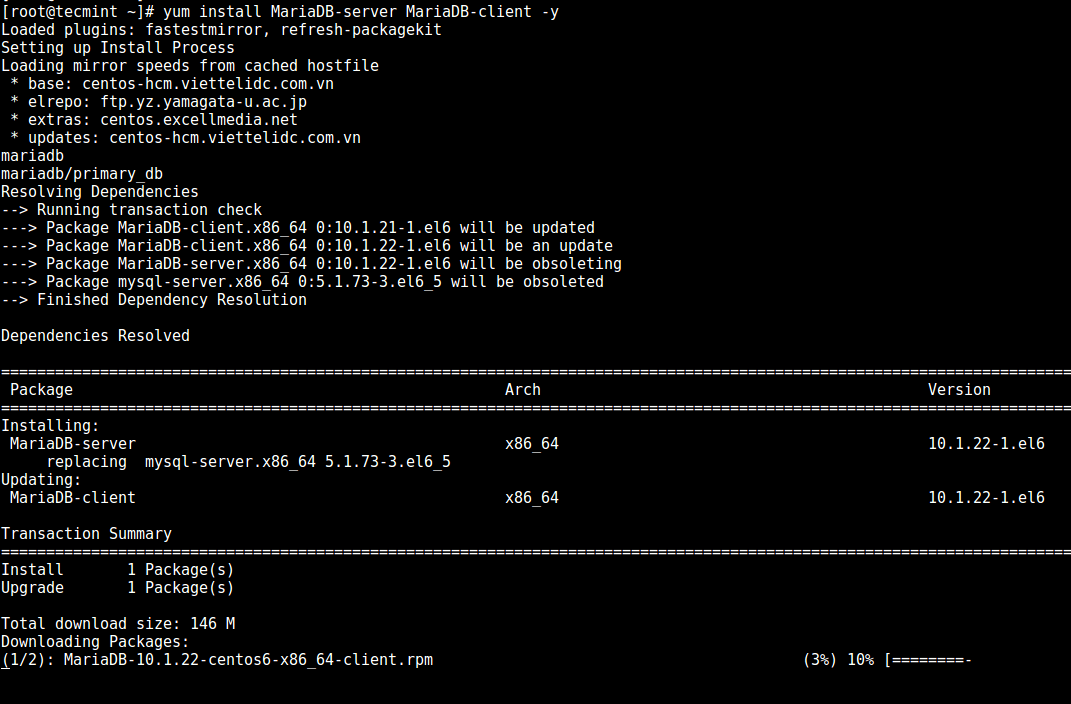
2. After adding the MariaDB repository, install MariaDB server packages as follows:
# yum install MariaDB-server MariaDB-client -y
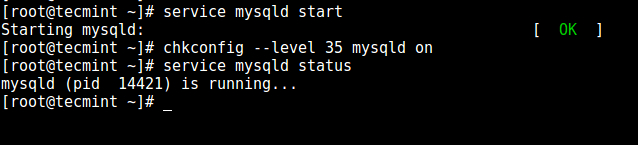
3. Once the installation of MariaDB packages completes, start the database server daemon for the mean time, and also enable it to start automatically at the next boot as below:
# service mysqld start
# chkconfig --level 35 mysqld on
# service mysqld status
Step 3: Secure MariaDB in CentOS 6
4. Now run the mysql_secure_installation script to secure the database by: setting root password (if not set in the configuration step above), disabling remote root login, removing the test database as well as anonymous users and finally reload privileges as shown in the screen shot below:
# mysql_secure_installation

5. After installing MariaDB server, you may want to check certain MariaDB features such as: installed version, default program argument list, and also login to the MariaDB command shell like so:
# mysql -V
# mysql --print-defaults
# mysql -u root -p
Step 4: Learn MariaDB Administration
For starters, you can go through:
- Learn MySQL / MariaDB for Beginners – Part 1
- Learn MySQL / MariaDB for Beginners – Part 2
- MySQL Basic Database Administration Commands – Part III
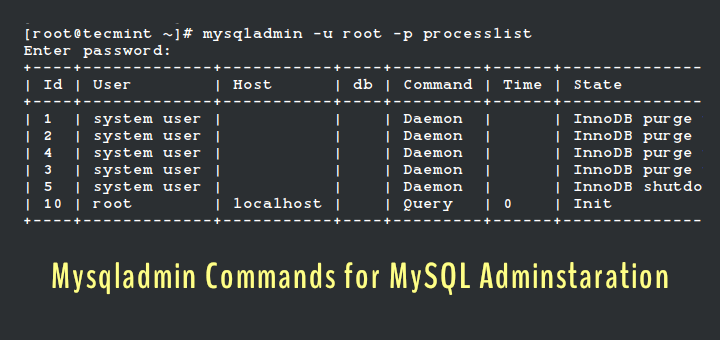
- 20 MySQL (Mysqladmin) Commands for Database Administration – Part IV
If you’re already using MySQL/MariaDB, it’s important to keep in mind a list of useful commandline tools to monitor MySQL/MariaDB performance in Linux and also learn a few MySQL/MariaDB performance tuning and optimization tips.
In this guide, we showed you how to install and secure MariaDB 10.1 stable version in RHEL/CentOS 6. Use the feedback form below to send us any questions or any thoughts concerning this guide.


replace all “mysqld” with “mysql” please ;)
@illega1
Okay, we will do that as soon as possible.
@illega1
Actually on CentOS 6, the service name is mysqld not mysql.
On my system, it was
which worked, instead of
@Juraj
Which Linux distro are you using? Could it be Debian/Ubuntu, if so, then that is the correct command. Many thanks for sharing with us.