In earlier articles, XenServer 6.5 configuration and usage was discussed. In May 2016, Citrix released the new version of the XenServer platform. Plenty has remained the same but there are also some useful new additions to this latest release.
One of the biggest changes is the upgrade to the underlying Dom0 environment. XenServer 6.5 was using CentOS 5.10 and the new release of XenServer 7 Dom0 has been updated to CentOS 7.2. This has brought about a newer Linux kernel in Dom0 as well as ease of future upgrade abilities within CentOS 7.
Another big change occurred to the partitioning done for Dom0. Older releases of XenServer relied upon MBR and a rather small root partition (4GB). Subsequently, many users likely experienced issues where logs would routinely fill up the root partition if not monitored or exported to an external log mechanism.
With the new release, the partitioning scheme has changed to GPT as well as a more logical partitioning has been performed. The chart below is fully credited to the official Citrix release information:
- 18GB XenServer host control domain (dom0) partition
- 18GB backup partition
- 4GB logs partition
- 1GB swap partition
- 5GB UEFI boot partition
These changes do require larger hard drive requirements for Dom0 compared to older versions of XenServer but the scheme does alleviate several issues experienced in older versions.
The next notable upgrade in XenServer 7 is the actual upgrade from Xen 4.4 to Xen 4.6. Xen is the actual hypervisor portion of XenServer.
The list of fixes and enhancements is quite large but some of the highly noted enhancements from Citrix include agentless anti-malware introspection for guests as well as frameworks that can allow guests to be migrated between CPU’s of different generations.
There are many other enhancements seen in this upgrade and the author strongly encourages viewing the lists and associated documents on Citrix’s website:
DISCLAIMER
The purpose of this article is to walk through a fresh install as well as assist administrators with the process of upgrading older XenServer installs to the newer XenServer 7 and applying critical patches.
- Fresh Install of XenServer 7
- Upgrading XenServer 6.5 to XenServer 7
- Applying XenServer 7 Critical Patch
There are several ways to do the upgrading process and the ‘right’ solution for any particular install will be highly dependent on the organization. Please be sure to understand the implications and processes required for a successful upgrade.
Citrix has released a very detailed document that should be reviewed before the upgrade process is started: xenserver-7-0-installation-guide.pdf
XenServer System Requirements
- XenServer 7 ISO : XenServer-7.0.0-main.iso
- Server capable of virtualization
- Hardware Compatibility List is here: http://hcl.xenserver.org/
- Many systems will work even if not listed but results may vary, use at your own risk.
- Minimum 2GB ram; 4GB or more recommended to run virtual machines
- Mimimum 1 64-bit x86 1.5GHz cpu; 2GHz or more and multiple CPUs are suggested
- Harddrive space of at least 46GB; more required if virtual machines will be saved locally
- At least a 100mbps network card; multiple gigabit suggested
Author Suggested Additions
In order to save some potential headaches for readers, the author recommends the following items before beginning this process:
- Update the firmware on the XenServer system (especially NIC firmware) – more later
- Stop all non-essential guests to prevent issues
- Read through Citrix’s documentation as well as this article before beginning
- Make sure to back up pool information in order to make a revert easier if needed
- Restart all the XenServer hosts one more time after all steps have been completed if the environment can afford the reboot time
Single Host Upgrade and Fresh Install of XenServer 7
This first process will walk through a completely new install of XenServer 7. Be sure to check the minimum hardware requirements to ensure that the machine can support XenServer 7.
1. The first step in the installation is to download the XenServer ISO file. Using the link above, the file can easily be downloaded from the Internet using the ‘wget’ command.
# wget -c http://downloadns.citrix.com.edgesuite.net/11616/XenServer-7.0.0-main.iso
Once the ISO has downloaded, copy it to a USB drive with the ‘dd’ utility. CAUTION – The following command will replace EVERYTHING on the flash drive with the contents of the XenServer ISO. This process will also create a bootable USB drive for the installation process.
# dd if=XenServer-7.0.0-main.iso of=</path/to/usb/drive>
2. Now place the bootable media into the system that XenServer should be installed. If the bootable media creation step was successful, the system should display the XenServer splash screen.
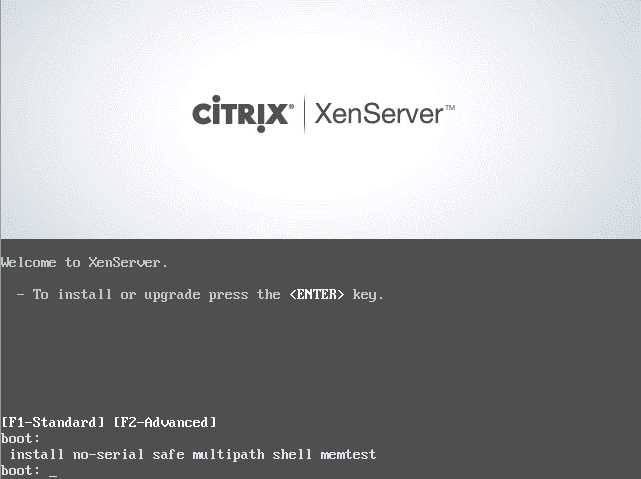
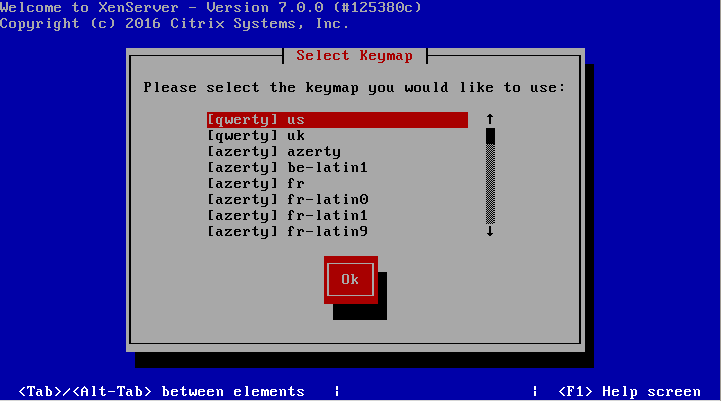
3. From this screen, simply hit enter to boot into the installer. The first screen, once the installer has started successfully, will ask the user to select their language.
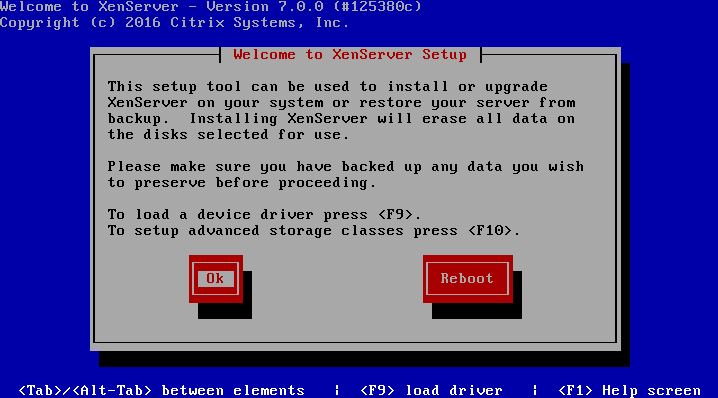
4. The next screen will ask the user to confirm that an upgrade or install should be done as well as ask for any other special drivers that may need to be loaded in order to install XenServer.
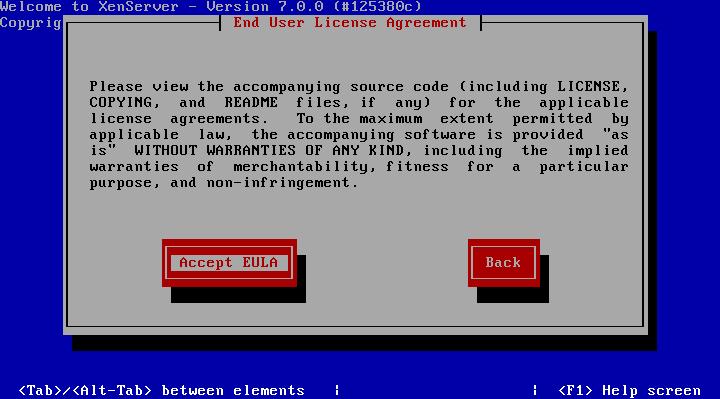
5. The next screen is the obligatory EULA (End User License Agreement). Use the keyboard arrows to move the cursor to the ‘Accept EULA‘ button.
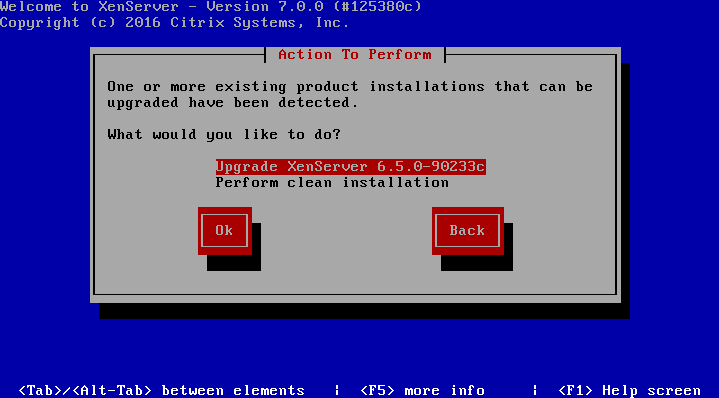
6. This is where the installation can take one of two paths if the installer detects a prior install. The next screen will prompt the user for a clean install or an upgrade to an existing XenServer install. The first set of instructions here will walk through a clean install. If an upgrade is needed skip ahead to step 15.
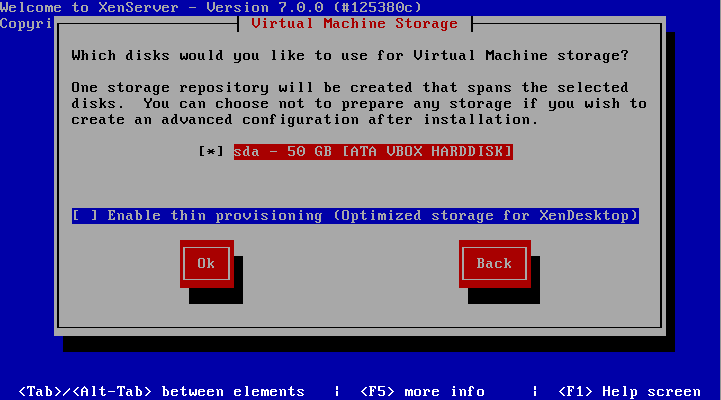
7. The next screen will prompt for the installation device. In this case it will be ‘sda’.
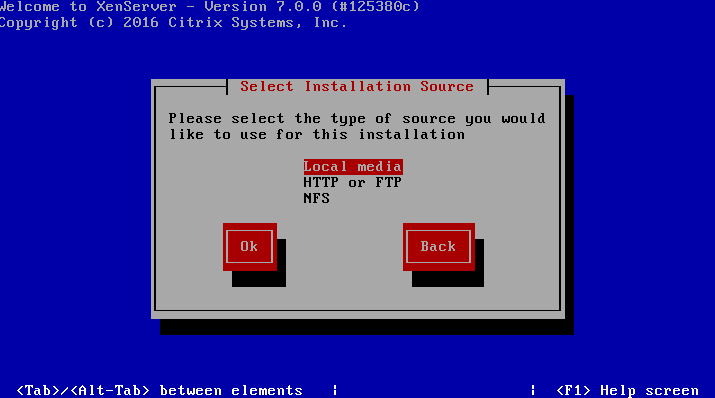
8. Once the installation path has been chosen, XenServer will need to know where the installation files reside. In this case, the installer was booted from local media and that is the option that should be chosen.
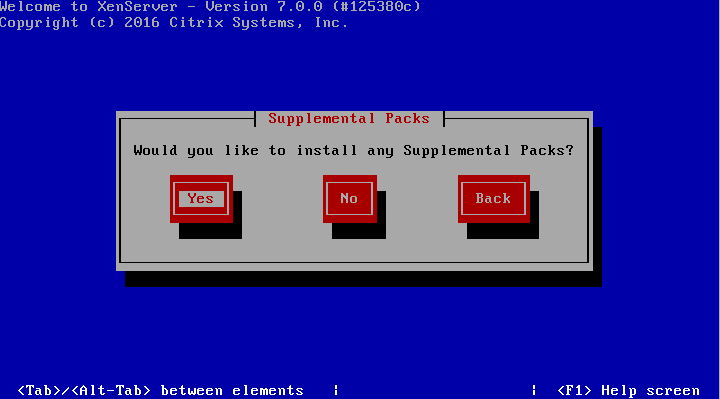
9. The next step will allow the user to install supplemental packs at the same time as this installer. At the time of this writing, there aren’t any supplemental packs for XenServer 7 so ‘no’ can be selected here.
10. The next screen will allow the user to confirm the integrity of the source files before installing. Running this test is not required but can help detect installation issues before trying to write files.
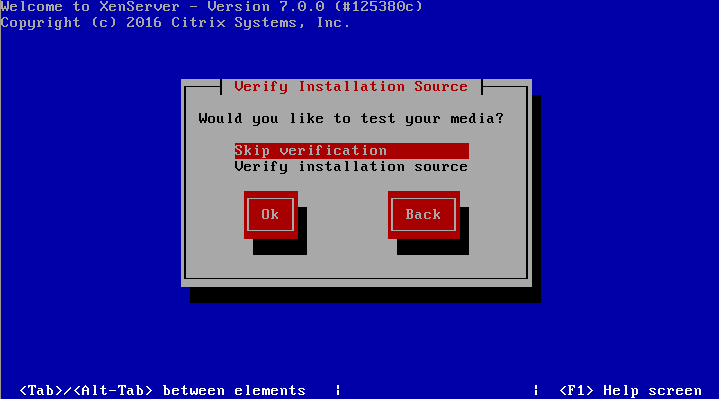
11. Once the verification is completed, if selected during install, the XenServer installer will ask the user to setup some system information.
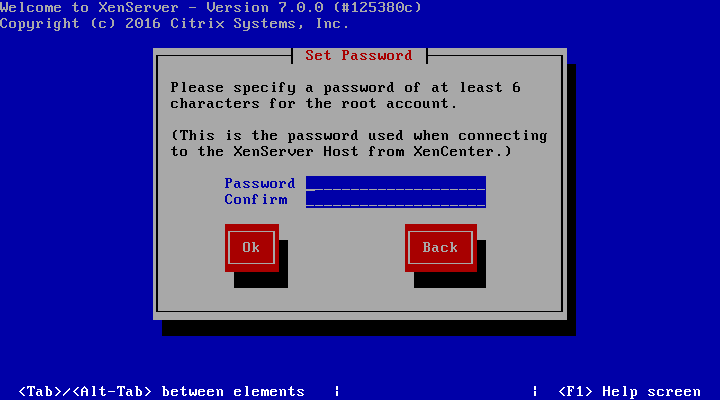
The first prompt will be to set the root user’s password. Now, since XenServer will be the underlying system to potentially several important virtualized servers, it is imperative that the password be secured as well as sufficiently complex!
Important: Do not forget this password either as there will not be any other users on the system once the installer finishes!
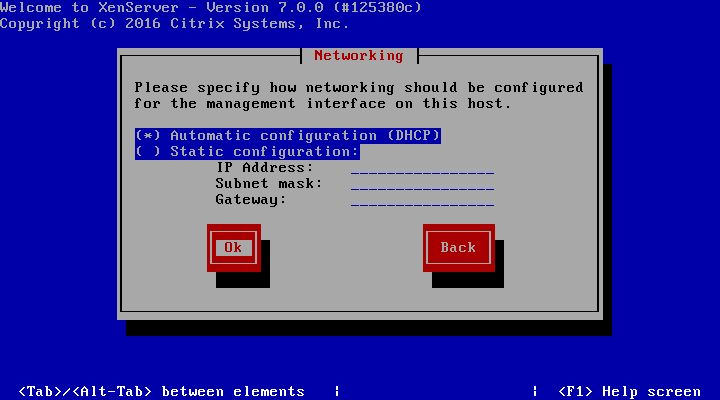
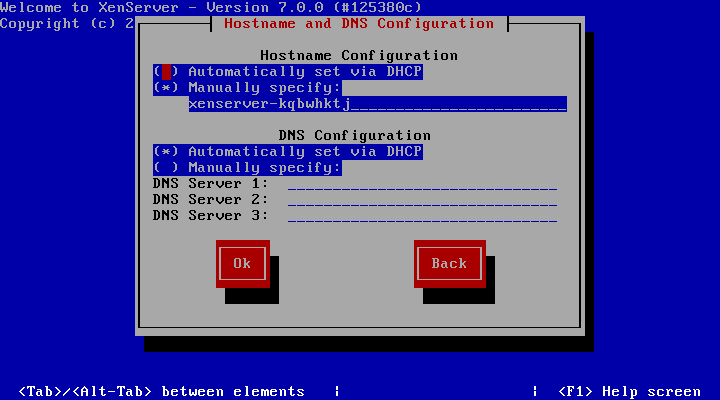
12. The next couple of steps will ask how the management network interface should be configured (Static address or DHCP) as well as hostname and DNS information. This will be dependent on the environment.
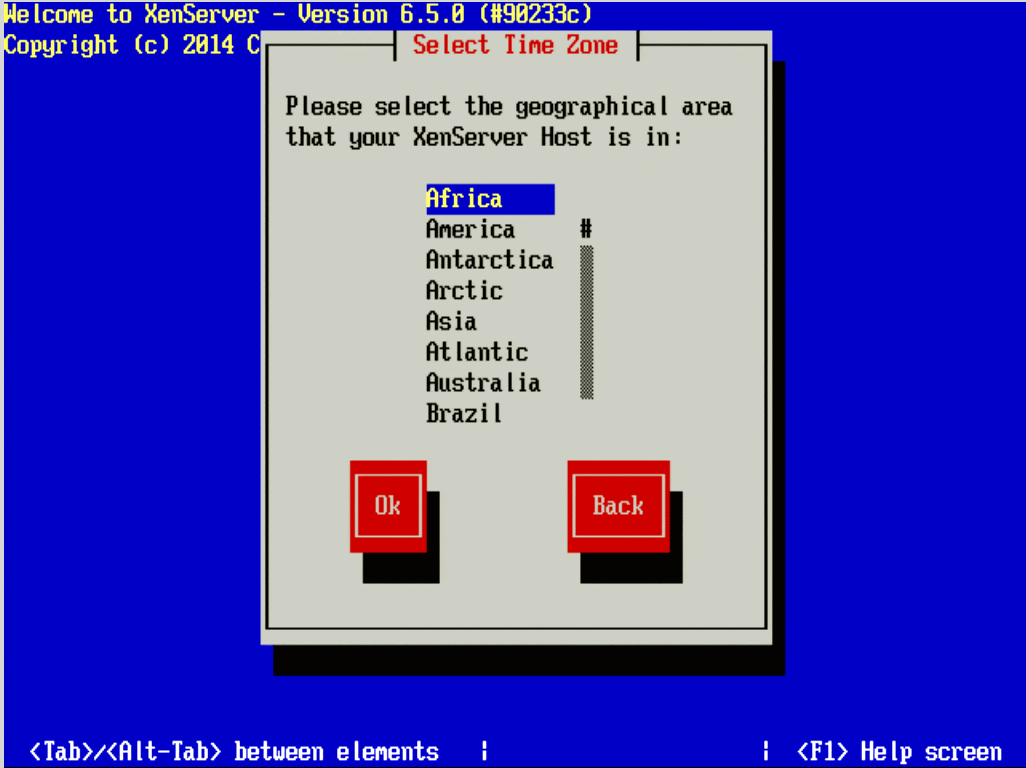
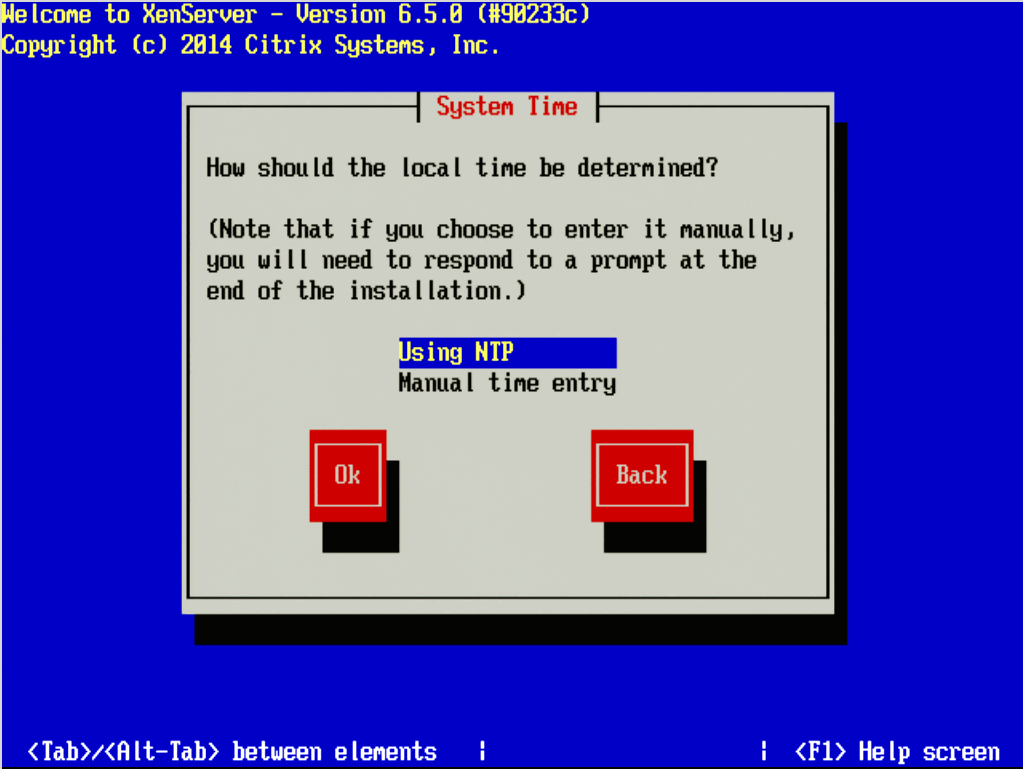
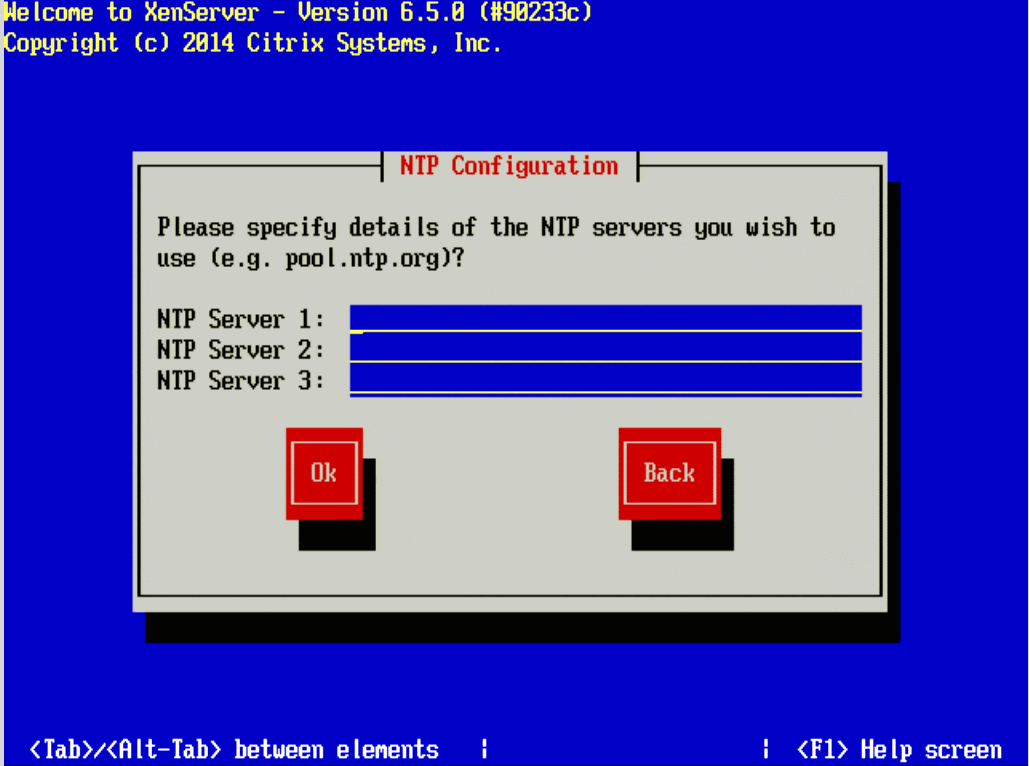
13. This step covers several screens for setting time zone information and NTP (Network Time Protocol).
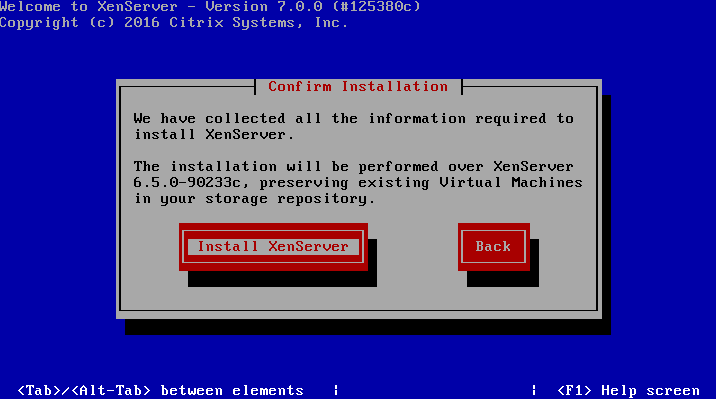
14. At this point in the installer, all of the initial configuration information for a clean install has been provided and the installer is ready to install all the necessary files.
WARNING – Continuing at this point WILL ERASE ALL DATA on the target disks!
Continue to step 19 after selecting ‘Install XenServer‘.
Upgrading XenServer 6.5 to XenServer 7
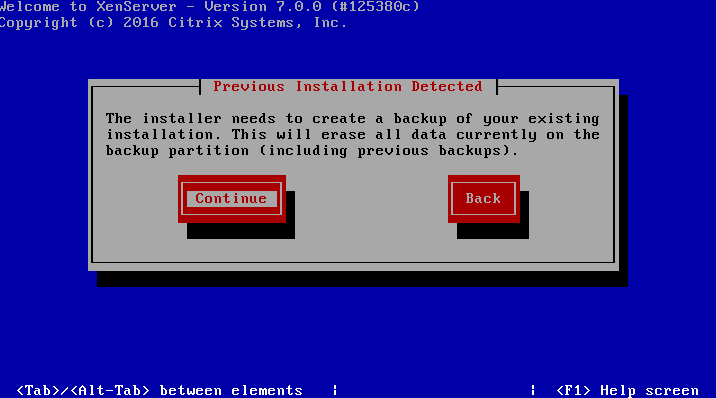
15. These steps are only used if performing an upgrade to an older version of XenServer. The installation media will locate older versions of XenServer if the user wishes. When doing an upgrade, the installer will create a backup of the current system automatically.
16. Once the back up is created, the installer will prompt for supplemental packs. At the time of this writing, there aren’t any supplemental packs for XenServer 7.
17. The next screen will allow the user to confirm the integrity of the source files before installing. Running this test is not required but can help detect installation issues before trying to write files.
18. Finally the upgrade can begin! At this point the installer will backup the older 6.x system and make the appropriate changes to setup XenServer 7.
Continuing XenSever 7 Installation
19. One of the most obvious changes the author noted with the newer XenServer 7 is that boot times seemed to have been drastically reduced. Most of the XenServer 7 Systems tested so far have booted approximately 35-60% faster than they did when running XenServer 6.5. If the installation was successful, the system should boot to the XenServer console.

Congratulations, the installation/upgrade of XenServer was successful! Now it is time to create virtual guests, networking, and storage repositories!
Applying XenServer 7 Critical Patch XS70E004
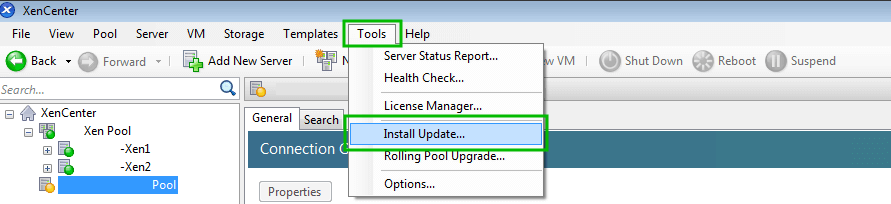
20. To apply this patch through XenCenter, simply go to the ‘Tools’ menu and select ‘Install Update’.
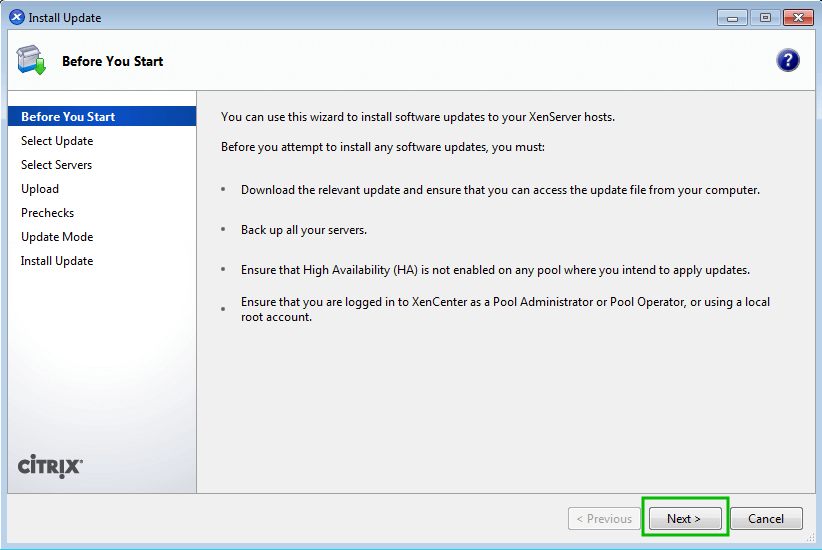
21. The next screen will provide some information about the patch installation process. Just click next to continue after reading the precautions.
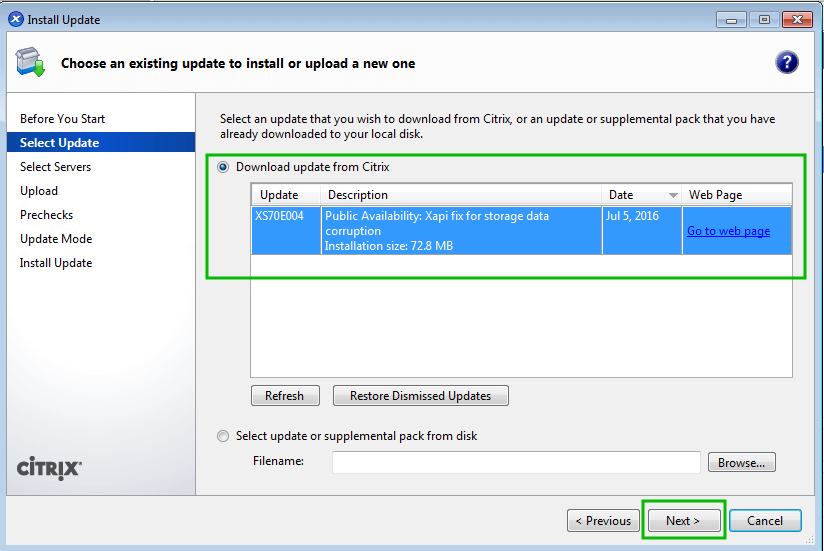
22. XenCenter, if connected to the Internet, will be able to locate any missing patches for the environment on this screen. At the time of this article the only patch available is ‘XS70E004’. This patch should be applied IMMEDIATELY following the upgrade or installation of XenServer 7.
23. The next screen will prompt for the XenServer hosts to apply the patch to.
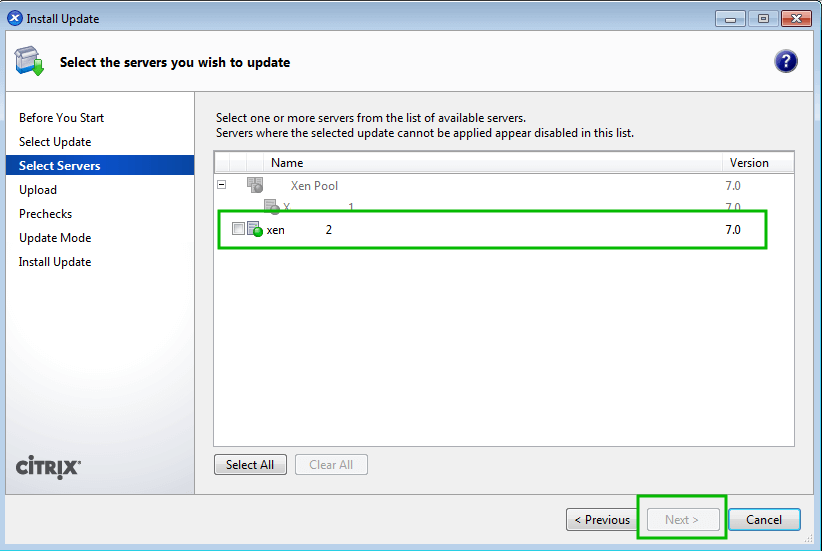
24. After clicking ‘next’ XenCenter will download the patches and push them to the selected servers. Simply wait for this process to complete and select ‘next’ when applicable.

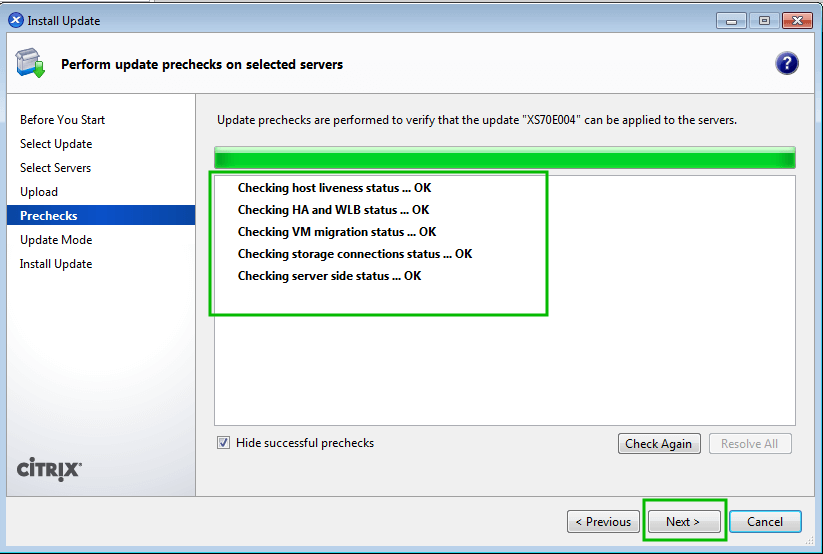
25. With the patch files uploaded, XenCenter will run a series of checks to ensure that certain conditions are met before the installation of the patches and the rebooting of hosts.
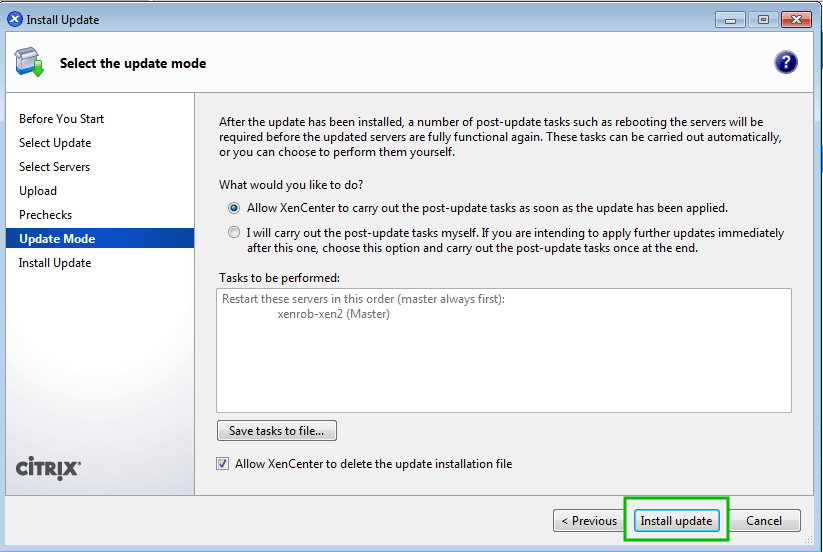
25. Once all of the pre-checks are completed, XenCenter will prompt the administrator as to how post install tasks should be handled. Unless there is a compelling reason not to, allowing XenCenter to carry out these tasks is usually the best answer.
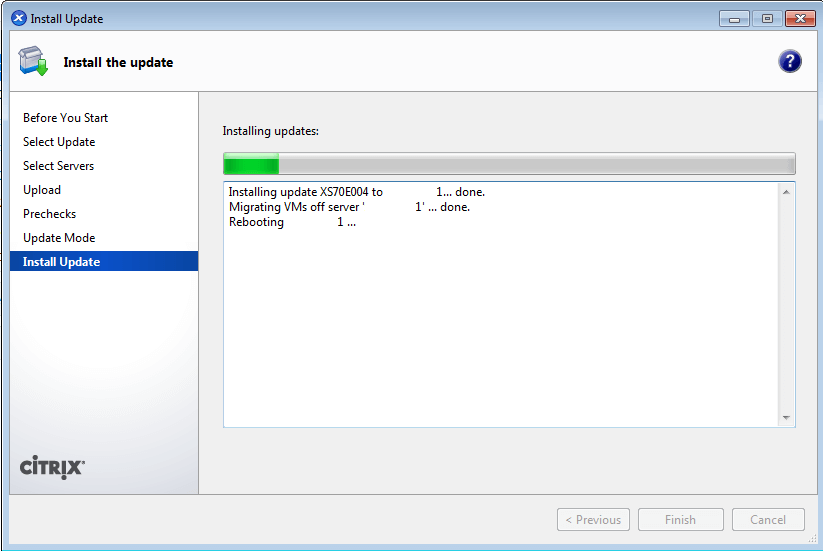
26. The next screen will display the progress of the patch installation and alert the administrator of any errors experienced.
This concludes the process of patching XenServer 7 hosts. The next step is to start creating virtual guests! Thank you for reading this XenServer 7 install article.
Don’t Miss: XenServer 7 – Pool Upgrade via CLI and XenCenter Web Interface
Please let us know of any issues you have in the comments below.
I’m stuck in the DD command. I’m on macOS and the diskutil list command shows the USB as /dev/disk3, but I get “disk busy” if I try to dd the ISO to it. what am I doing wrong? “of=/dev/disk3” is what I am using.
dev/disk3 (external, physical):
#: TYPE NAME SIZE IDENTIFIER
0: GUID_partition_scheme *32.0 GB disk3
1: EFI EFI 209.7 MB disk3s1
2: Microsoft Basic Data U 31.8 GB disk3s2
ikomrad,
I’m not particularly savvy on Mac these days but I’d venture a guess that the disk is either mounted or you have an application/folder that is opened or being used from that disk. Make sure that you umount the drive or whatever the Mac equivalent may be.
Another word of caution, I’ve seen/had issues when using flash drives larger than 8GB. If possible, I’d strongly suggest finding a smaller flash drive for the DD process.
hi, to have a local storage with ext3 and can access direct to the VHD files, do I have to select thin provisioning or not??
Thanks
Xisco,
To have local storage, you won’t have to thin provision. Realize though that local storage creates some serious limitations (lack of high availability and lack of VM migration capabilities).
I got an error
After step 4, my installation didn’t change to step 5, got an errno 2 error : No such file or directory /sys/block/md126p1
Dzy,
It looks like you are trying to setup software RAID on your XenServer system perhaps? I’ve never setup a XenServer system with software RAID. However there does appear to be a thorough discussion about software RAID on XenServer 6.5 here: https://discussions.citrix.com/topic/360943-software-raid-mdadm-on-xenserver-65-unexpected-failure/
Perhaps that link will be of assistance. If you’re not trying to setup software RAID, can you explain what your setup looks like?
Why describe how to install XS70E004 ? The installation ISO’s was re-rolled to include this very critical patch.
Torben,
At the time the article was being written, XS70E004 wasn’t part of the ISO. Even still showing how to install one patch, allows users to know how to install all of the other patches that will be released as well.