A little too early, not too late.
Here, we already have a guided installation procedure on the next iteration of the world’s most popular free operating system — Ubuntu 16.04 LTS.
Canonical currently released the first beta images of Ubuntu 16.04; however, there’s no standard Unity flavor at this time and sadly, we won’t be seeing it until the 24th of March – which is the release date for beta 2 — and we should see stable builds emerging in by April 21st — followed by subsequent release candidates.
If you’re worried on how this guide will work with the first point release, worry no more as the installation procedure hasn’t changed so much from the previous releases so if you are familiar with the installation of previously released Ubuntu versions, then you shouldn’t find it too hard breezing through with this one.
Ubuntu 16.04 Xenial Xerus is now official and you can download either the 32bit or 64bit ISO images from here beforehand.
Once you’ve done that, you may now continue with the installation procedure which is absolutely straight forward; however, if you do run into problems, you can always leave a comment down below.
We also covered on how you can dual boot Ubuntu 16.04 with your current windows 10 or 8 system even though we have a previous guide on that subject here – just call this an updated version.
If you’re looking for Server Edition installation, read our article: Installation of Ubuntu 16.04 Server
As you’re probably familiar with, the installation of multiple OSes in a dual/triple boot configuration requires a bit of technical expertise from your end – as you might have to go into your BIOS or UEFI (on newer systems) to do some manual configuration but that shouldn’t be too difficult.
For systems with legacy BIOS, all you’ll need to do is change the boot order and depending on your system, you might have to press the F2, F10, F12, DEL key to enter your BIOS (you might need to Google your way around that) – while on the latter i.e UEFI, you’d mostly need to disable secure boot and fast boot and enable legacy support — that is, if the OS you’re trying to install doesn’t have UEFI support baked in by default – but, such isn’t the case of Ubuntu Xenial Xerus 16.04 LTS.
Ubuntu 16.04 LTS comes with UEFI support and it should install just fine on your PC – be it in a dual boot fashion or a single install.
As usual, pre-requisites, we must get.
Ubuntu is currently only available as an alpha install and you can proceed and download the most recent daily build image from here.
We’d assume you’ve downloaded the latest stable build from the official Ubuntu mirrors as provided in the links above.
Once, you have your ISO image ready, you may now proceed to creating a bootable disk with Rufus, or universal USB installer. You’d mostly want to go with the former as it’s as straight forward as (making an installable USB) can get – moving forward, get your PC set (plug it in), make sure you’re connected to the internet and you’re good to go.
Note: Given the time at which this article was originally published, the standard Ubuntu flavor is only available in alpha; however, we’ll be update this guide (if needed) once the beta 2 image is available for download and the stable release too.
At this point, we’ve updated the article as promised so you may proceed with full confidence in the procedure.
The curated list of features to be expected with the final build of Ubuntu include:
- First Ubuntu LTS to ship Systemd as the default service manager.
- Mir display server.
- Ubuntu 16.04 will ship in two variants, one with Unity 7 and another with Unity 8. With the latter expected to become standard after the release of 16.10.
- Unity launcher position change (to whatever side of the screen you want to place it).
- The server filesystem ZFS will also be implemented in the next LTS release.
- Linux kernel 4.4 will ship with 16.04 LTS.
- Considering it being an LTS release, you’ll also get 5 years ongoing software support.
- Gnome software center to replace Ubuntu’s archaic software center experience.
- The Ubuntu devs
also hope to implement Snappyhave implemented Snappy with Unity 7 which is the GUI of Xenial Xerus.however, it’s unlikely that it will be ready be the time Xenial Xerus will be making its way to the market by April. - Firmware updates via the Gnome software center is also a possibility.
After being severely bashed by privacy advocates, Ubuntu 16.04 LTS will finally turned off by default, the controversial online search (that gathers search results from the likes of Wikipedia and Amazon when you launch the dash to search for something locally stored on your PC).It’s now turned off by default.

Once we have all that cleared up, you may now proceed.
Ubuntu 16.04 Installation Guide
1. First off, plug in your USB drive into the intended install PC after which you’ll power the said system up and boot from USB disk (provided you’ve done the needed BIOS or UEFI configuration as mentioned above).
And you are greeted with what may seem a familiar screen – depending on how much time you’ve had with Ubuntu and derivatives in the past. Well, you want to proceed by clicking the install Ubuntu button but if you’d rather give the system a spin first, then go ahead and select the first option (try Ubuntu).
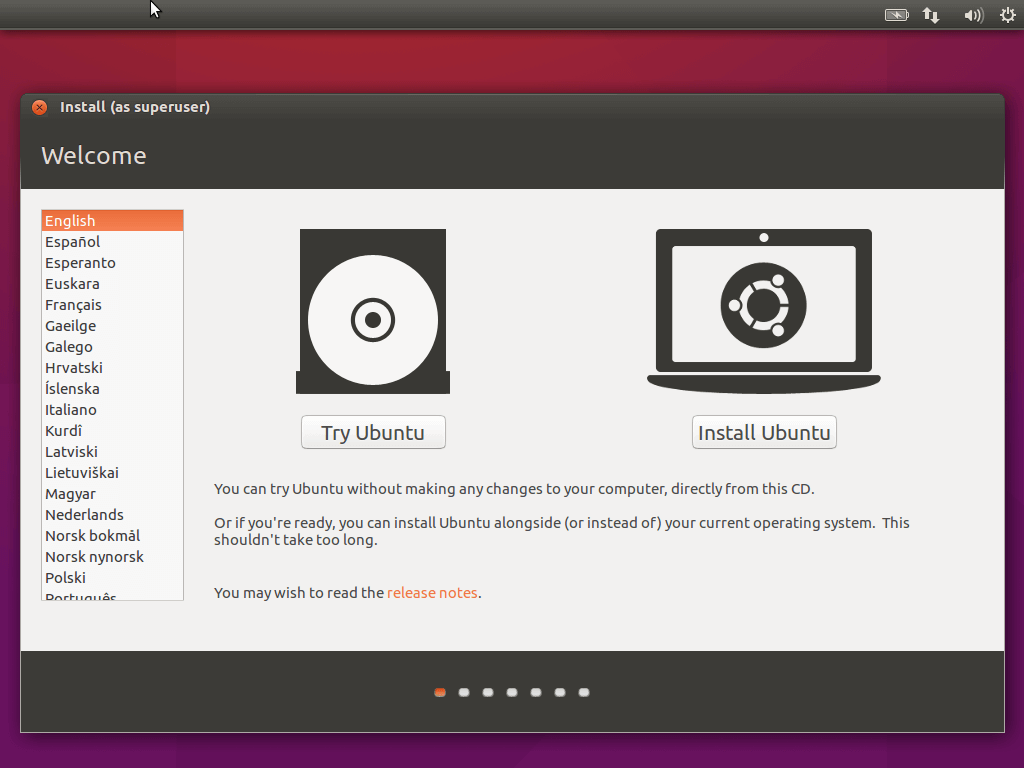
When you now decide to proceed with the installation, you’ll get a dissimilar welcome screen – thereafter, everything is pretty much the same if you decide to NOT try the OS first.
As you can see on the left bar of both screenshots, you’ll have to choose your language as needed; and this, of course, will be the default (once installed) throughout the system.
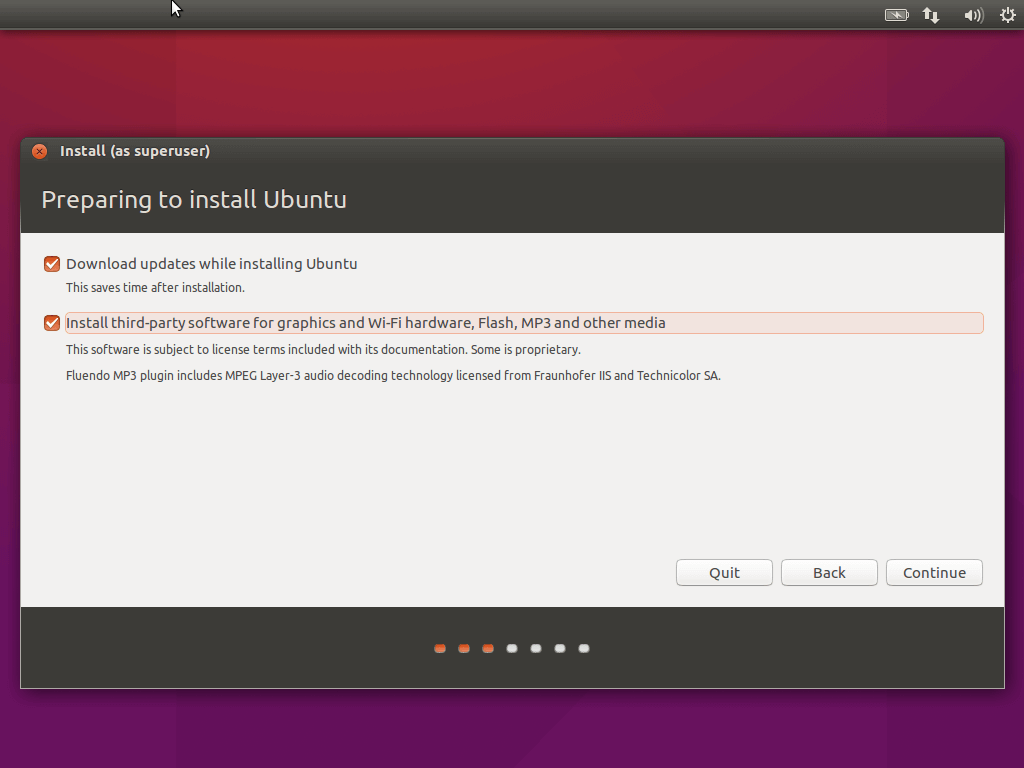
2. Next up is your preparation screen and you should tick both options before you continue so you won’t have to go through the hassle of installing updates and codecs after you might have completed the installation. If you are without an internet connection though, the first option will be greyed out, but then you can tick the second and continue your installation.
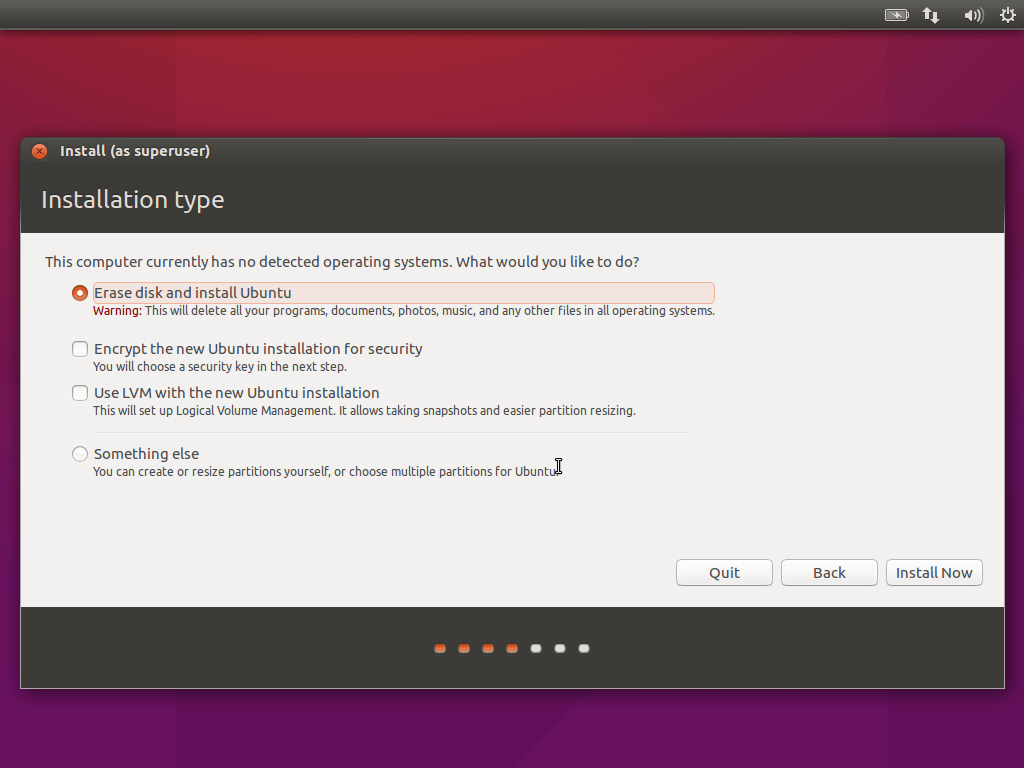
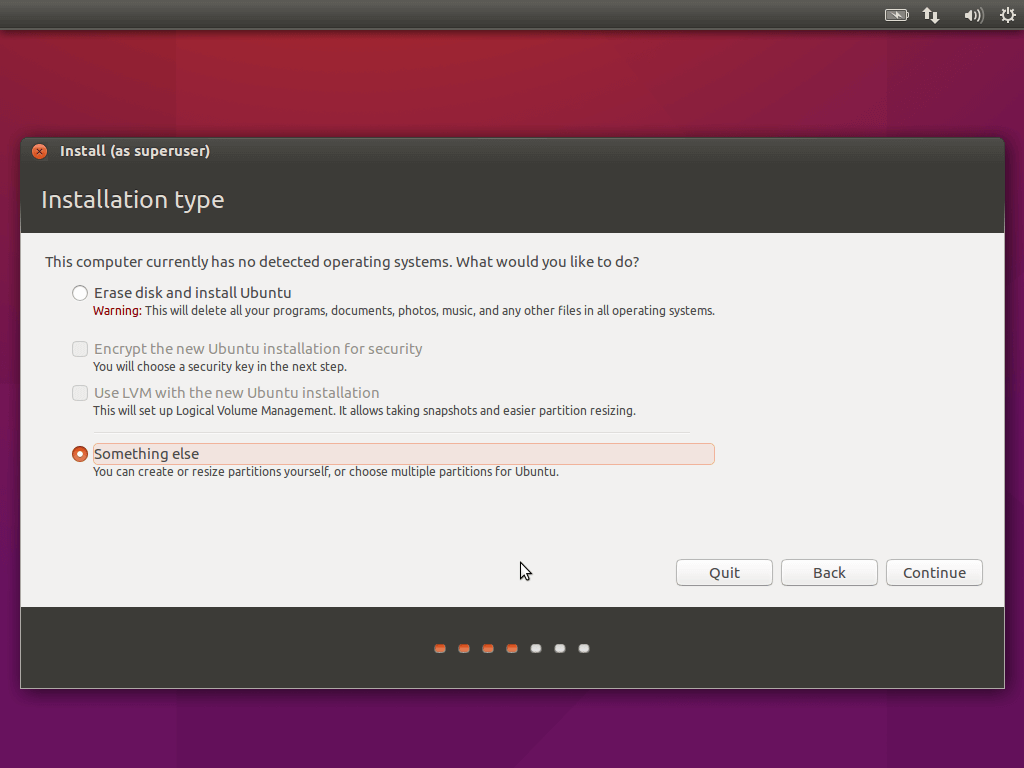
3. At this point, you have to choose your installation type and the first screenshot is an automated process, even if you have an operating system already installed, the installer will auto-detect it and allow you partition the drive in the next screen with simple sliders that will auto-allocate your assigned space for the Ubuntu partition.
Choose an option as needed and proceed – you may also decide to encrypt your disk or use (LVM) logical volume manager with your Ubuntu installation – but we advise that you select those ONLY if you know what you’re doing.
If you’d prefer to manually partition your disk though for Ubuntu 16.04 dual boot with Windows, go to the end of the article at section Ubuntu 16.04 Manual Partitioning and come back to #5 to continue with the installation.
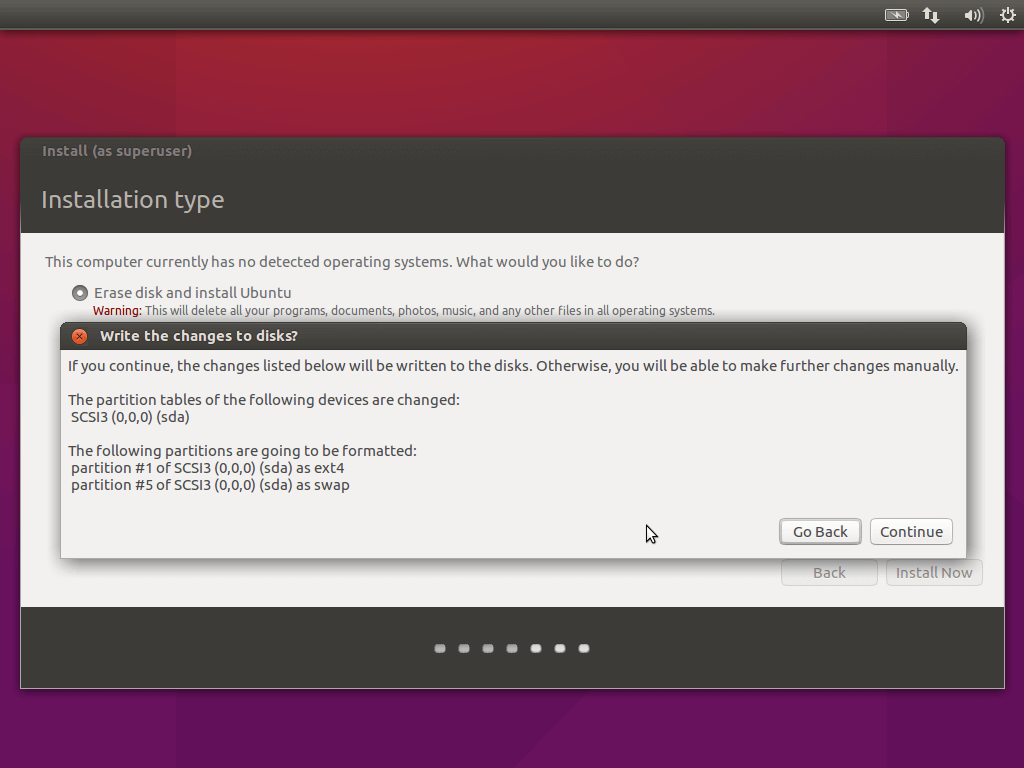
4. Prompt to confirm that you want the changes to be made to your internal drive; click continue to move onto the next screen.
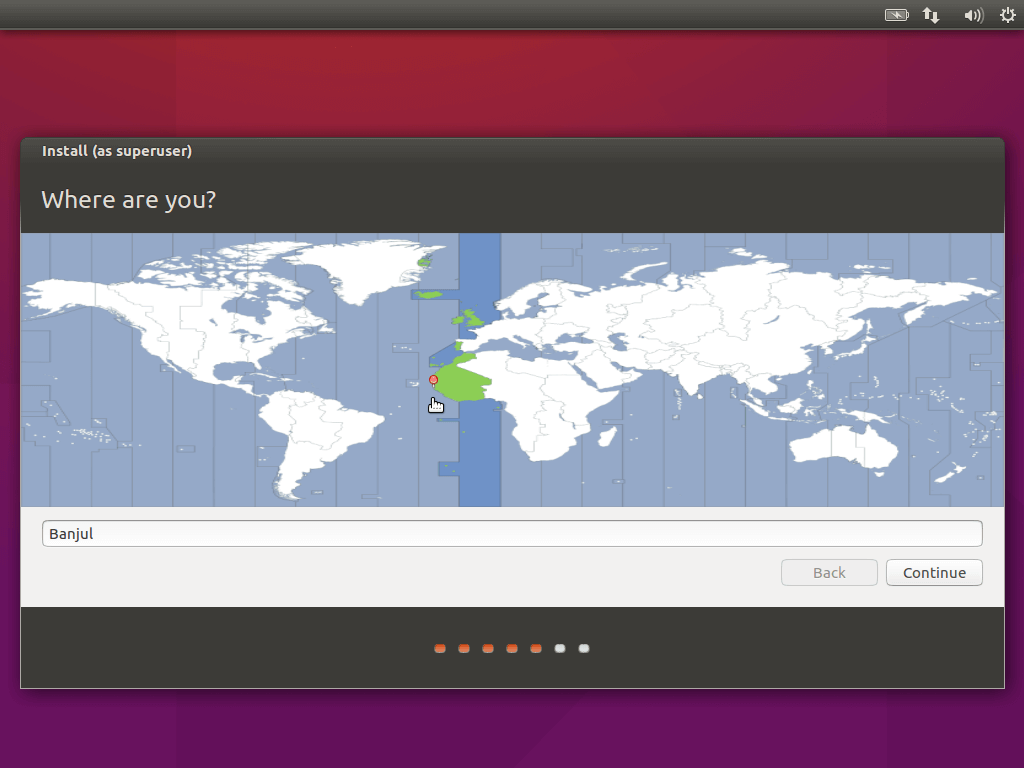
5. This is where you select your current location; hint: the setup auto-detects your location if you’re connected to the internet.
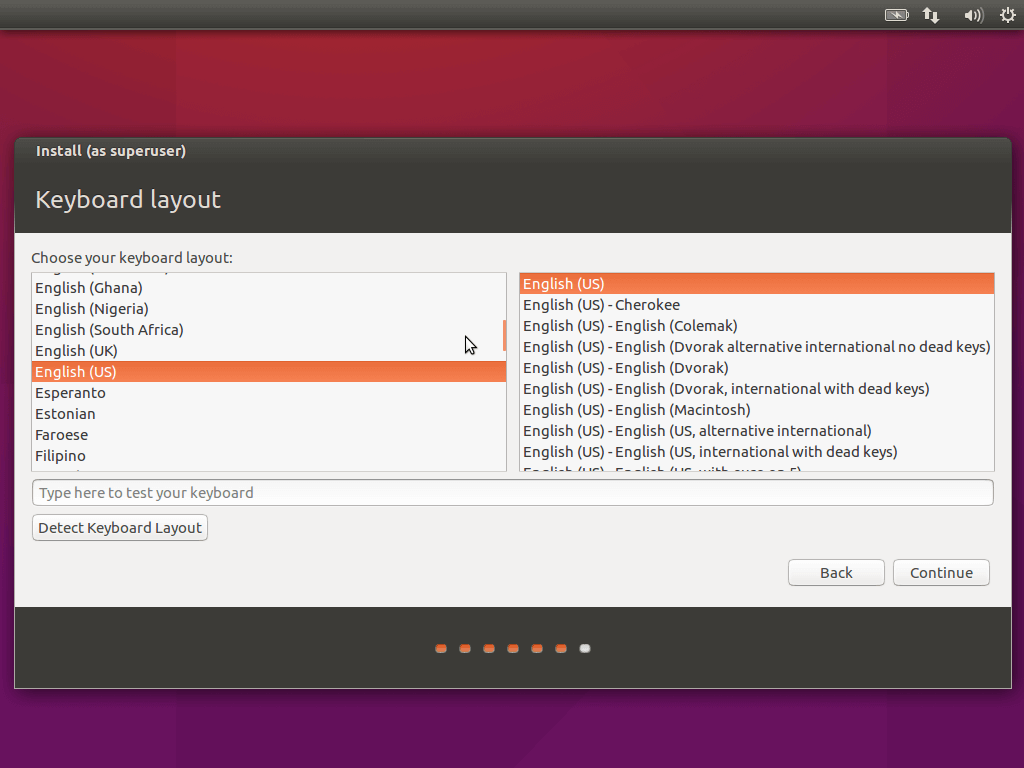
6. Configure as needed — depending on your type of keyboard and default input language.
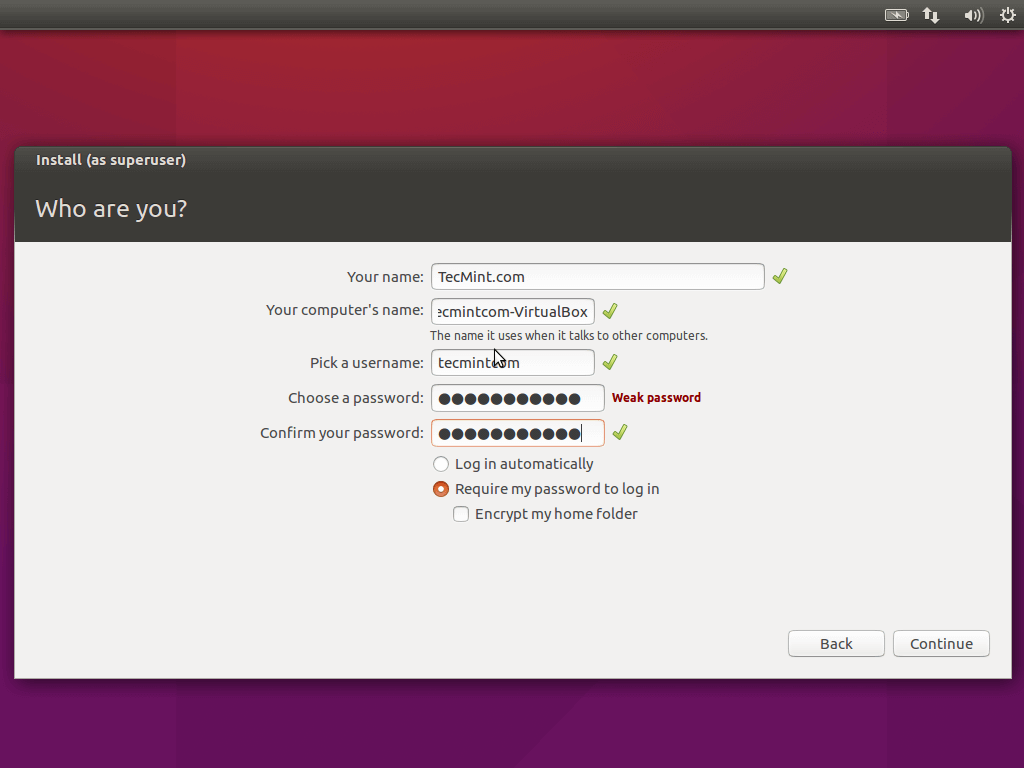
7. This is where you enter your user details in the right order – that is, descending; after which you can click continue to proceed to the next screen.
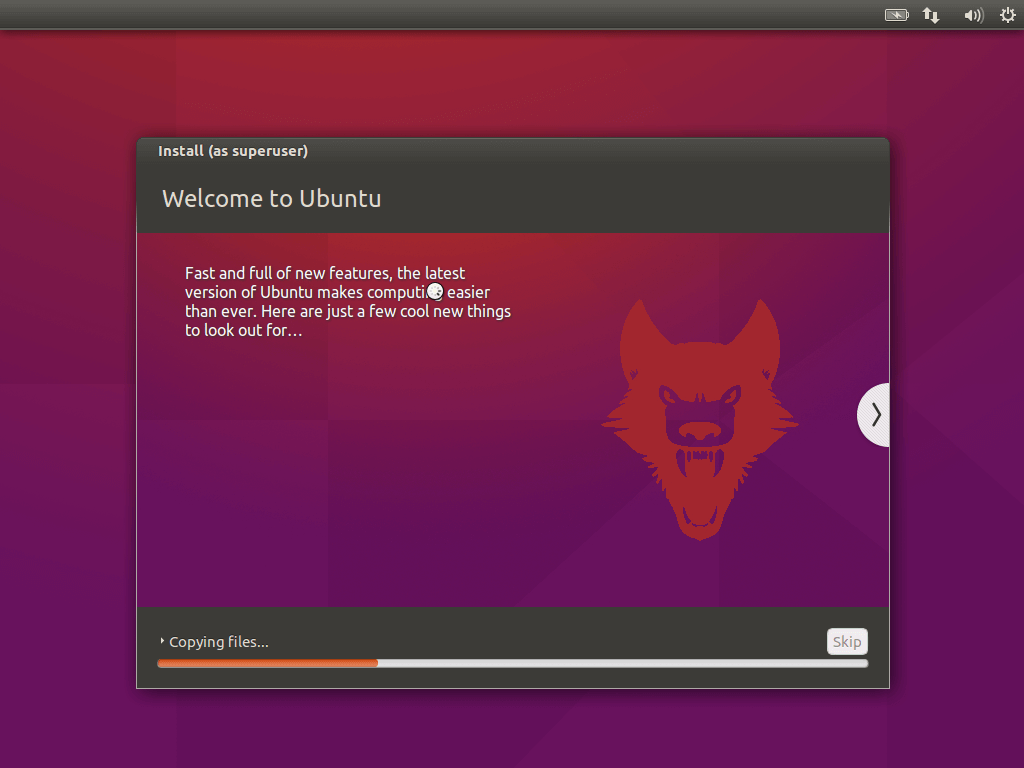
8. Right up next, is the beginning of installation which (depending on your PC hardware), can take a long or short time.
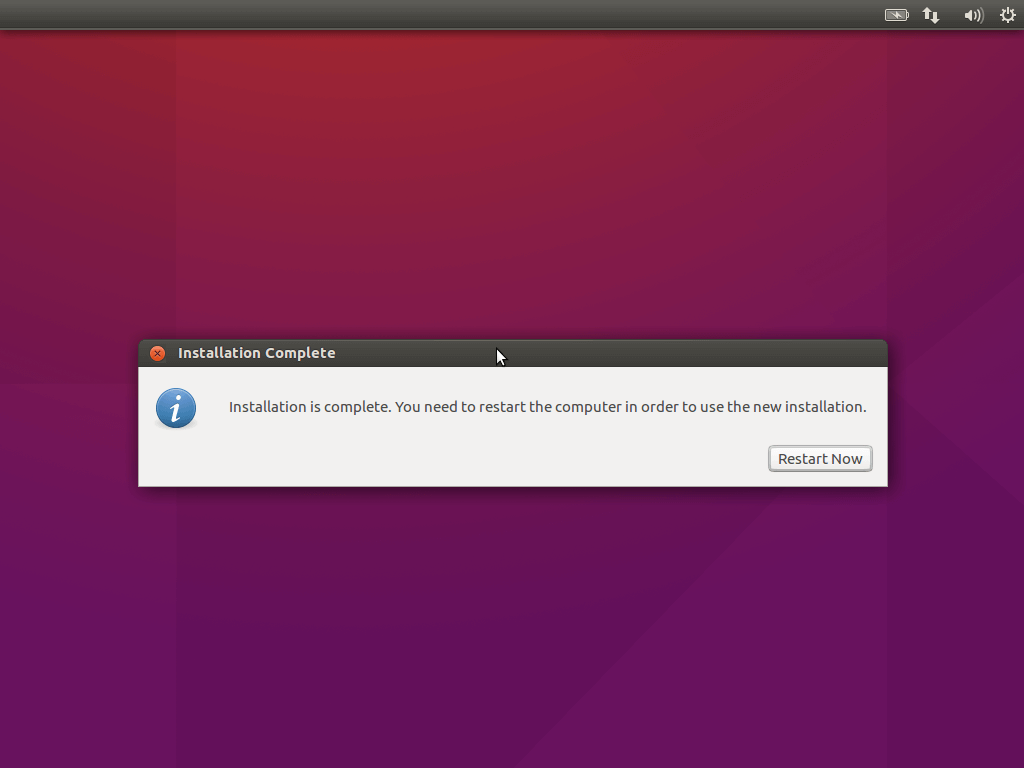
9. At this point, the installation is complete and now, you may restart your PC.
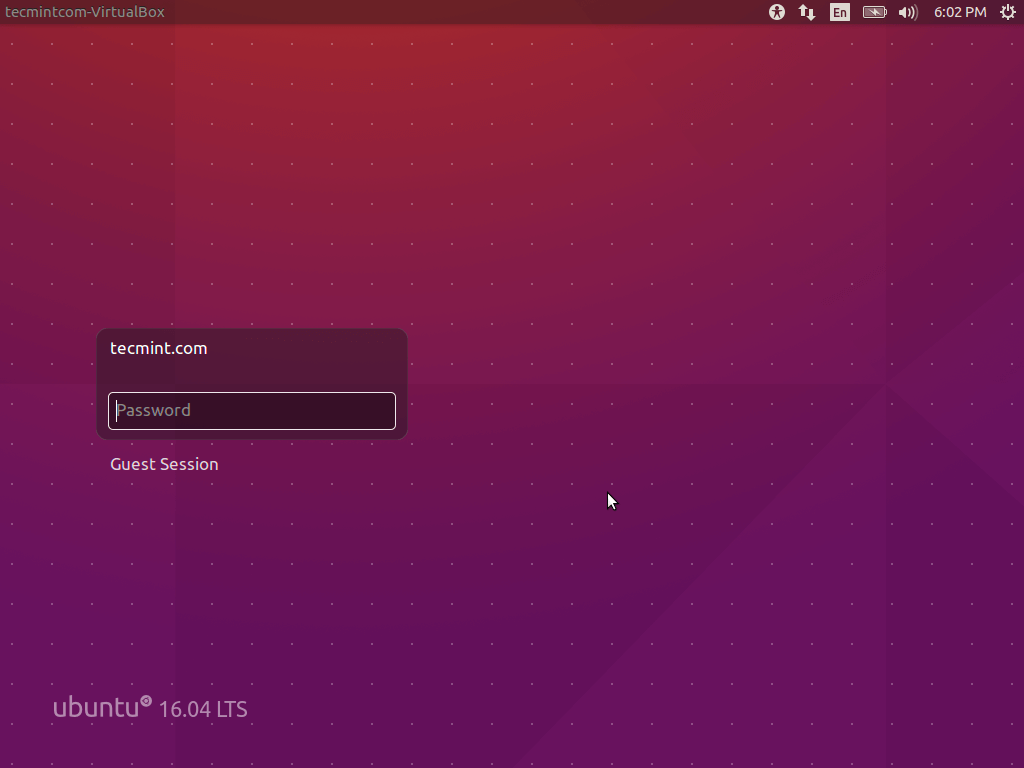
10. Once you’ve restarted, you are now greeted with the login screen where you input your password (or in the case of multiple users select your name) and press enter to continue to the Unity7/8 DE.
11. Ubuntu 16.04 desktop.

Update Ubuntu 16.04
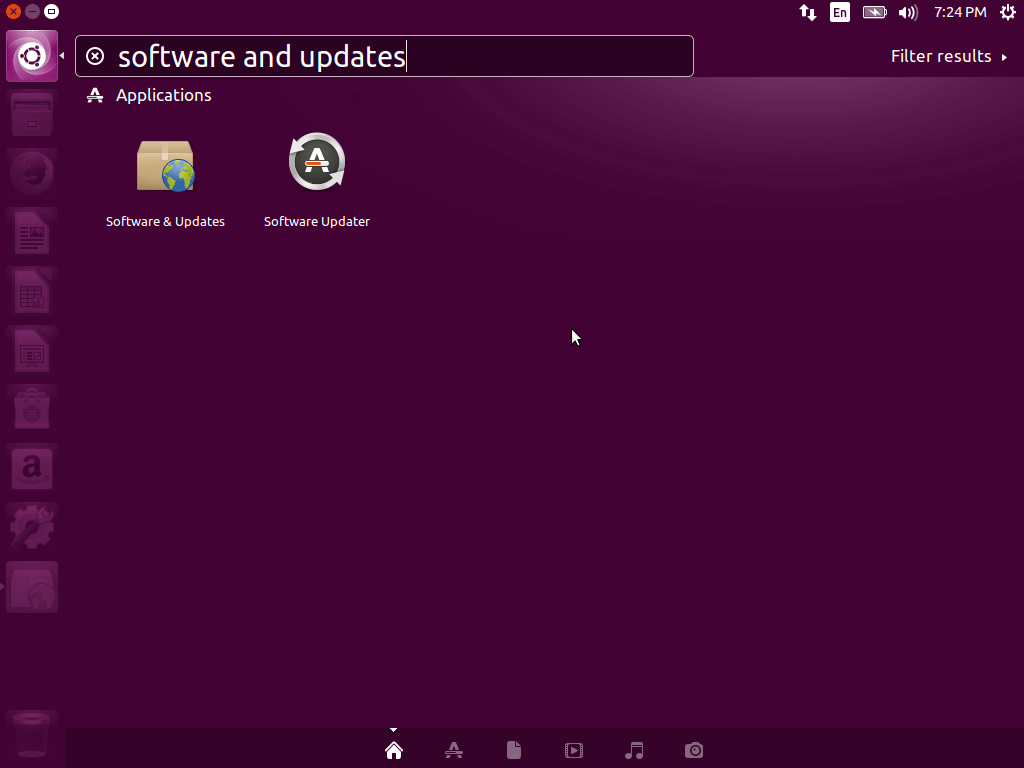
12. A good practice for any Linux user is to update the system once it’s done installing – hence, a brief how-to-update walkthrough.
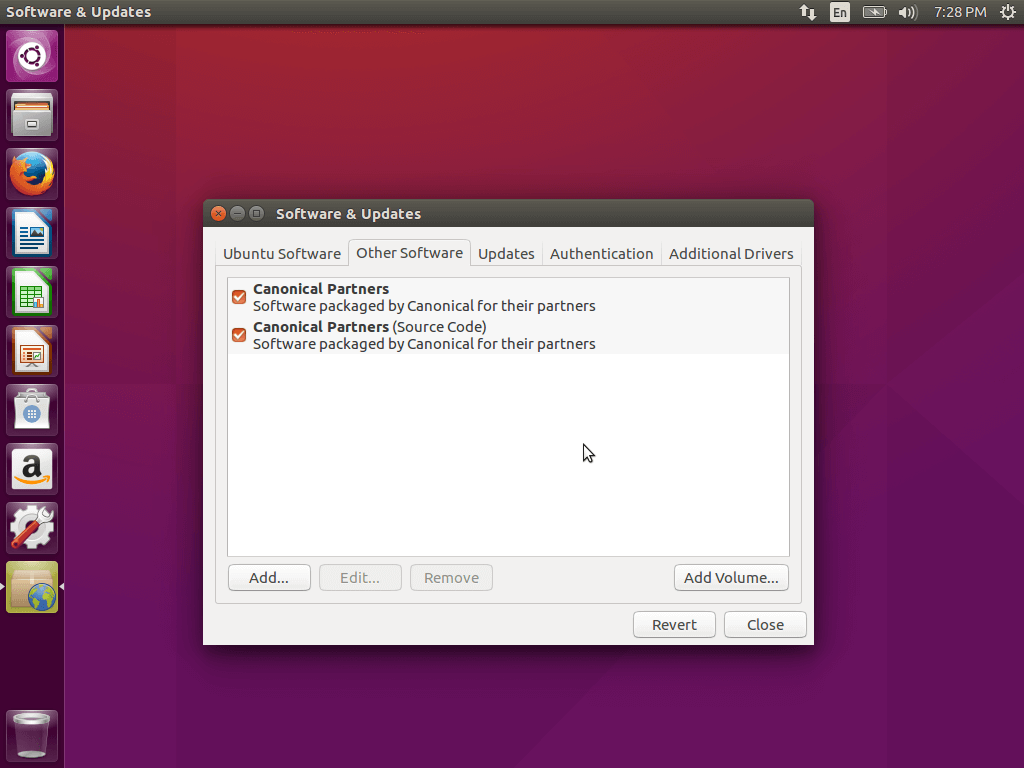
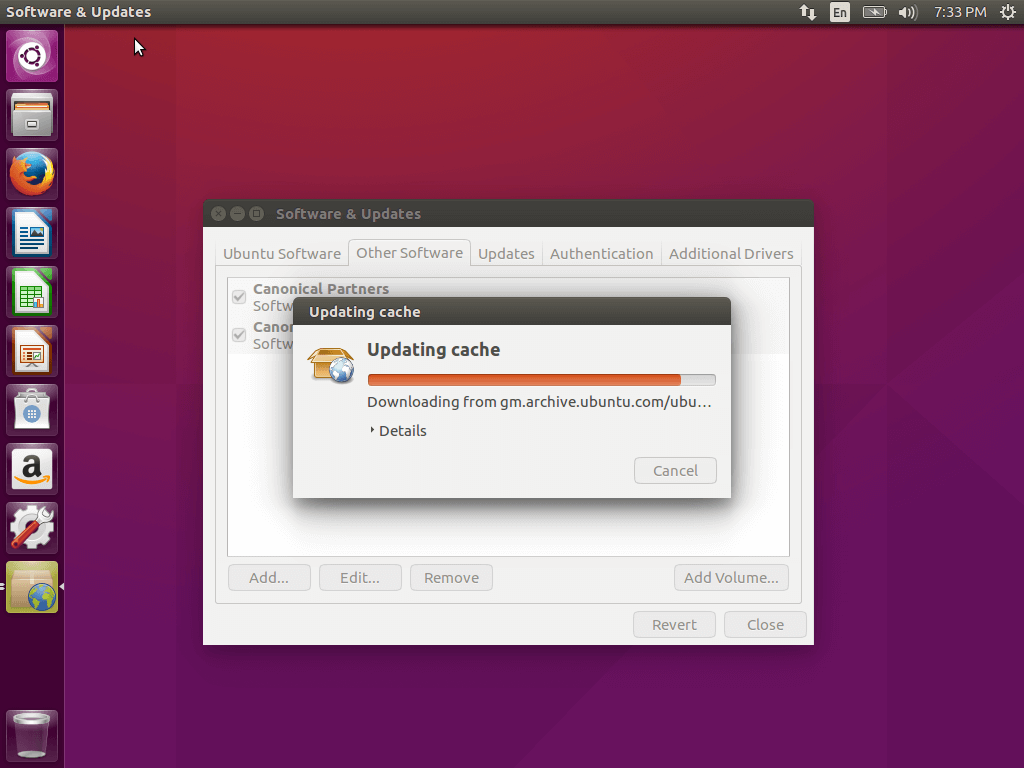
First off, go on to the Unity dash (which is the square button on the top left corner in the image above and below) and search for “software and updates”, open it and select the “other sources” tab, tick both options (mind you, you’ll be prompted to enter your root password) the software cache is updated and you’re good to go.
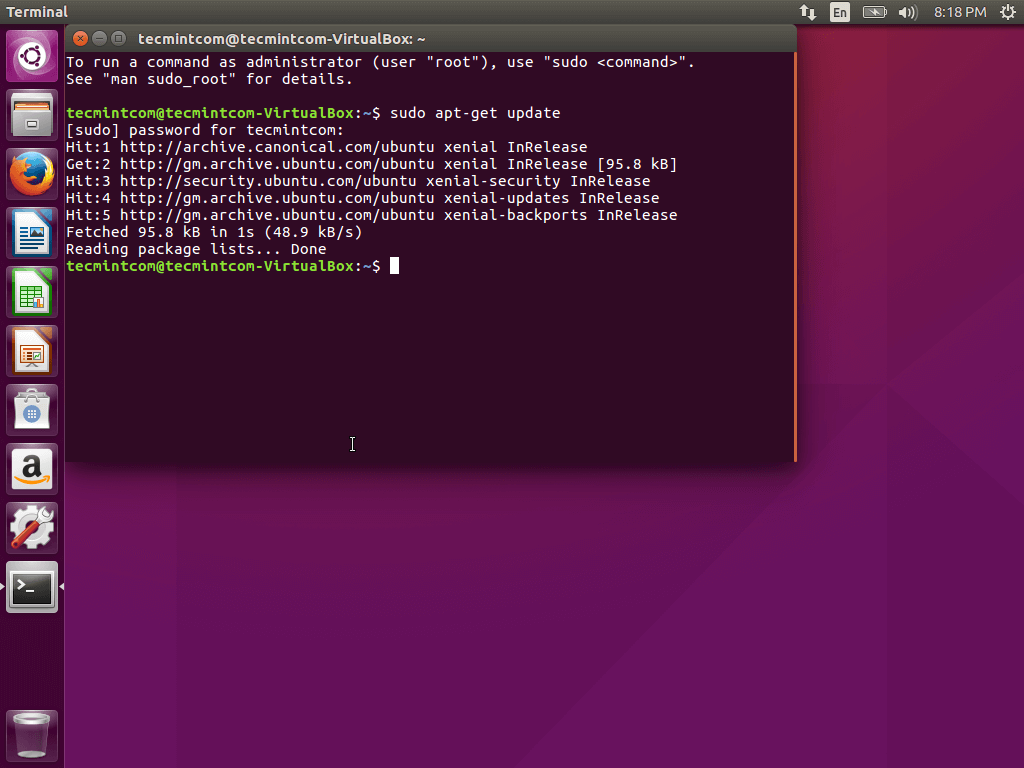
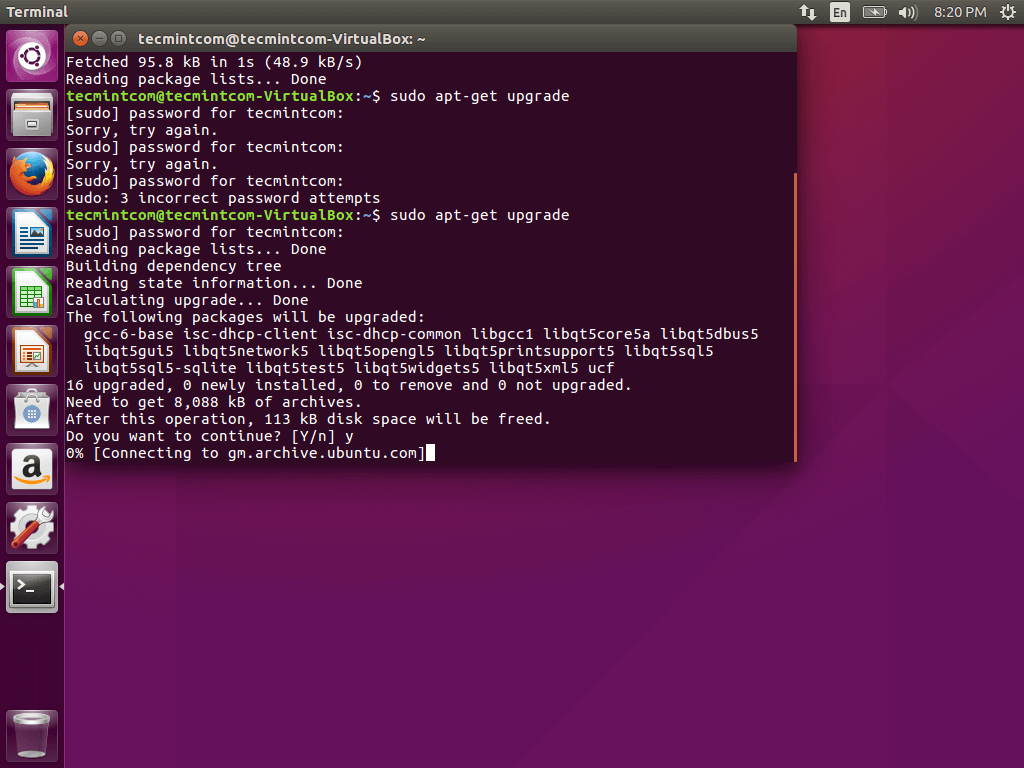
Once you have that setup, you may not go to the same dash and type in “terminal” and enter the follow-up commands (consecutively) to update your Ubuntu installation.
$ sudo apt-get update
$ sudo apt-get upgrade
13. The new gnome app store in Ubuntu is perhaps the most prominent feature of the OS and as of this writing, it doesn’t exactly seem to function as expected, however, considering the alpha status of the image I’m using, such things are expected and most issues and whatnot should be ironed out before the “stable” is ready for prime-time in April.
Ubuntu 16.04 Manual Partitioning
Manual partitioning — #3 for those of you that will rather take this route.
3a. Instead of “Erase disk and install Ubuntu”, go ahead and choose the last option “something else”.
3b. Depending on the number of physical drives you have hooked up in your PC, they can be labelled as dev/sda, dev/sdb, dev/sdc and so on. In my case, however, I’ve only got one HD to install Ubuntu in – dev/sda.
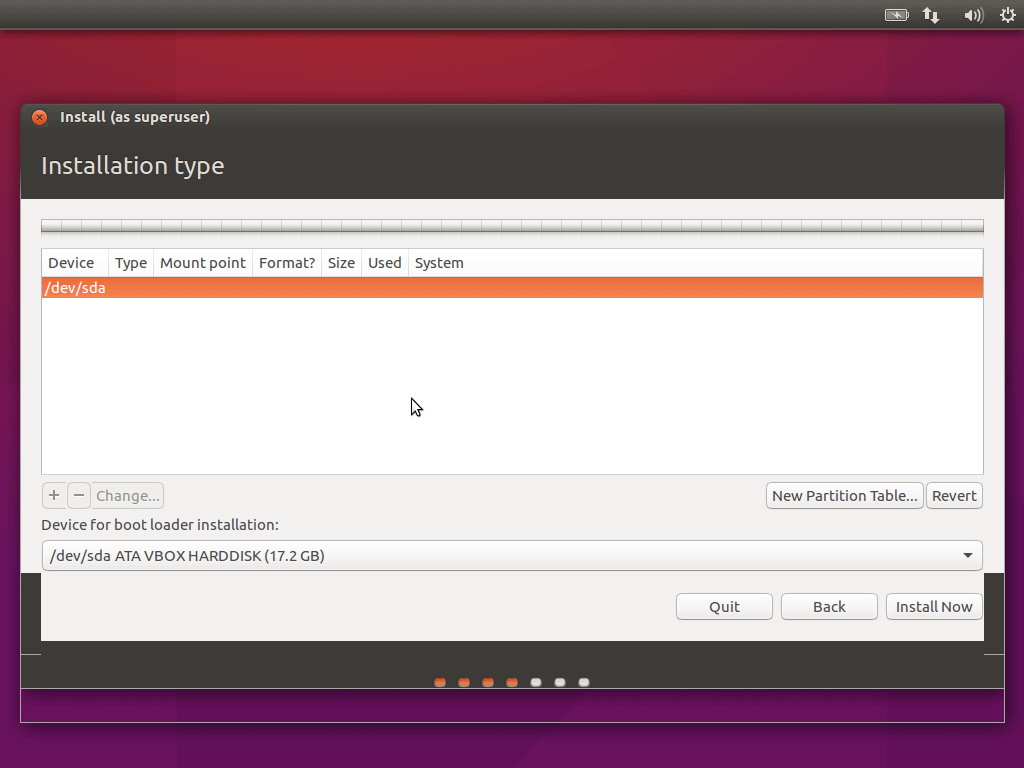
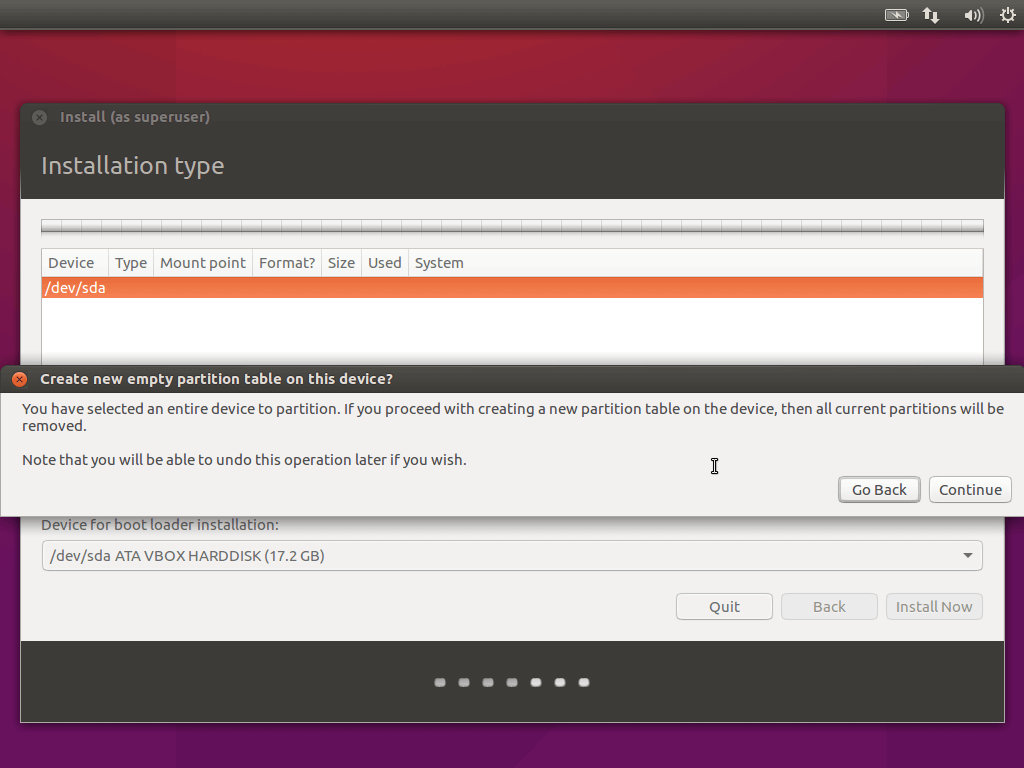
3c. Now you may go on and create a partition table.
3d. After you might have done that, you want to proceed and create the partitions you’ll need for Ubuntu (by clicking the + button in the lower area of the partition screen); if you’re on a low specced PC with say, 2GB of RAM, it’s advisable to create a minimum swap partition (equivalent of virtual memory on Windows) that is twice the size of the physical memory. In my case, I have 2GB of RAM so I created a swap partition of 4GB.
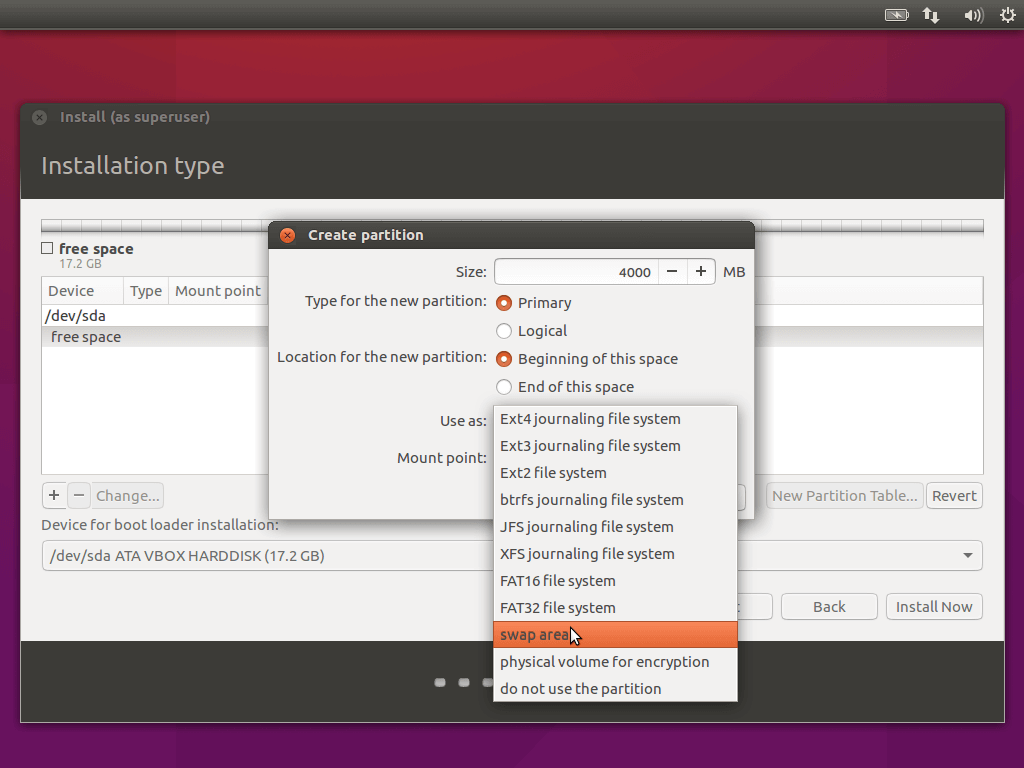
In the case where your PC has 8GB (or more) of physical memory, it is rather irrelevant to create a swap space of twice that amount (cause you’ll never get to use even half of it) so it only makes sense to create something not too big – something like 2GB will be just okay.
3e. Once you’re done creating your swap, you can now go ahead and create a root partition with the rest of the free space available. However, if you’d prefer a separate partition for your home folder, you can as well create it, but you’re mostly fine with a single partition.
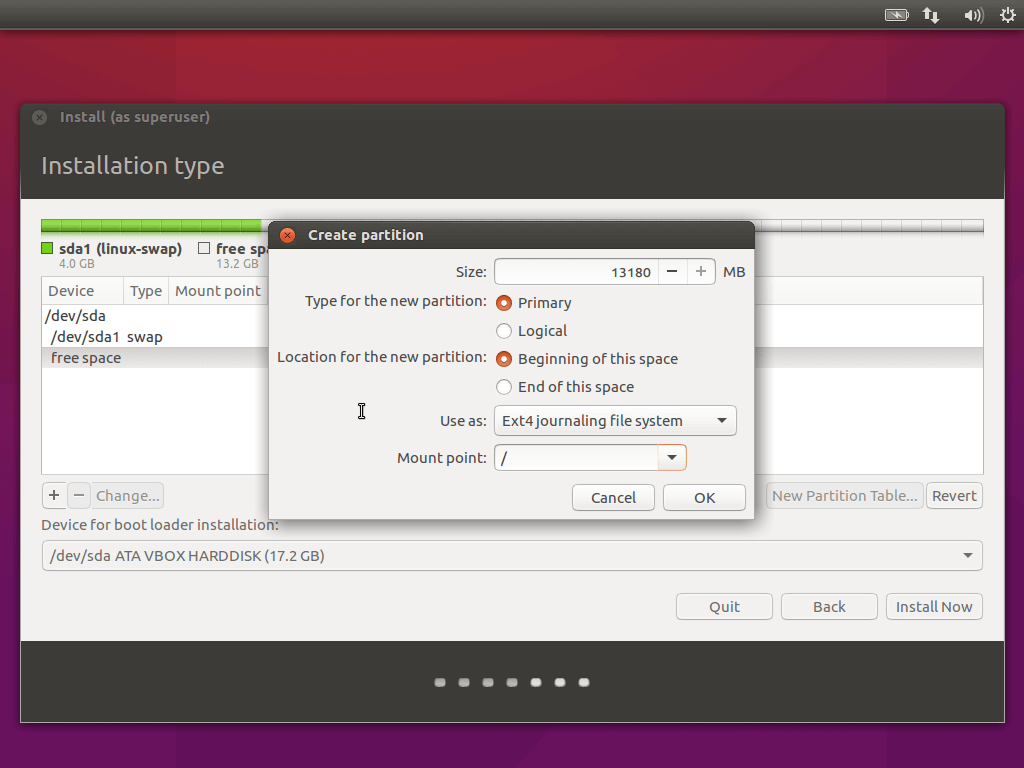
3f. From the screenshot below, my swap is labelled “/dev/sda1 swap” and my root partition is “/dev/sda2 /”.
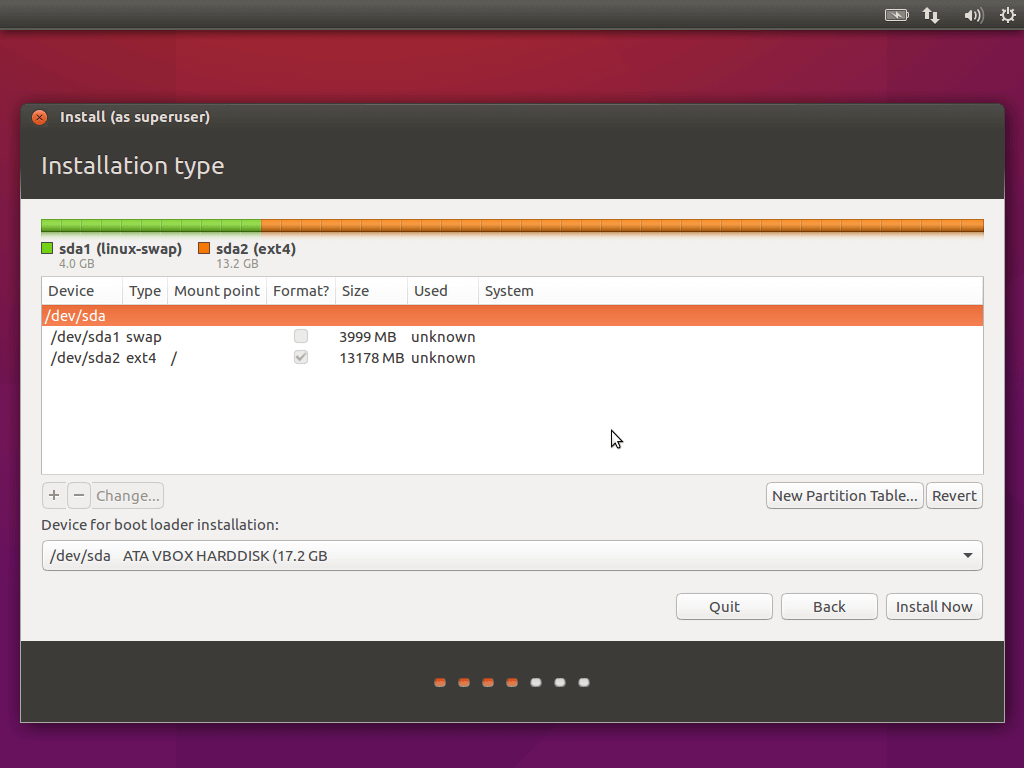
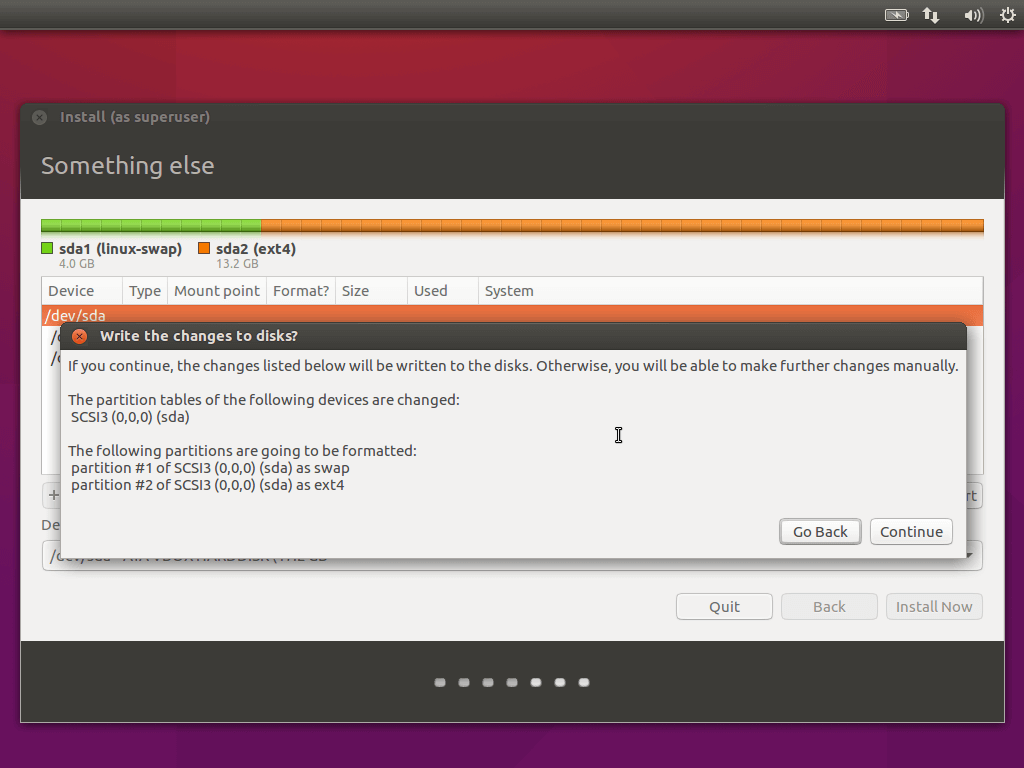
3g. lastly, confirm that you want to write the changes to disk and go back to #5 to continue your installation.
If you encounter any difficulty while installing, let us know in the comments below and we’ll respond as quickly as we can.


Hi Guys,
Thanks for this fruitful instruction, it helped me a lot once before when i had Win 8 and Ubuntu together, now i want to come back to Ubuntu again and have it along with win 10.
THE PROBLEM IS like SANJAY said in his comment, i did the installation correctly but i don’t see the grub where i have to chose from where to boot
CREATING AN EASY UEFI ?? how i do that, on the bios,? I DIDN’T SEE THAT . I HAVE A LENOVO X1 CARBON THAT ALLOWS BOTH BOOT OPTION legacy and uefi; i don’t know how to create an easy uefi boot entry on lenovo x& carbon.
please any advice will be apreciated
I’ve installed the AMD64 distro (Kubuntu, but it should be the same) on my Lenovo Ideapad 110. I want to replace it with the i386 neither the USB nor the CD will boot. I tried booting Ubuntu 16.04, same result. Before I start creating Alpha distros and Kanotix, Knoppix, Debian etc., is this is bug or a feature?
I need to replace that distro because my writing software (Scrivner) won’t load under the AMD flavor.
Hi i am trying to install Ubuntu 16.04 on my computer, that already has windows 10, but the installation got hung on the “preparing to install Ubuntu” screen for what has now been 30 minutes. Computer specs should be fine, so is something wrong? I’m booting from dvd
David Parker and also Okmesh have given me the answers I needed, thank you to them both. I wish I could remember how to give the correct answers the TICK symbol, but, Ahhh the joys of old age.
Regards,
Rod
My installation freezes on “force uefi installation?” Window and is non-responsive. Whether I click “go back” or “continue” nothing happens. What should I do now?
I want to erase all the disk partitions and Install Ubuntu 16.04 LTS but I plan to install Windows 10 later.
Hi, I already have installed Ubuntu 14.04 on my PC. I have downloaded ISO of 16.04.1. I would like to install 16.04.1 without changing the existing partitions or loosing the existing data. Can somebody tell me the steps involved? I have slow or unreliable internet connection, so I would prefer installation/upgrade from the downloaded ISO (copied to DVD).
I currently run Windows 7 and need to install Ubuntu on my device. I had created a partition on Windows for the install and then got stuck on the screen (step 3b/3c) where you need I was asked to set root directories and stuff. I was new to Linux and didn’t want to mess with data on my HDD so I quit the installation there. Please help as I’d really like to work with Ubuntu
My mystery is the third-party software checkbox. I had no idea whether I needed it, but it would have required me to suffer through another battle against secure-boot (which my HW won’t disable short of turning off EFI).
Therefore I’m proceeding without 3rd party SW; I hope the laptop is still usable when I’m done. If there’s guidance to whether/when someone needs the 3rd party SW checkbox, please point to it.
Hi, I am a noob. I am running Ubuntu 16.04.1 and sometimes get things drastically wrong. I decided to create a partition and run Linux from the partition, so when I mess up, I can still go to the original installation and copy things across to continue fiddling.
PROBLEM: I do not know how to get into my original copy of Linux. How do i boot into the original instead of the new partition?
For Crossover Linux to install 32 bit software, at least 3Mb virtual memory is required. When an entire 1 Tb HD is default formatted to use LVM, Crossover posts the error message “At least 3 Mb virtual memory is required”.
How should 16.10 be installed to provide sufficient virtual memory for Crossover?
Hi i have a dell inspiration 3543 with windows 10 installation but now i install the Ubuntu 16.04 in same laptop with follow above step and i successfully install Ubuntu but now when restart the laptop by default windows 10 is start i don’t got any option dual operation, But when i press f12 key at that time i got the one option which is windows boot manager when i select this option windows 10 is star, So my question is how i am get the dual boot option kindly help me with same issue
You may need to use EasyUEFI. Simply select create a new boot entry and it will automatically select the EFI partition. There should be a grub.cfg file there. Select this and give it a name and save it. Next time you go into your Uefi menu you should see a grub option which should let you boot Ubuntu.
I’ve just tried to install the 16.04 upgrade, which could not fully complete. Now that I’ve rebooted, it’s asking for login information and my usual login isn’t working. Please help!
I had ubuntu 16.04 in my system. Suddenly grub mode came. I downloaded iso file of ubuntu16.04 and made a bootale usb. Now when I am trying to install it,there is and error saying ext4 partition. … could not created. I have tried going to something else option and then mannualy doing things,but the error is still there. Please help me so that I can use my system again.
I have a 1TB Disk drive that’s completely free of any partitions. It’s a Dell XPS 8900, i7 6700K core, 32 GB Ram. The installer tells me the disk has 0 bytes free when installing 16.04 LTS. It’s frustrating. I guess Ubuntu is too stupid to figure out how to partition my disk. I’m at a loss as Linux is not at all my preferred OS, but I want to learn it and use it, it has promise from what I’ve seen and I’m not ready to write it off yet. Trying to search for the issue I am experiencing turns up people trying to install alongside other OSs. The installer will finally crash at setting time zone, goes to collect debugging information, which fails because of the disk space.
Any pointers would be VERY appreciated :)
Just find your post and I wonder if you know how to get off a full disk encryption ?
For now my xenial works great but I can’t boot anymore from usb and I don’t know how to revert my fully encrypted ssd or just reinstall without encryption from usb (I have my passphrase)
When I divide my partition and click ‘Install Now’ button, it says “The partition /dev/sdb3 assinged to / starts from the minimum alignment for this disk, which may lead to very poor performance.”. I followed the instructions below, but it still doesn’t work. I Googled it many times, but I didn’t find any suitable solution for it. What should I do?
I couldn’t connect to internet using DSL. Any help?
Formatting screwed my post:
vg00-lv_root_crypt UUID=uuid of /dev/mapper/vg00-lv_root ………
vg00-lv_swap_crypt UUID=uuid of /dev/mapper/vg00-lv_swap ……….
I wanted to use LVM and root+swap volume LUKS encryption on a disk containing Windows (half of the disk used). As the installer is not capable of creating LVM and encrypted volumes in this scenario I had 2 options: use mini install ISO or setup disk with desktop ISO manually.
Mini install ISO installer does not allow installing grub into a partition, only in MBR, so you have to do some manual steps using either option if you want to use Windows boot loader.
I used desktop Live DVD, in a terminal window I created boot partition and extended LVM partition, created vg00 diskgroup, created lv_root volume, lv_swap volume and lv_home volume.
Using ´cryptsetup luksFormat –hash=sha512 /dev/mapper/vg00-lv_root´ and ´cryptsetup luksOpen /dev/mapper/vg00-lv_root vg00-lv_root_crypt´ (and the same way for swap) I created encrypted volumes (when you do not use naming convention {VG_NAME}-{LV_NAME}_crypt, the installer will not allow to use it ! ).
Before I created default user I had to open terminal window again and create /etc/crypttab like this:
vg00-lv_root_crypt UUID= none luks,hash=sha512
vg00-lv_swap_crypt UUID= none luks,hash=sha512,swap
and copy this file to /target/etc/ otherwise the installer FAILED to create the user.
After that the installer finished successfully. I´m posting this as a hint for newbies like me :-)
P.S.: If you don’t want to enter password twice during boot, after booting to the new install, modify /etc/crypttab like this:
vg00-lv_root_crypt UUID= BLABLA1 luks,hash=sha512,keyscript=decrypt_keyctl
vg00-lv_swap_crypt UUID= BLABLA1 luks,hash=sha512,swap,keyscript=decrypt_keyctl
(BLABLA1 works like a variable name for storing the password you enter during boot)
and modify /lib/cryptsetup/scripts/decrypt_keyctl according to the patch (https://launchpadlibrarian.net/183484399/decrypt_keyctl.patch) mentioned here:
https://bugs.launchpad.net/ubuntu/+source/cryptsetup/+bug/1362881
DO NOT rename the patched script, in /etc/crypttab it MUST be referred as decrypt_keyctl.
Finally, run update-initramfs -ck all
Thanks Nyyr.. I’m sure people will find this post use…
useful**
is there any way to upgrade the o.s to beta version and if its there then how please also tell me the process through graphic and terminal method
Thank you for reminding me of that Prakash…I’ll have an article up for it…. be on the look out.
What is new in Ubuntu 16.04?
When it comes to networking, because there was an issues with networking services in Ubuntu 15.04 and Ubuntu 15.10. Automatic configurations of interfaces was a problem.
given that Ubuntu 16.04 Xenial Xerus is an entirely new release with the Linux Kernel 4.4 and a lot of other improvements under the hood; I don’t suppose you’ll experience any of the issues you ‘ve mentioned above…but you should really try it out before installing to see how well it works with your hardware..
you should go through with the article first..