SSL (Secure Sockets Layer) is a cryptographic protocol that allows secure data flow between a server and its clients using symmetric/asymmetric keys by using a digital certificate signed by a Certificate Authority (CA).
Requirements
This tutorial provides an approach on how to set up Secure Sockets Layer (SSL) communication cryptographic protocol on Apache Web Server installed in Red Hat Enterprise Linux/CentOS 7.0, and generate self-signed Certificates and Keys with the help of a bash script which greatly simplifies the entire process.
Step 1: Install and Configure Apache SSL
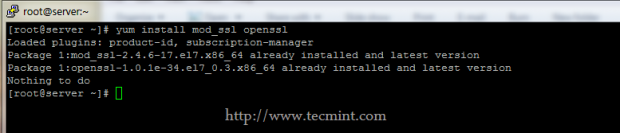
1. To enable SSL on Apache HTTP Server use the following command to install SSL Module and OpenSSL tool-kit which is needed for SSL/TLS support.
# yum install mod_ssl openssl
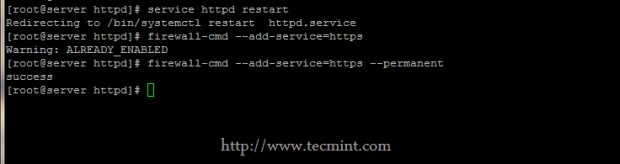
2. After SSL module has been installed, restart HTTPD daemon and add a new Firewall rule to ensure that SSL port – 443 – it’s opened to outside connections on your machine in listen state.
# systemctl restart httpd
# firewall-cmd --add-service=https   ## On-fly rule

# firewall-cmd --permanent  --add-service=https   ## Permanent rule – needs firewalld restart
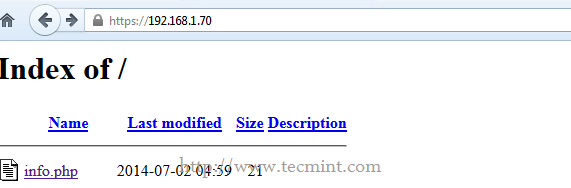
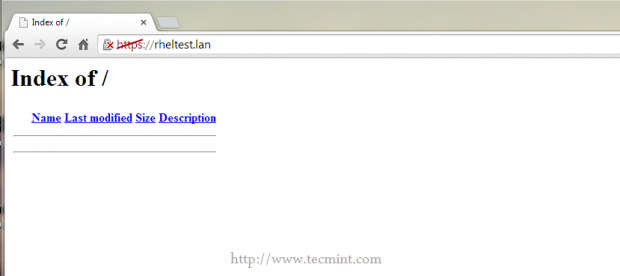
3. To test SSL connection, open a remote browser and navigate to your server IP address using HTPS protocol on https://server_IP.
Step 2: Create SSL Certificates and Keys
4. The previous SSL communication between the server and client was done using a default Certificate and Key automatically generated on installation. In order to generate new private keys and self-signed certificates pairs create the following bash script on a executable system path ($PATH).
For this tutorial /usr/local/bin/ path was chosen, make sure the script has executable bit set and, then, use it as a command to create new SSL pairs on /etc/httpd/ssl/ as Certificates and Keys default location.
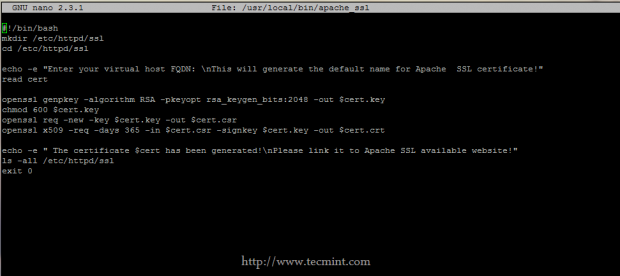
# nano /usr/local/bin/apache_ssl
Use the following file content.
#!/bin/bash
mkdir /etc/httpd/ssl
cd /etc/httpd/ssl

echo -e "Enter your virtual host FQDN: \nThis will generate the default name for Apache SSL Certificate and Key!"
read cert

openssl genpkey -algorithm RSA -pkeyopt rsa_keygen_bits:2048 -out $cert.key
chmod 600 $cert.key
openssl req -new -key $cert.key -out $cert.csr
openssl x509 -req -days 365 -in $cert.csr -signkey $cert.key -out $cert.crt

echo -e " The Certificate and Key for $cert has been generated!\nPlease link it to Apache SSL available website!"
ls -all /etc/httpd/ssl
exit 0
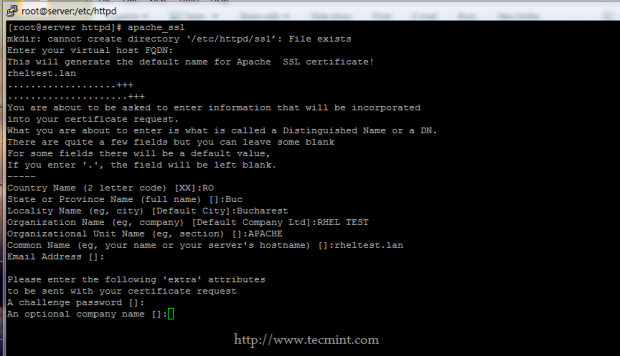
5. Now make this script executable and launch it to generate a new pair of Certificate and Key for your Apache SSL Virtual Host.
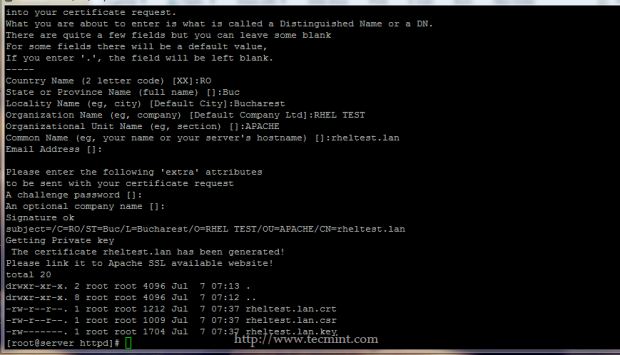
Fill it with your information and pay attention to Common Name value to match your server FQDN or in case of Virtual Hosting to match the Web address you will be accessing when connecting to a secure website.
# chmod +x /usr/local/bin/apache_ssl
# apache_ssl
6. After the Certificate and Key are generated, the script will present a long listing of all your Apache SSL pairs stored in /etc/httpd/ssl/ location.
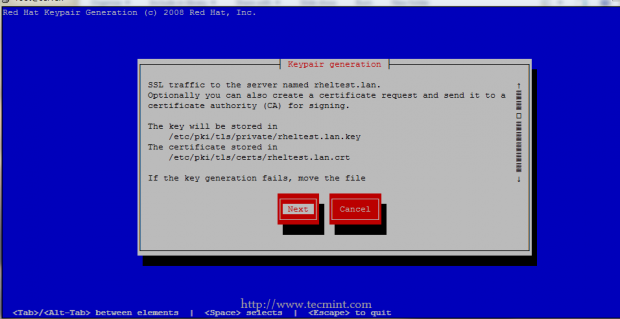
7. Other approach on generating SSL Certificates and Keys is by installing crypto-utils package on your system and generate pairs using genkey command, which can impose some problems especially when used on a Putty terminal screen.
So, I suggest to use this method only when you are directly connected to a screen monitor.
# yum install crypto-utils
# genkey your_FQDN
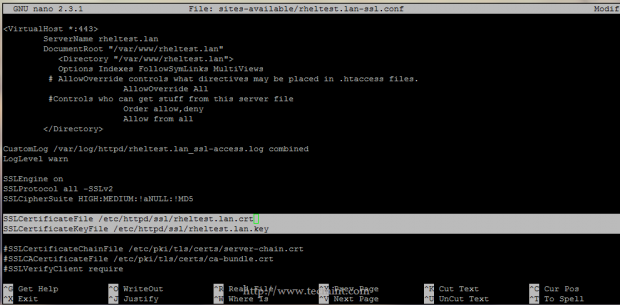
8. To add the new Certificate and Key to your SSL website, open your website configuration file and replace SSLCertificateFile and SSLCertificateKeyFile statements with the new pairs location and names accordingly.
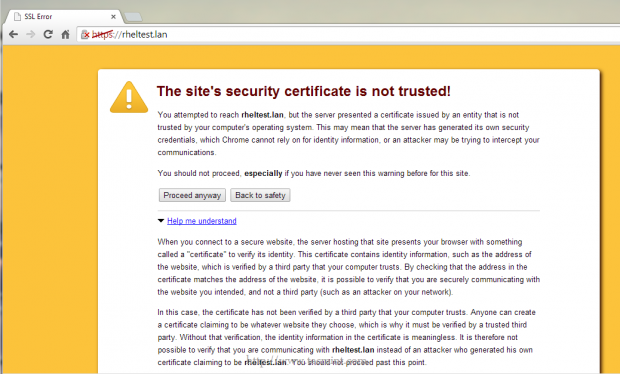
9. If the Certificate is not issued by a trusted CA – Certification Authority or the hostname from certificate does not match the hostname who establish the connection, an error should appear on your browser and you must manually accept the certificate.
That’s it! Now you can use apache_sslas a command line on RHEL/CentOS 7.0 to generate as many pairs of self-signed Certificates and Keys you need, and all will be kept on /etc/httpd/ssl/ path with the Key file protected with 700 permissions.


WOW just what I was looking for. Came here by searching for create ssl certificates
remove the previous message my mistake I forgot the chmod for the file.
Hi I did try the ‘apache_ssl’ script but nothing happens.
Question: is there a option for error logging in the script?