After a surprising postpone of the release date, the Fedora Project has finally released the highly anticipated version 23 of the Fedora operating system.
For those of you who haven’t heard about Fedora – it’s a Linux distribution developed by the community supported Fedora Project and sponsored by no other, but Red Hat. An interesting fact (according to Wikipedia) is that Linux Torvalds uses Fedora on all of his computers.
Fedora comes in three editions:
- Workstation – for general use on Desktop machines and laptops
- Server – for server installations and management
- Cloud – for Cloud and Docker related application hosting
Here are some of the new features that come in all three releases:
Fedora 23 Workstation
- Linux Kernel 4.2
- GNOME 3.18
- LibreOffice 5
- Fedup has been replaced with DNF
- Cinnamon spin
- Firmware updates
Fedora 23 Server
- Cache server for web applications
- Updates in Cockpit – supports Kubernetes container orchestration system
- Complete conversion to systemd
- Python 3 used instead of Python 2
- New Perl version 5.22
- SSLv3 is disabled by default
- Unicode 8.0
- Mono 4
Fedora 23 Cloud
While there have been no major updates in the Cloud edition of Fedora 23 – there have been some security enhancement an performance optimization tweaks.
Preparation
In this tutorial we are going to show you how to install Fedora 23 Workstation on your system. If you already have an earlier version of Fedora installed on your system, you can check our Upgrade guide:
To complete the installation, you will need to download the latest Fedora 23 Workstation image from the official website. You will need to choose the package that matches your system’s architecture. You can use the links below to complete the downloads.
Note that the links are temporary unavailable for download, but we hope that Fedora team will soon make them available..
Download Fedora 23 Workstation Live Image
Download Fedora 23 Workstation Netinstall Image
Installation of Fedora 23 Workstation
1. Once the download is complete, you will need to prepare a bootable media – USB Flashdrive or CD/DVD. To complete this task, you can follow the instructions provided here:
2. Finally when your bootable media is prepared and ready, plug it in the appropriate port/device and boot from it. You will now see the first Fedora 23 installation screen:
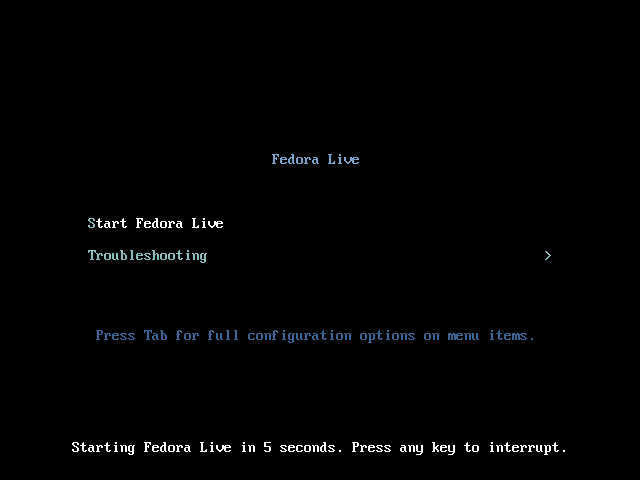
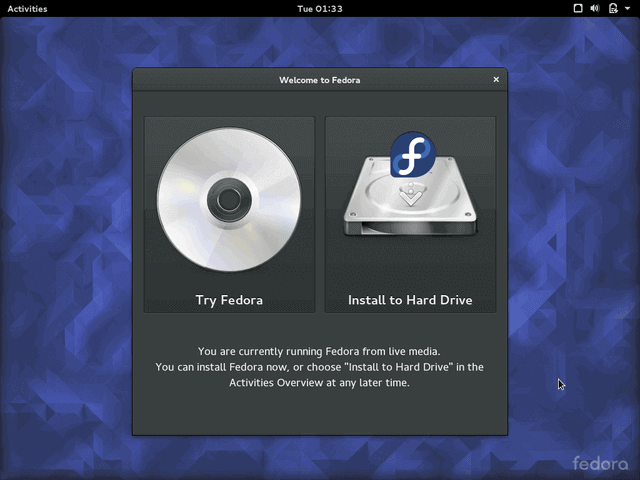
3. You have the option to try fedora without installing or directly run the installation wizard. If you want to play with Fedora, prior installing it, you can choose the first option.
For the purpose of this tutorial, we will use “Install to Hard Drive“.
4. On the next step the installer will ask you to choose your language:
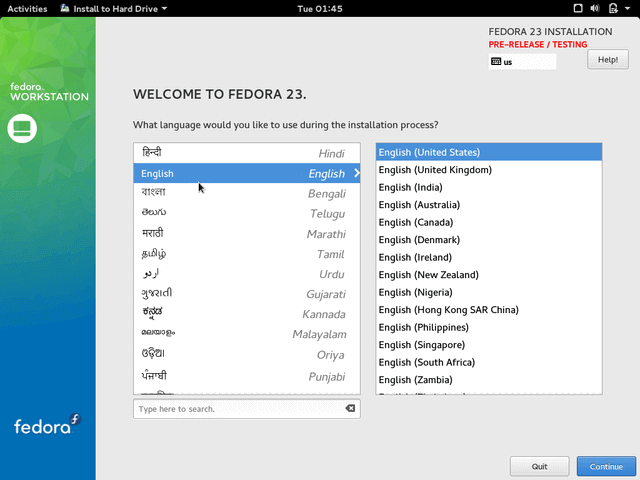
5. Once you’ve made your choice, click the “Continue” button that will take you to the next screen. Here you can customize your Fedora installation by configuring:
- Keyboard Layout
- Time and date (automatically detected if connected to internet)
- Installation destination
- Network & Hostname
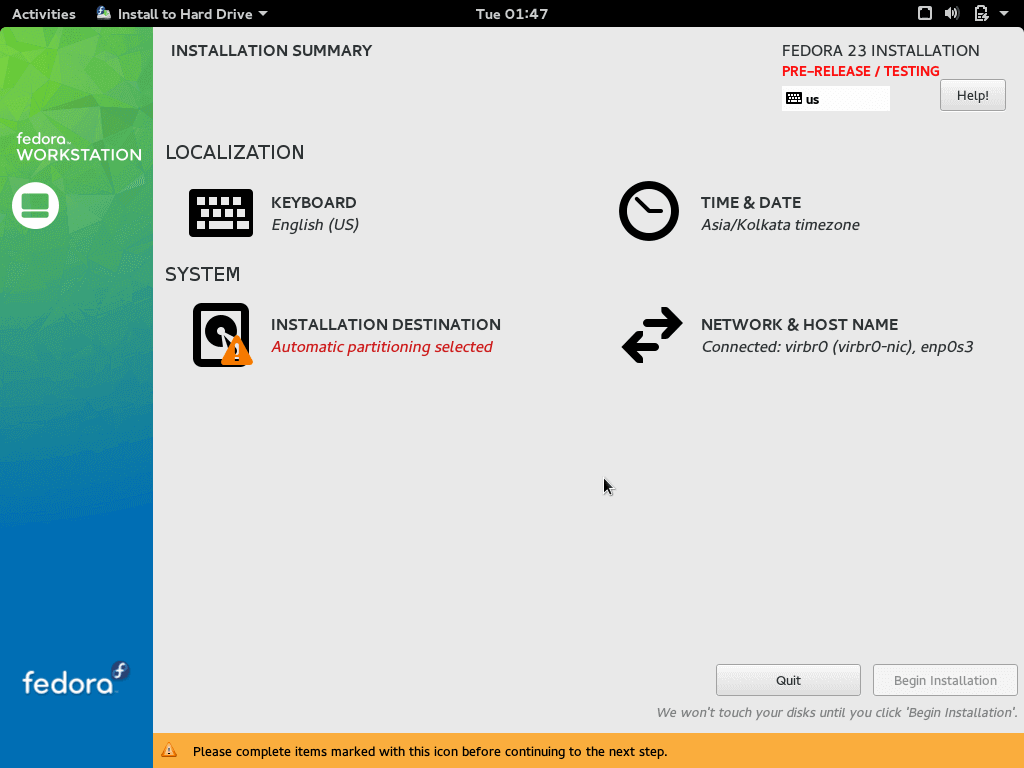
We will go through each of the sections separately and discuss their options.
Configure Keyboard Layout
5. The keyboard layout will be predefined with the language you have selected. If you want to add more, click the Plus "+" sign and add more layouts. When ready click the “Done” button:

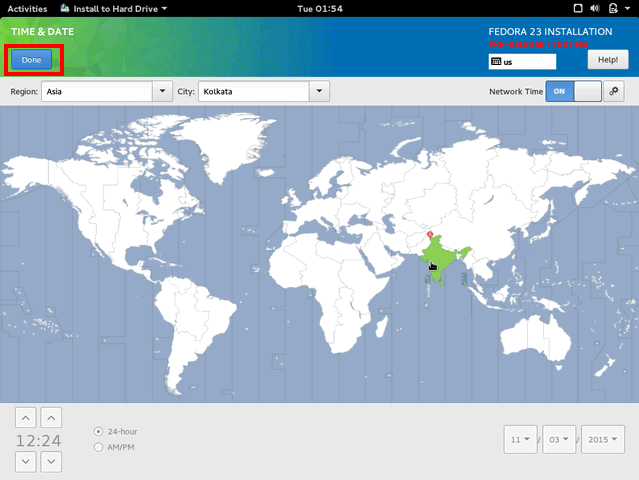
Set Time & Date
6. Time & date section allows you to configure the time and data on your system. It’s automatically detected if your system is connected to the internet. Otherwise you can manually specify the timezone. When you have finished editing the settings, click “Done“:
Configure Installation Destination
7. This is where you can configure your disk partitions. To configure this, click the disk image and select “I will configure partitions manually”
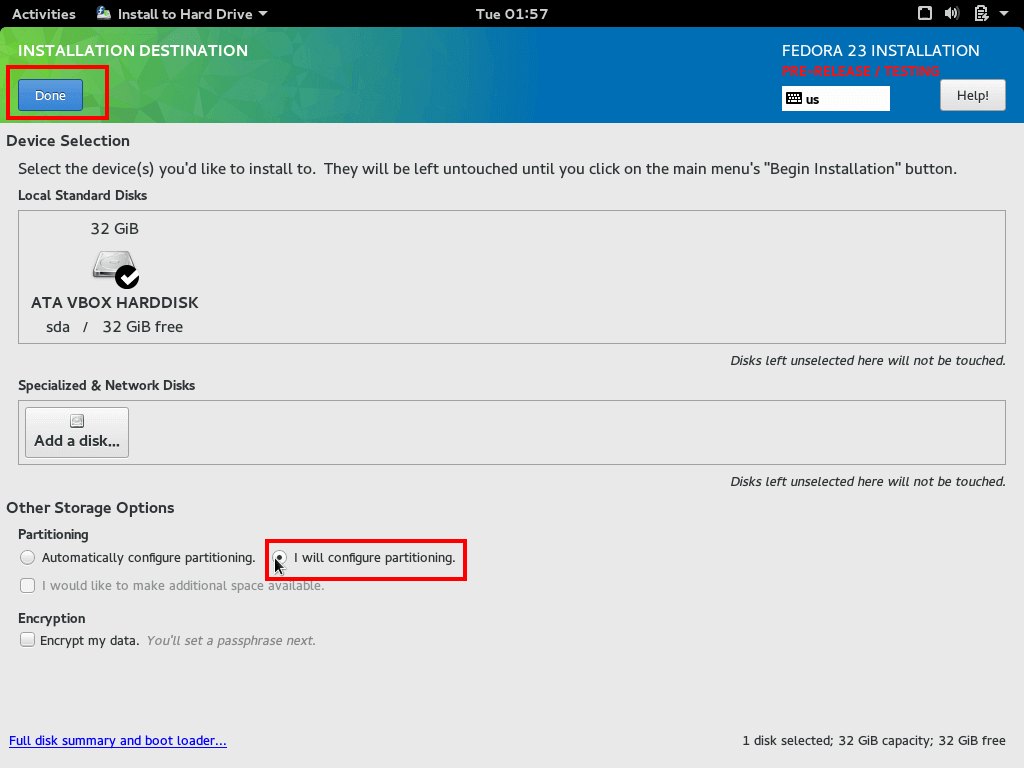
8. Now click “Done” so you can be taken to the next screen where you can configure the partitions. In there, change the “Partition Scheme” to “Standard Partition“:
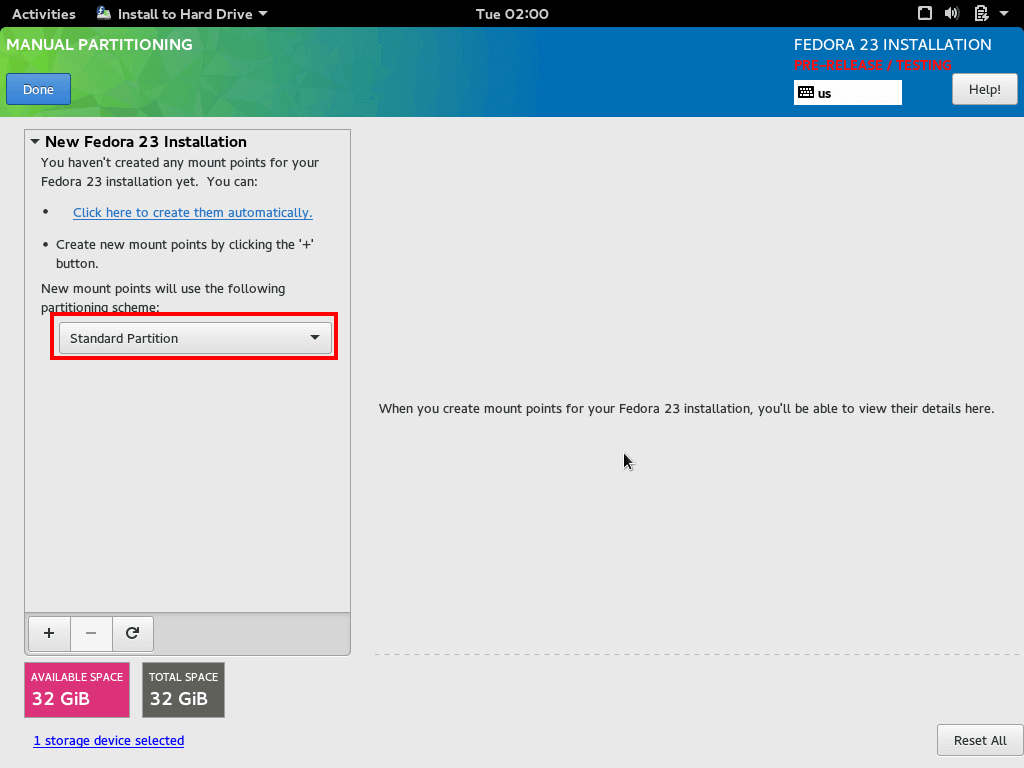
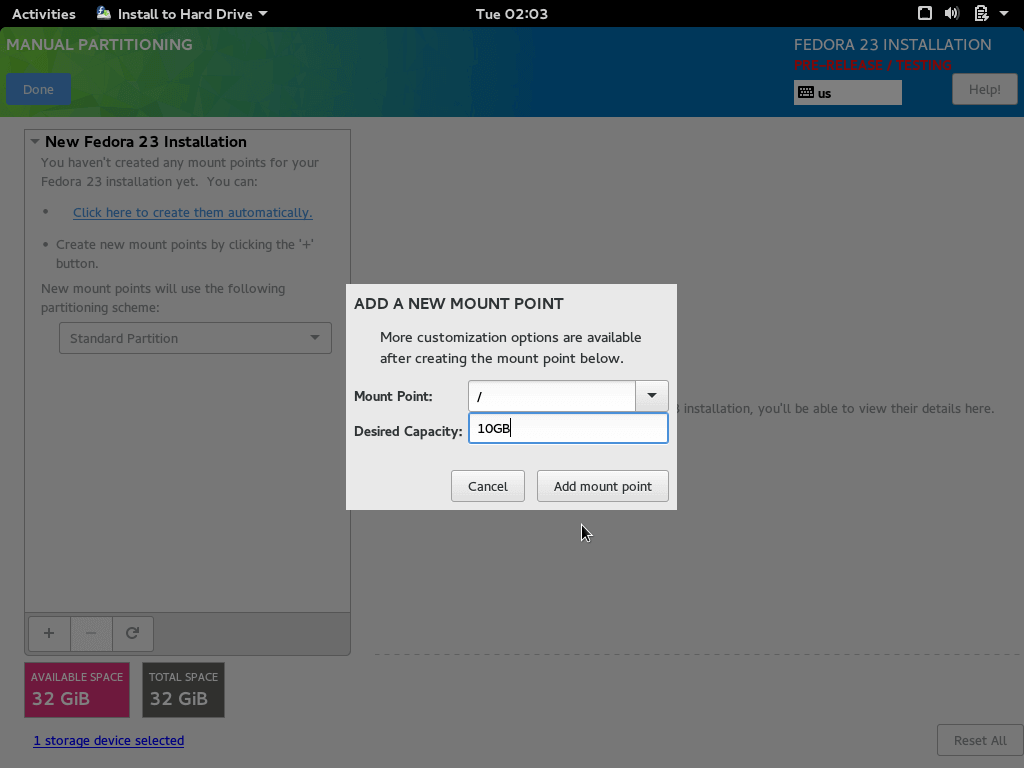
9. To create new partitions click the "+" sign and create new partition. The mount point should be set to "/":
Now you have the options to customize your root partition. If you want to you can change it’s size. For the purpose of this tutorial, we have set the root partition to 10 GB which should be more than enough:
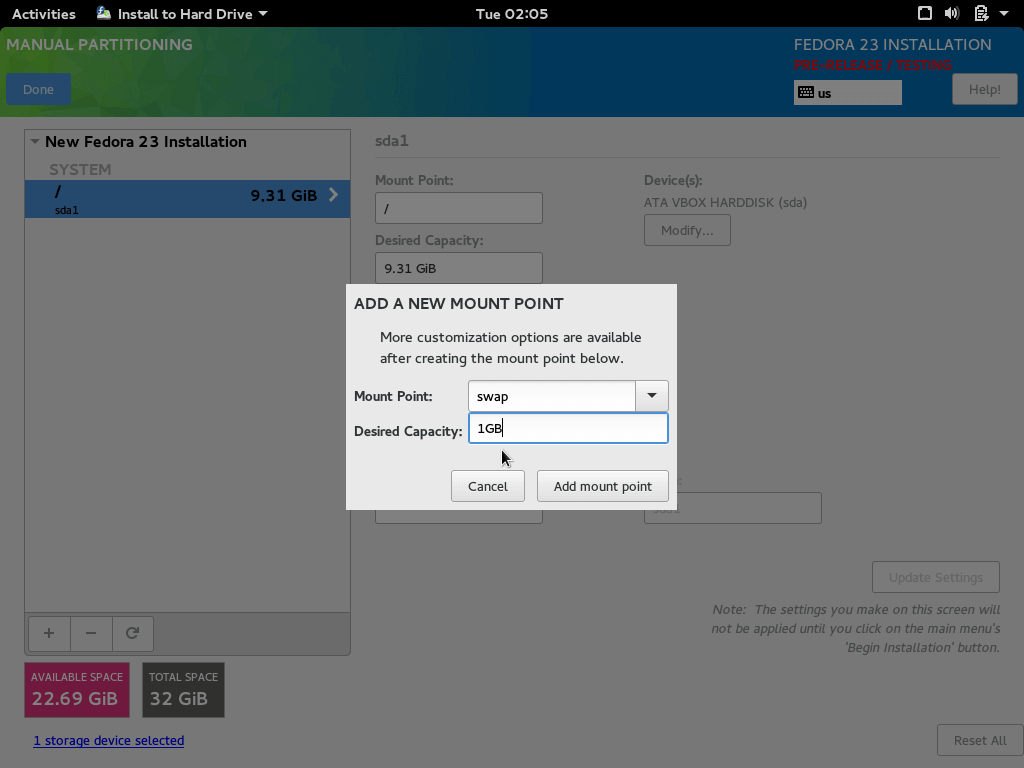
10. Now let’s add some swap space for our Fedora installation. Swap partition should be about 1 GB or double the RAM. Newer computers come with plenty of RAM so 1 GB should be more than enough:
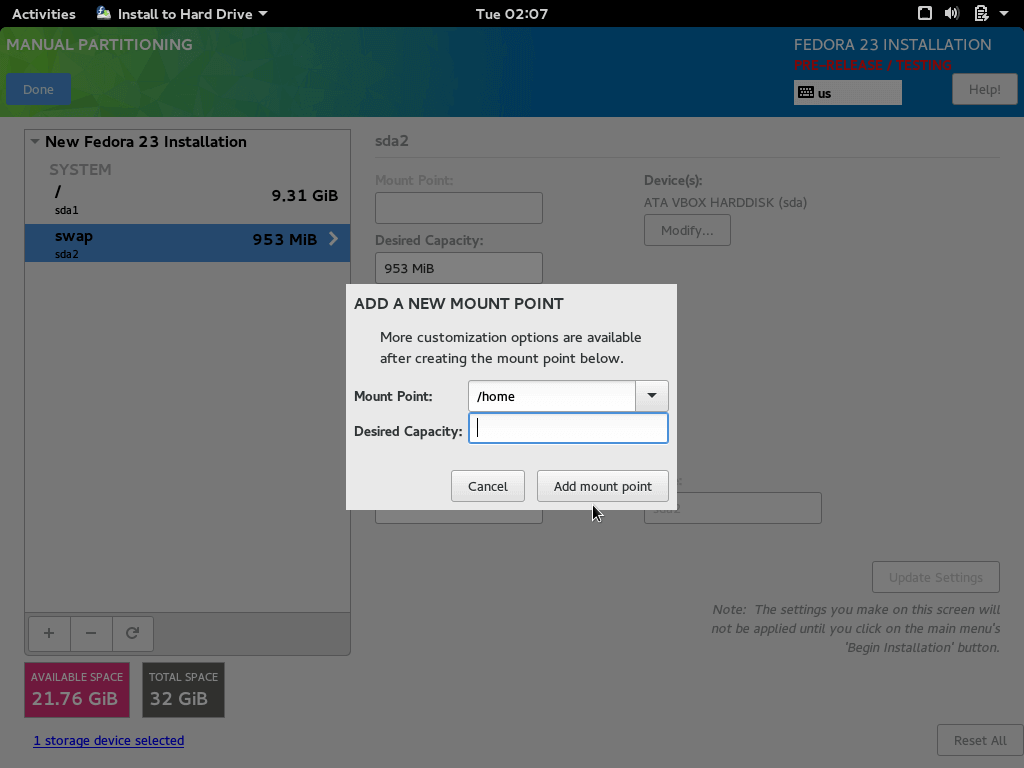
11. Finally add the "home" partition. It should take the rest of the available disk space. Follow the same steps and for “mount point” select “/home”. To use all the remaining space leave the “desired capacity” field blank:
You are now ready to proceed by clicking the “Done” button. The installer will show a screen of the changes that will be made to the disk. Review them and click “Accept” if everything is ok:

Configure Network and Hostname
12. You will now be brought back to the configuration screen. Click on “Network and Hostname” to configure your system’s hostname:
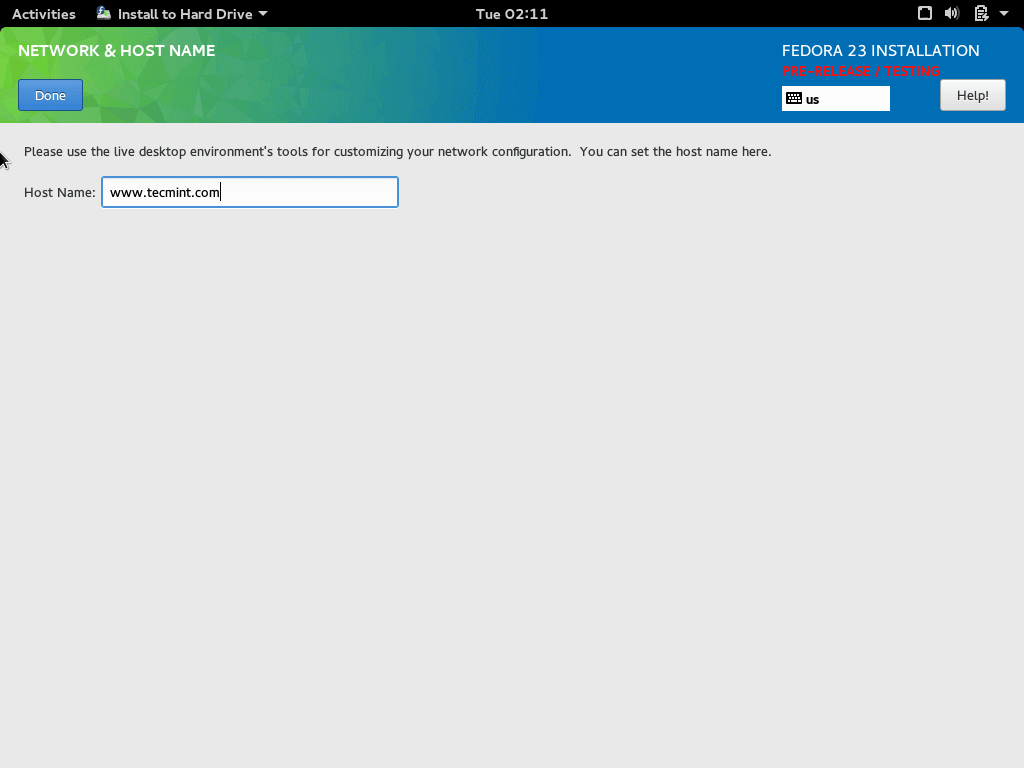
When ready click the “Done” button.
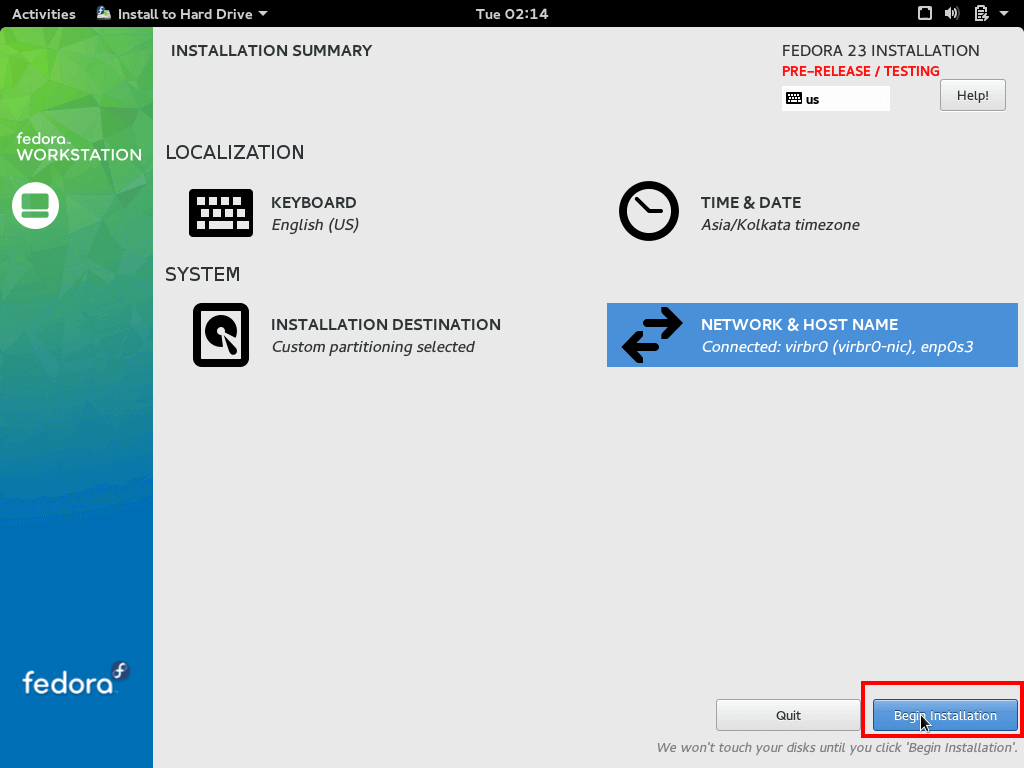
Fedora 23 Begin the install
13. Back to the configuration screen, you are now ready to finish the installation process. For that purpose click the “Begin Installation” at the bottom right:
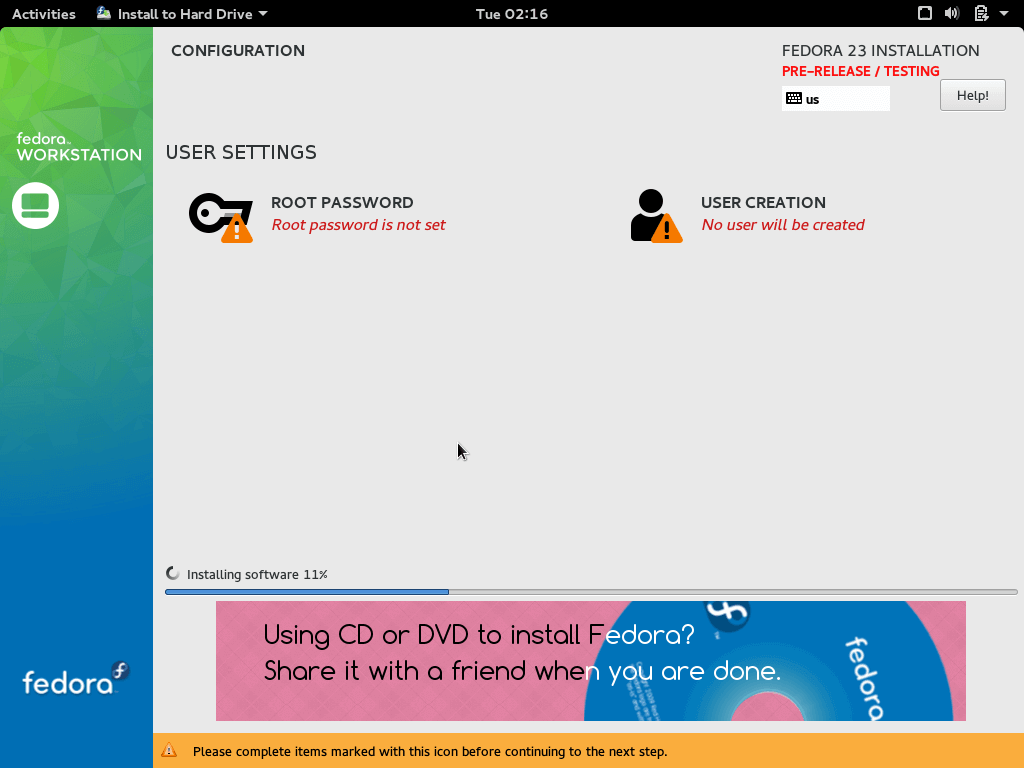
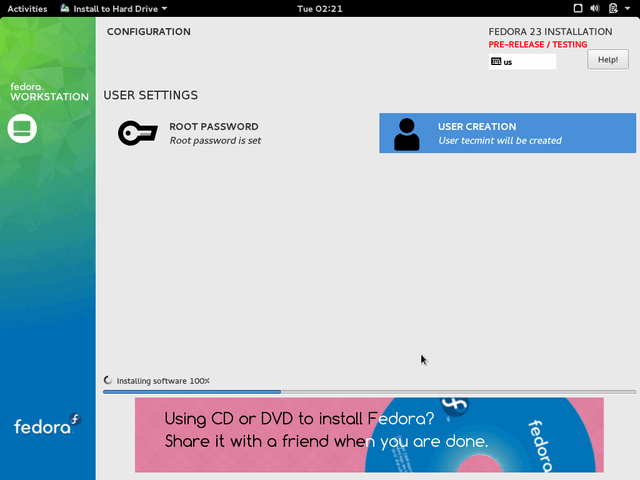
14. While the installation runs, you can configure the root user’s password and create additional user:
15. Click on “Root Password” to setup the password for the root user:
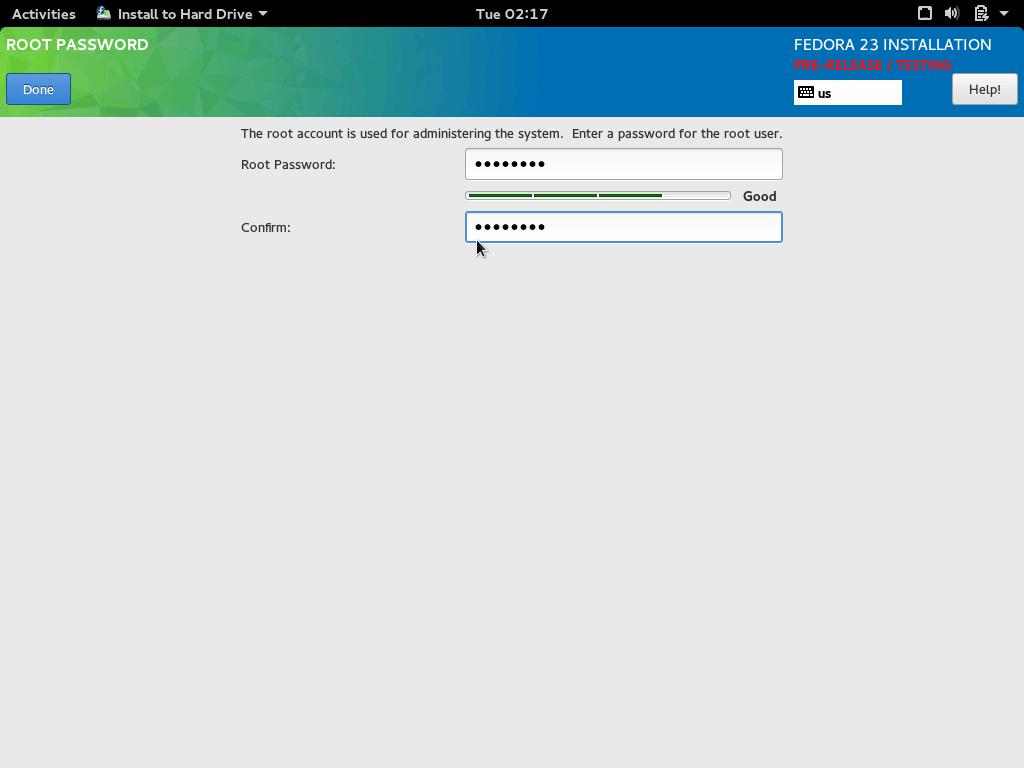
When ready click “Done” and go to the next screen.
16. Create your new user by setting:
- Full Name
- Username
- Choose to give the user administrative privileges
- Require password upon login
- Password
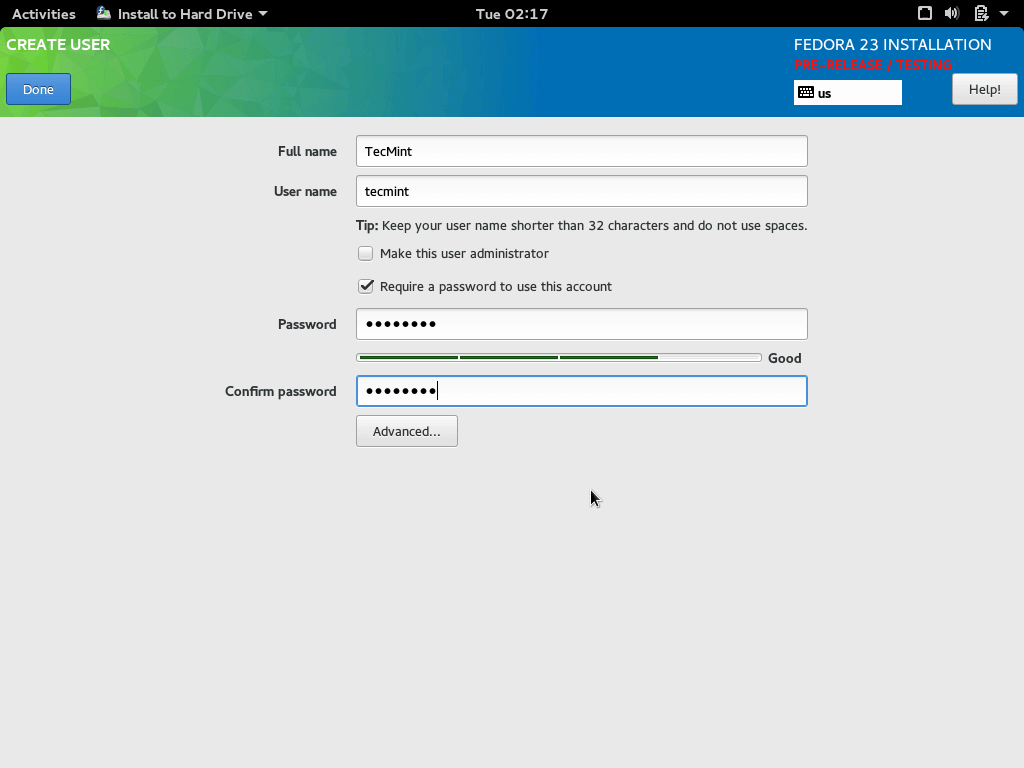
Once you are ready with that, click the “Done” button and wait for the installation to finish.
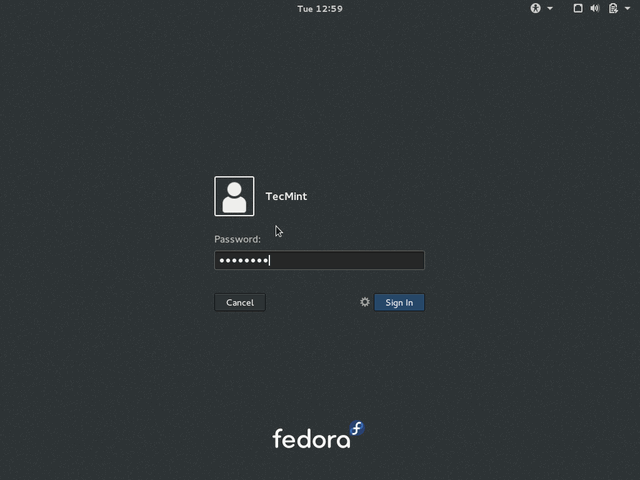
17. When ready, you will need to eject your installation media and boot to your brand new Fedora 23 installation.
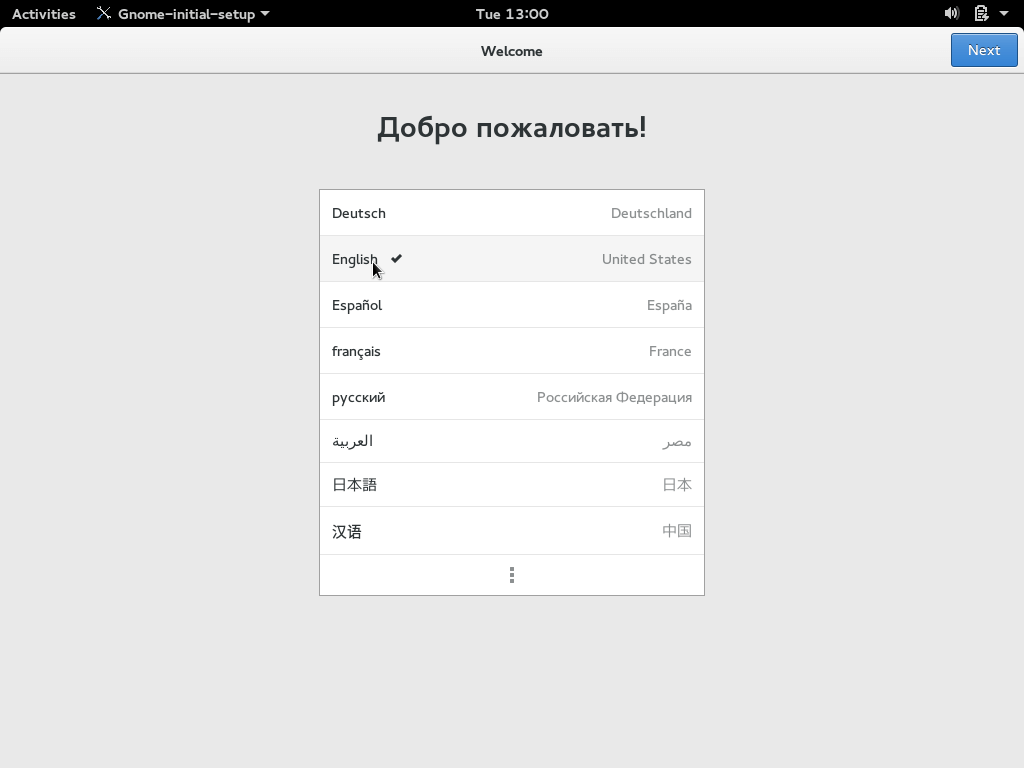
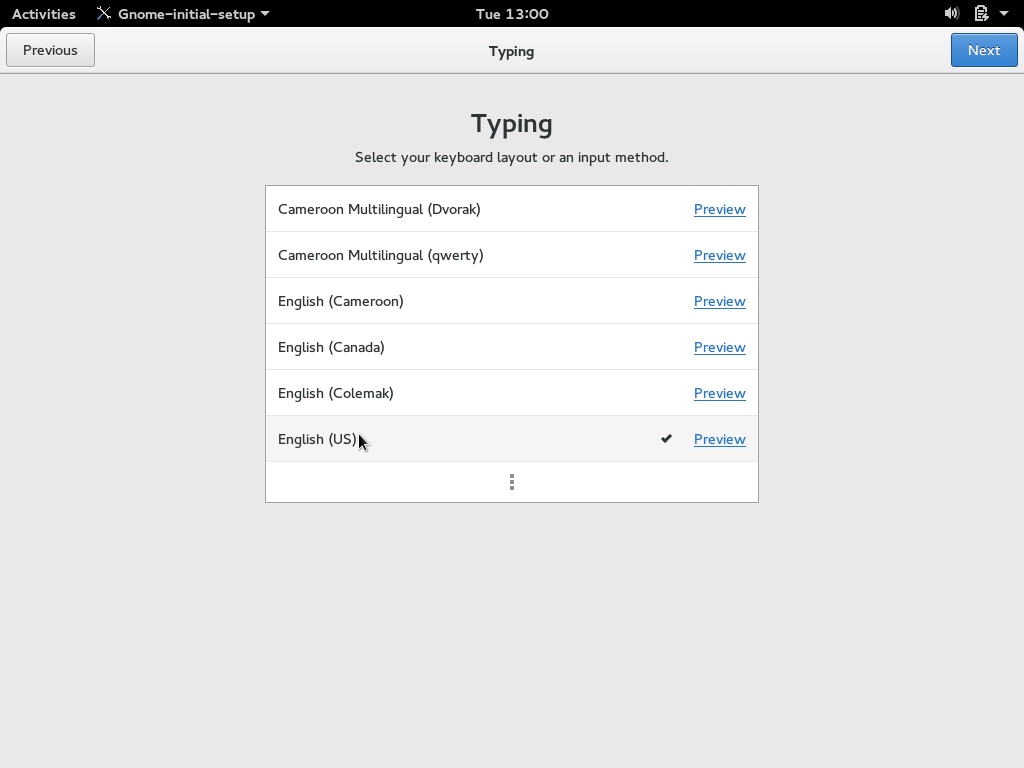
18. When you first login, you will be asked to choose your language preferences and keyboard settings once more. After that you will be asked to adjust the privacy settings for your user:
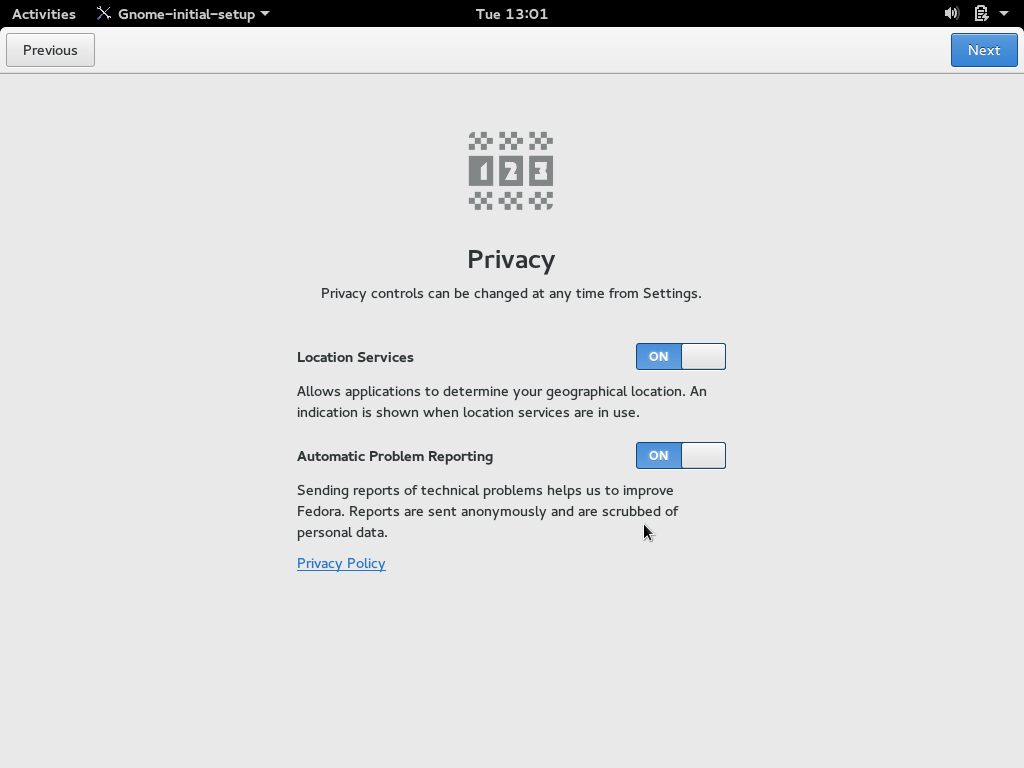
19. You can choose whether or not to disable location services and problem reporting. After that you can connect an online account to your Fedora 23:
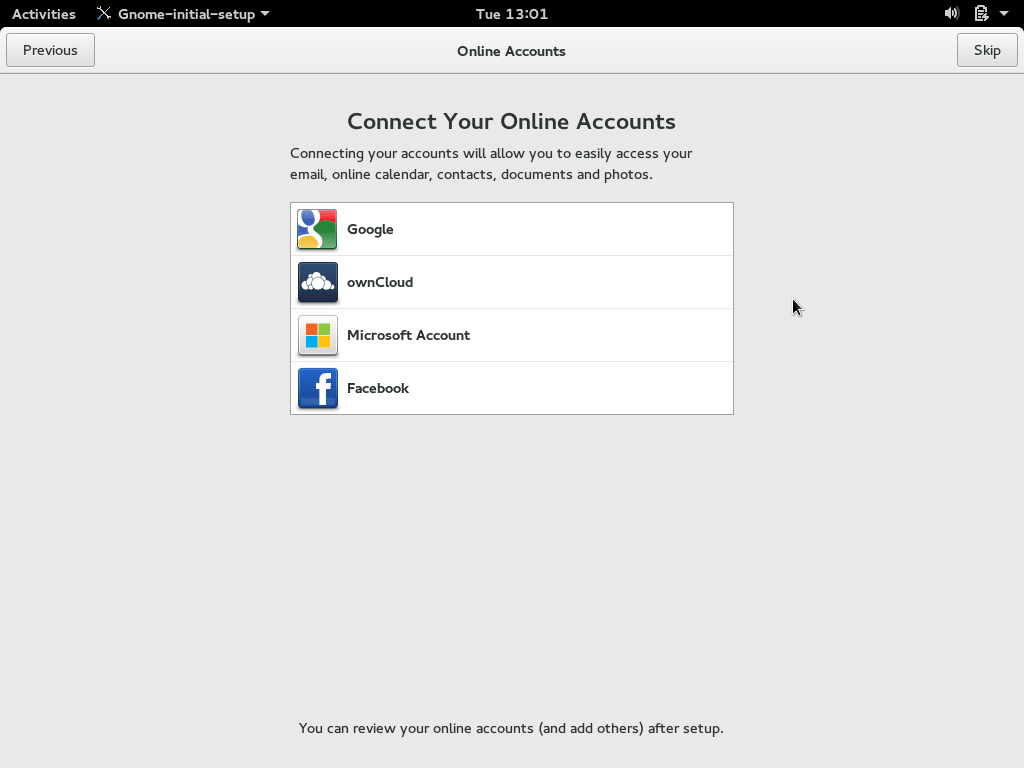
If you don’t feel like setting up an online account right now, you can skip that setting.
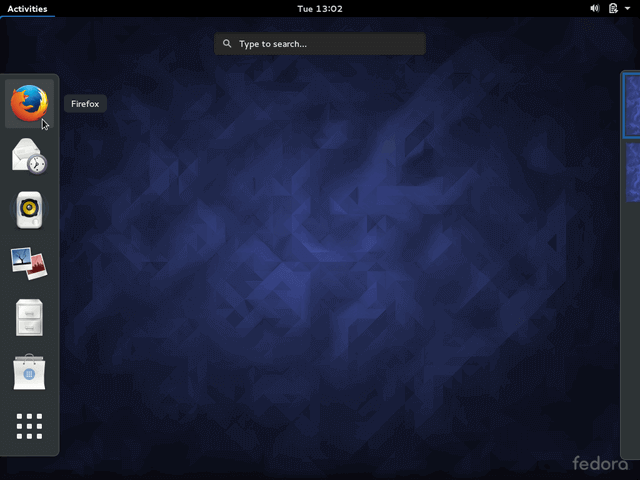
20. Finally your Fedora 23 is ready to use.

Read Also: 24 Things to Do After Fedora 23 Installation


I’m sure this is all very interesting for someone NOT familiar with Linux or Fedora for that matter. Great job in that sense :))
But how about some more deep stuff? What filesystems are supported upon installation? In particular, is ZFS supported? Sure I can download the installer and go all the way to the point when this becomes clear… but I hoped you who already spent your precious time to check up things like this could tell something.
Anyway, thaks for your effort.