In the previous topic, you learn about basic Ansible terminologies and basic concepts. In this topic (Part 2 of Ansible series), we will demonstrate how you can install and configure an Ansible control node on RHEL 8.
In our setup, we are going to use 1 Ansible server and 2 remote Linux nodes:
Control Node 1: RHEL 8 Server     IP: 192.168.0.108         Ansible Server
Managed Host 1: Debian 10         IP: 192.168.0.15          Webserver
Managed Host 2: CentOS 8          IP: 192.168.0.200	    Database Server
What is an Ansible Control Node?
A control node is a Linux server that has Ansible installed on it and is used for managing remote hosts or nodes. These remote systems are known as Managed Hosts or Managed nodes.
In the setup above, the control node is the RHEL 8 server on which Ansible will be installed and Debian 10 & CentOS 8 are the managed hosts.
NOTE: Ansible is only installed on the control node and not the managed hosts.
Step 1: Installing Python 3
By default, RHEL 8 comes with Python 3 and you can verify the version of Python installed on your server by running.
# python3 -V

If for whatever reason Python3 is not installed, install it using the following dnf command.
# dnf install python3

If multiple versions of Python exist on your RHEL 8 system, you can set Python 3 as the default Python version by running.
# alternatives --set python /usr/bin/python3

Step 2: Enable Official RedHat Repository
After installing Python3, make sure that you have enabled RedHat’s official repository for Ansible as shown below.
# subscription-manager repos --enable ansible-2.8-for-rhel-8-x86_64-rpms

NOTE: For the above command to work, ensure that you have registered your RHEL 8 for RedHat subscription.
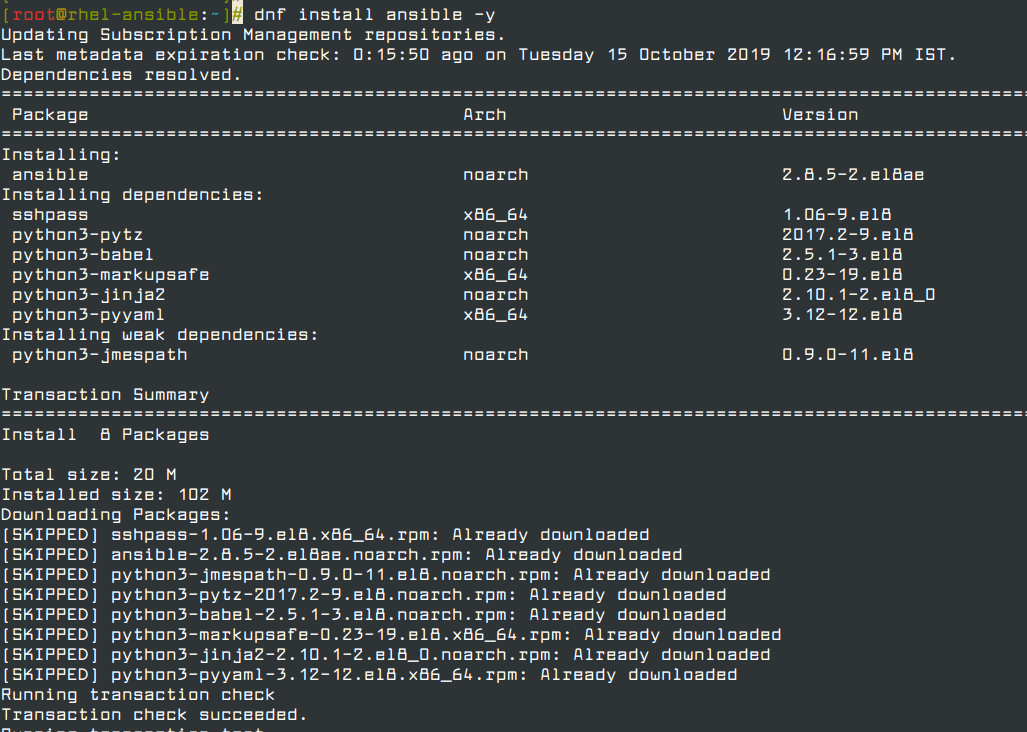
Step 3: Install Ansible on RHEL 8
To install Ansible on the Control node which is our RHEL 8 system, run the command.
# dnf install ansible -y
Once installed, you can check the version of Ansible installed by running the command.
# ansible --version

Step 4: Creating a Static Host Inventory File
So far, we have successfully installed ansible on the Control Node which is our RHEL 8 server. The remote nodes to be managed by the control node need to be defined in a file called the inventory file. The inventory file is a plain text file that resides on the control node and consists of the remote hosts’ hostnames or IP addresses.
A static host file is a plain text file that contains a list of managed nodes defined by their IP addresses or hostnames. Let’s create a static file ‘hosts‘ in the /etc/ansible/ directory.
# vi /etc/ansible/hosts
Next, define a group or groups for your managed hosts. We have 2 managed hosts as earlier seen in the setup at the introduction of this topic. From the setup, the static host file will be defined as follows:
[webserver]
192.168.0.15

[database_server]
192.168.0.200
Save and exit the inventory file.
To list managed hosts run:
# ansible all -i hosts --list-hosts

Thus far, we have managed to install Ansible in the control node and define the managed hosts in a static Host file residing on the control node.
Next, we are going to see how we can manage or control our remote or managed hosts.
Step 5: Setup the Ansible Control Node to Connect with the Remote Nodes
For the Ansible control node (RHEL 8) to manage the remote host systems (Debian 10 and CentOS 8) we need to set up passwordless SSH authentication to the remote hosts. For this to happen, you need to generate an SSH key pair and save the public key to the remote nodes.
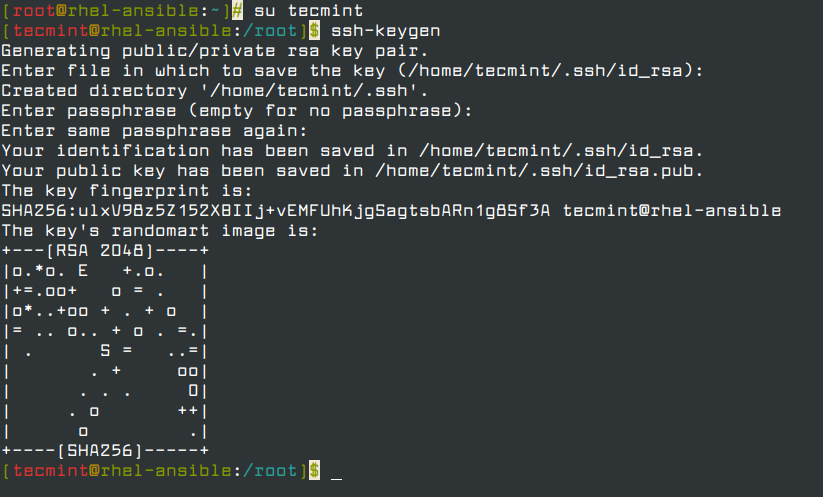
On the Ansible control node, log in as a normal user and generate the SSH key pair by running the command.
# su tecmint
$ ssh-keygen
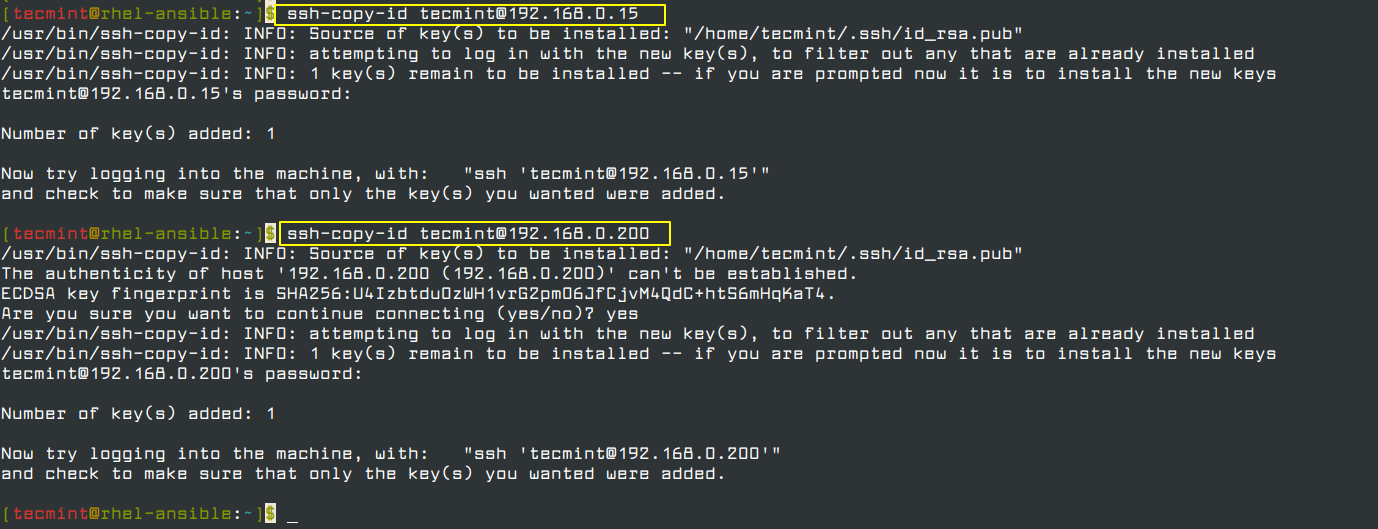
Next, copy the public ssh key to remote nodes as shown.
$ ssh-copy-id [email protected]	        (For Debian 10 node)
$ ssh-copy-id [email protected]	        (For CentOS 8 node)
Having added the public keys to all of our remote nodes, we are going to issue a ping command from the Ansible Control node to ensure that they are reachable.
$ ansible -m ping all
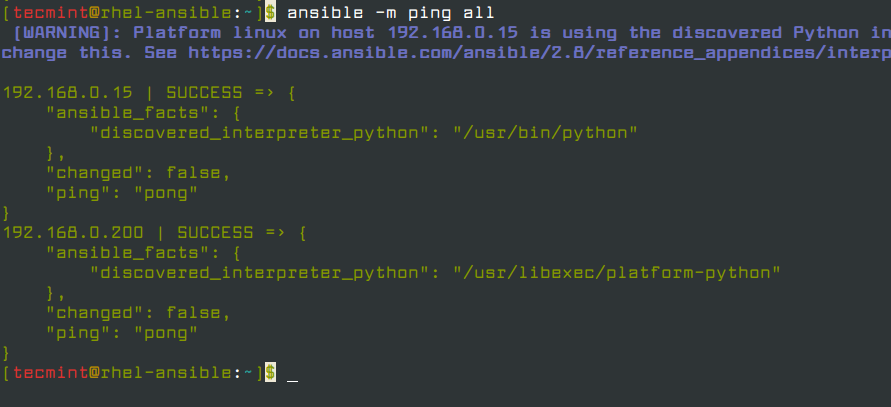
From the output above, we can clearly see that the ping command was successful and we were able to test reachability to all the nodes.
Conclusion
In this guide, we successfully installed and set up Ansible on the control node running RHEL 8. We later defined the remote hosts in a static host file and configured the control node to connect and control the managed hosts by setting up SSH passwordless authentication.


I didn’t understand how managed nodes trust to control node. In this way any people can do this with their server, so they can connect my server. Don’t we have to authenticate the ansible control node at our local systems (managed nodes)?