Docker is a most popular, open-source platform for developers and system administrators to build, run, and share applications with containers. Containerization (the use of containers to deploy applications) is becoming popular because containers are flexible, lightweight, portable, loosely coupled, scalable, and more secure.
This article is a good starting point for beginners to learn how to install and use Docker on a Ubuntu 20.04 Linux system with some basic commands. For this guide, we will install Docker Community Edition (CE).
Prerequisites:
Installing Docker on Ubuntu 20.04
To use the latest version of Docker, we will install it from the official Docker repository. So, start by adding the GPG key for the official Docker repository to your system, after that add the repository configuration to the APT source with the following commands.
$ curl -fsSL https://download.docker.com/linux/ubuntu/gpg | sudo apt-key add -
$ sudo add-apt-repository "deb [arch=amd64] https://download.docker.com/linux/ubuntu focal stable"
Now update the APT package cache to include the new Docker packages to the system using the following command.
$ sudo apt update
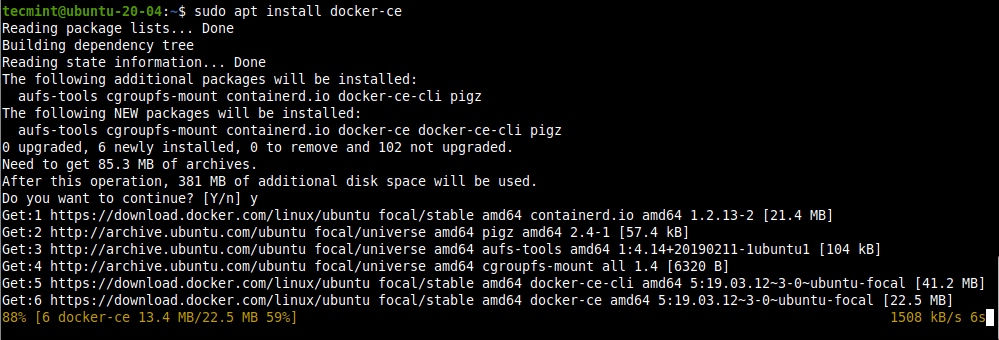
Next, install the Docker package as shown.
$ sudo apt install docker-ce
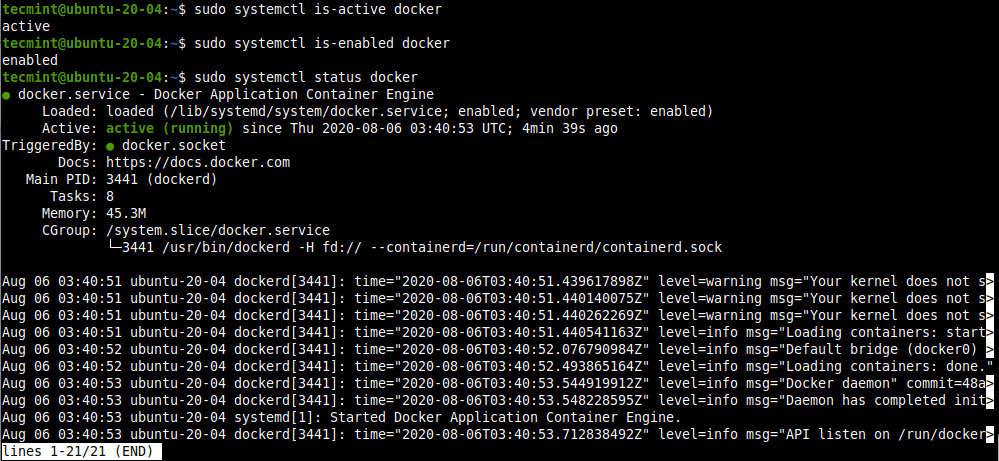
During the Docker package installation process, the package installer triggers the systemd (system and service manager) to automatically start and enable the docker service. Using the following commands to confirm that the docker service is active and is enabled to automatically start at system startup. Also, check its status:
$ sudo systemctl is-active docker
$ sudo systemctl is-enabled docker
$ sudo systemctl status docker
There are several other systemctl commands to manage and control the docker service which includes the following:
$ sudo systemctl stop docker			#stop the docker service
$ sudo systemctl start docker			#start the docker service
$ sudo systemctl  restart docker		#restart the docker service
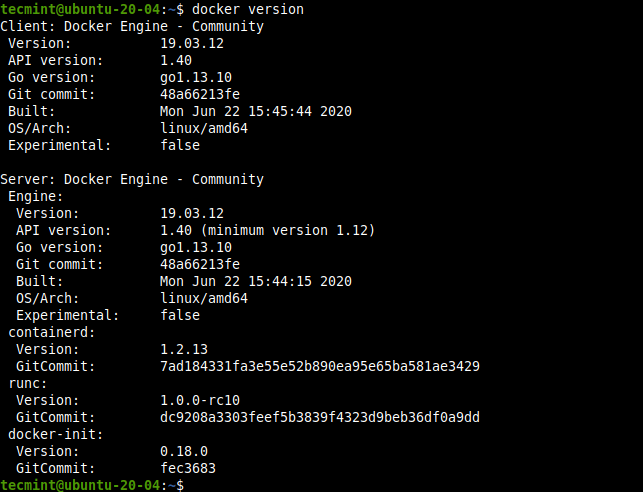
To check the version of Docker CE installed on your system, run the following command:
$ docker version
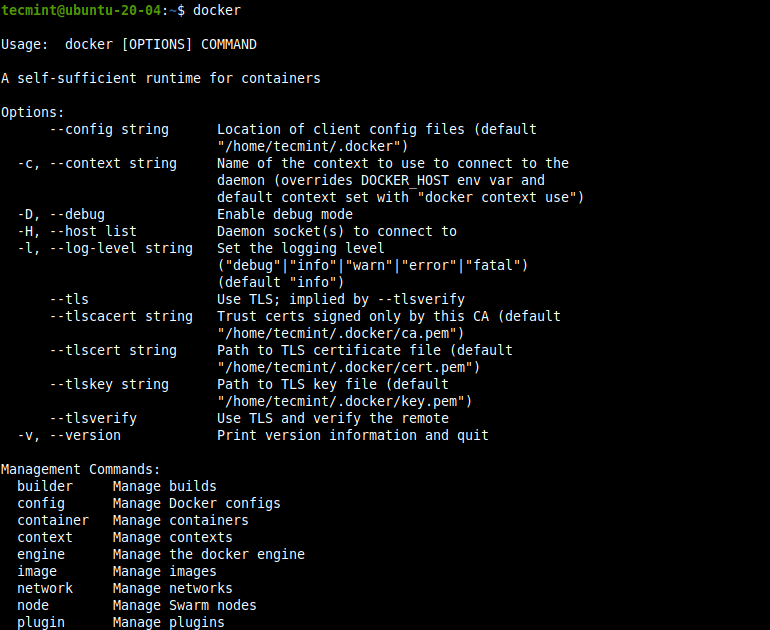
You can view available docker usage commands by running the docker command without any options or arguments:
$ docker
Manage Docker as a non-root User with sudo Command
By default, the Docker daemon binds to a UNIX socket (instead of a TCP port) which is owned by the user root. Therefore the Docker daemon always runs as the root user and to run the docker command, you need to use sudo.
Besides, during the Docker package installation, a group called docker is created. When the Docker daemon starts, it creates a UNIX socket accessible by members of the docker group (which grants privileges equivalent to the root user).
To run the docker command without sudo, add all non-root users who are supposed to access docker, in the docker group as follows. In this example, the command adds the currently logged on user ($USER) or username to the docker group:
$ sudo usermod -aG docker $USER
OR
$ sudo usermod -aG docker username
To activate the changes to groups, run the following command:
$ newgrp docker
$ groups

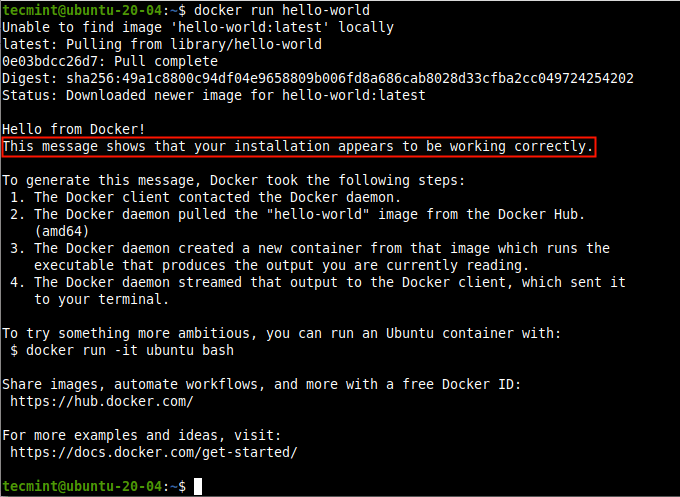
Next, verify that you can run docker commands without sudo. The following command downloads a test image and runs it in a container. Once the container is running, it prints an informational message and exits. This is also another way to cross-check whether your installation is working fine.
$ docker run hello-world
Working with Docker Images
A Docker image is a read-only template file with instructions for creating a Docker container. You can either create your custom images or you can only use those created by others and published in the Docker Hub, the world’s largest library and community for container images.
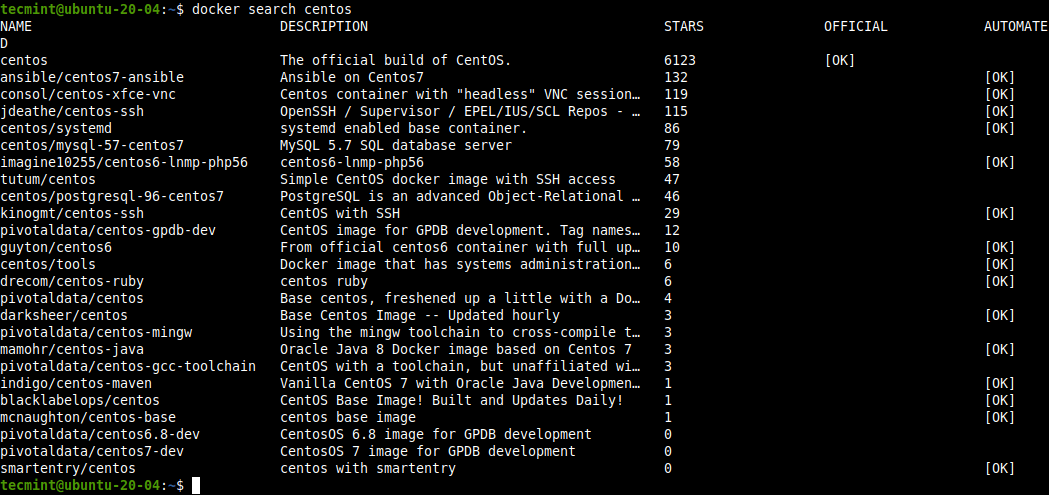
You can search for an centos image in the Docker Hub with the following command:
$ docker search centos
To download an image locally, use the pull command. This example shows how to download the official centos image.
$ docker pull centos

Once the download is complete, you can list the available images on your local system.
$ docker images

If you no longer need an image, you can remove it from your system.
$ docker rmi centos
OR
$ docker rmi centos:latest    #where latest is the tag
Running and Managing Docker Containers
A Docker container is a process that runs natively on Linux and shares the kernel of the host machine with other containers. Concerning a Docker image, a container is just a running image.
To start a container based on your new centos image, run the following command where “centos” is the local image name and “cat /etc/centos-release” is the command to run in the container:
$ docker run centos cat /etc/centos-release

A container runs a discrete process that is isolated in that it has its own: file system, networking, and isolated process tree separate from the host. Note that you can manipulate a container using the container’s ID, ID-prefix, or name as shown below. The above container process exits after the command runs.
To list Docker containers, use the docker ps command as follows. Use the -l flag to show the latest created container in all states:
$ docker ps
OR
$ docker ps -l
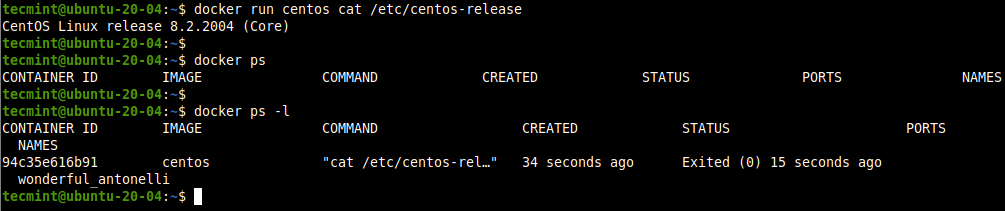
To show all containers including those that have exited, use the -a flag.
$ docker ps -a

You can also start a container using its container ID after it has exited. For example, in the previous command, our container ID is 94c35e616b91. We can start the container as shown (note that it will run the command and exit):
$ docker start 94c35e616b91

To stop a running container using its ID, use the stop command as shown.
$ docker stop 94c35e616b91
Docker also allows you to assign a name to a container using the --name option when running it.
$ docker run --name my_test centos cat /etc/centos-release
$ docker ps -l

Now you can use the container name to manage (start, stop, stats, remove, etc.) the container:
$ docker stop my_test
$ docker start my_test
$ docker stats my_test
$ docker rm my_test
Running an Interactive Session into a Docker Container
To launch an interactive shell session in a container to enable you run commands within the container, run the following command:
$ docker run --name my_test -it centos

In the above command, the -it switches tell Docker to allocate a pseudo-TTY connected to the container’s stdin thus creating an interactive bash shell in the container.
You can exit by issuing the exit command as shown.
# exit
If you prefer not to exit, you can detach from a container and leave it running. To do that, use the CTRL+p then CTRL+q key sequence.

You can connect back to the container using the attach command which will attach local standard input, output, and error streams to the running container:
$ docker attach my_test
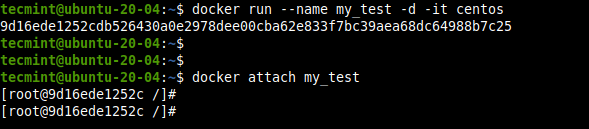
Besides, you can start a container in detached mode using the -d flag. Then use the attach command to attach your terminal’s standard input, output, and error streams to the running container:
$ docker run --name my_test -d -it centos
$ docker attach my_test
Last but not least, you can stop a running container from the host session by running the following command:
$ docker kill my_test
That’s all! In this guide, we have covered how to install and use Docker CE in Ubuntu 20.04 Linux. If you have any questions, use the feedback form below to ask us.


How can I move the default directory to store docker images to a directory I specify.
Good intentions but:
@Ced,
Corrected the systemctl commands in the article…
Thanks