Previously during software development, developers would submit their code to a code repository like GitHub or Git Lab usually, the source code would be fraught with bugs and errors. To make it even worse, developers would have to wait until the entire source code was built & tested to check for errors. This was tedious, time-consuming and frustrating. There was no iterative improvement of code, and overall, the software delivery process was slow. Then came Jenkins.
Jenkins is a free and opensource continuous integration tool written in Java that allows developers to continuously develop, test and deploy code in a simple and effective way. It automates tasks thereby saving time and takes away the stressful part of the software development process.
In this article, we demonstrate how you can install Jenkins on CentOS 8 Linux.
Step 1: Install Java on CentOS 8
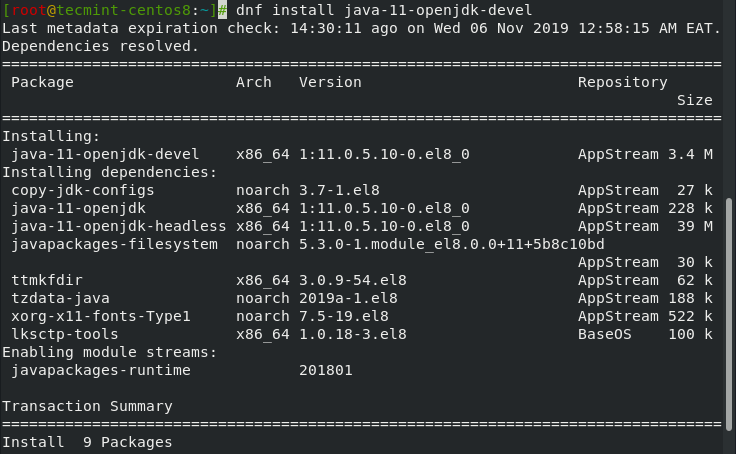
For Jenkins to function, you need to install either Java JRE 8 or Java 11. In the example below, we decided to go with the installation of Java 11. Therefore, to install Java 11, run the command.
# dnf install java-11-openjdk-devel
To verify the installation of Java 11, run the command.
# java --version

The output confirms that Java 11 has been successfully installed.
Step 2: Add Jenkins Repository on CentOS 8
Since Jenkins is not available in CentOS 8 repositories, therefore we are going to add Jenkins Repository manually to the system.
Begin by adding Jenkins Key as shown.
# rpm --import https://pkg.jenkins.io/redhat-stable/jenkins.io.key
Now append Jenkin’s repository to CentOS 8.
# cd /etc/yum/repos.d/
# curl -O https://pkg.jenkins.io/redhat-stable/jenkins.repo

Step 3: Install Jenkins on CentOS 8
Having successfully added Jenkins repository, you can proceed to install Jenkins by running.
# dnf install jenkins

Once installed, start and verify the status of Jenkins by executing the commands.
# systemctl start jenkins
# systemctl status jenkins
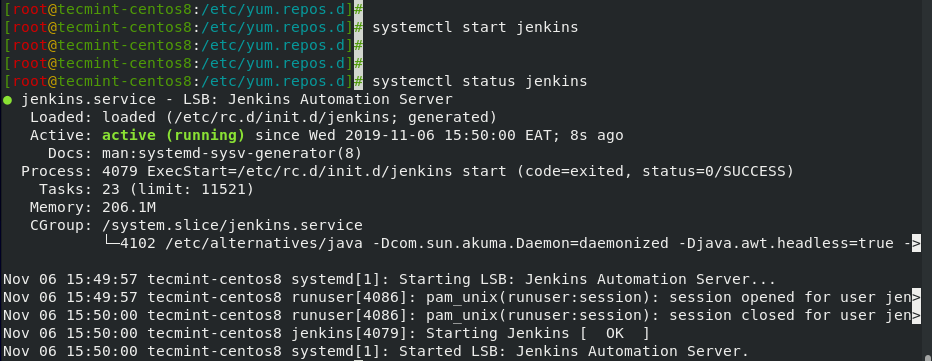
The output above shows that Jenkins is up and running.
Next, you need to configure the firewall to allow access to port 8080 which is used by Jenkins. To open the port on the firewall, run the commands.
# firewall-cmd --add-port=8080/tcp --permanent
# firewall-cmd --reload

Step 4: Setting up Jenkins on CentOS 8
With the initial configurations done, the only remaining part is setting up Jenkins on a web browser. To achieve this, browse your server’s IP address as shown:
http://server-IP:8080
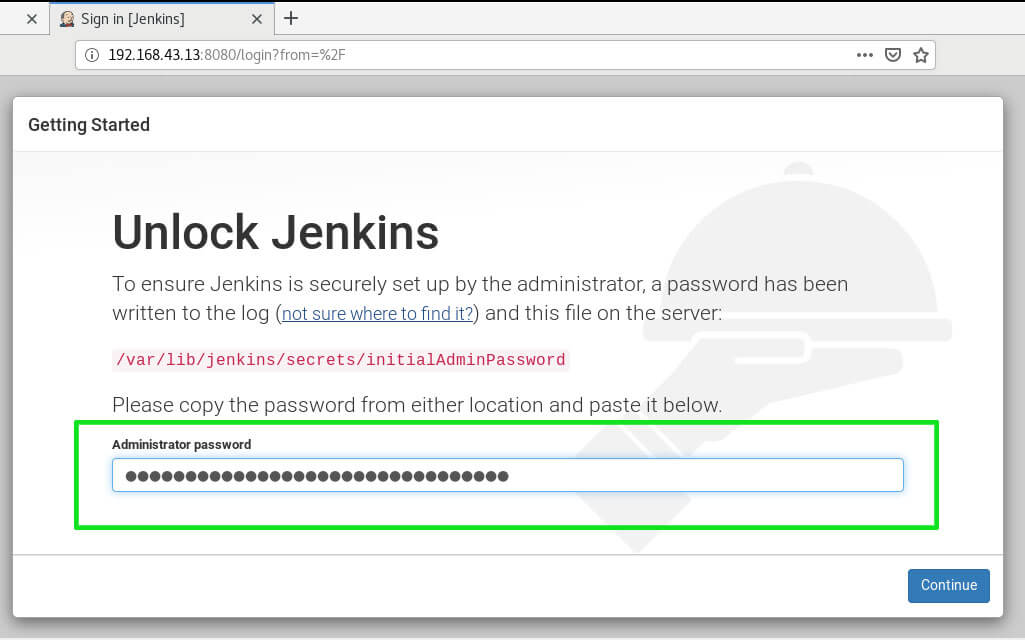
The first section requires you to unlock Jenkins using a password. This password is placed in the file /var/lib/Jenkins/secrets/initialAdminPassword file.
To read the password, simply use the cat command as shown.
# cat /var/lib/Jenkins/secrets/initialAdminPassword

Copy & paste the password in the Administrator password text field & click ‘Continue‘.
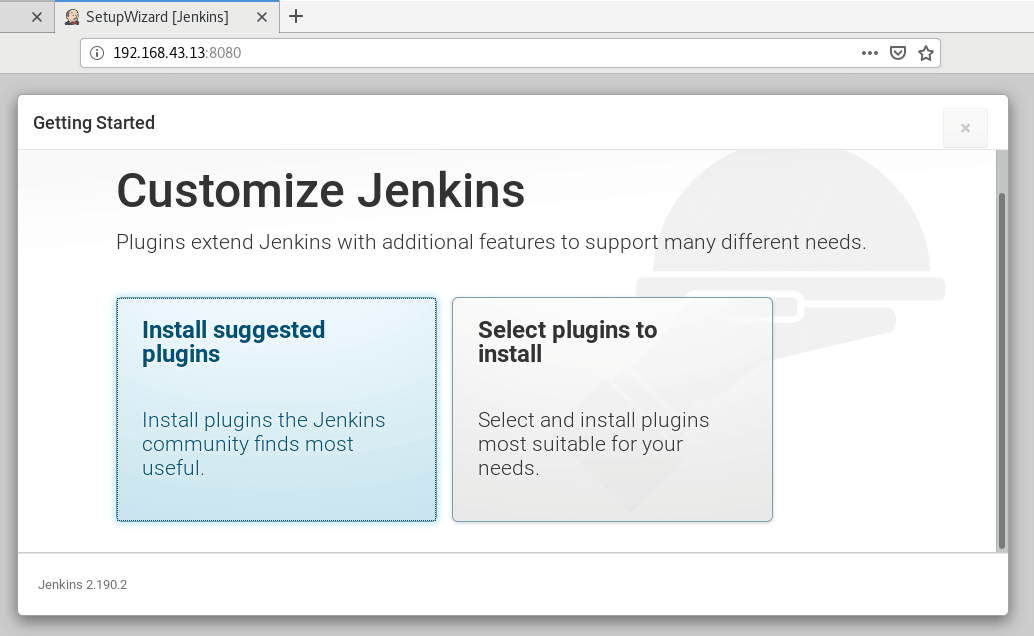
In the second stage, you will be presented with 2 options: ‘Install using suggested plugins‘ or ‘Select plugins to install‘.
For now, click on ‘Install using suggested plugins‘ to install essential plugins for our setup.
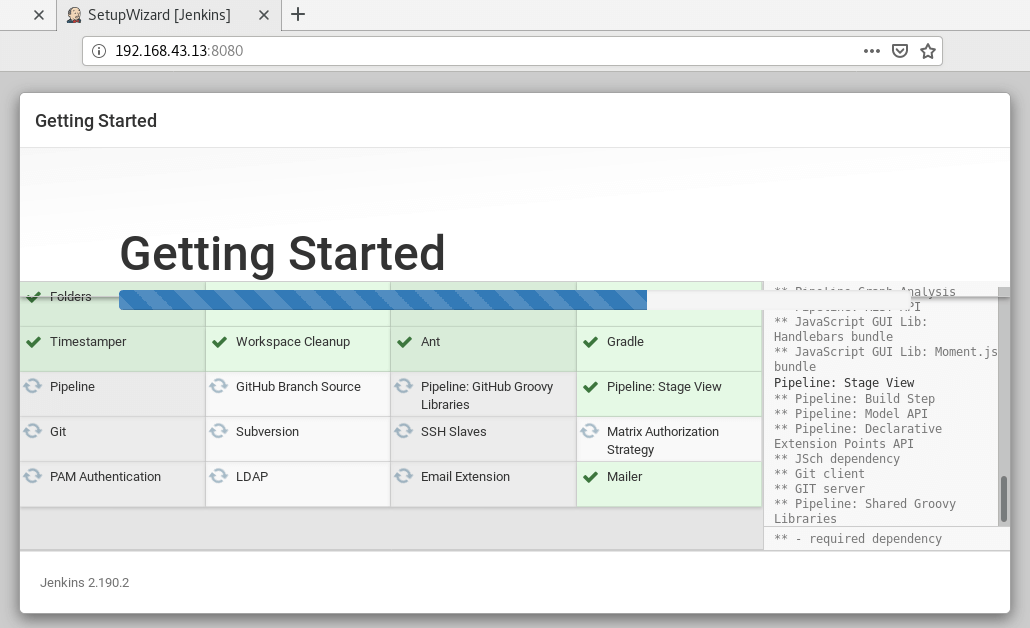
Shortly, the installation of the plugins will get underway.
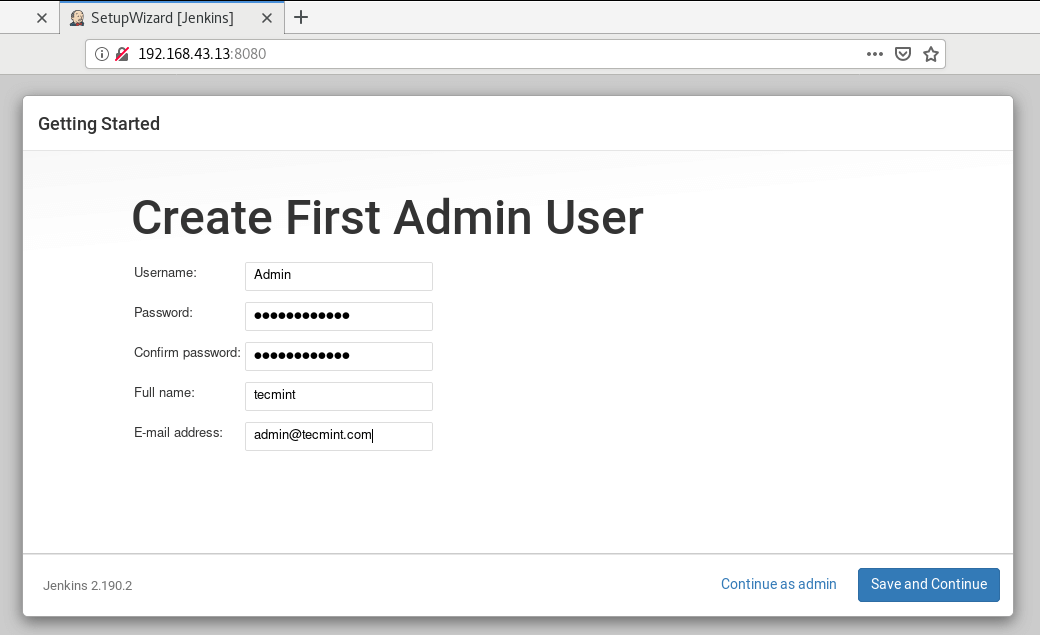
In the next section, fill out the fields in order to create the First Admin user. After you are done, click on ‘Save and continue‘.
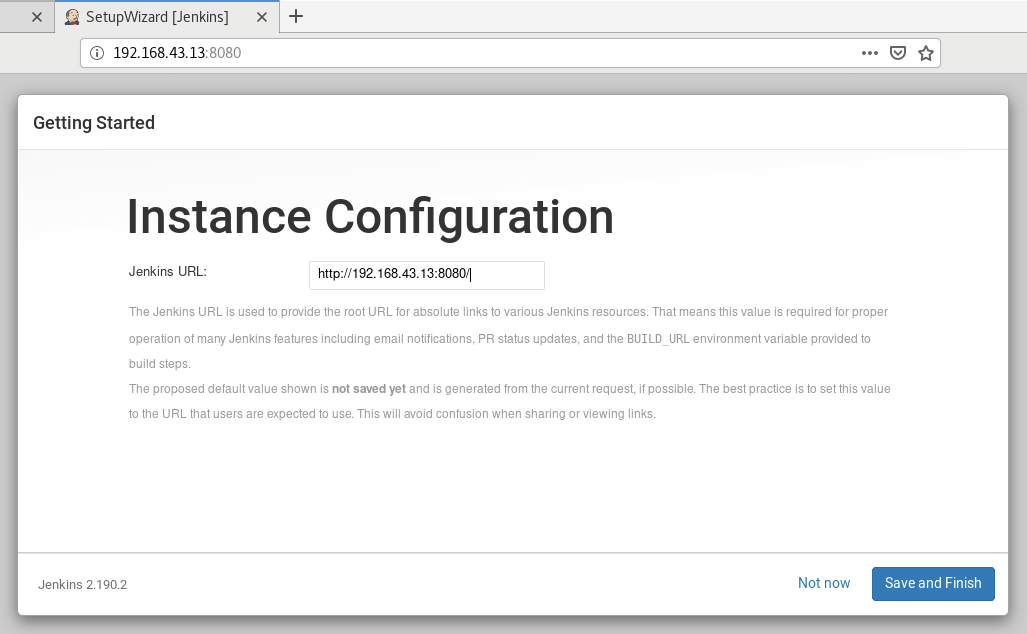
The ‘Instance Configuration‘ section will provide you with the default Jenkins URL. For simplicity, it’s recommended to leave it as it is and click ‘Save and Finish‘.
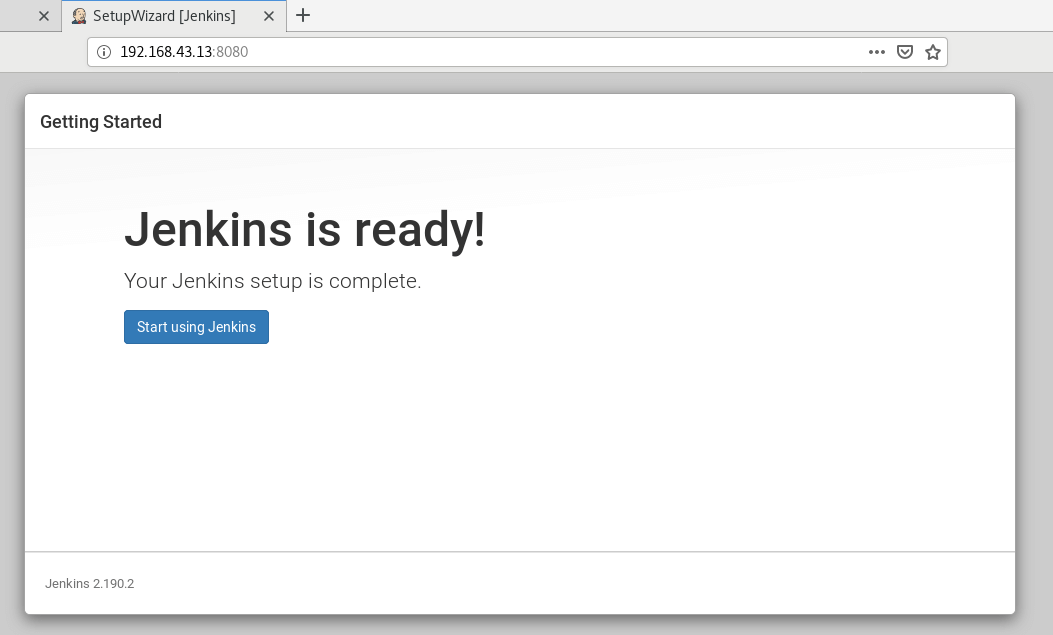
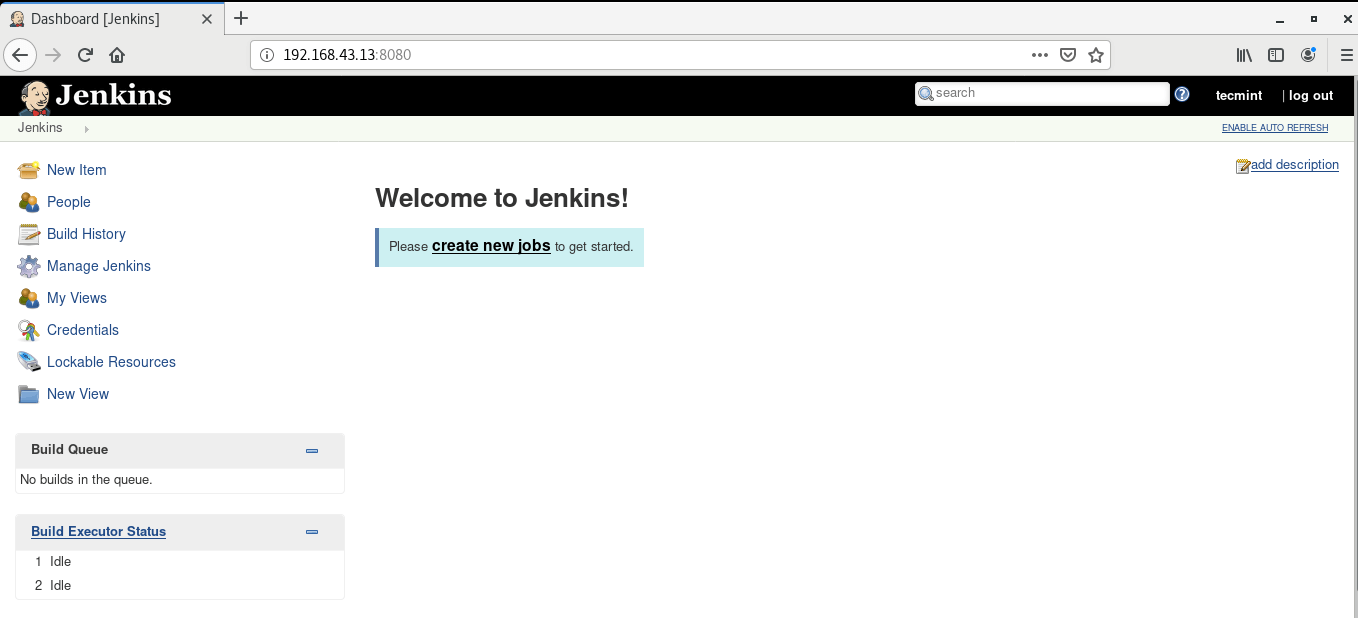
At this point, Jenkins setup is now complete. To access the Jenkins dashboard, simply click on ‘Start using Jenkins‘.
Jenkins’s dashboard is displayed below.
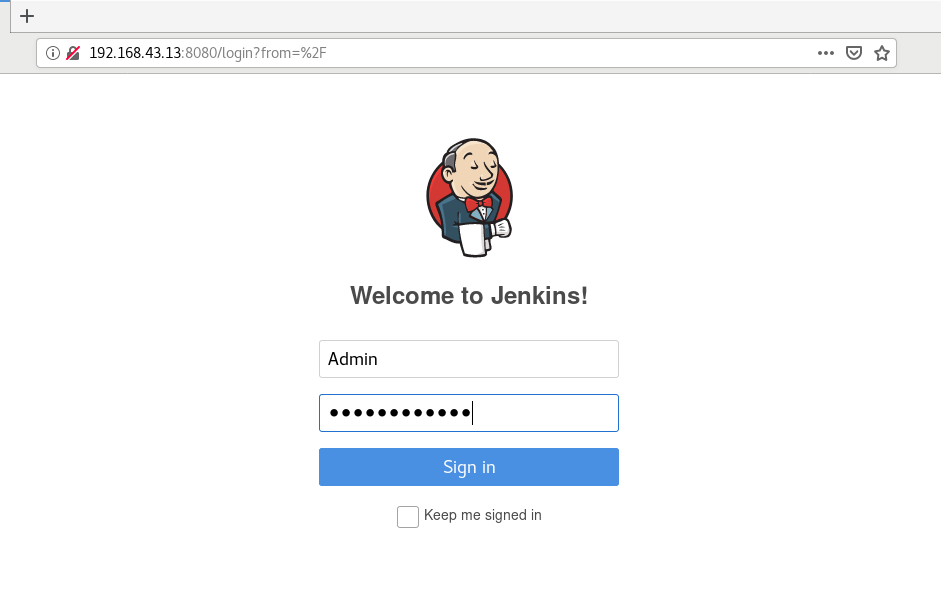
Next time you log into Jenkins, simply provide the Admin username and the password you specified when creating the Admin user.
Conclusion
That was a step-by-step procedure of how to install Jenkins Continuous Integration tool on CentOS 8. To learn more about Jenkins. Read Jenkins Documentation. Your feedback on this guide is most welcome.


