Magento is a powerful and highly flexible open-source e-Commerce platform (or content management system (CMS)) written in PHP. It ships in two main editions: Enterprise and Community edition. The Community Edition is intended for developers and small businesses.
It is fully customizable to meet users requirements enabling them to setup and manage a fully operational e-Commerce store in minutes. Magento runs on such web servers as Apache, Nginx and IIS, a backend databases: MySQL or MariaDB, Percona.
In this guide, we will show how to install Magento Community Edition on a CentOS 7 VPS with LAMP (Linux, Apache MariaDB and PHP) stack. The same instructions also works on RHEL and Fedora based distributions with slight changes in commands.
Requirements
This article will guide you to install the most recent version of “Community Edition” of Magento on a system running:
- Apache version 2.2 or 2.4
- PHP version 5.6 or 7.0.x or later with required extensions
- MySQL version 5.6 or later
Note: For this setup, I am using website hostname as “magneto-tecmint.com” and IP address is “192.168.0.106“.
Step 1: Installing Apache Web Server
1. Installing Apache web server is so simple, from the official repositories:
# yum install httpd
2. Then, in order to allow access to Apache services from HTTP and HTTPS, we have to open port 80 and 443 where the HTTPD daemon is listening as follows:
------------ On CentOS/RHEL 7 ------------
# firewall-cmd --permanent --zone=public --add-service=http
# firewall-cmd --permanent --zone=public --add-service=https
# firewall-cmd --reload

---------- On CentOS/RHEL 6 ----------
# iptables -A INPUT -p tcp -m state --state NEW --dport 80 -j ACCEPT
# iptables -A INPUT -p tcp -m state --state NEW --dport 443 -j ACCEPT
# service iptables save
Step 2: Install PHP Support for Apache
As I said Magento requires PHP 5.6 or 7.0 and default CentOS repository includes PHP 5.4, which is not compatible with latest Magento 2 version.
3. To install PHP 7, you need to add the EPEL and IUS (Inline with Upstream Stable) repository in order to install PHP 7 using yum:
Install PHP 7 on CentOS 7
# yum install -y http://dl.iuscommunity.org/pub/ius/stable/CentOS/7/x86_64/ius-release-1.0-14.ius.centos7.noarch.rpm
# yum -y update
# yum -y install php70u php70u-pdo php70u-mysqlnd php70u-opcache php70u-xml php70u-mcrypt php70u-gd php70u-devel php70u-mysql php70u-intl php70u-mbstring php70u-bcmath php70u-json php70u-iconv
Install PHP 7 on CentOS 6
# yum -y update
# yum -y install epel-release
# wget https://dl.fedoraproject.org/pub/epel/epel-release-latest-6.noarch.rpm
# wget https://centos6.iuscommunity.org/ius-release.rpm
# rpm -Uvh ius-release*.rpm
# yum -y update
# yum -y install php70u php70u-pdo php70u-mysqlnd php70u-opcache php70u-xml php70u-mcrypt php70u-gd php70u-devel php70u-mysql php70u-intl php70u-mbstring php70u-bcmath php70u-json php70u-iconv
4. Next, open and modify the following settings in your /etc/php.ini file:
max_input_time = 30
memory_limit= 512M
error_reporting = E_COMPILE_ERROR|E_RECOVERABLE_ERROR|E_ERROR|E_CORE_ERROR
error_log = /var/log/php/error.log
date.timezone = Asia/Calcutta
Note: The value for date.timezone will vary as per your systems time zone. Refer to check system timezone and set timezone in Linux.
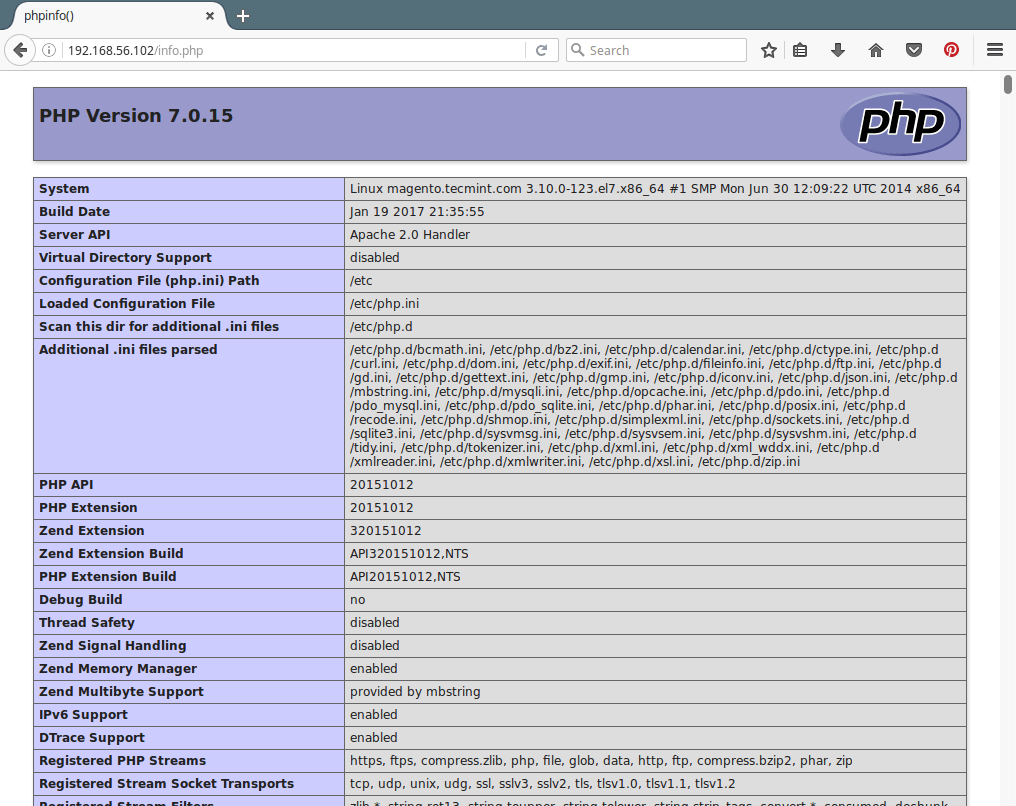
5. Next, to retrieve a complete info concerning the PHP installation and all its current configurations from a web browser, let’s create a info.php file in the Apache DocumentRoot (/var/www/html) using the following command.
# echo "<?php phpinfo(); ?>" > /var/www/html/info.php
6. Once all the required configuration completes, its time to start the Apache service and enable it to start automatically from the next system boot as well like so:
------------ On CentOS/RHEL 7 ------------
# systemctl start httpd
# systemctl enable httpd

------------ On CentOS/RHEL 6 ------------
# service httpd start
# chkconfig httpd on
7. Next, we can verify that Apache and PHP is working fine; open a remote browser and type your server IP Address using HTTP protocol in the URL and the default Apache2 and PHP info page should appear.
http://server_domain_name_or_IP/
http://server_domain_name_or_IP/info.php
Step 3: Install and Configure MariaDB Database
8. We must note that Red Hat Enterprise Linux/CentOS 7.0 moved from supporting MySQL to MariaDB as the default database management system.
To install MariaDB database, we need to add the following official MariaDB repository to file /etc/yum.repos.d/MariaDB.repo as shown.
Install MariaDB in CentOS 7
[mariadb]
name = MariaDB
baseurl = http://yum.mariadb.org/10.1/centos7-amd64
gpgkey=https://yum.mariadb.org/RPM-GPG-KEY-MariaDB
gpgcheck=1
Install MariaDB On RHEL 7
[mariadb]
name = MariaDB
baseurl = http://yum.mariadb.org/10.1/rhel7-amd64
gpgkey=https://yum.mariadb.org/RPM-GPG-KEY-MariaDB
gpgcheck=1
Install MariaDB in CentOS 6
[mariadb]
name = MariaDB
baseurl = http://yum.mariadb.org/10.1/centos6-amd64
gpgkey=https://yum.mariadb.org/RPM-GPG-KEY-MariaDB
gpgcheck=1
Install MariaDB On RHEL 6
[mariadb]
name = MariaDB
baseurl = http://yum.mariadb.org/10.1/rhel6-amd64
gpgkey=https://yum.mariadb.org/RPM-GPG-KEY-MariaDB
gpgcheck=1
9. Once the repo file in created, we are now able to install MariaDB as follows:
# yum install mariadb-server mariadb
OR
# yum install MariaDB-server MariaDB-client
10. After the installation of MariaDB packages completes, start the database daemon for the mean time and enable it to start automatically at the next boot.
------------ On CentOS/RHEL 7 ------------
# systemctl start mariadb
# systemctl enable mariadb

------------ On CentOS/RHEL 6 ------------
# service mysqld start
# chkconfig mysqld on
11. Then run the mysql_secure_installation script to secure the database (set root password, disable remote root login, remove test database and remove anonymous users) as follows:
# mysql_secure_installation
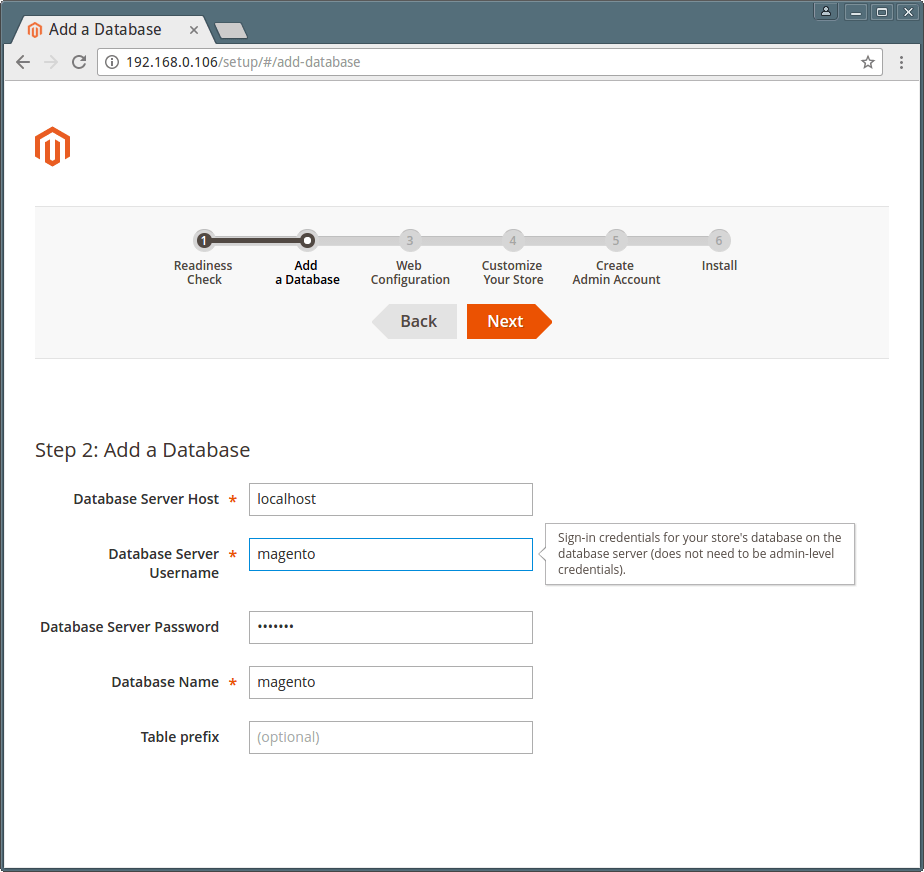
12. Next create a magento database and user as shown.
# mysql -u root -p

## Creating New User for Magento Database ##
mysql> CREATE USER magento@localhost IDENTIFIED BY "your_password_here";

## Create New Database ##
mysql> create database magento;

## Grant Privileges to Database ##
mysql> GRANT ALL ON magento.* TO magento@localhost;

## FLUSH privileges ##
mysql> FLUSH PRIVILEGES;

## Exit ##
mysql> exit
Step 4: Install Magento Community Edition
12. Now, go the Magento official website, and create a user account in case you a new customer.(or simply login if you already have an account) and download the latest version of Magento Community Edition.
13. After you download Magento tar file, extract the contents into the Apache Document Root (/var/www/html) as follows:
# tar -zxvf Magento-CE-2.1.5-2017-02-20-05-36-16.tar.gz -C /var/www/html/
14. Now you need to set Apache ownership to the files and folders.
# chown -R apache:apache /var/www/html/
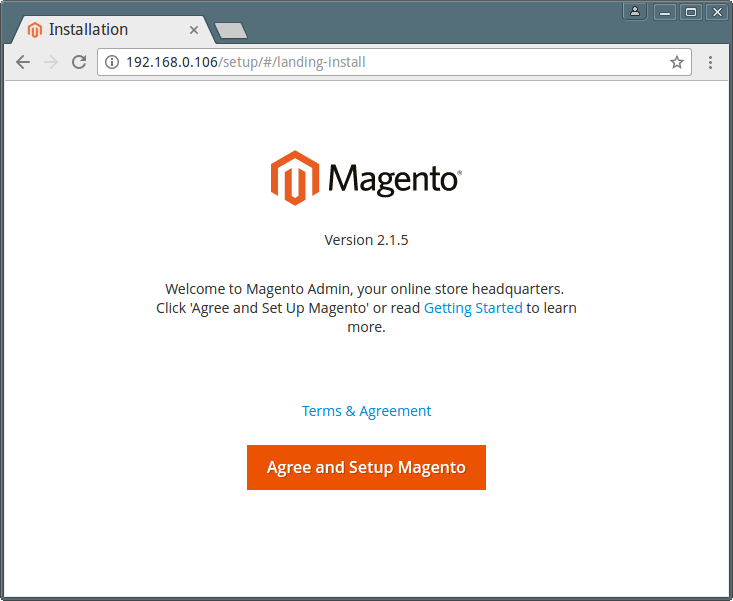
15. Now open your browser and navigate to the following url, you will be presented with the Magento installation wizard.
http://server_domain_name_or_IP/
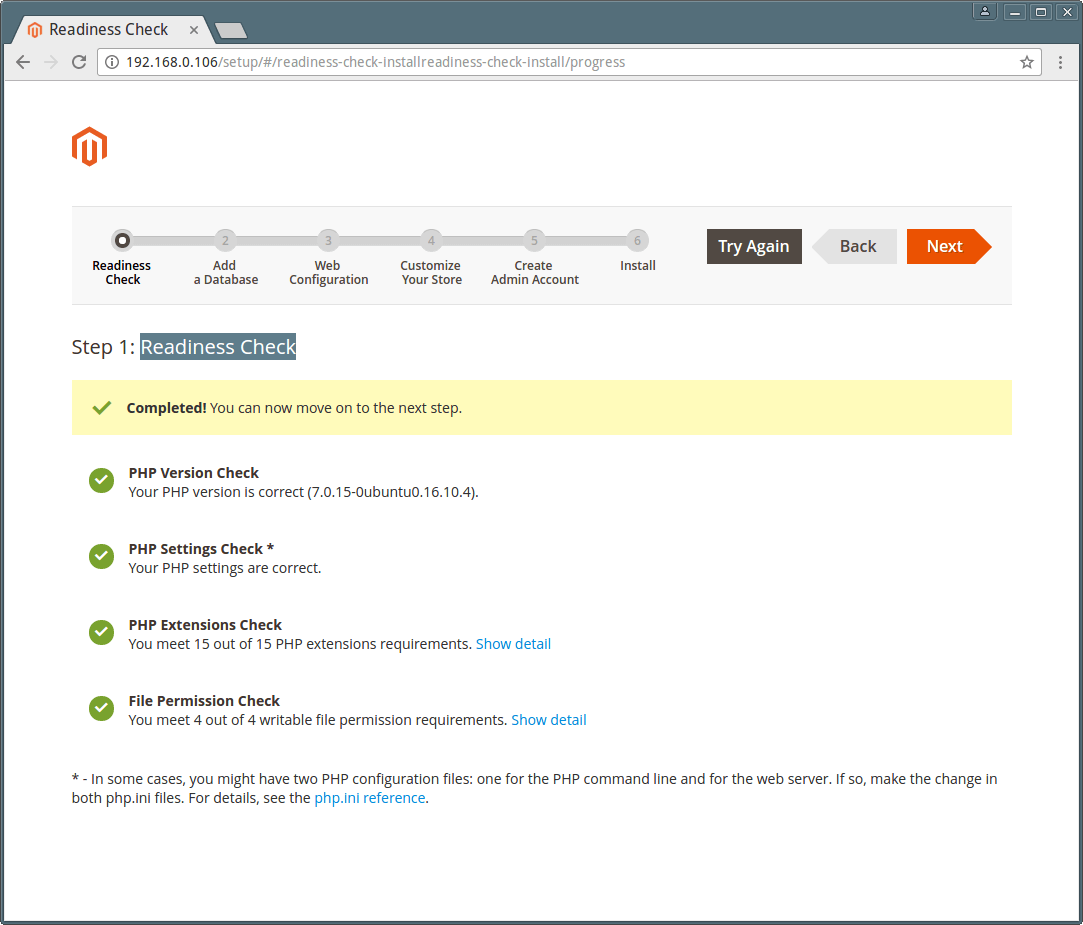
16. Next, the wizard will carry a Readiness Check for the correct PHP version, file permissions and compatibility.

17. Enter magento database settings.
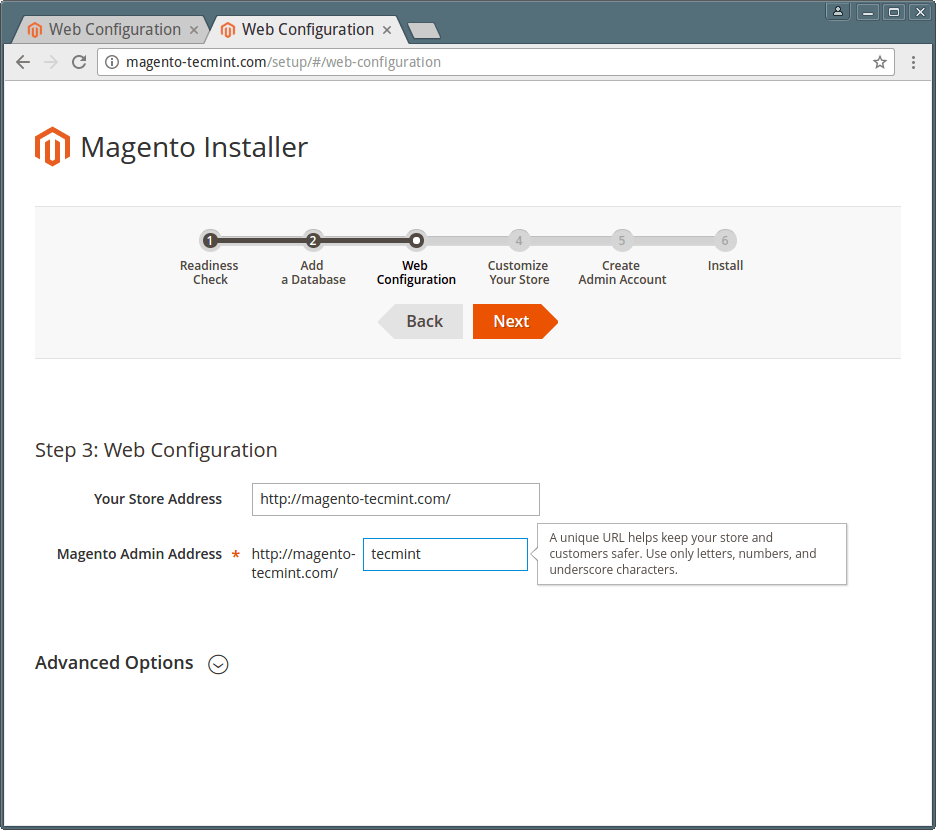
18. Magento Web site configuration.
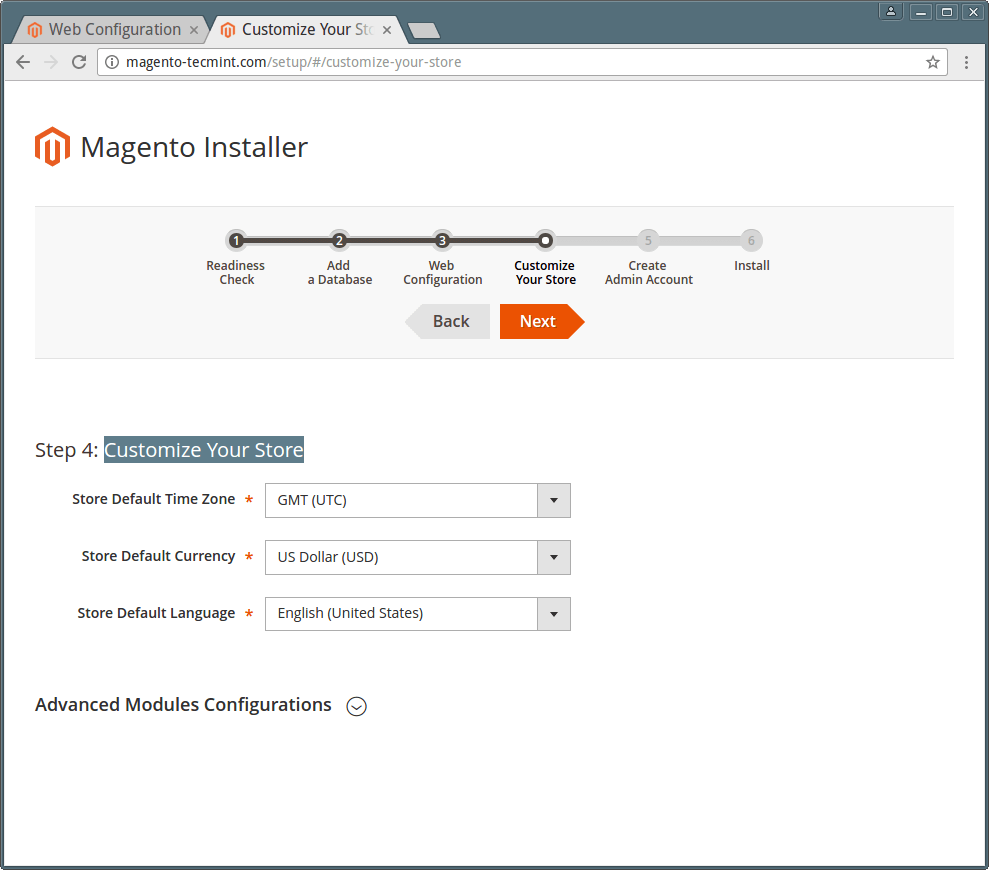
19. Customize your Magento store by setting timezone, currency and language.
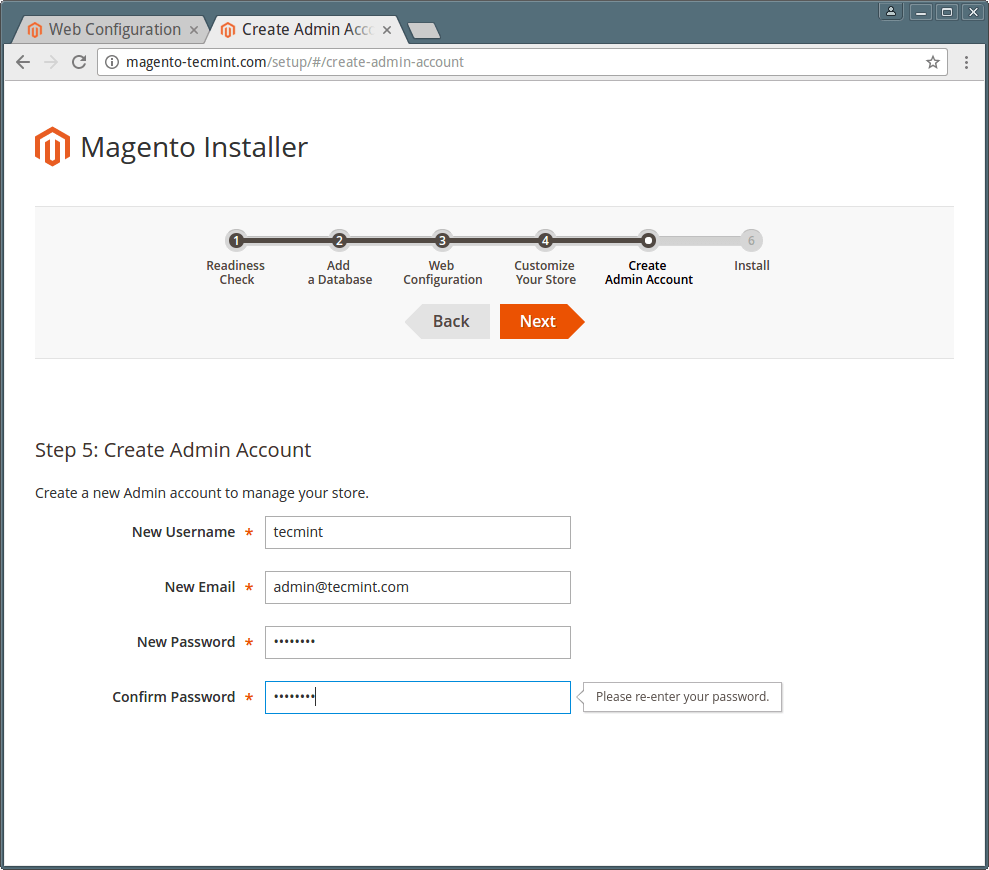
20. Create a new Admin account to manage your Magento store.
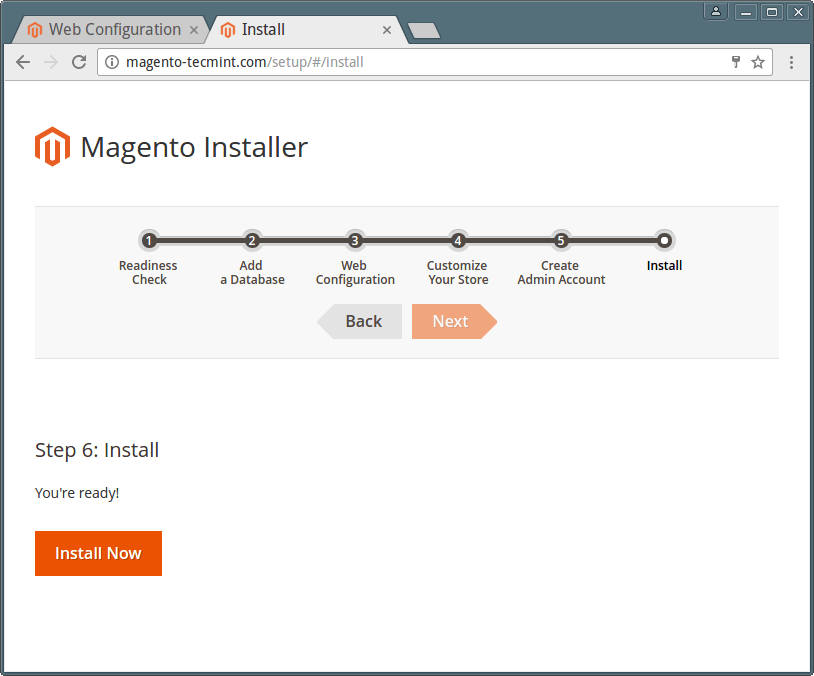
21. Now click ‘Install Now‘ to continue Magento installation.
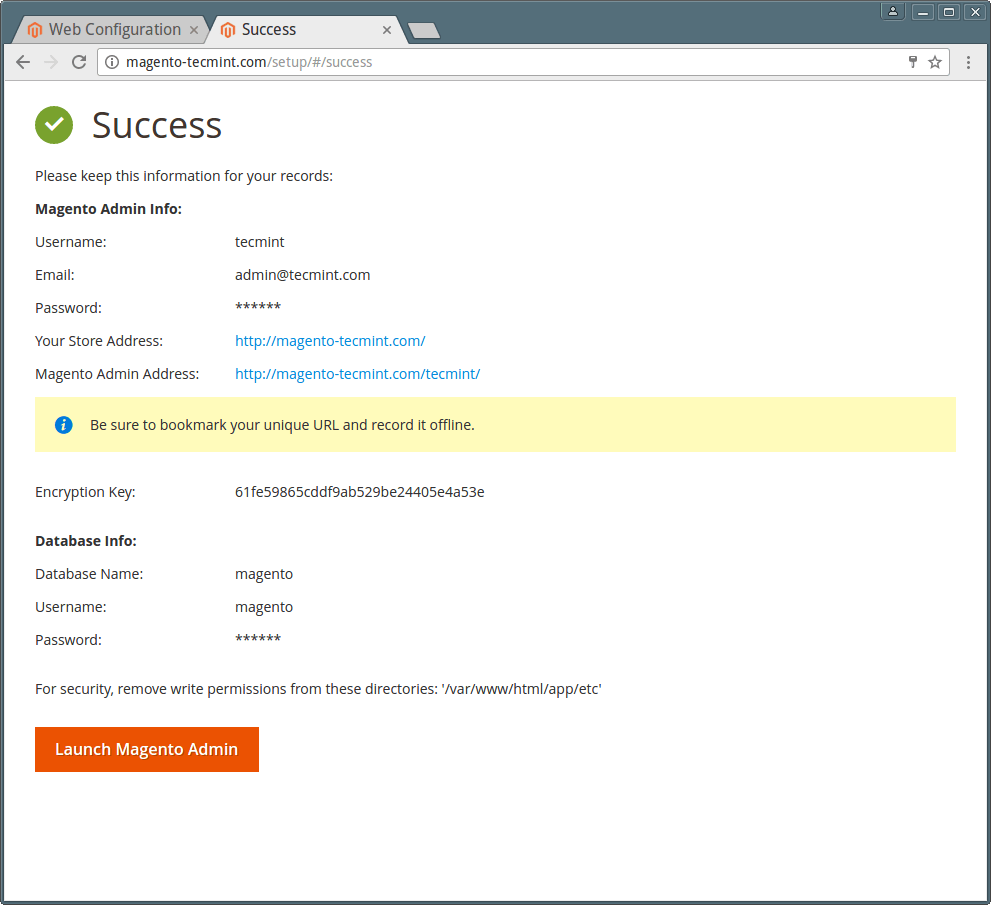
That’s it! you have successfully installed Magento in CentOS 7. If you face any errors during installation, feel free to ask for help in the comments..


Hi, Good article, but you have missed the SELinux settings therein. Please include.
Hello,
I installed Magento 2 and Zimbra with help of Tecmint articles. Thank you. Now I am looking Cluster installation for Magento 2. Will you please help me?
Best regards..
At step 15, I type in the URL with my IP address and a blank page shows up instead of the Installation Wizard. All proper steps have been taken without errors.
@Anh,
Can you view PHP information at the following URL?
Yes, I put in my IP address and it works.
Hi Ravi Saive,
Thanks a lot for your complete instruction. I do that your guide. I can Successful install Magento 2.2.0 in my centos 7.5, php = 7.0.30. RAM = 1GB, storage = 25GB.
But after install my home page is broken (like css do not effect). Others pages was not found.
@Kokogyi,
Could you share the link to homepage? so that I can check it. Also have you installed the Magento on correct web server root directory?
Hello, I have followed all steps. There is not problem with installation with magento 1 but with magento 2 I have getting this message “Vendor autoload is not found. Please run ‘composer install’ under application root directory.”
Will you please help me to solve this.
Best regards..
@Raut,
On Which Linux distributions are you trying to install Magento 2?
CentOS 7, Apache
@Raut,
Magento Update installation dependencies as follows:
First log in to your Magento Linux server, change to the Magento installation directory and run composer install as shown.
This command updates package dependencies and can take a few minutes to complete.
One PHP extension missing: yum install php70u-soap
I am following this guide but having issues with php. I cannot get it to properly install. I get errors telling me conflicts the way you have it written and to use
--skip-broken. didn’t work either.The phpinfo() page will not display anything except for the php tag that got echo’ed to the file. Any Idea?
@Aaron,
Please remove or disable any third party repo, before installing PHP version as in this guide. Because having multiple repositories sometimes conflict with each other..
I followed these steps for magento2 install on centos to no avail. The Ip/magento2/setup/ is not displaying the default installation as displayed above.
////content
>[root@localhost html]# ls -a
. .git .htaccess index.php magento2 .travis.yml
.. .gitignore .htaccess.sample info.php .php_cs
>[root@localhost html]# cd magento2
[root@localhost magento2]# ls -a
. CONTRIBUTING.md lib pub
.. COPYING.txt LICENSE_AFL.txt README.md
app dev LICENSE.txt releases
bin Gruntfile.js.sample magento setup
CHANGELOG.md index.php nginx.conf.sample var
composer.json info.php package.json.sample vendor
composer.lock ISSUE_TEMPLATE.md php.ini.sample
composer.phar ius-release.rpm phpserver
[root@localhost magento2]#
///////
could you shed some light on what am i doing wrong here?
Thank you in advance for your help.
Hello Ravi,
Is it possible to talk to you in private? I’m new on Magento and I will appreciate if you can help me to build my Magento Platform.
Thanks
Very informative and nicely written article. This will help beginners a lot to setup server and install Magento 2 store. I had also written a brief tutorial to install Magento 2 on Debian server. Please have a look at it:
cloudways.com/blog/install-magento-2-on-debian/
If you have any suggestions regarding my article, please note it down in the comments section.