Owncloud is a market-leading, client-server software that offers a cloud platform that allows you to back-up your files in a central location and syncs them on the cloud. It’s an excellent alternative to popular backup applications such as OneDrive, Dropbox and Google Drive.
Unlike these popular platforms, OwnCloud doesn’t offer data center capabilities for hosting files. Nevertheless, you will be guaranteed the security and privacy of your stored data.
In this article, we will walk you through how you can install OwnCloud on CentOS 8.
Prerequisites
Before we get started, ensure that you have a LAMP stack installed and running.
With all the requirements fulfilled, we can roll our sleeves and get started!
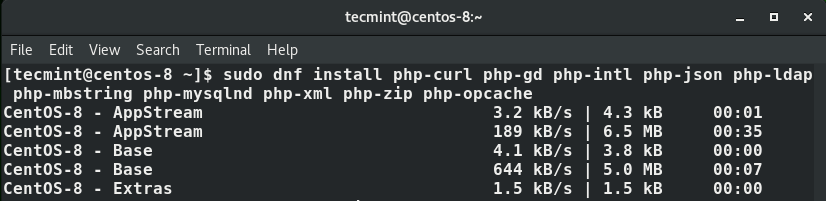
Step 1: Install Additional PHP Modules
OwnCloud is a PHP application and its official documentation recommends PHP 7.3 or PHP 7.2 which comes installed by default. Also, some additional PHP extensions are required by OwnCloud for it to work seamlessly.
So open your terminal as a sudo user and run the command.
$ sudo dnf install php-curl php-gd php-intl php-json php-ldap php-mbstring php-mysqlnd php-xml php-zip php-opcache
Step 2: Create a Database for OwnCloud
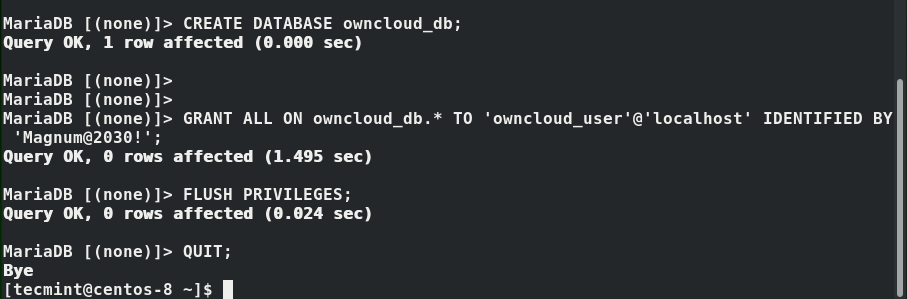
After installing the requisite PHP extensions, login to the MariaDB database engine using the command below and provide the password.
$ mysql -u root -p
Upon logging in, create a database for OwnCloud and add a user for the database.
MariaDB [(none)]> CREATE DATABASE owncloud_db;
MariaDB [(none)]> GRANT ALL ON owncloud_db.* TO 'owncloud_user'@'localhost' IDENTIFIED BY 'StrongP@ssword';
MariaDB [(none)]> FLUSH PRIVILEGES;
MariaDB [(none)]> EXIT;
Step 3: Download OwnCloud in CentOS 8
The next step is to download the OwnCloud file, by the time of writing this guide, the latest version on OwnCloud is 10.3.2. Using the wget command, download the latest tarball file.
$ wget https://download.owncloud.org/community/owncloud-10.3.2.tar.bz2
Then extract the tarball file to the /var/www/ directory.
$ sudo tar -jxf owncloud-10.3.2.tar.bz2 -C /var/www/
Next, configure ownership permissions that will allow Apache webserver to read / access Owncloud’s files and folders.
$ sudo chown -R apache: /var/www/owncloud
Step 4: Configure Apache Web Server for OwnCloud
A few changes are required for the Apache webserver to serve OwnCloud. So create a configuration for OwnCloud.
$ sudo vim /etc/httpd/conf.d/owncloud.conf
Append the following configuration.
Alias /owncloud "/var/www/owncloud/"

<Directory /var/www/owncloud/>
  Options +FollowSymlinks
  AllowOverride All

 <IfModule mod_dav.c>
  Dav off
 </IfModule>

 SetEnv HOME /var/www/owncloud
 SetEnv HTTP_HOME /var/www/owncloud

</Directory>
Save and exit the file.
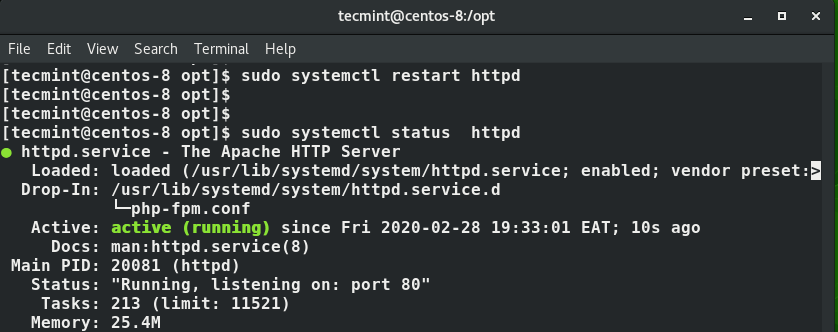
For the changes to come into effect, restart the webserver and confirm the status by running.
$ sudo systemctl restart httpd
$ sudo systemctl status httpd
If SELinux is enabled and running, execute the command below to allow the Apache webserver to write to Owncloud’s directory.
$ sudo setsebool -P httpd_unified 1
Step 5: Finalize Installation of OwnCloud on CentOS 8
With all the major configurations done, it’s time to finalize the installation of OwnCloud. So launch your browser and visit your server’s IP as shown.
http://server-ip/owncloud
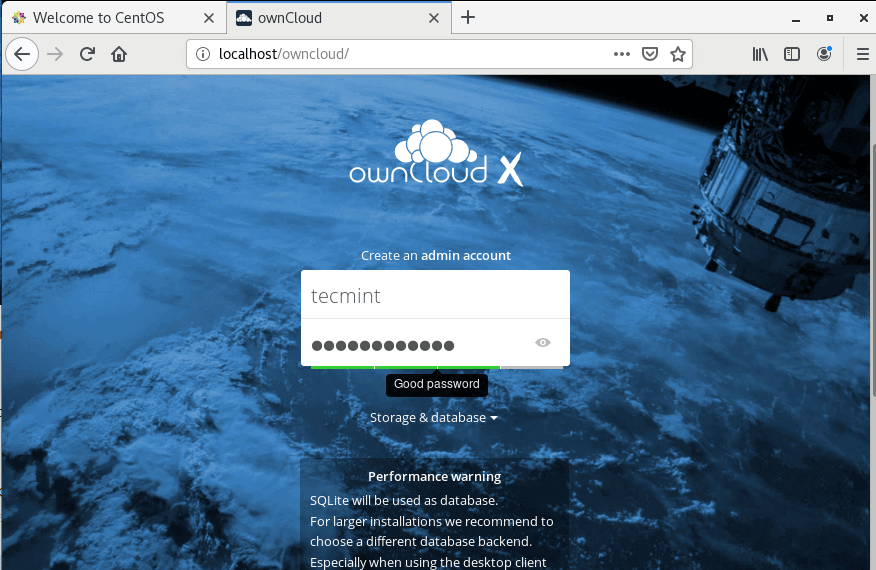
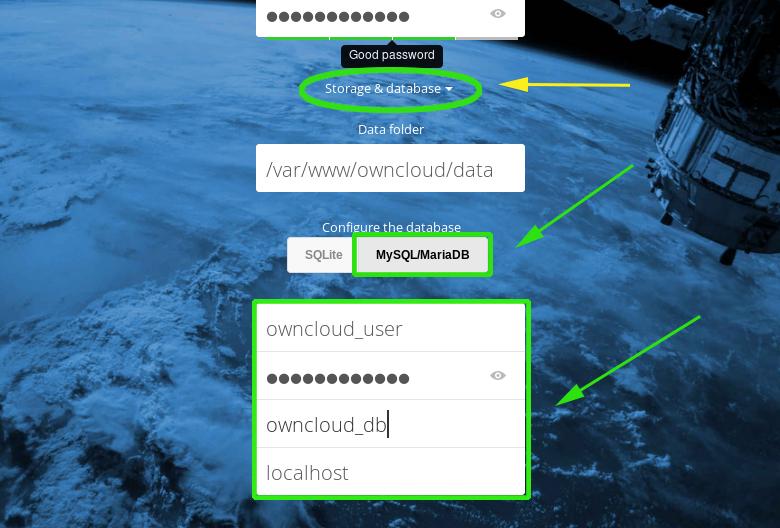
Provide the username and password as shown above. Next click on ‘Storage and database’ link directly below and select ‘MySQL/MariaDB’ database. Fill out all the database details i.e database user, password, and database name.
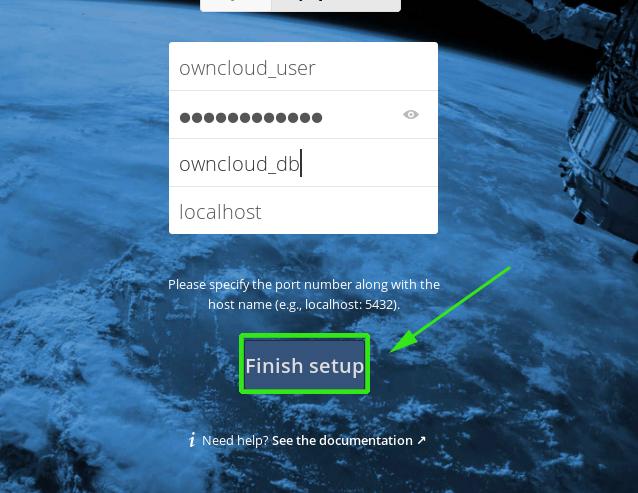
Finally, click the ‘Finish Setup’ button to complete the setup.
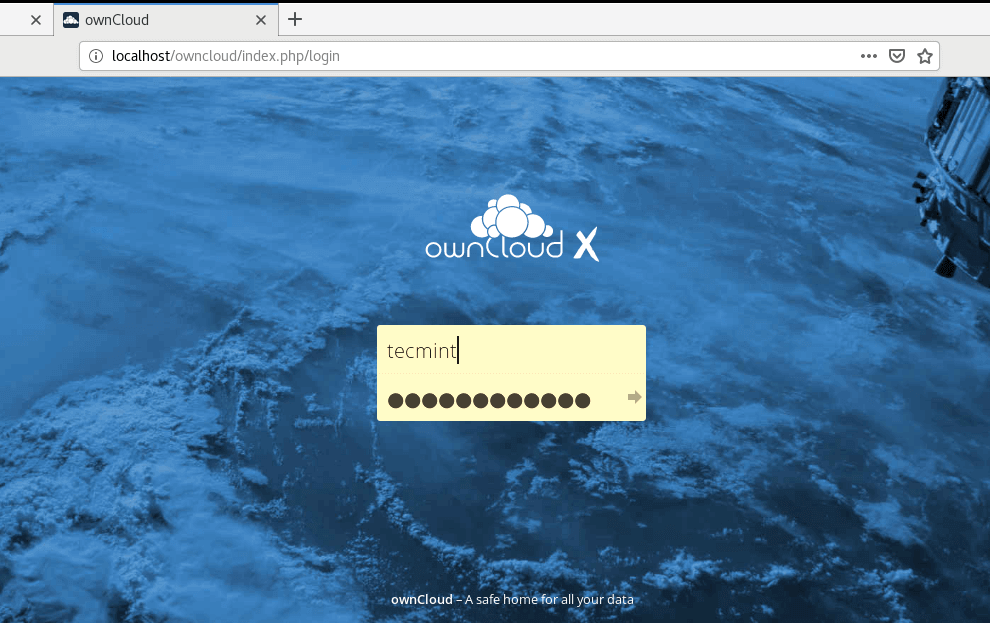
This brings you to the login page where you will log in with the username and password that you specified earlier on.
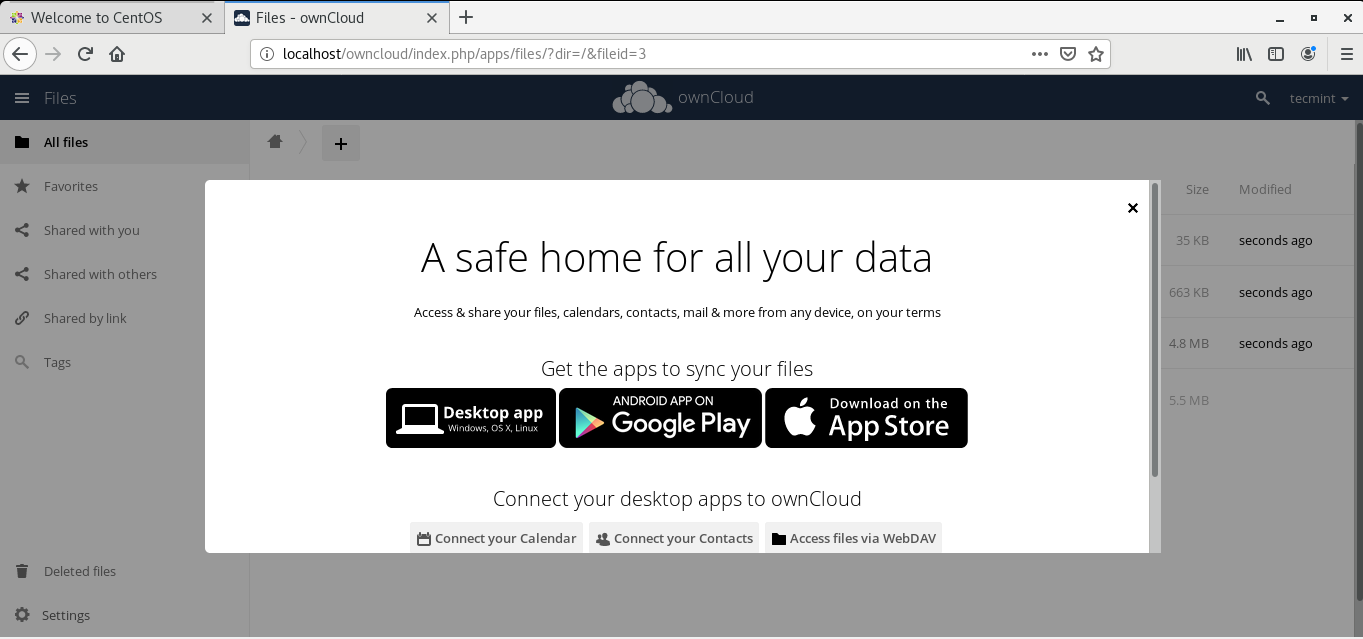
Since we are logging in for the first time, you will be presented with options for installing the owncloud App on different platforms such as Android and iOS.
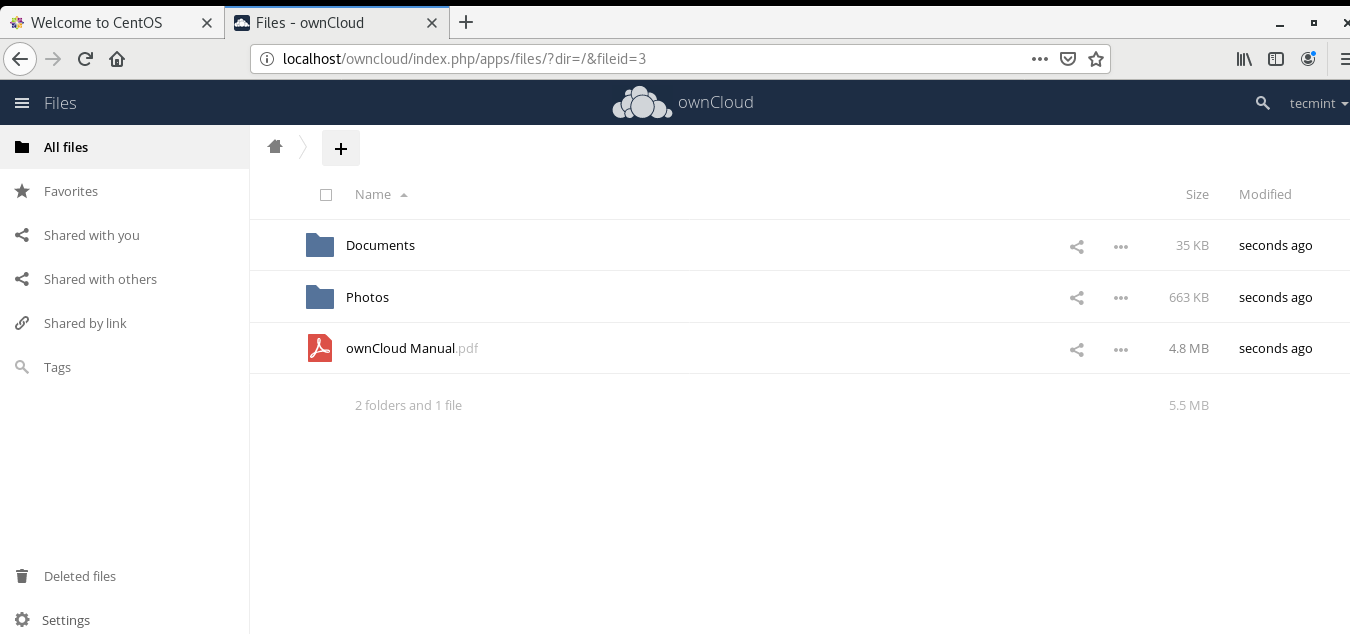
This is what the dashboard looks like. Quite simple and intuitive to use.
And that’s how you install OwnCloud on CentOS 8. Your feedback is much welcome.


I had one error message.
This version of ownCloud is not compatible with PHP 7.4
You are currently running PHP 7.4.8.
Please. I need your help.
@Jungyu,
Seems PHP 7.4 not supported now, only PHP 5.6, 7.0, 7.1, and 7.2 are supported. You should wait or downgrade your PHP version.
Hi, Thanks for the article. But i wonder, if you can add the small part in order to get an Owncloud with Nginx and letsEncrypt? I try but I’m not able to get anything working when combining your 2 tutorial. Thanks in advance