Canonical, the company behind Ubuntu, released Ubuntu 22.04 LTS (Jammy Jellyfish) on April 21, 2022, for Ubuntu Desktop, Ubuntu Server, Ubuntu Cloud, and Ubuntu Core with a five years long term support guaranteed on software and updates until April 2032.
The scope of this tutorial is to present a classic installation of Ubuntu 22.04 Server made from a CD media or a USB bootable stick and also, a basic installation of LAMP (Linux, Apache, MySQL, and PHP) packages stack with basic configurations.
Table of Contents
Download Ubuntu 22.04 Server
The installation of Ubuntu 22.04 ISO image can be downloaded using the following link for 64-bit bit systems only.
Step 1: Installing Ubuntu 22.04 Server
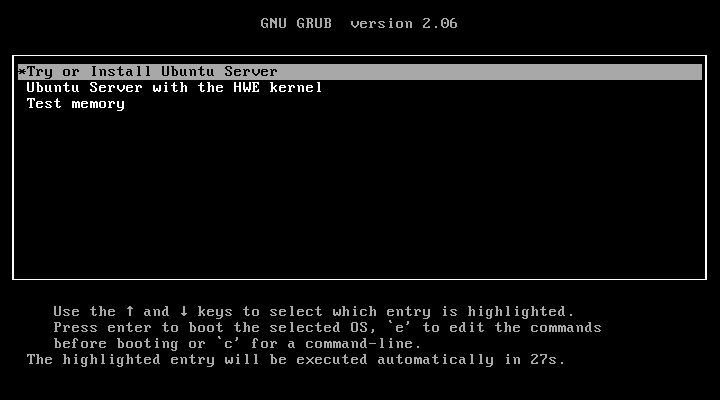
1. Create a bootable CD/USB image using some bootable creators. After the system booting sequence choose your media bootable type from BIOS options (CD/DVD or USB Drive).
On the first prompt choose Install Ubuntu Server end and hit Enter.
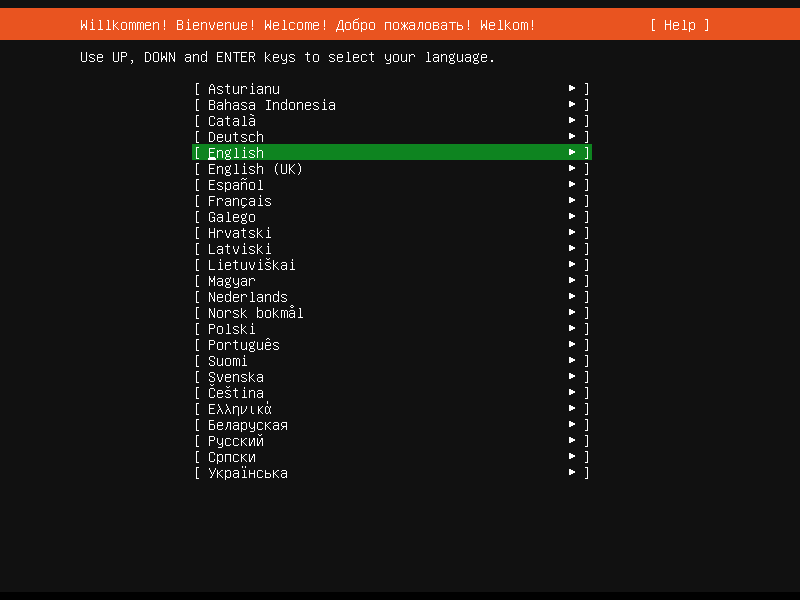
2. Next select your System default Language and also Installation Process Language.
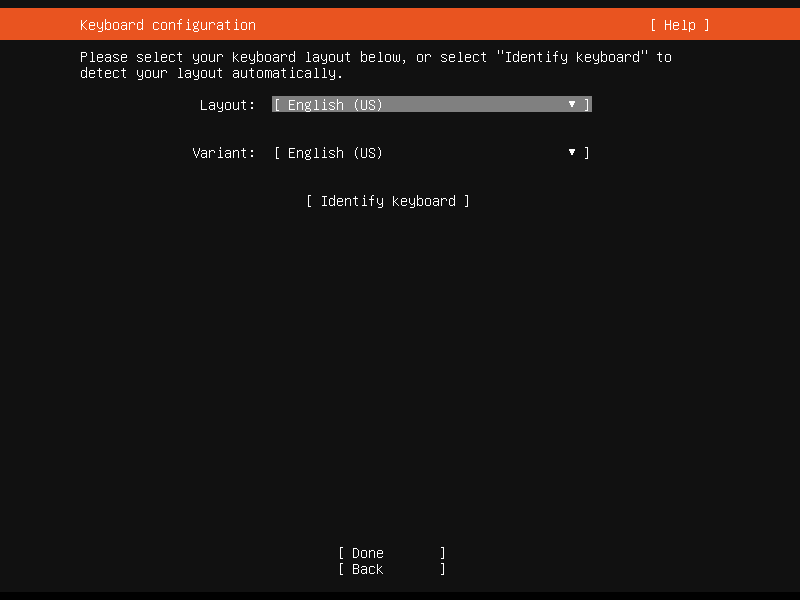
3. Please choose your keyboard layout or select “Identify keyboard” to detect your layout automatically.
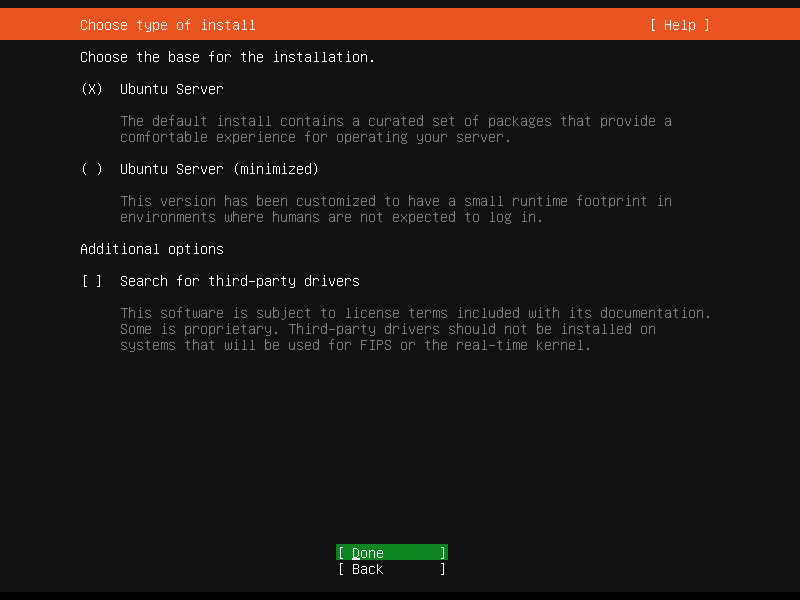
4. Choose the first option ‘Ubuntu Server‘ for your installation.
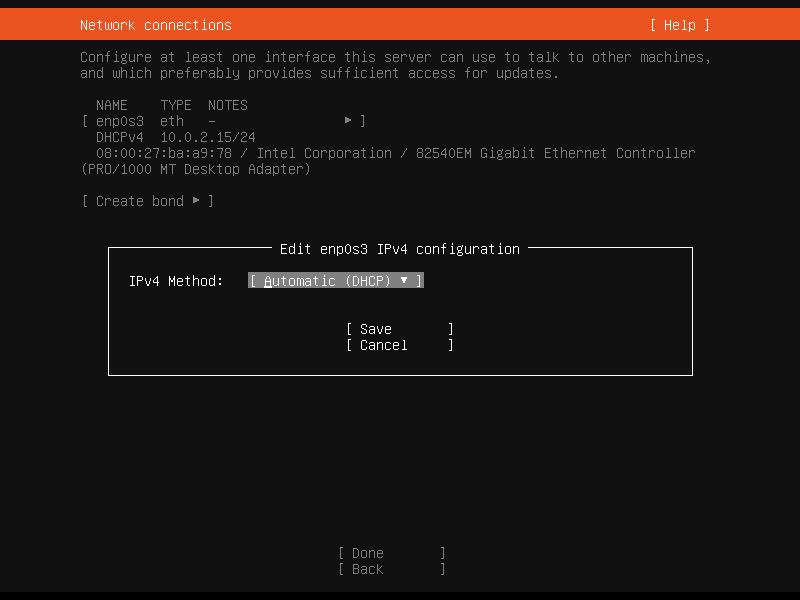
5. On the next prompt series enter your network interface settings: IP address, netmask, gateway, and DNS name servers.
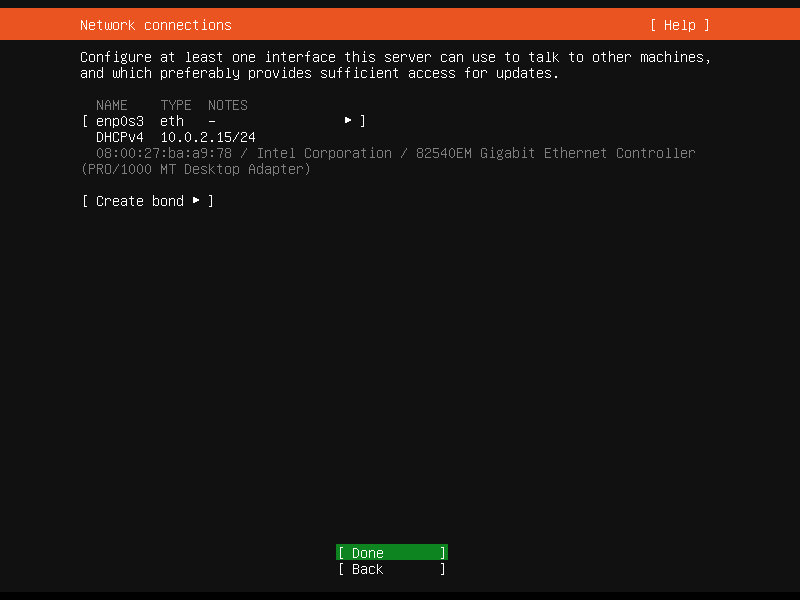
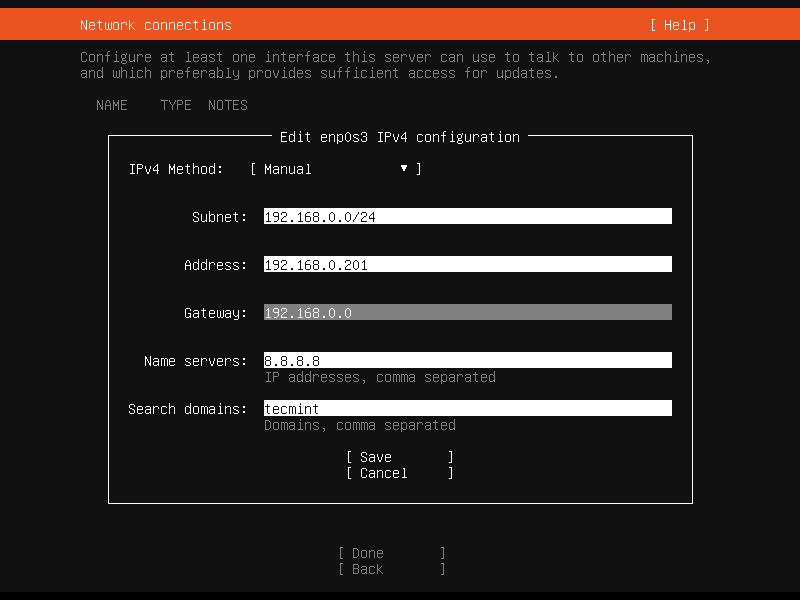
If your server is connected to the network, and you run a DHCP server on your directly connected network the installer automatically configures network settings with the ones provided by the DHCP server.
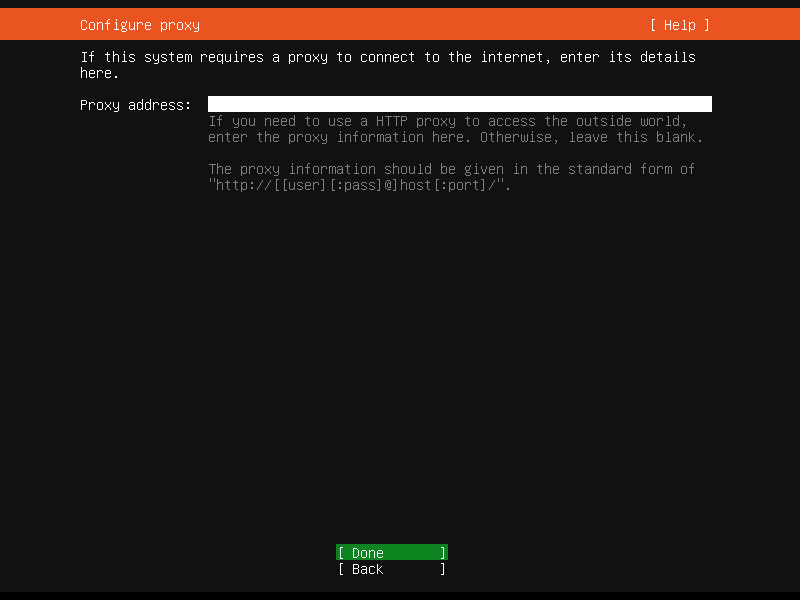
6. If you don’t access the Internet through a proxy leave it blank and Continue.
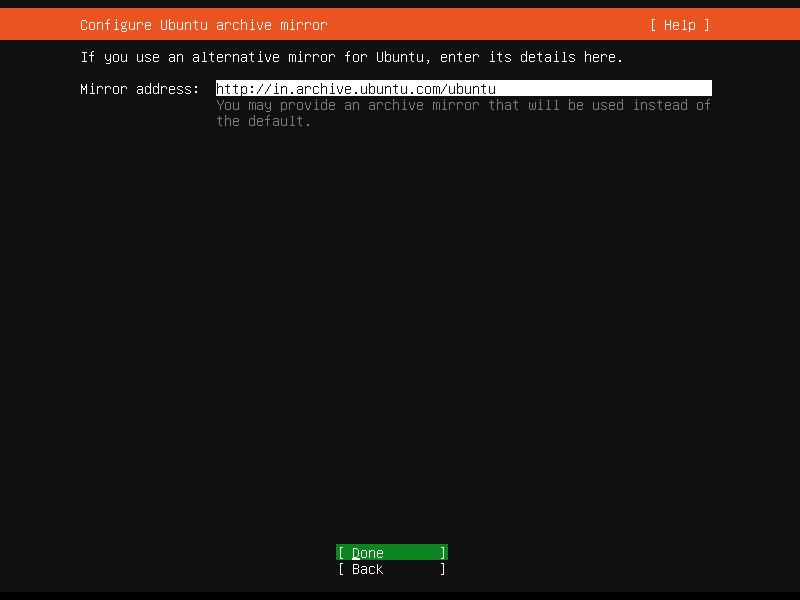
7. If you don’t have other Ubuntu mirrors, stick to default and Continue.
8. The hard-disks Partition table is one of the most sensitive subjects involving a server because here you have a lot of tweaking to do depending on your server’s final destination type web server, databases, file sharing NFS, Samba, application server, etc.
- For example, if redundancy, fail-over, and high availability are needed you can set up RAID 1, if your space grows fast you can set up RAID 0 and LVM, and so on.
- For more general use you can just use the Guided option with LVM, which is a customized option made by developers.
- For a production environment, you probably should have LVM, software, or hardware RAID and separate partitions for /(root), /home, /boot, and /var ( the /var partition has the fastest growth rate on a production server because here are logs, databases, applications meta info, servers caches and others located.
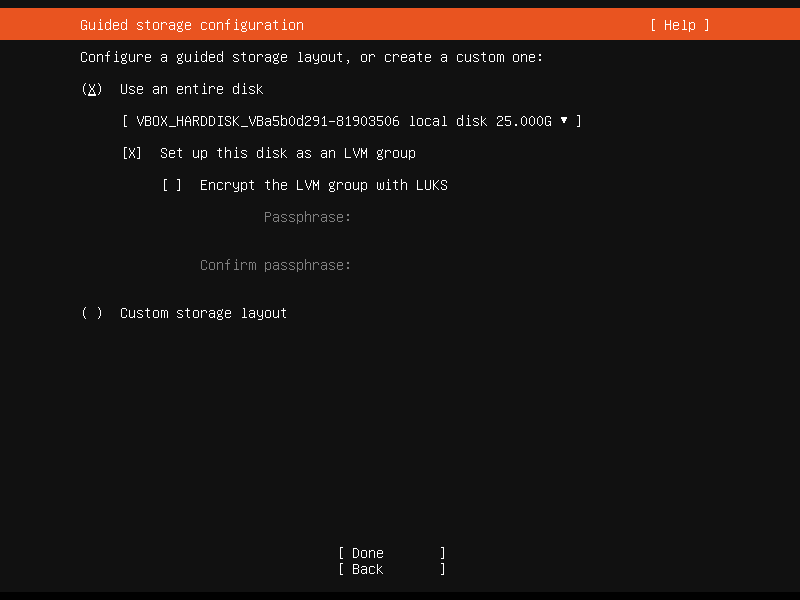
So, now on guided storage configuration, choose “Use an entire disk” and set up the disk as an LVM group as shown.
9. Confirm the partition table, If you like to make some changes to this Partition Table you can select ‘Back‘ and edit your partitions.
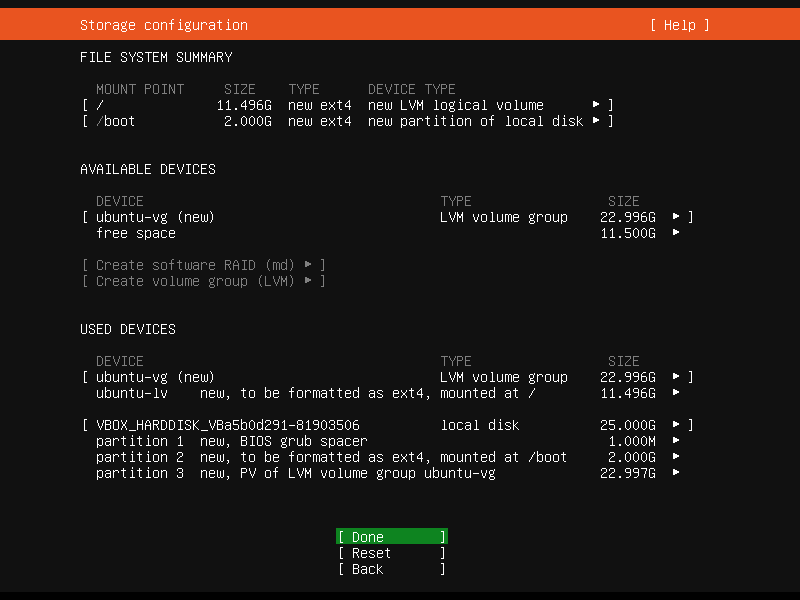
10. Confirm the write changes to the disk.

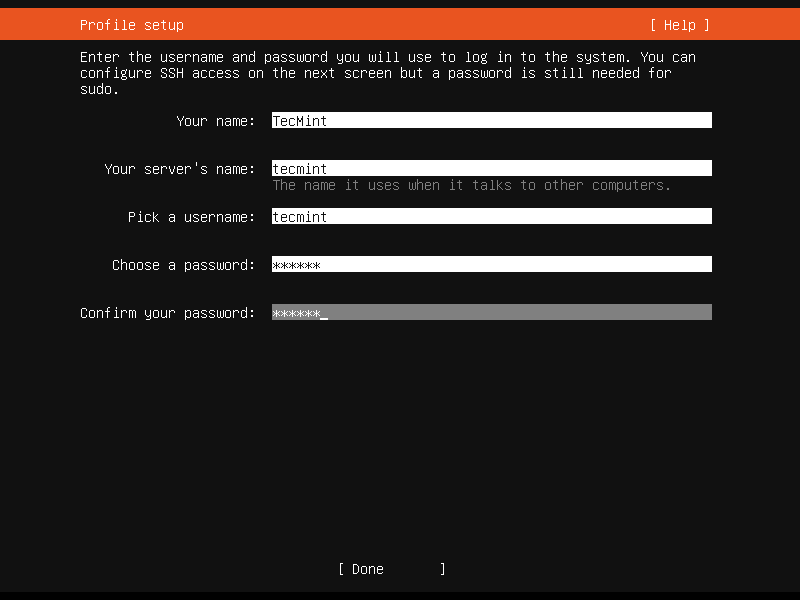
11. Now is the time to set up your administrative user. On Ubuntu, this user replaces the root account and has all root account powers by employing sudo. Enter your username and hit on Continue.
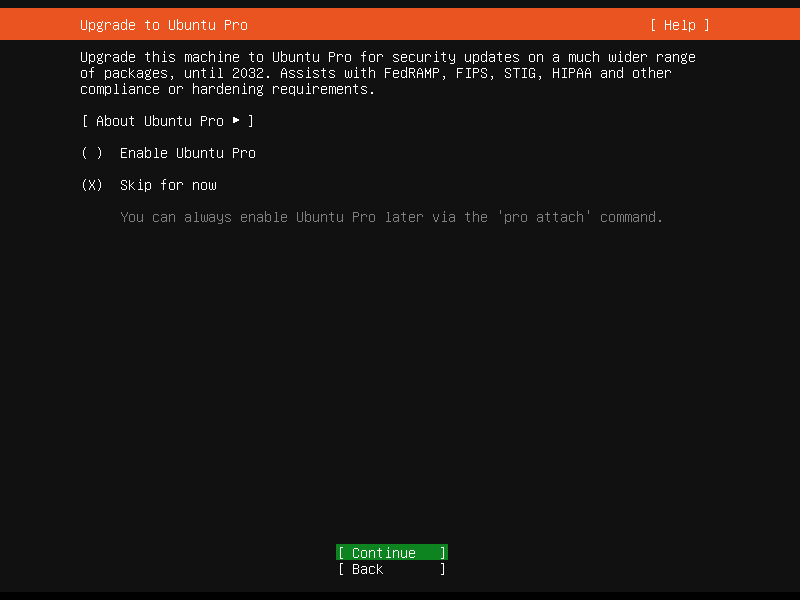
12. Ubuntu Pro is a yearly subscription that offers open-source software security updates, which you can use free of charge for personal use on up to 5 machines. For enterprise, you need to purchase a subscription. I am skipping this option for now.
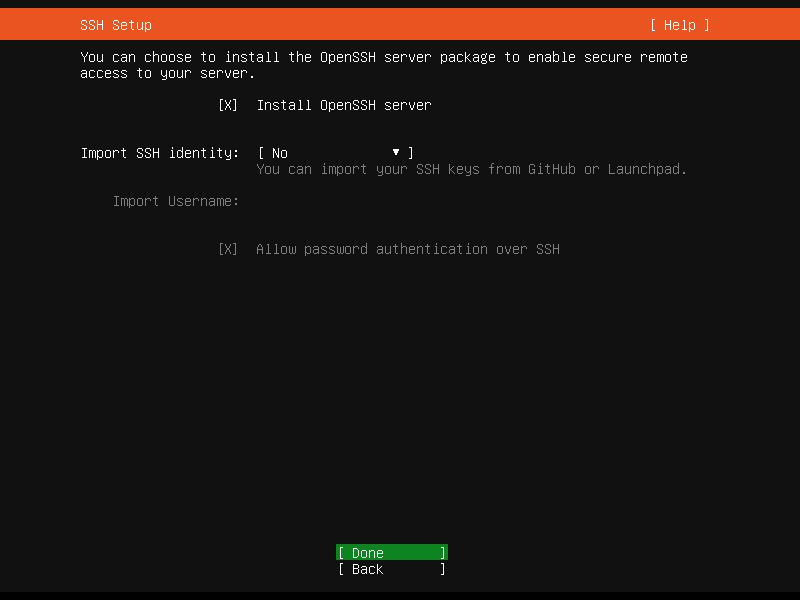
13. Next, install OpenSSH Server to enable remote login.
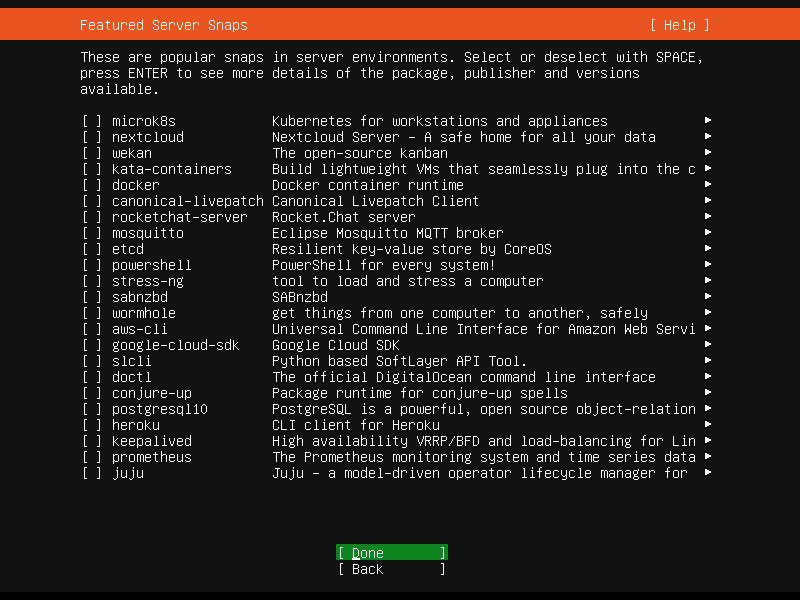
14. The “Featured Server Snaps” window shows popular snaps in your server environment. If you don’t want to install any snaps, just leave them blank and continue to Ubuntu installation.
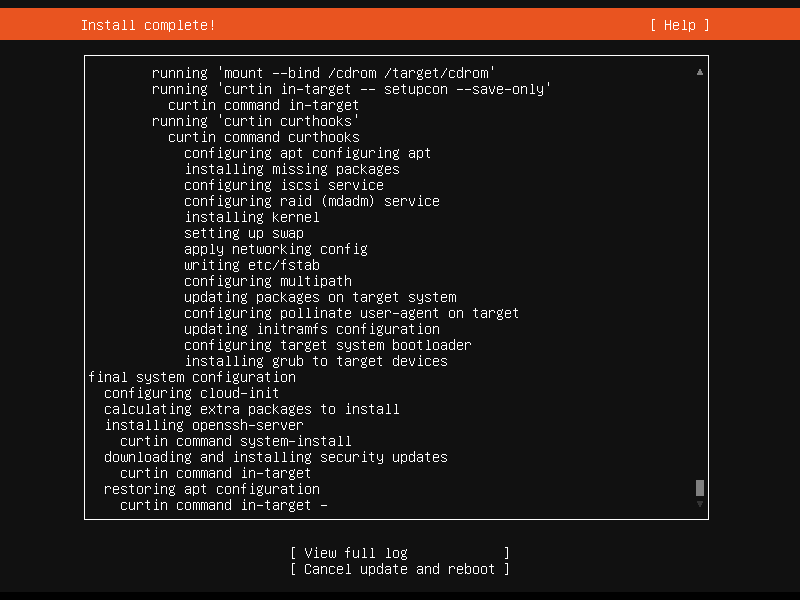
15. Once installation and updates are finished, remove your media installation drive (CD/DVD, or USB) and hit Reboot Now/strong> to reboot.
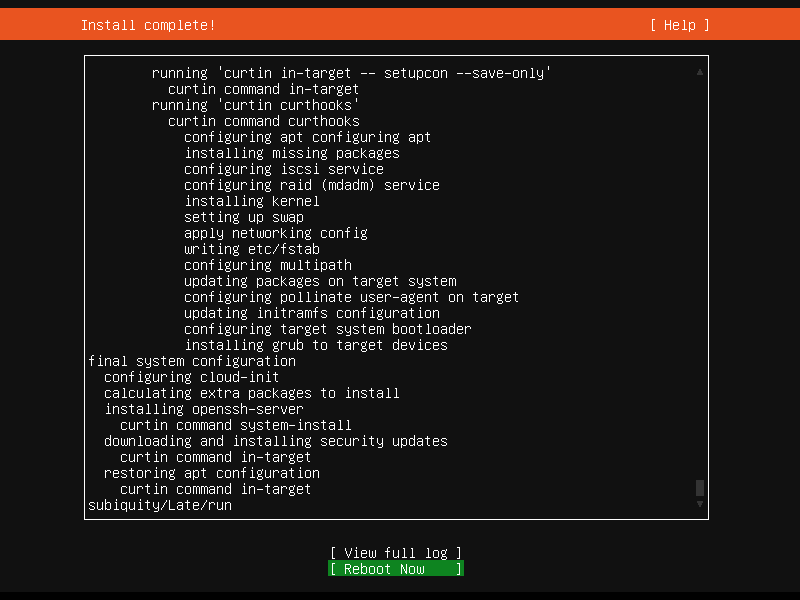
Congratulations! Ubuntu 22.04 LTS Server edition is now installed and ready to rock on your brand-new metal or virtual machine.
Step 2: Basic Network Configurations
For now, only the Core server packages are installed and you can’t really offer network services for your network.
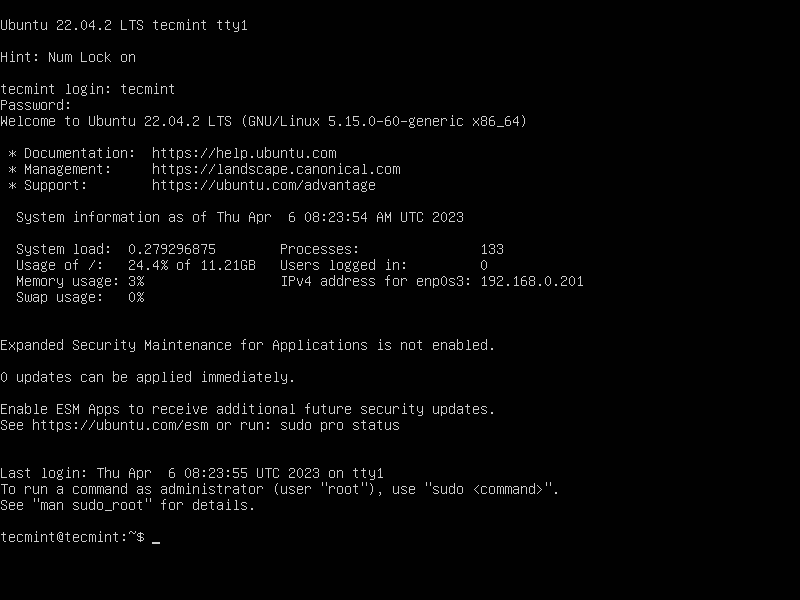
16. In order to install software login to your server console for now and verify some basic configurations like network connectivity, settings, startup daemons, software sources, updates, and others by running a series of Linux commands.
17. View system load and basic information – After login with your credentials this information is presented by default MOTD. Also, top and htop commands are useful.
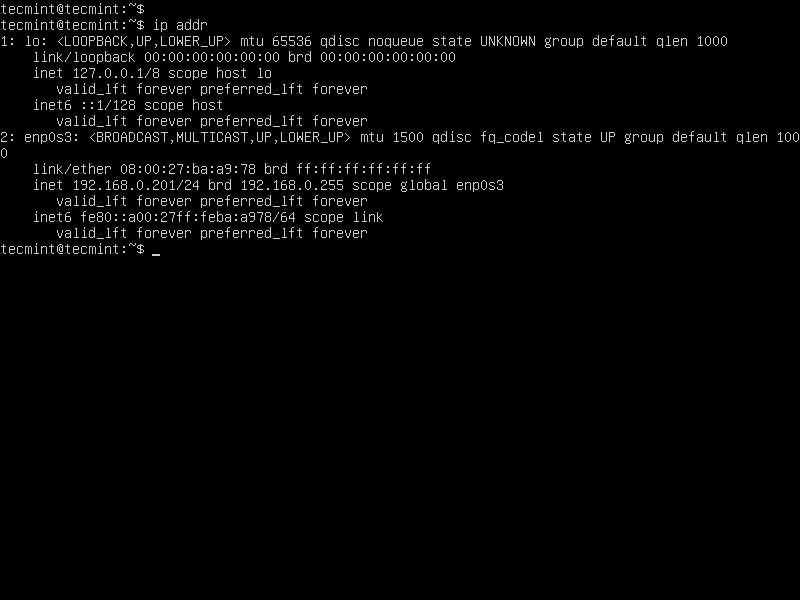
18. Verify network IP addresses using the following ip command.
$ ip addr
19. Verify internet connectivity: run a ping command against a domain name (this will test TCP/IP stack and DNS).
$ ping –c 4 google.com

If you get the “Temporary failure in name resolution“ message, edit your ‘/etc/resolv.conf’ file and add the following.

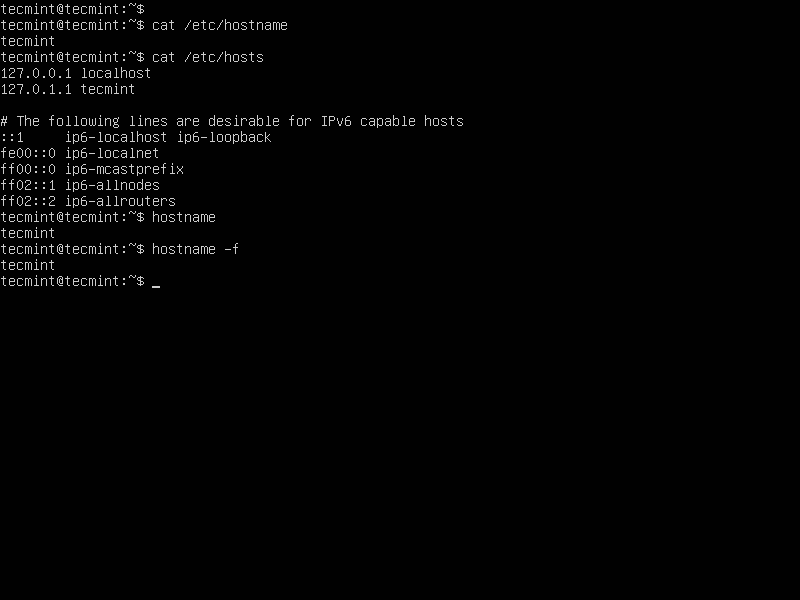
20. Verify the machine hostname using the following command.
$ cat /etc/hostname
$ cat /etc/hosts
$ hostname
$ hostname –f
21. Finally, update and upgrade your Ubuntu system.
$ sudo apt-get update
$ sudo apt-get upgrade
Step 3: Install LAMP Stack in Ubuntu 22.04
LAMP acronym stands for Linux OS, Apache HTTP Server, MySQL, MariaDB, MongoDB databases, Php, Perl, or Python programming languages used for generating dynamic webpages.
All of these components are free and Open-Source software and are suitable for building dynamic websites or other web applications and are the most used platforms on the Internet today (Last year Apache was estimated to serve over 23.04% of all active websites).
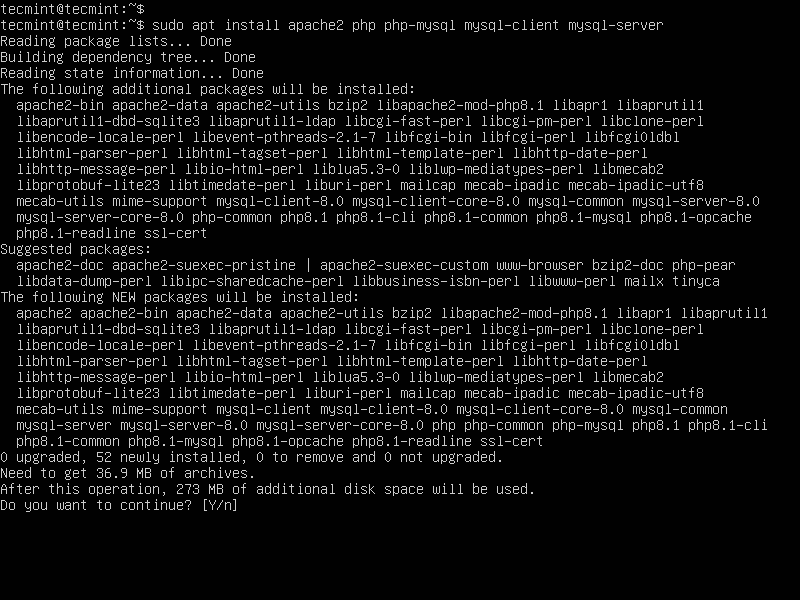
22. LAMP stack can be installed step by step or using just one single command.
$ sudo apt install apache2 php php-mysql mysql-client mysql-server
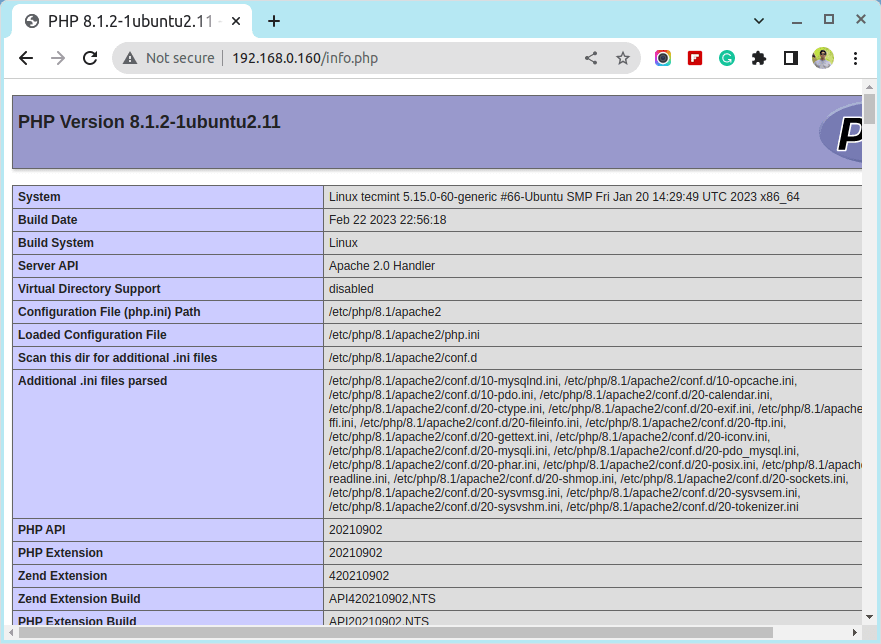
23. To confirm php status create an ‘info.php‘ file in the ‘/var/www/html’ server path with the following content.
$ sudo echo "" > /var/www/html/info.php
24. Then open a browser and enter your server IP address or http://server_address/info.php.
Ubuntu 22.04 and LAMP is an excellent platform to deliver network services and develop all kinds of dynamic or static websites, and complex web applications with the help of Apache, all of this made with a minimum financial impact using Free and Open Source software and the latest technologies.


Hi,
I am trying to install ububtu server. I am not connected to Internet yet. While installing, I am asked to select Ubuntu archived mirror. You have not mentioned this step.
What to do now? If i proceed, bad mirror error comes.
Plz help. Thanks
If you don’t have some kind of local apt-mirror setup at your premises then you cannot install Ubuntu without an internet connection. The procedure for offline installation without an apt mirror is very complicated, does not guarantee that security patches or up-to-date packages will be installed and prone to errors, so the bast way to install Ubuntu is to connect the machine to internet while performing the installation procedure. After the installation install all the required software and then you can plug the machine into your local offline network.
A wonderful guide.. i just installed my server with lamp stack.. tanks a lot..
Thank you very much for this.. great article
Thank you Matei for writing this. Just some suggestions —
# sudo service ssh restart
# sudo /etc/init.d/ service_name start|stop|restart|status
What does the 2nd line “# sudo /etc/init.d/ service_name start|stop|restart|status” mean? Is it meant to a comment? If so, please make it clear that it is a comment. Otherwise, it looks like a command! Very confusing to a newbie. I’m not a newbie but I almost wanted to stop reading after seeing this line. It does not reflect well on the author’s intelligence to present it this way.
$ ps aux | grep service-name
$ sudo netstat –tulpn
$ sudo lsof -i
Same – I suppose you wanted to write ps aux | grep ssh or ps aux | grep httpd — that is, you meant to say replace the service-name with the name of the service. If so, please say so! Otherwise this appears like Ubuntu can grep and list all the services in the ps listing — which isn’t possible with other Linux distro and Freebsd.
Thank you.
Please read more about linux commands to get their meaning! You can find a great start-up here: https://www.tecmint.com/free-online-linux-learning-guide-for-beginners/ ! It looks to me that you are a newbie if you those two lines are confusing to you! Actually both command do the same thing!
Best writeup i’ve found online. Big big Thankyou.
especially step 8 “press goback at enter hostname, and enter static ip” – such a timesaver. Typical linux documentation not mentioning this ‘very’ important step. Again big thanks :)
I’d like to add a few notes if i may, that i came across doing a Ubuntu LAMP installation…
April 2015. Ubuntu v14.10. Bootable usb stick. An old BIOS server not uEFI, with multiple OSs and HDDs
Speed
choosing Install Ubuntu Server is much much faster than choosing Advanced Install. For some unknown reason the progress bars fly by compared to crawling by with that second option. very odd!
Partitioning
1) i always get asked if i first want to unmount “sdb” (which is the drive i’m going to install to) sometimes i’ve said no, othertimes yes. it doesnt appear to make a difference.
2) disabling (turning off) hdd’s in bios, does ‘not’ stop them showing up in the partition manager, or GRUB configuration. so careful!
3) if using LVM, create a small /boot partition outside of any logical Group. A real ‘gotchya’.
Partitioning Example (not uefi)
so, i selected Manual partitioning, then the disk to use “sdb”, then the (40GB) freespace on said disk, then
Create a partition: 1GB, primary, at beginning, /boot, ext4, bootflag=on
Use LVM and create a Volume Group “LinuxPartitions” using (39GB) freespace
– still in LVM create Logical Volume “root” 35GB and “swap” 4GB. exit LVM
Back in partition manager, select LV Root and set UseAs=ext4, /, “root”.
– select LV Swap and set UseAs=swap.
Done, finished, write, continue…
Problems with GRUB
“other operating systems found” on ‘disabled’ disks !!!!!!! “Install GRUB to MBR…” choose: No! It’ll cause a Fatal Error trying to write to some disable disk. When asked, type the correct location: /dev/sdb in my case.
Finished, reboot, login
–failed to start unit user1000…
–failed to start user service…
these are known bugs apparently.
Again Thanks a lot. I hope my input helps others learning all this.
Hello Matei,
I believe the tutorial has a small typo on the step [28]
I believe you wanted to run the command: sudo lsof -i
Thank you for the great work.
@jairu,
Thanks for pointing out, yup that was a typo at our end..corrected in write up..
This is crap!!! Quite a number of errors. Just more misinformation on the great information superhighway.
@Nunya,
We are very sorry for the errors if any you find on the article, it would be great if you could tell us so that we can correct it. thanks in advance.
Wonderful article! We are linking to this particularly great
post on our website. Keep up the great writing.
I just used the LAMP part of this tutorial, because I am using Zentyal 4 community edition, which pretty much covers initial installation and configuration of Ubuntu server 14.04 in an idiotproof way, but this worked out of the box for me, thanks a lot!
thanks for this wonderful guide . i have completed my ubuntu server 14.1 . I am newbie to linux…
Thanks for the screenshots!!
Followed instructions to the letter – after step 21 – removed CD and restarted. Monitor shows not optimal mode and no display. tried 3 other monitors with basic same result – text maybe slightly different but no display????
found threads about booting into recovery mode – hold shft key down, down arrow and enter, etc. – nothing works.
14.04 server.
suggestions?
@Jeffrey: Does the GRUB menu appear? Does your system uses UEFI instead of BIOS? Do you get any errors at all?
Sir i am having a problem with the installation, after the installation, the operating system wont boot. Just blank screen. I used a flash drive as an installation media. Do you have any idea what is the problem?
Jeffrey,
I had the same problem. Be aware that not all USB stick are created equal. I spent three days banging my head against the wall because I couldn’t get Ubuntu 14.04 server to install the boot loader correctly. It turned out to be the PNY 16GB USB stick. I tried a cheap 8GB stick I had laying around and it worked. Three days of head banging can sure take out a lot of sheet rock ;)
Little John
If the Ubuntu installation is successful, restart the computer and hold down SHIFT key while booting(initial boot screen).This will open Ubuntu boot menu. Select Advanced boot options and check for any system errors
your formatting hacked up the metacharacters in my patch output, ah well.
Well, I just wanted to point out one thing: in 14.04, apparently, you can’t call manually to ‘/etc/init.d/script_name ‘, you must use the ‘service script_name ‘ excepting that of course, you CAN override the new default if you know where to look. following is an example of the over-ride in patch format (kind of)
root@vortex3:~/utils/linux# /etc/init.d/ssh status
root@vortex3:~/utils/linux# patch /lib/lsb/init-functions ./init-functions.patch
patching file /lib/lsb/init-functions
root@vortex3:~/utils/linux# /etc/init.d/ssh status
* sshd is running
root@vortex3:~/utils/linux# cat init-functions.patch
267c267,268
return 1
> #custom edit- re-enables manually calling /etc/init.d/script_name again.
root@vortex3:~/utils/linux#
hello i am getting an error on the command sudo apt-key adv –keyserver keyserver.ubuntu.com –recv-keys key_hash could someone tell me why and how to fix it
Thank you for this… looking forward on your post… I’m just a newbie in ubuntu, hoping for help in the future..