Varnish Cache (also referred to as Varnish) is an open-source, high-performance HTTP accelerator designed for speeding up web servers. In our last articles, we’ve explained how to setup Varnish Cache for Apache on CentOS 7 and CentOS 8.
In this article, we will show you how to install and use Varnish Cache as a front-end to the Nginx HTTP server in CentOS 7. This guide should also work on RHEL 7.
Requirements
Step 1: Install Nginx Web Server on CentOS 7
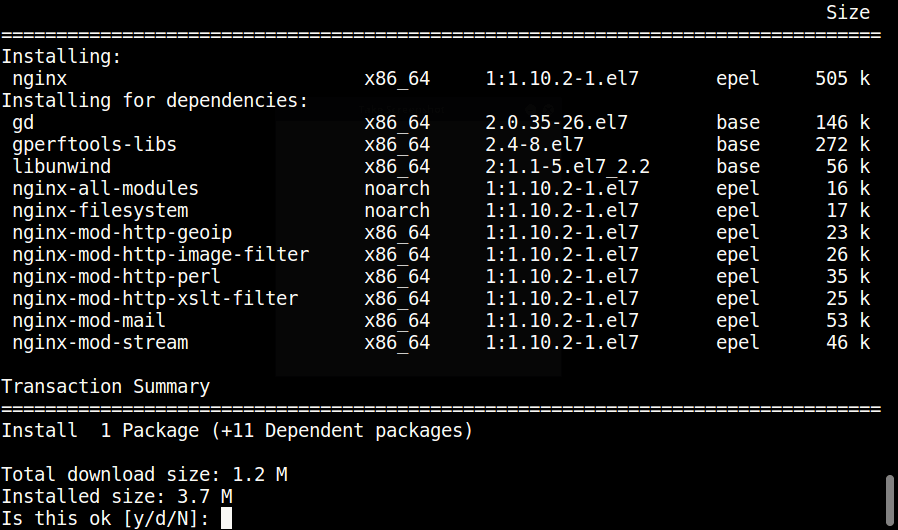
1. Start by installing the Nginx HTTP server from the default CentOS software repositories using the YUM package manager as follows.
# yum install nginx
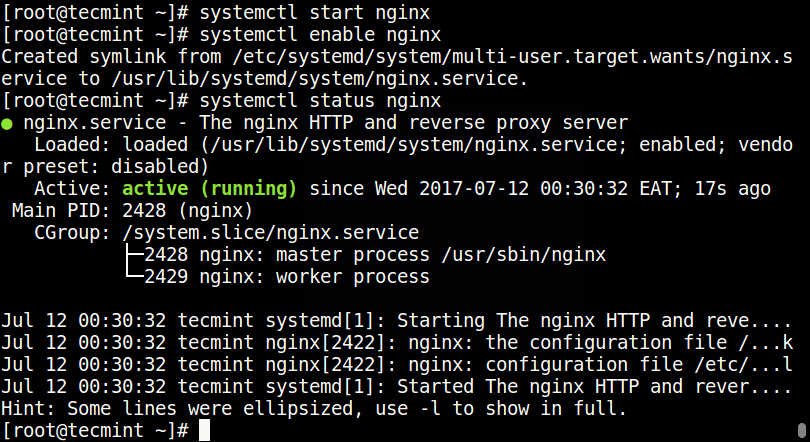
2. When the installation completes, start the Nginx service for now and enable it to start automatically at system boot.
# systemctl start nginx
# systemctl enable nginx
# systemctl status nginx
3. Now modify system firewall rules to permit inbound packets on port 80 using the commands below.
# firewall-cmd --zone=public --permanent --add-port=80/tcp
# firewall-cmd --reload
# firewall-cmd --zone=public --permanent --add-port=8080/tcp
# firewall-cmd --reload

Step 2: Install Varnish Cache on CentOS 7
4. Now there are pre-compiled RPM packages for the latest version of Varnish Cache 6 (i.e 6.5 at the time of writing), therefore you need to add the official Varnish Cache repository.
Before that, you need to enable the EPEL repository to install several dependency packages as shown.
# yum install -y epel-release
5. Next, install pygpgme, a package for handling GPG signatures and yum-utils, a collection of useful utilities that extend yum’s native features in various ways.
# yum install pygpgme yum-utils
6. Now create a file named /etc/yum.repos.d/varnishcache_varnish5.repo that contains the repository configuration below.
# vi /etc/yum.repos.d/varnishcache_varnish65.repo
Important: Make sure to replace el and 7 in the config below with your Linux distribution and version:
[varnishcache_varnish65]
name=varnishcache_varnish65
baseurl=https://packagecloud.io/varnishcache/varnish65/el/7/$basearch
repo_gpgcheck=1
gpgcheck=0
enabled=1
gpgkey=https://packagecloud.io/varnishcache/varnish65/gpgkey
sslverify=1
sslcacert=/etc/pki/tls/certs/ca-bundle.crt
metadata_expire=300

[varnishcache_varnish65-source]
name=varnishcache_varnish65-source
baseurl=https://packagecloud.io/varnishcache/varnish65/el/7/SRPMS
repo_gpgcheck=1
gpgcheck=0
enabled=1
gpgkey=https://packagecloud.io/varnishcache/varnish65/gpgkey
sslverify=1
sslcacert=/etc/pki/tls/certs/ca-bundle.crt
metadata_expire=300
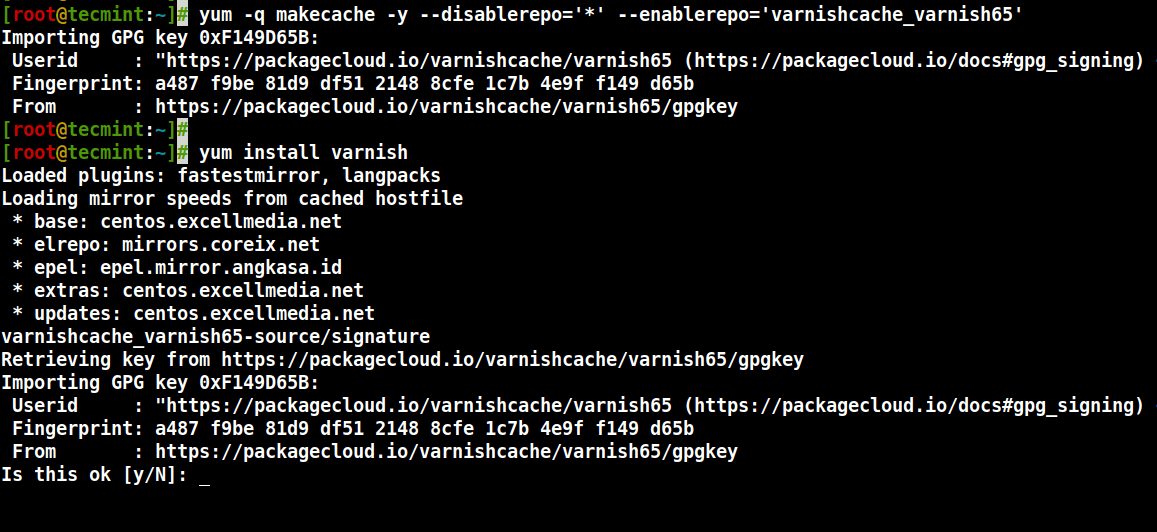
7. Now run the command below to update your local yum cache and install the varnish cache package (do not forget to accept the GPG key by typing y or yes while installing the package):
# yum -q makecache -y --disablerepo='*' --enablerepo='varnishcache_varnish65'
# yum install varnish
8. After installing Varnish Cache, the main executable will be installed as /usr/sbin/varnishd and varnish configuration files are located in /etc/varnish/:
- /etc/varnish/default.vcl – this is the main varnish configuration file, it is written using vanish configuration language(VCL).
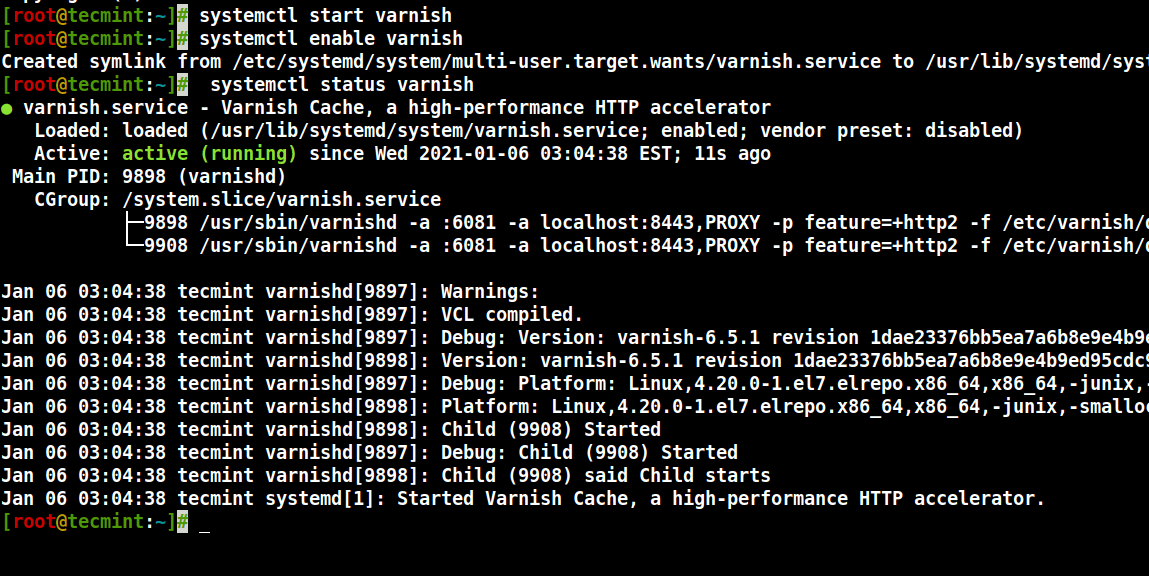
9. Now start the varnish service, enable it to automatically start during system boot, and verify its status to ensure that it is up and running as follows.
# systemctl start varnish
# systemctl enable varnish
# systemctl status varnish
10. You can confirm that the Varnish installation was successful by seeing the location of the Varnish executable and version installed on your system.
$ which varnishd
$ varnishd -V
Sample Output
varnishd (varnish-6.5.1 revision 1dae23376bb5ea7a6b8e9e4b9ed95cdc9469fb64)
Copyright (c) 2006 Verdens Gang AS
Copyright (c) 2006-2020 Varnish Software
Step 3: Configure Nginx to Work With Varnish Cache
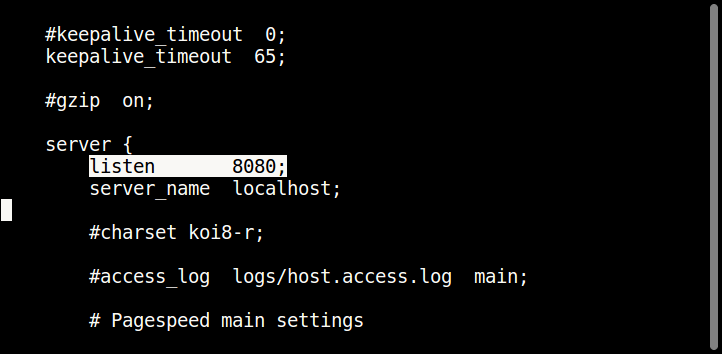
11. In this step, you need to configure Nginx to work with Varnish Cache. By default Nginx listens on port 80, you should change the default Nginx port to 8080 so it runs behind Varnish caching.
Open the Nginx config file /etc/nginx/nginx.conf and find the line listen 80 and change it to listen 8080 as in the server block shown in the screenshot below.
# vi /etc/nginx/nginx.conf
Note: This should be done in all server block configuration files (usually created under /etc/nginx/conf.d/) for websites that you want to serve via Varnish.
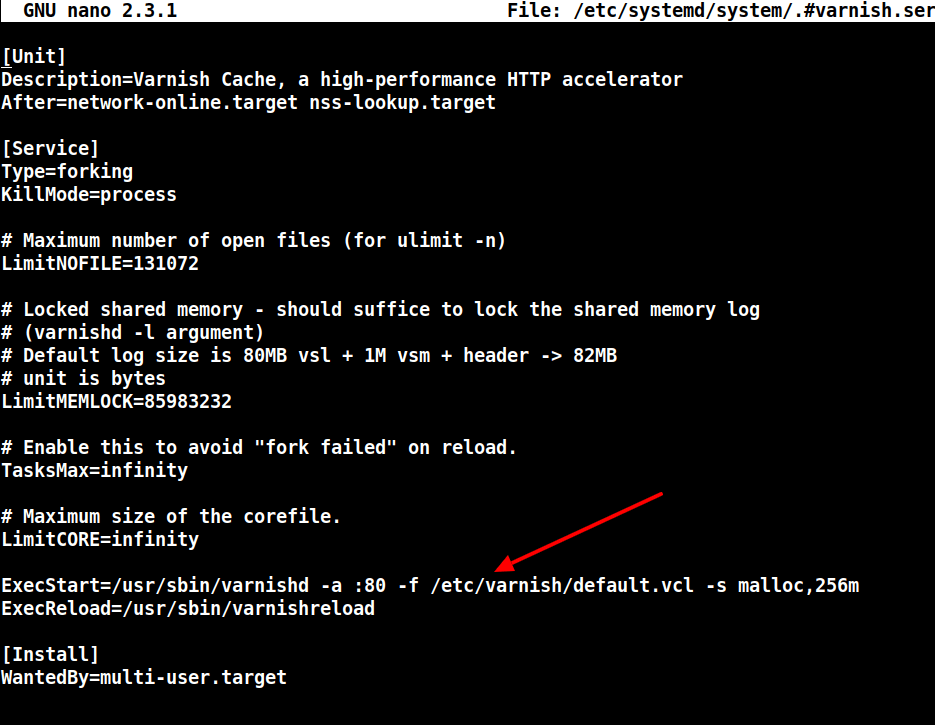
12. Next, open the varnish service configuration file and find the parameter ExecStart which specifies the port Varnish listens on, and change its value from 6081 to 80.
# systemctl edit --full varnish
The line should look as shown.
ExecStart=/usr/sbin/varnishd -a :80 -f /etc/varnish/default.vcl -s malloc,256m
13. Next, set up Nginx as a backend server for Varnish proxy, in the /etc/varnish/default.vcl configuration file.
# vi /etc/varnish/default.vcl
Find the backend section, and define the host IP and port. Below is the default backend configuration, set this to point to your actual content server.
backend default {
    .host = "127.0.0.1";
    .port = "8080";
}
14. After performing all the necessary configurations, restart Nginx HTTPD and Varnish cache to effect the above changes.
# systemctl daemon-reload
# systemctl restart nginx
# systemctl restart varnish
Step 4: Test Varnish Cache on Nginx
15. Finally, test if Varnish cache is enabled and working with the Nginx service using the cURL command below to view the HTTP header.
# curl -I http://localhost
Sample Output
HTTP/1.1 200 OK
Server: nginx/1.16.1
Date: Wed, 06 Jan 2021 09:24:18 GMT
Content-Type: text/html
Content-Length: 4833
Last-Modified: Fri, 16 May 2014 15:12:48 GMT
ETag: "53762af0-12e1"
X-Varnish: 2
Age: 0
Via: 1.1 varnish (Varnish/6.5)
Accept-Ranges: bytes
Connection: keep-alive
You can find additional information from the Varnish Cache Github Repository: https://github.com/varnishcache/varnish-cache
In this tutorial, we explained how to setup Varnish Cache for the Nginx HTTP server on CentOS 7. Use the comment form below to send us any queries or extra ideas.


While NGINX is capable of caching, why should we consider Varnish in front of NGINX?
Showing Error
[root@cloud ~]# yum install nginx
Loaded plugins: fastestmirror, universal-hooks
Loading mirror speeds from cached hostfile
* EA4: 185.53.12.144
* cpanel-plugins: 185.53.12.144
* base: mirror.sov.uk.goscomb.net
* extras: mirror.sov.uk.goscomb.net
* updates: mirror.sov.uk.goscomb.net
No package nginx available.
Error: Nothing to do
What to do please help.
@Deepender,
Install EPEL repo to install Nginx as shown.
Need some input help, please!
I keep getting an http/1.1 503 Backend fetch failed using the
curl -I http://localhostcommand.My /etc/varnish/default.vcl is active running. I’ve been over everything countless times and everything looks good any anyone have an idea of how to help?
Can you tell me where is the default.vcl located after installation?
@Gayatri
You can locate it in /etc/varnish/default.vcl. But when you install from source, this file is likely not to be available. You need to create it.
How do I delete it. I want to remove
Removing a package installed from source is a little of a challenge, because the system package manager normally doesn’t recognize it(as in keeping track of all its files and documentation etc..).
But you can try commands like:
$sudo make uninstall #if you still have the compilation directory
Or use find together with rm command(to locate and remove all package files), see the receptive man pages for more information.
@TEst
Sorry, respective* man pages.
Hello. Please help me.
[root@chiasewp varnish-5.1.2]# /usr/local/sbin/varnishd -a :80 -b https://chiasewp.com:8080
Error: Could not get socket :80: Address already in use
(-? gives usage)
@Việt
There is another process using port 80 on your machine, kill that process and run varnish one more time like this.
First find process ID using netstat and grep command below:
$sudo netstat -lntp | grep ‘:80’
Then kill it using its PID:
$sudo kill -9
Lastly, try to run varnish now.
For more info on how to find process listening on a certain port, read through: https://www.tecmint.com/find-out-which-process-listening-on-a-particular-port/
nginx run both port 80 and 8080 with the same PID