Setting up a Cisco 2940 for TACACS+
The first step is to console into the device and gain privilege exec access. From here global configuration mode is needed and can be obtained using “configure terminal”.
From global configuration mode the rest of the commands to setup TACACS+ will be issued.
# configure terminal
The first command that needs to be issued is the username command to setup some sort of backup method to gain access to the device in the event that the TACACS+ system is unavailable.
# username rob privilege 15 password mjth124WPZapY
The next step is to specify all of the server information and key.
tacacs-server host <server_ip>
tacacs-server key super_secret_TACACS+_key
The next step is used to setup the AAA information that the TACACS+ server will handle. First they will all be listed and then explained.
# aaa new-model
# aaa authentication login default group tacacs+ local none
# aaa authorization exec default group tacacs+ local none
# aaa authorization commands 0 default group tacacs+ local none
# aaa authorization commands 15 default group tacacs+ local none
# aaa accounting exec default start-stop group tacacs+
# aaa accounting commands 0 default start-stop group tacacs+
# aaa accounting commands 15 default start-stop group tacacs+
Detailed explanation about the commands used above:
- The first stanza creates a AAA model.
- The second line is used to tell the switch/router that it should check all login attempts against the TACACS+ server first and if the server isn’t available check the locally configured user database.
- The authorization lines tell the network device to contact the TACACS+ server to determine if the user is allowed to run particular commands at that particular privilege level.
- The accounting lines tell the network device to log activity to the TACACS+ server.
At this point the network device needs to be configured for ssh. The first step is to generate an RSA key. Certain versions of the Cisco IOS don’t support SSH and as such may require some different instructions for connecting that device to a TACACS+ server.
# ip domain-name <some.domain.name>
# crypto key generate rsa – This will prompt the user for the key size, set this to a number larger than 1024
# line vty 0 15
# transport input ssh
At this point, it’s time to test the new configuration. Log completely out of the switch and then attempt to SSH into the switch using the username configured earlier on the TACACS+ server. On Linux systems, this can be done via the command:
# ssh <tacacs_username>@<server_ip>
If access is granted to the switch/router, congratulations! TACACS+ is working properly for this user, it’s now time to go back and secure the user passwords and fine tune command privileges to the environment.
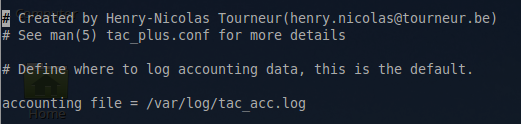
It may be beneficial to also take a look at the accounting log on the server to ensure that the commands are being logged properly in the accounting log file. The location of this log is set in “/etc/tacacs+/tac_plus.conf” file.
accounting file = /var/log/tac_acc.log
View this file and confirm that TACACS+ is recording commands entered.
# nano /var/log/tac_acc.log
Entries similar to the below should begin showing up once a TACACS user connects to the router/switch.

At this point the TACACS+ system is authenticating, authorizing, and accounting properly! Do be sure to make keys for the server and users more secure than what this guide used as AAA usually protects very sensitive network components in which unauthorized access could be very dangerous.


Hi, there,
I found an interesting project – tacacsGUI- a self-hosted front-end UI for tac_plus configuration. My installation was easy, try it. Plus it has some advantages like Backup Maker for auto backup, Subnet Searcher for subnet collection, etc.
Good luck!
Alexey,
This tool appears to be very useful. I’ll have to experiment with it and amend this article! Thanks for the heads up on this tool.
Perfect all information you need for both router and server. Thanks ! I tested it with GNS3 environment with a Router c3640 Version 12.4(12), it only works with cleartext password setup on TACACS+ server. When you generate the RSA Key on the router don’t forget to define the size to 1024, otherwise the key is not validated (it’s hidden on the script block).
Alain,
Thank you for that piece of information. I hadn’t had any issues with the setup yet but I’m sure your testing will help someone else in the future as well!